

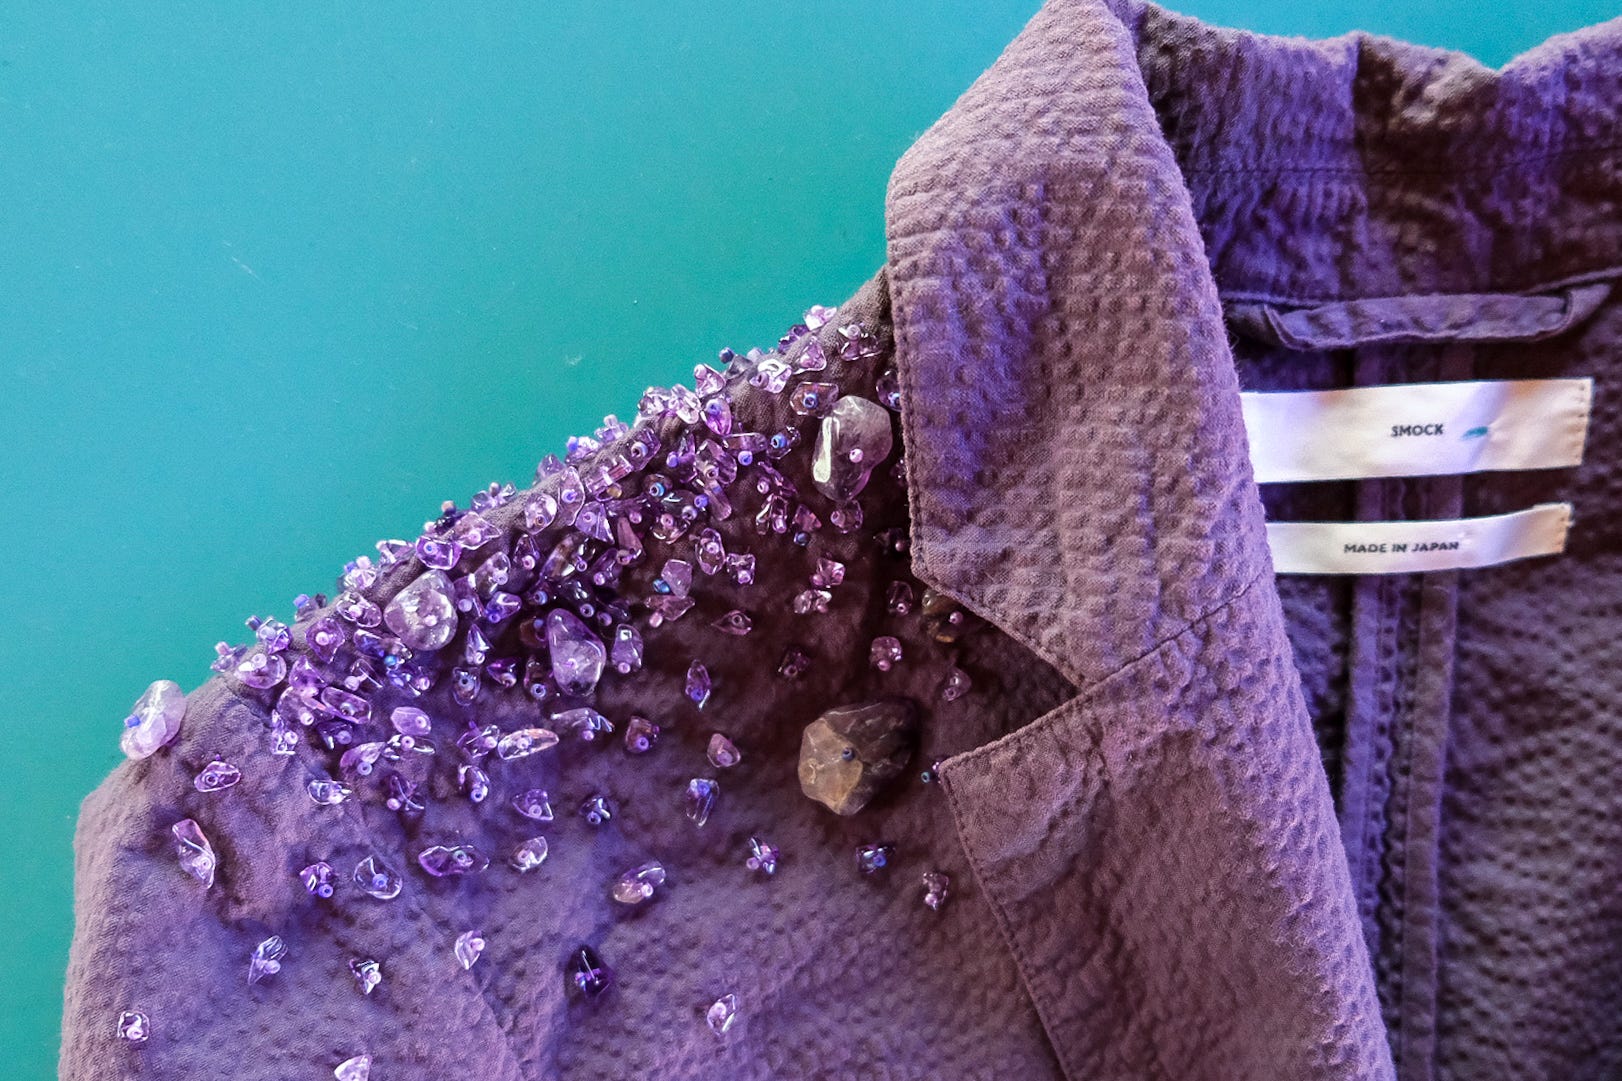
Amethyst Embellishment
Beadwork techniques for an experimental jacket upgrade.

Sometimes it’s fun to add a little extra embellishment to your clothes. Perhaps it was the sprays of embellishment seen on the Fall/Winter 2025 runways last month that inspired this letter’s project.

In today’s letter, I create an amethyst chip embellishment for a spring-weight jacket. I’ll share two methods for attaching amethyst chips—techniques that also work for sequins—and then I’ll take you through my process.
A few considerations…
Should I add reinforcement?
I considered adding a backing material for shape and to strengthen and stiffen the cotton. How heavy would the total weight of these amethyst chips be? This is a spring-weight jacket, and I didn’t want to add anything unnecessary. But, as it turns out, I ended up needing a backing for a different reason.
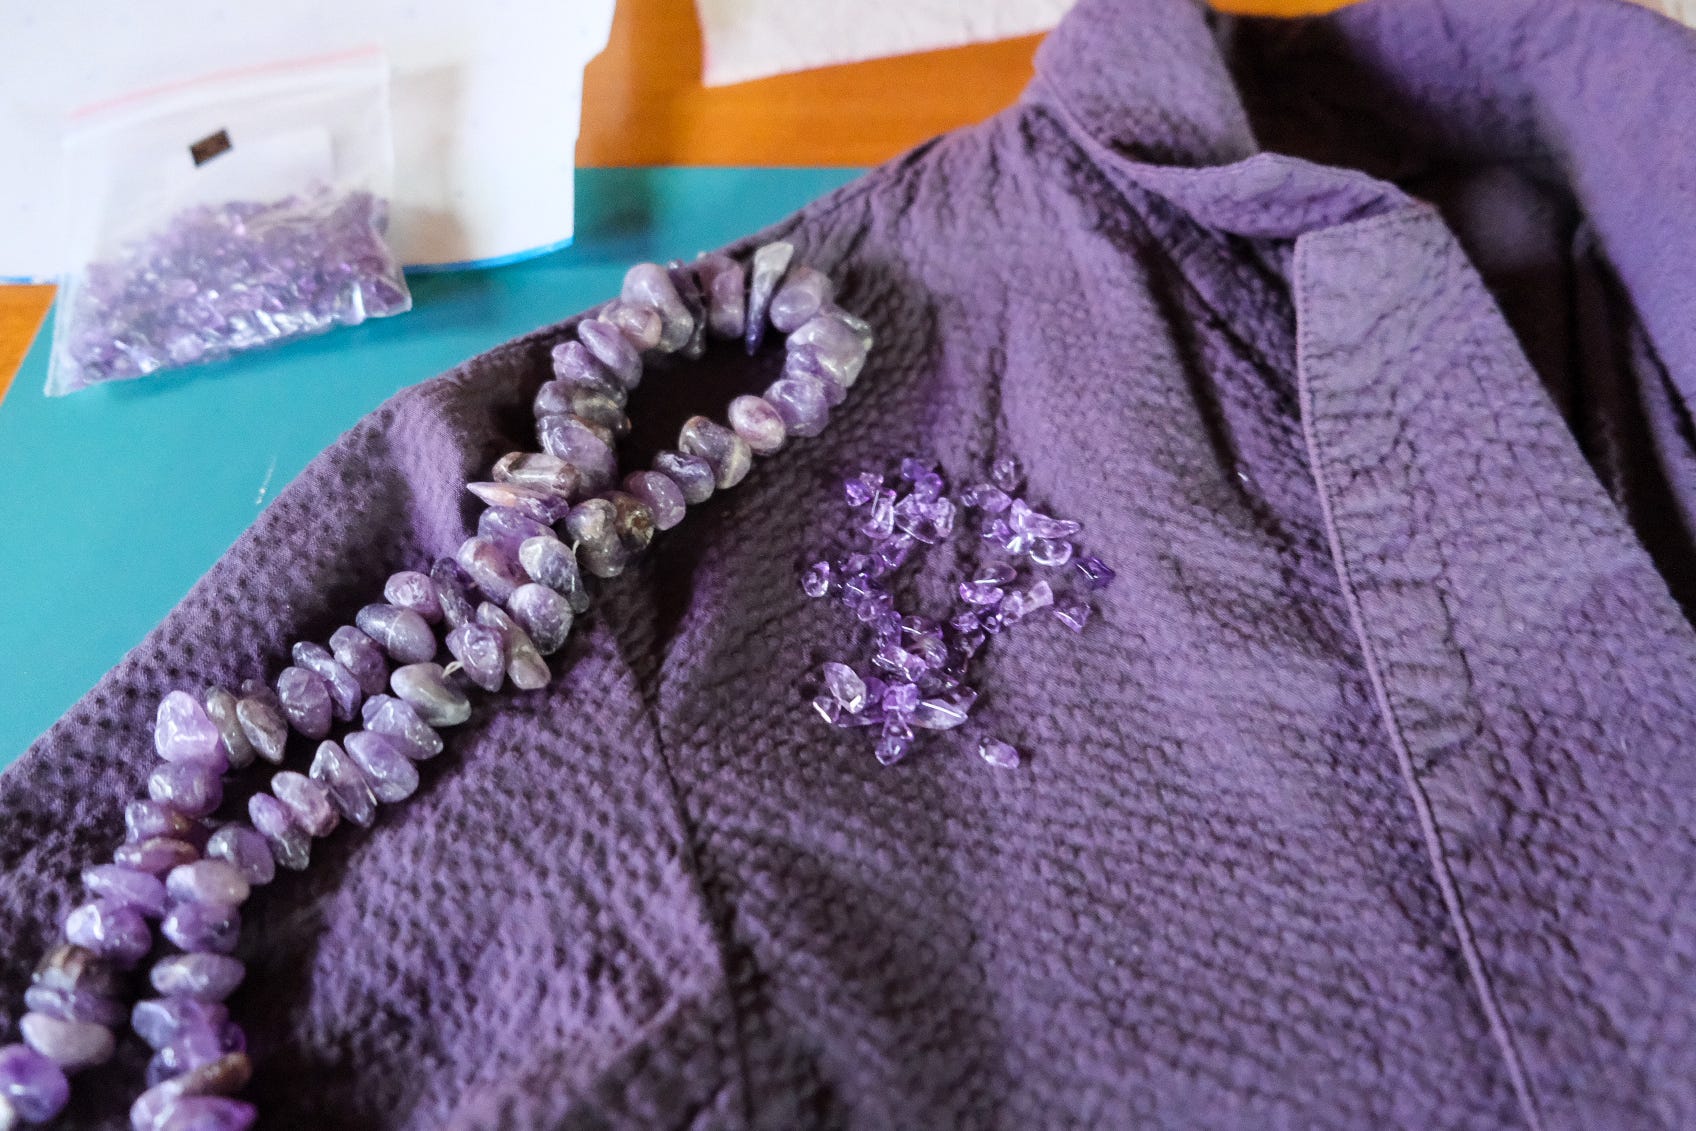
Front and back?
Front embellishment only, with some crossing over the shoulder seam and spilling onto the sleeve.
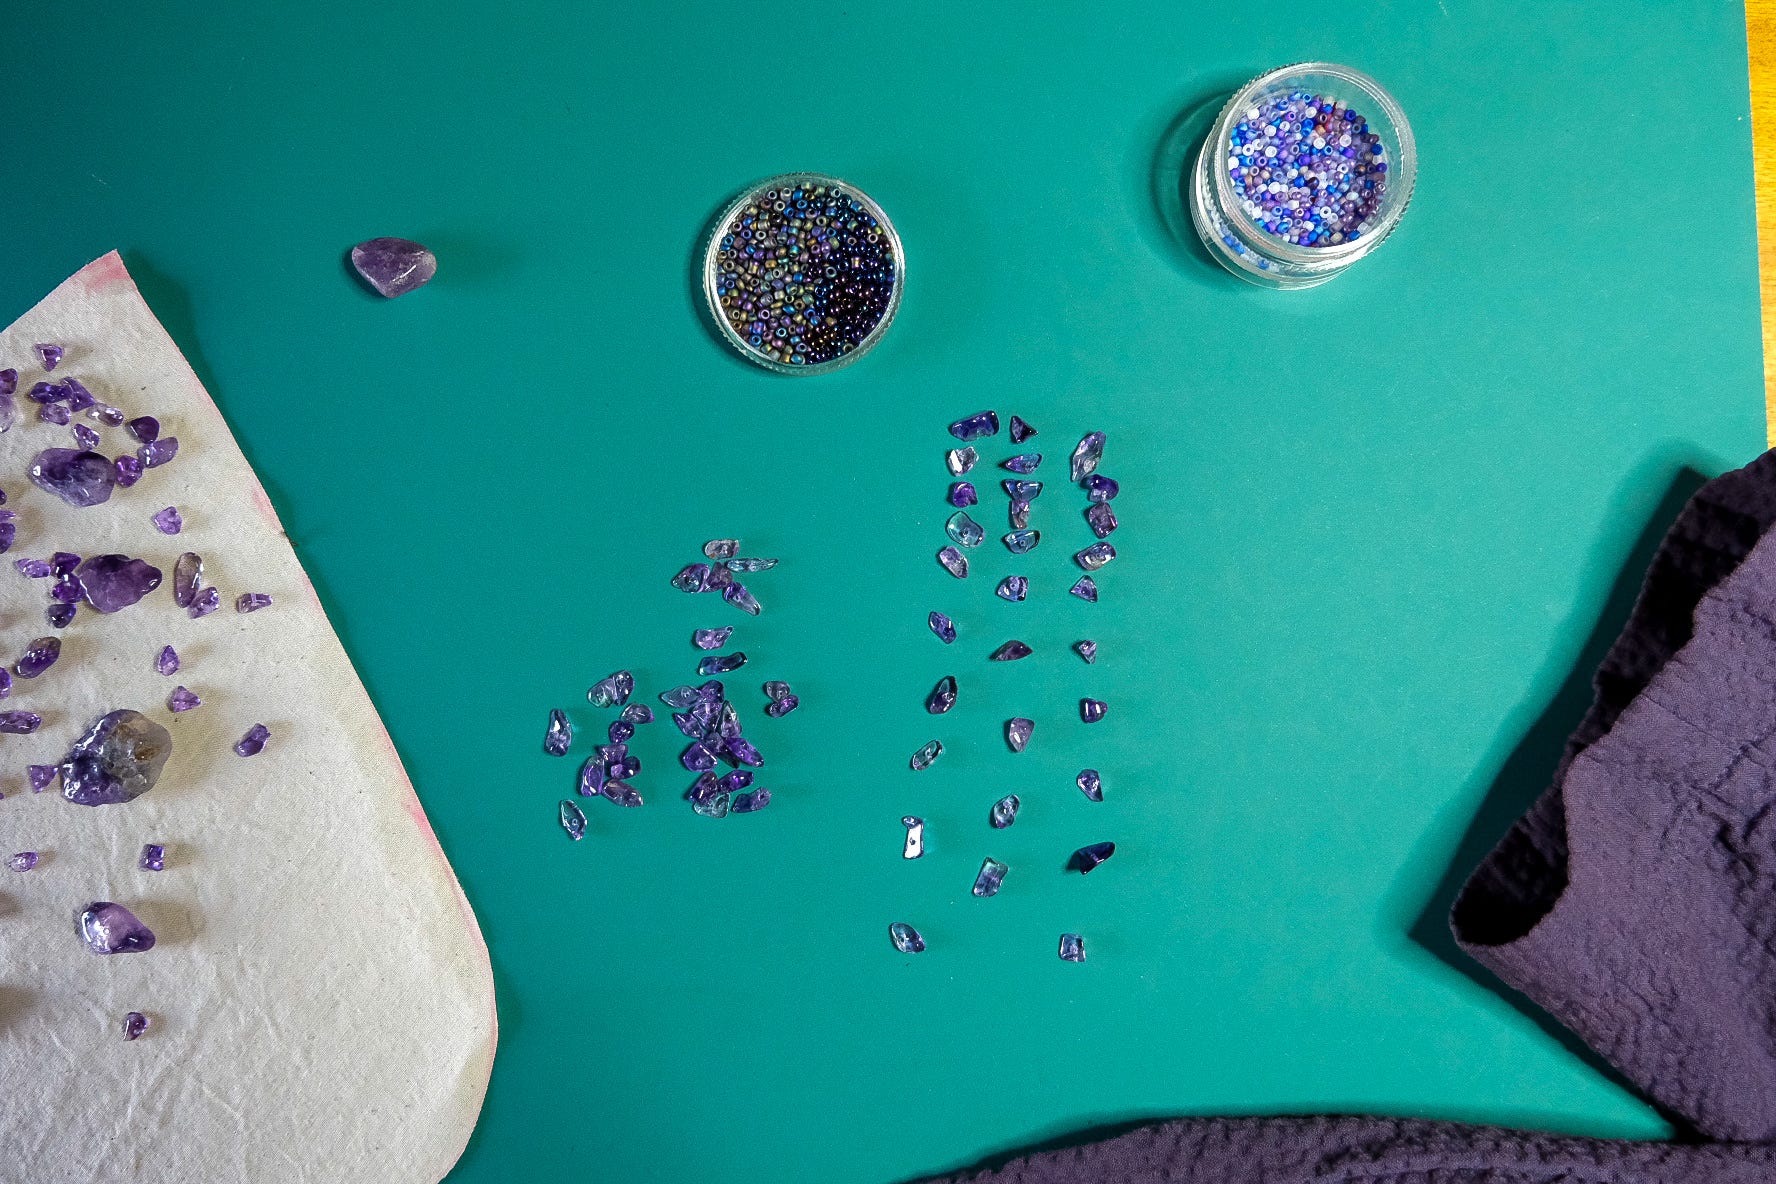
What will my layout look like?
Did I want an encrusted look, a splatter pattern, uniform arrangement, or a sprinkling of chips? Was I going to map it out or freehand it? Decisions, decisions!
Materials:
Beading needle
Thread: You can use beading, silk, or a strong sewing thread. Keep in mind, beading needles have very small eyes. Choose a thread that will work with your beading needle.
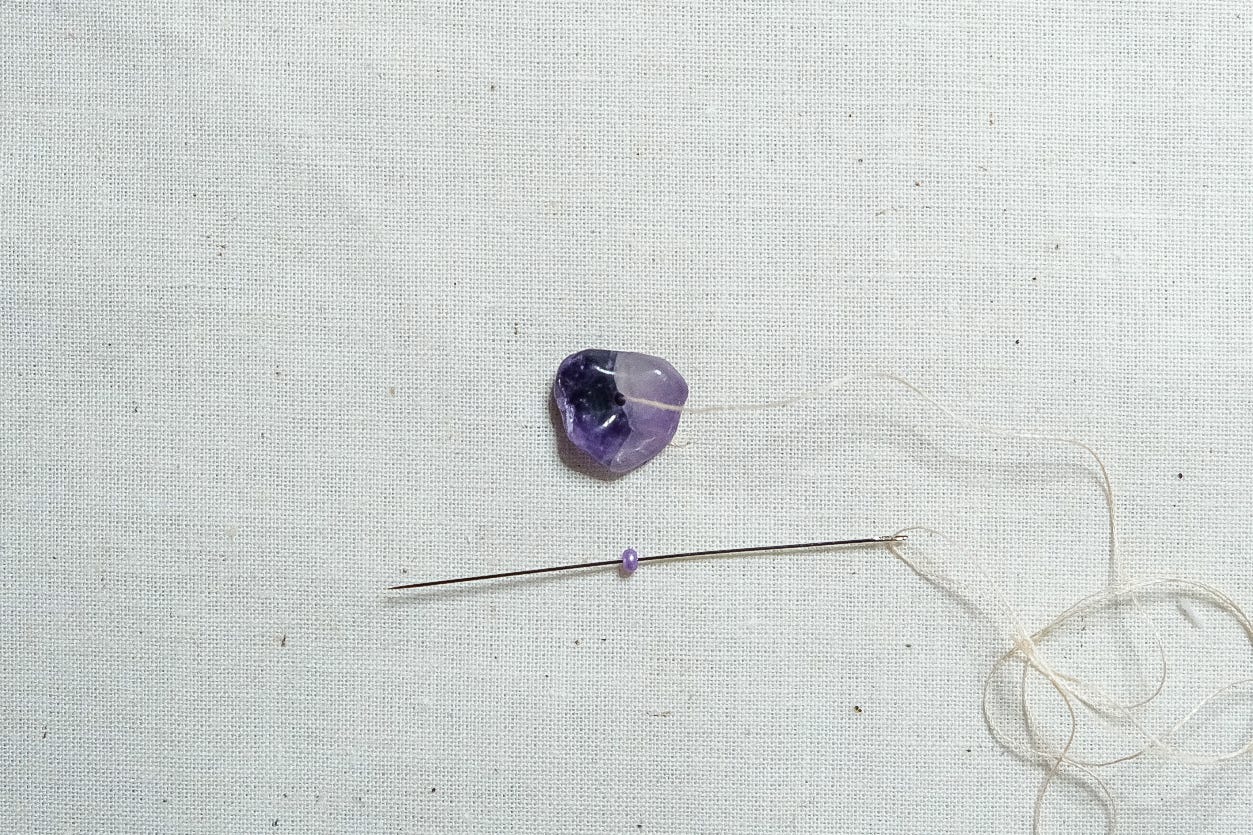
Amethyst chips: The chips, size small (4-7 mm), medium (8-9 mm) and XL (13-21 mm) are from jewelry supplier, Fire Mountain Gems. Make sure to get ones drilled with holes!
Seed Beads
Optional: tailor’s chalk, backing fabric, beeswax for thread
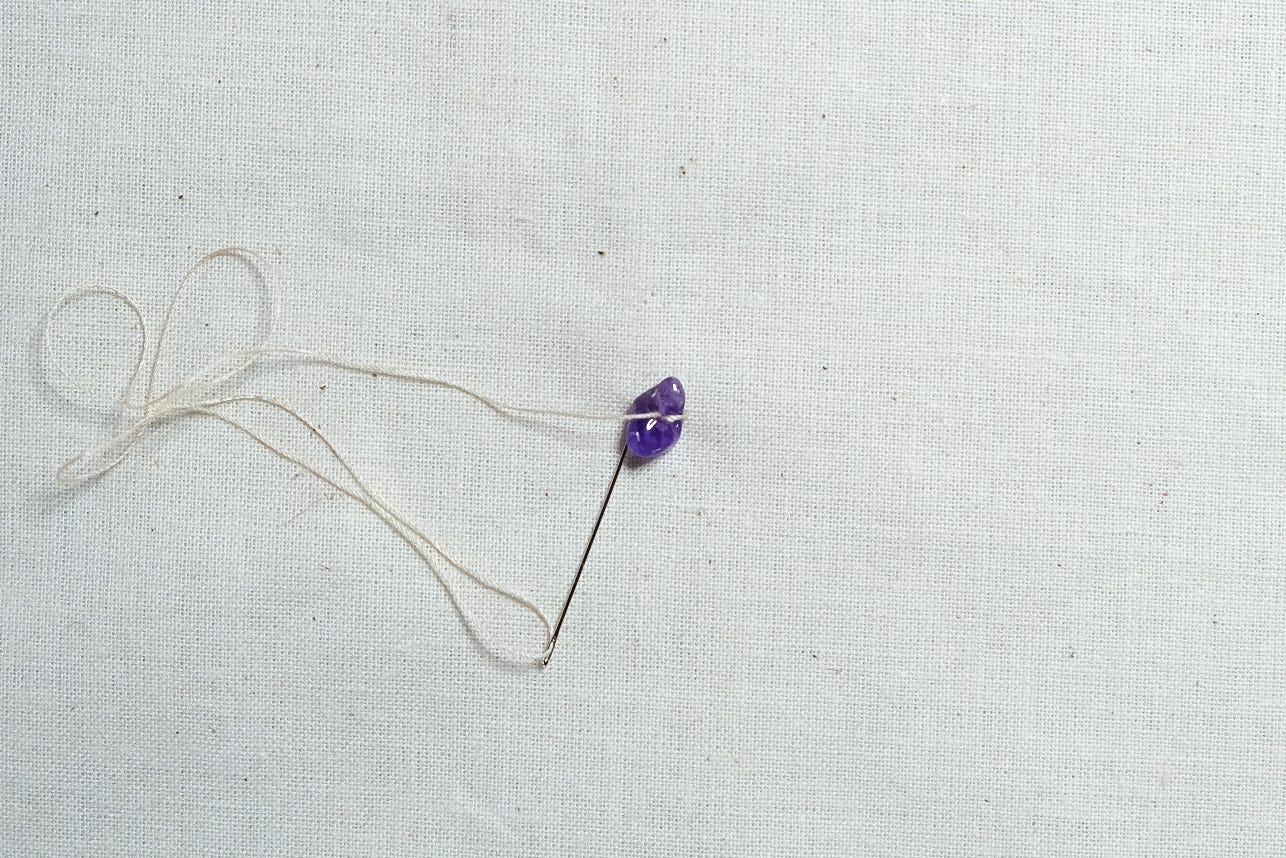
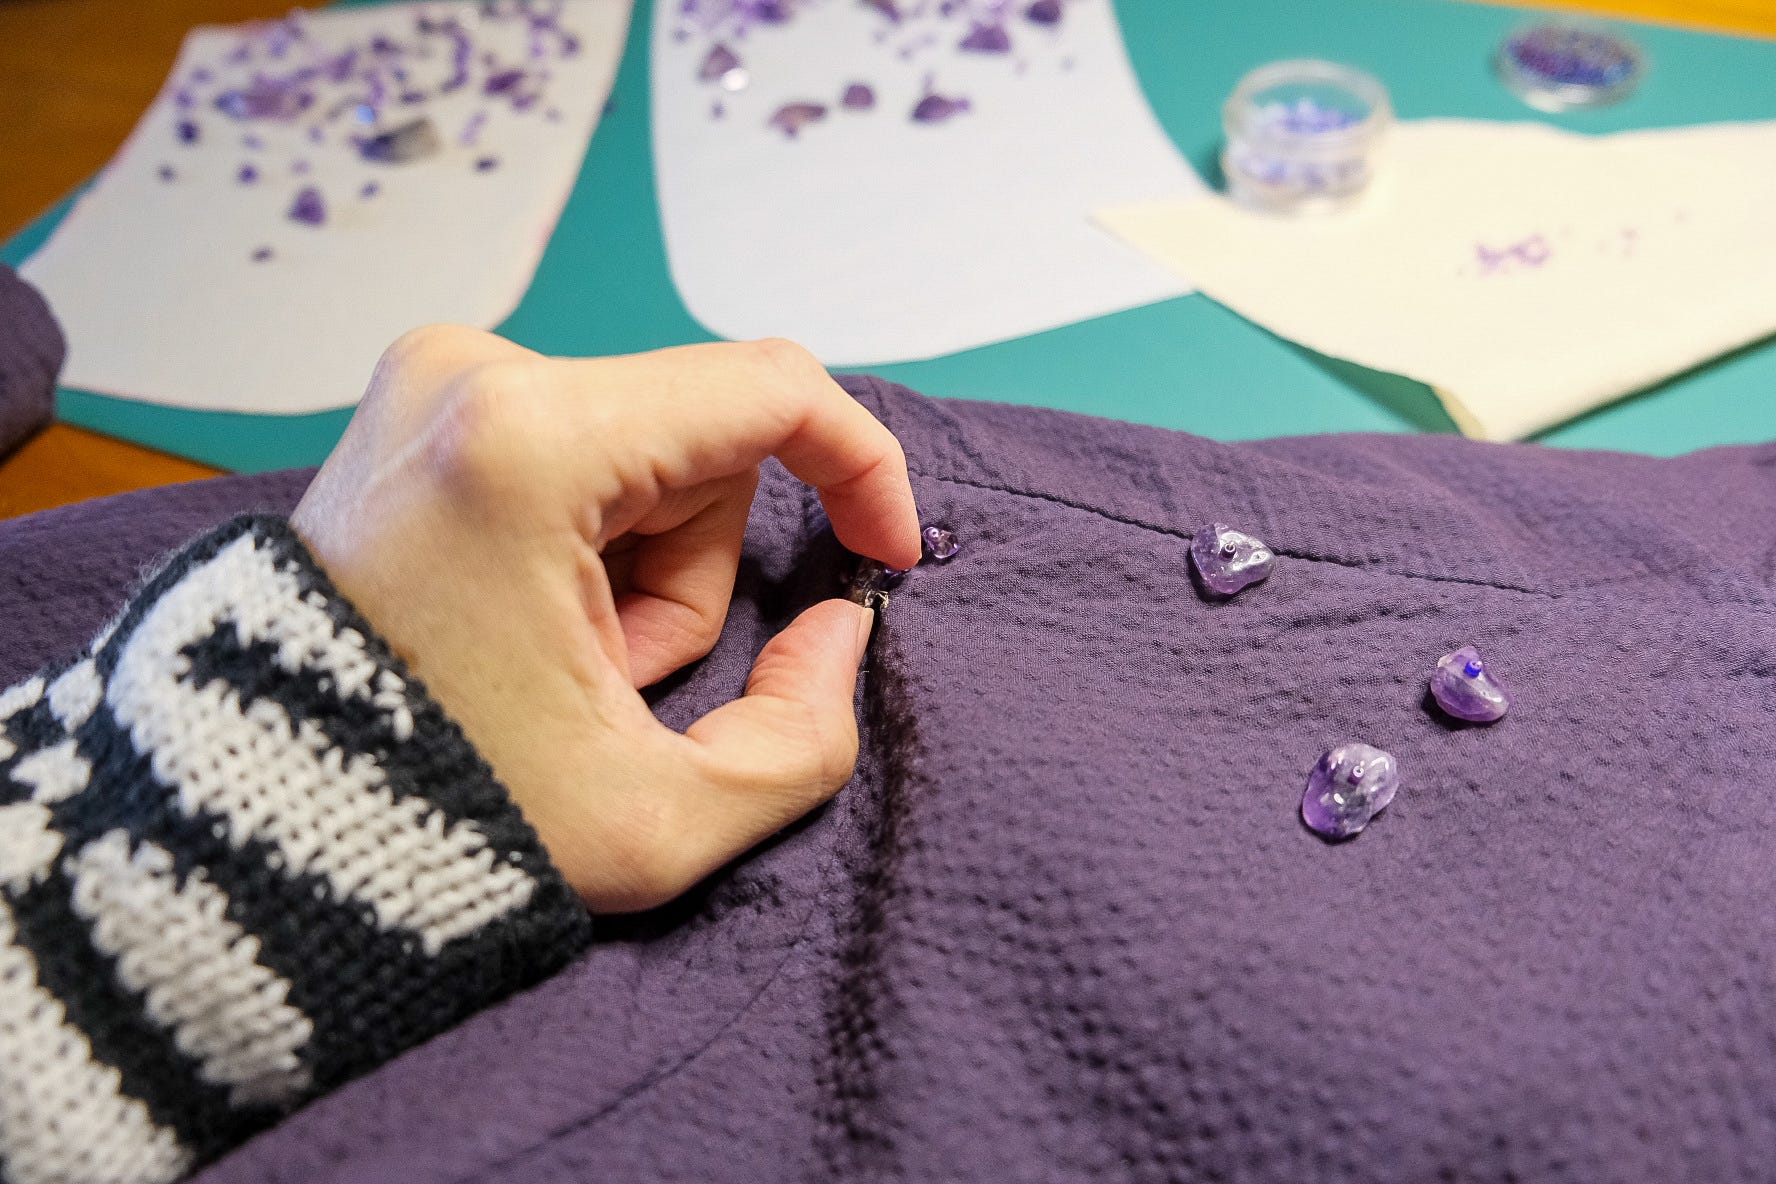
How to Attach a Single Chip
Make several tiny fastening stitches or start with a knotted thread.
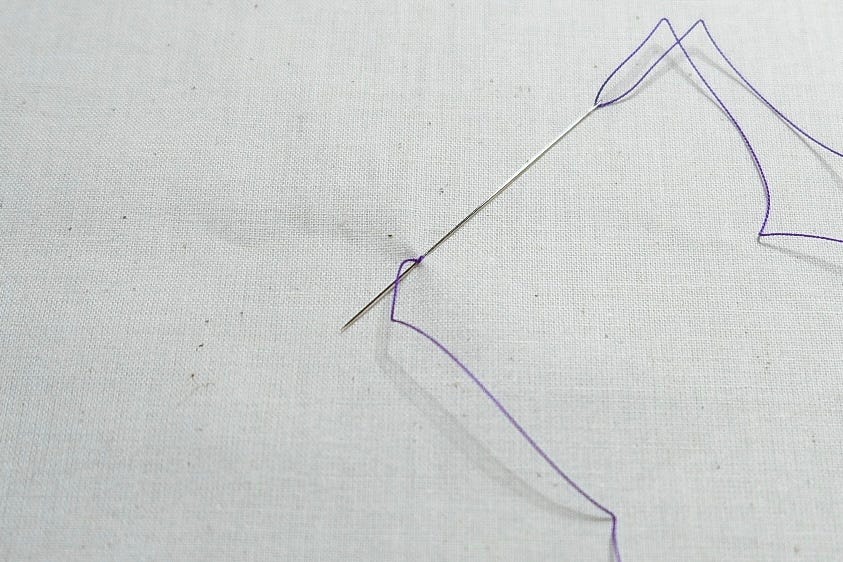
THE FASTENING STITCH
To begin with a fastening stitch, leave a 4-inch loose end. Insert the needle back 1/8-1/4 inch and bring it out at the point at which the thread last emerged. Make another few stitches through these same points for extra firmness.
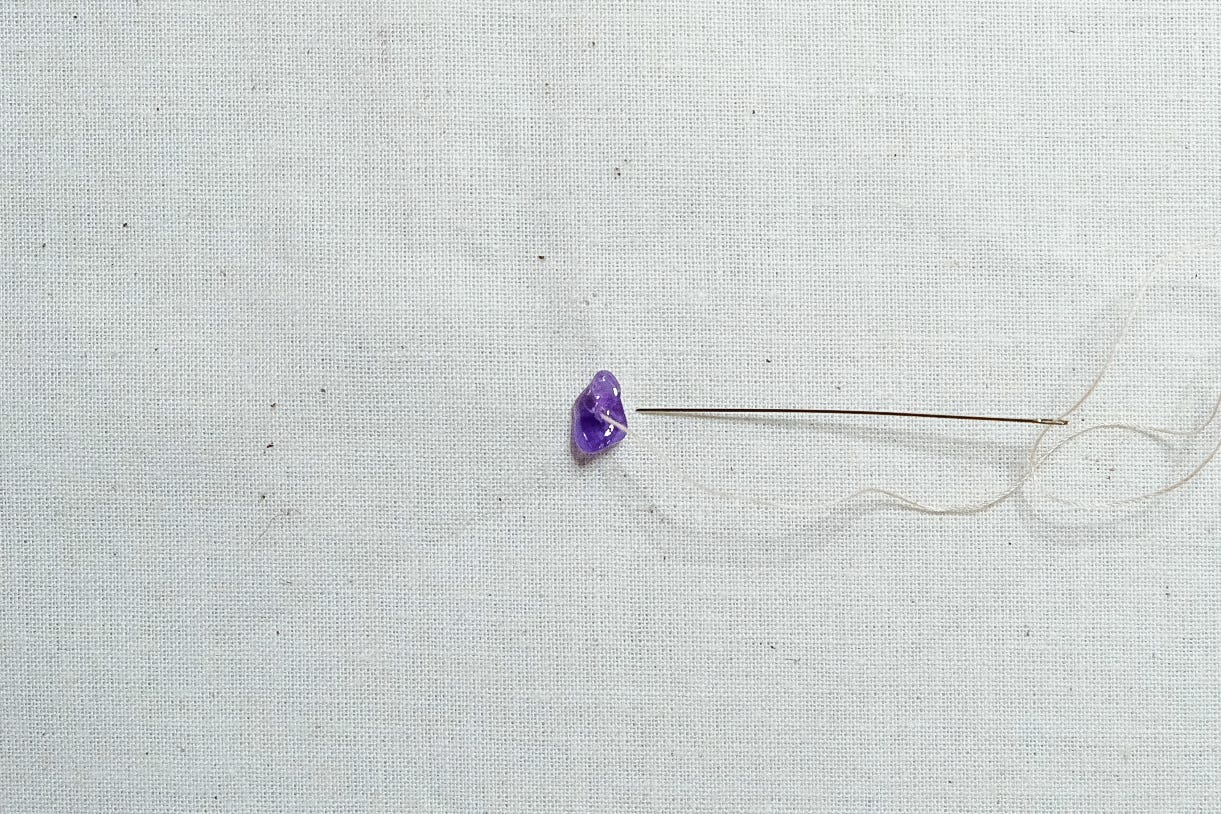
Bring the needle up from the wrong side, and pull the thread through. Then insert the needle through the hole of the chip, and slide it flattest side down, onto the thread.
Hold the chip flat against the fabric, and insert the needle at the right-hand edge. If you are left-handed insert the needle at the left-hand edge.

Bring the needle up again through the hole.

Pull the thread through, and insert the needle directly opposite the point at which the needle was inserted in the previous step.

Pull the thread through to the wrong side, and secure it with fastening stitches.


How to Attach a Chip with a Bead
Follow Steps 1 & 2 for attaching single chips above.
Insert the needle through the hole in the bead, and slide the bead onto the thread.

Hold the chip flat against the fabric, and bring the needle back down through the center of the chip.
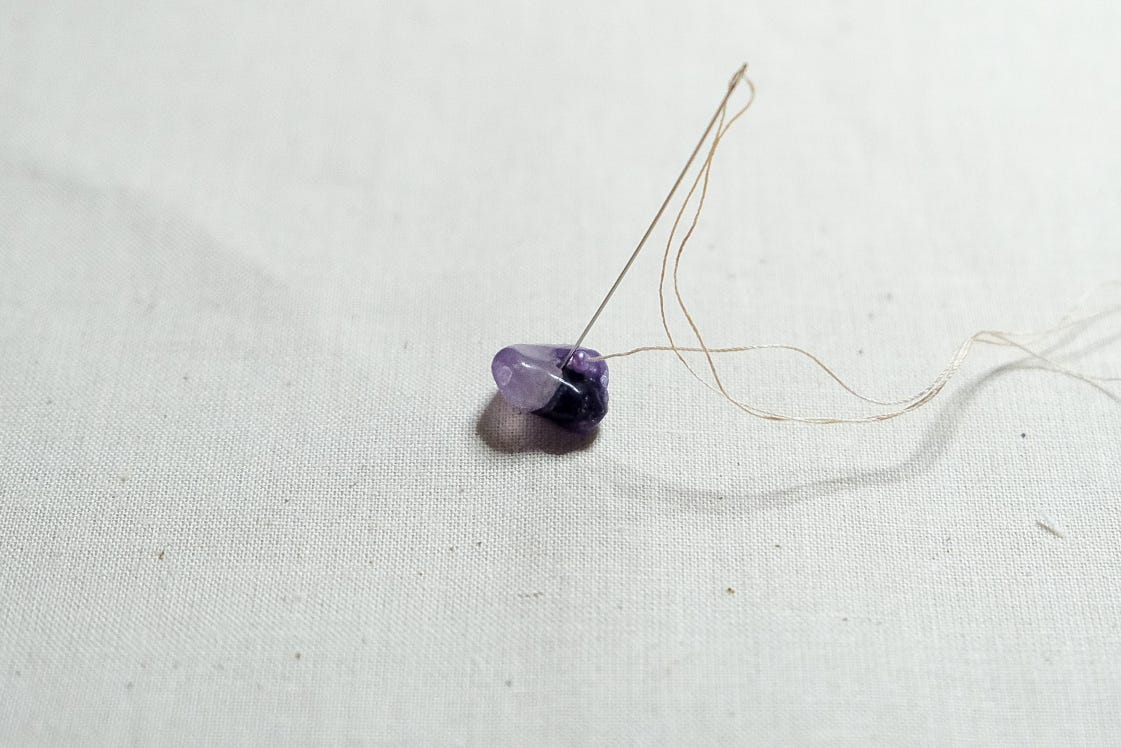
Pull the thread through to the wrong side of the fabric until the bead lies flat against the stone.
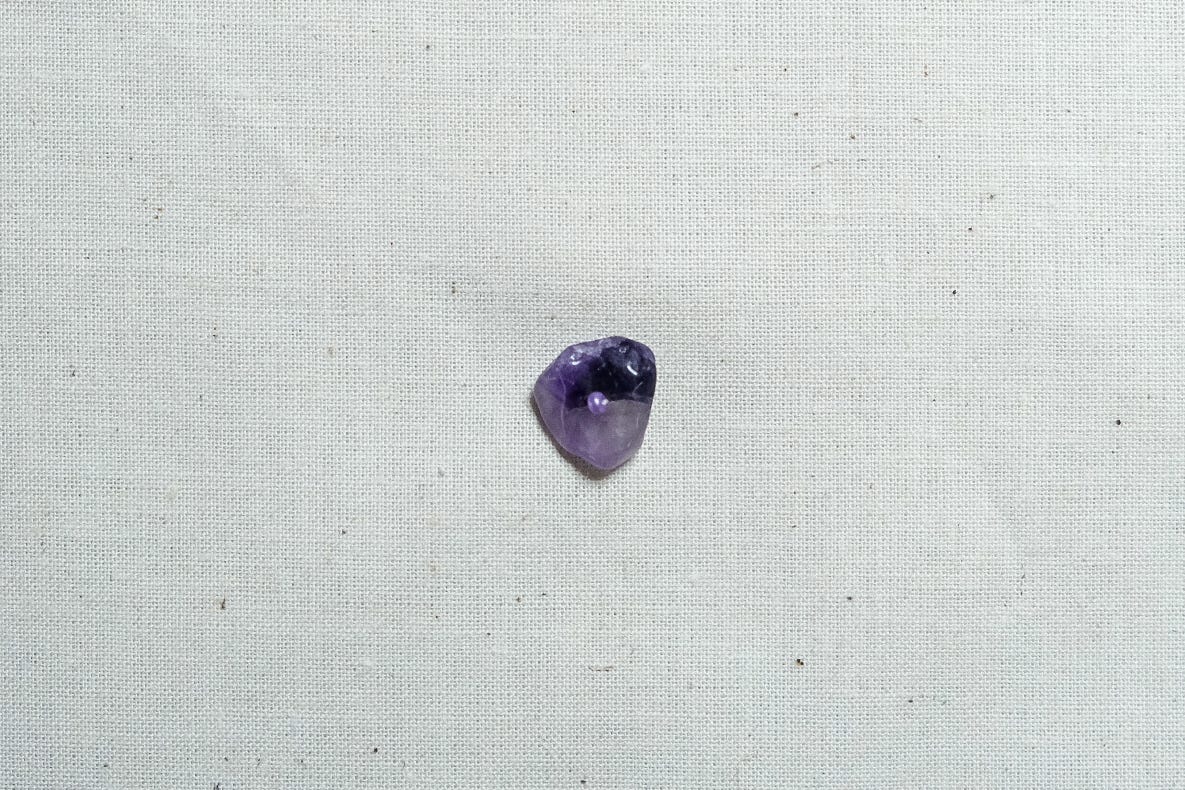
Fasten thread on the wrong side with fastening stitches.


Sewing Notes
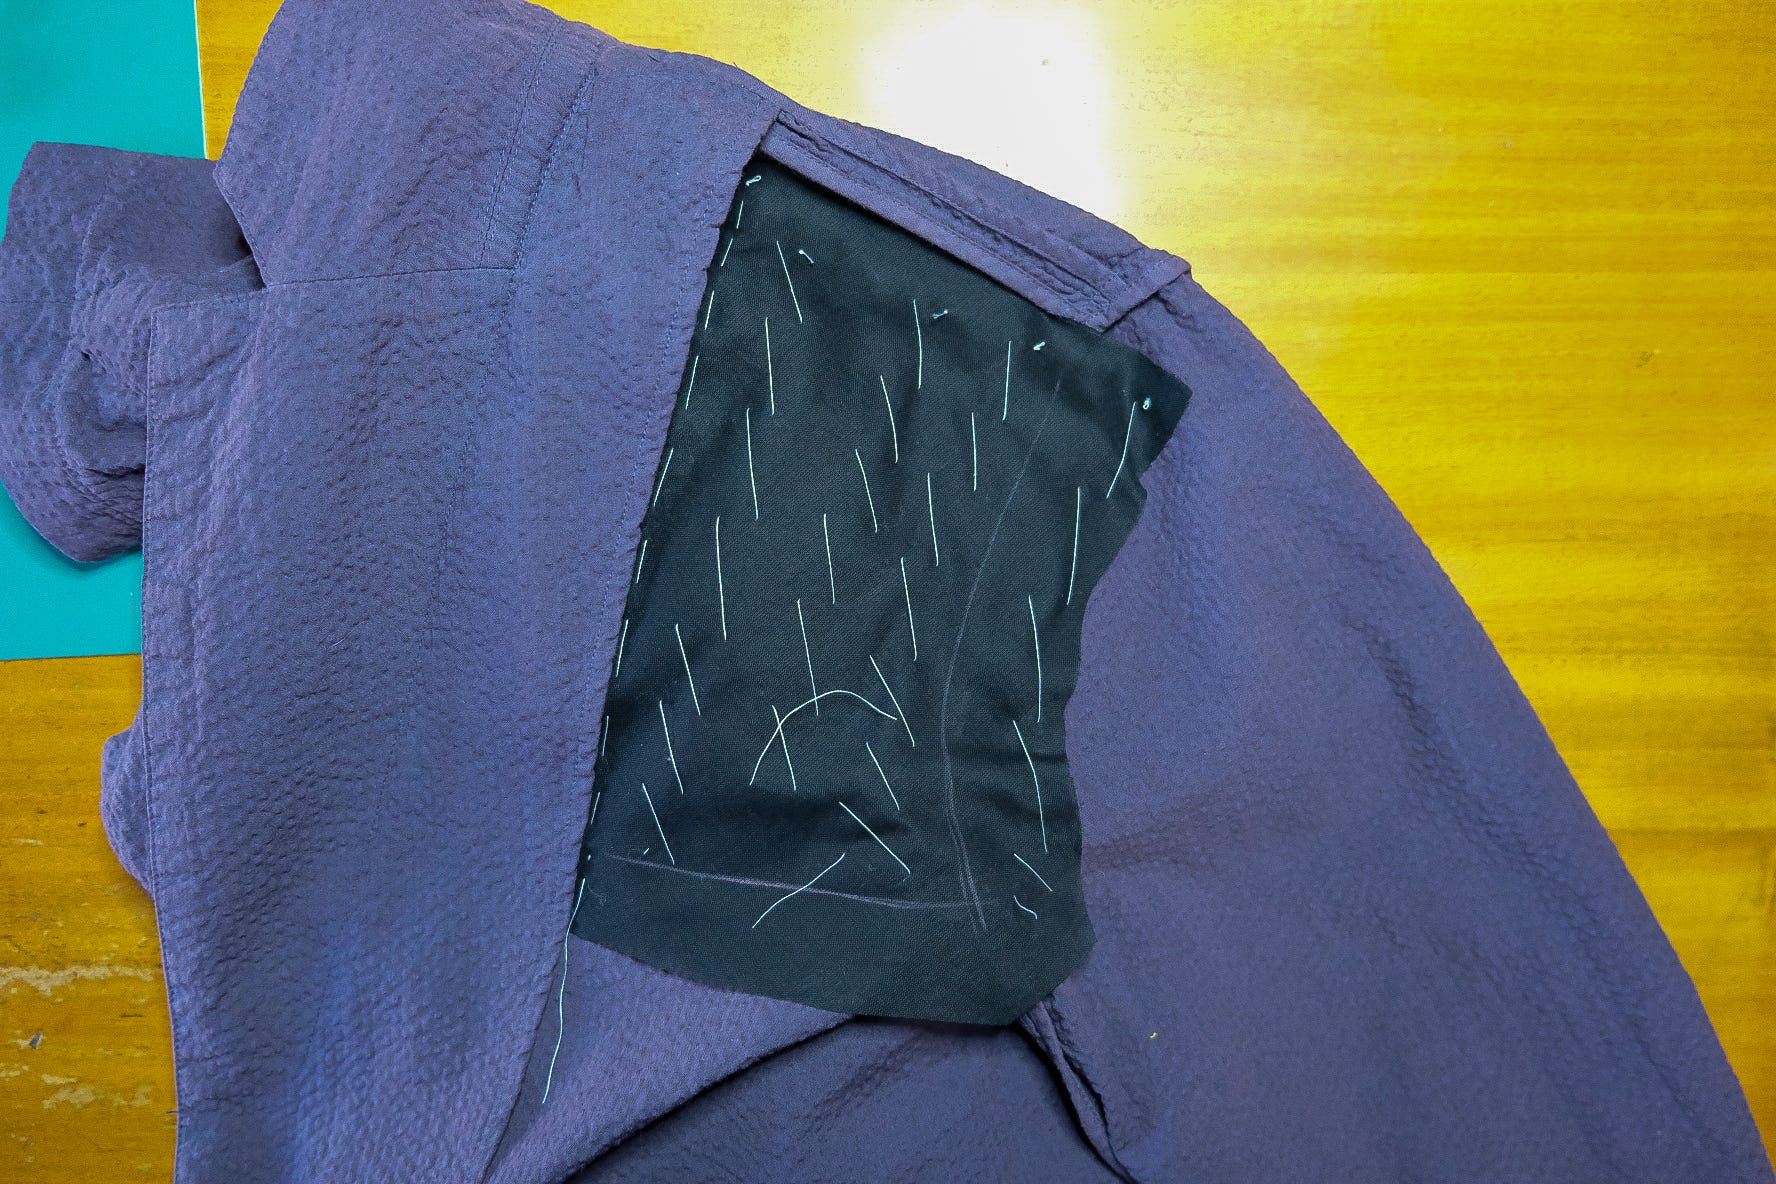
After sewing on a few stones, I noticed they weren’t as securely fixed as I’d hoped. They hung a bit loose on the thread. I think the weight and structure of the textured cotton might be part of the issue, so I added a bias-cut cotton voile backing for soft structure.
An easy way to capture the backing shape is to pin its outline on the jacket, overlay a piece of muslin, and lightly rub tailor’s chalk over the pins to transfer the shape.
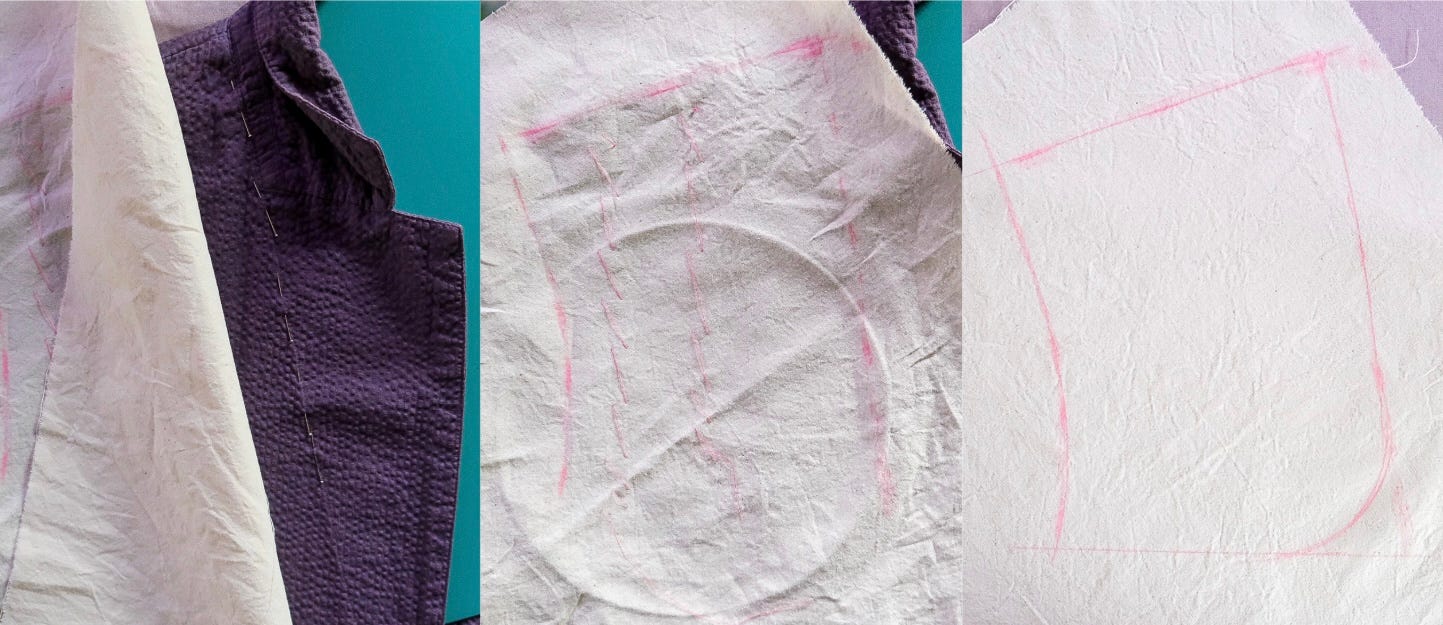
Next, I basted the voile on with diagonal basting. I cut it larger than needed, but I’ll trim it down once I’m finished sewing the embellishment.
Helpful Details
In addition to adding a backing, another trick for getting a tight fix on the larger chips is to insert the needle exactly back into the hole where it first emerged from the fabric before the stone and bead were threaded on.
If you notice one is loose and you’d prefer not to remove your stitches, you can always double up your stitches. Simply resew by bringing the needle back through the chip and bead, then down through the chip again.
You don’t need to cut the thread each time, but do begin and end each chip and bead combo with fastening stitches.

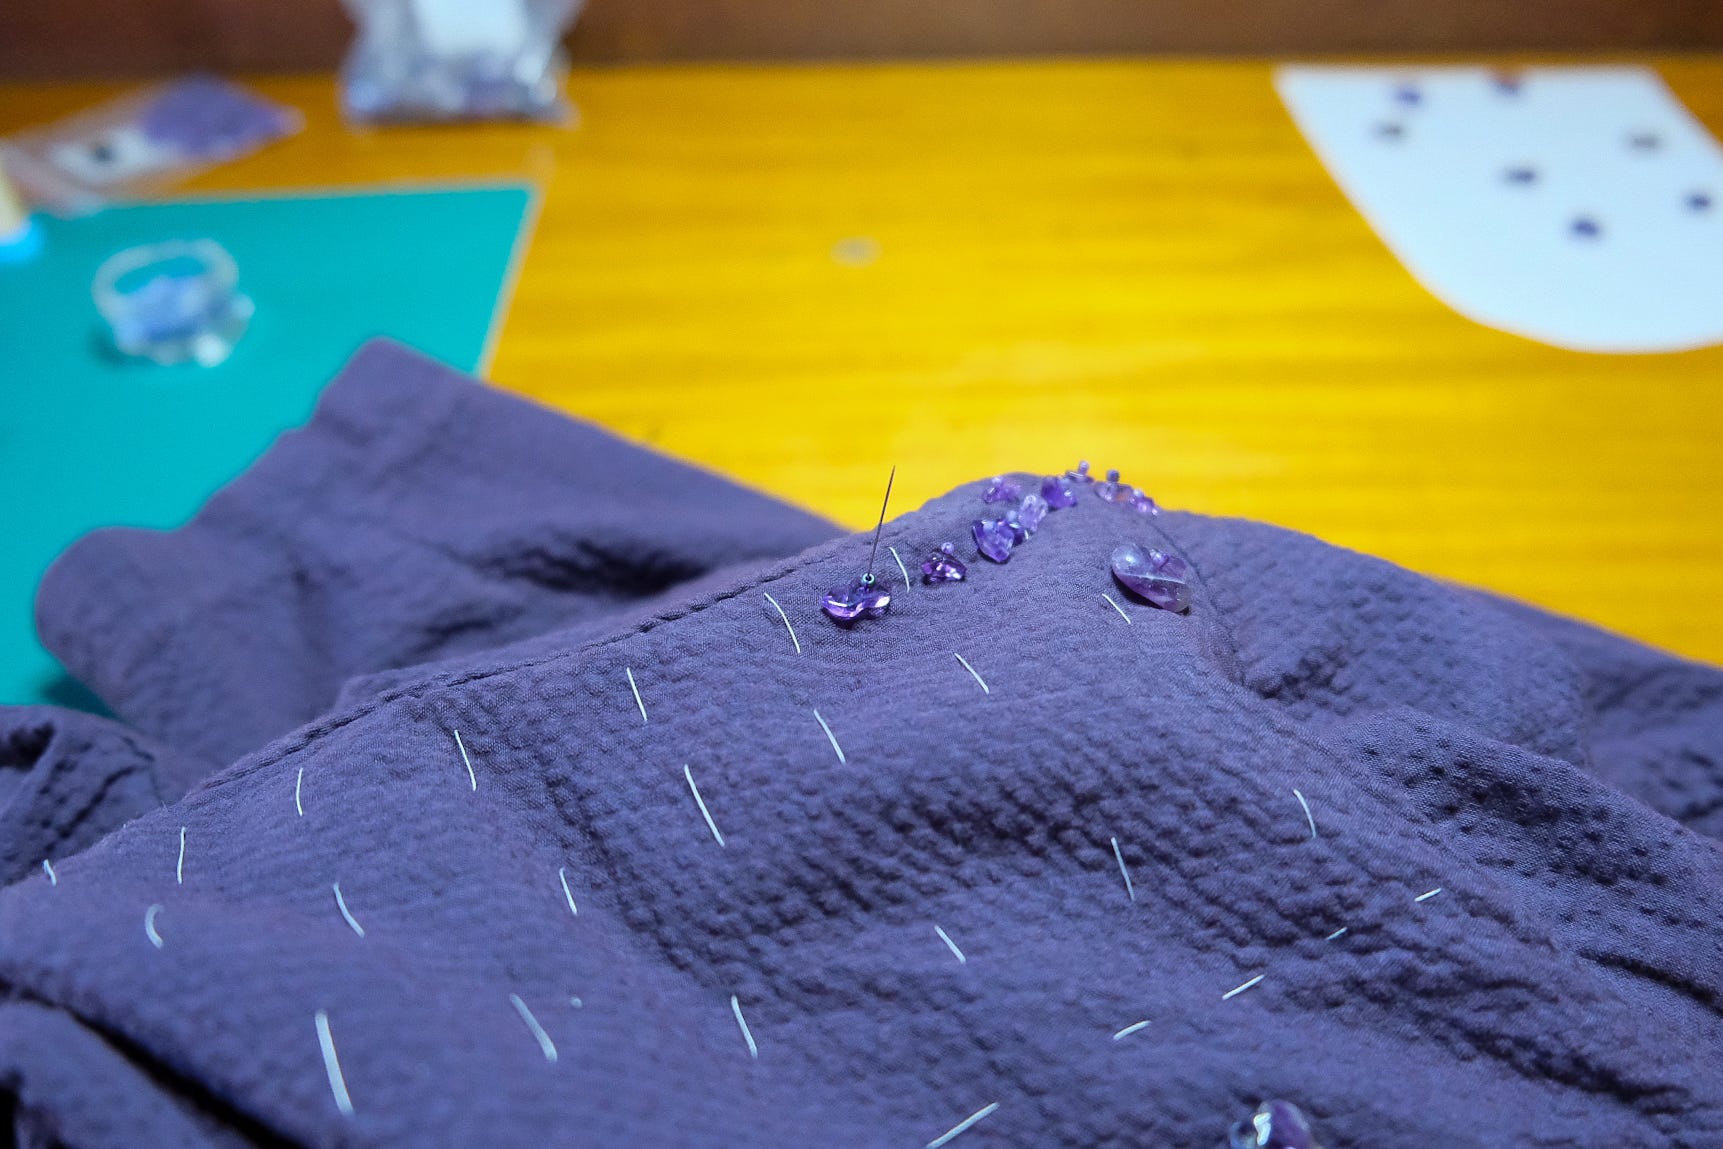
Here’s a look at how it’s coming together.

Embellished and ready to wear!
In Memory of Kenny Bonavitacola
Before I wrap up this letter, I want to share a few words about my former colleague, Kenny, who passed away at the beginning of April. Kenny was the kindest—so genuine, endlessly enthusiastic, and just bursting with creative joy. He celebrated you, no matter who you were.
He’d recently joined the FIT faculty, and I loved how he approached teaching: Let them dream. There’s plenty of time to learn the business side of fashion. Kenny made sure that couture dreams were nurtured, and that no matter your dreams, nothing was impossible. He was always lifting people up, always cheering them on.
Kenny made the world feel brighter, more inspiring, and deeply human.
WWD: New York Fashion Designer Kenny Bonavitacola Dies at 71
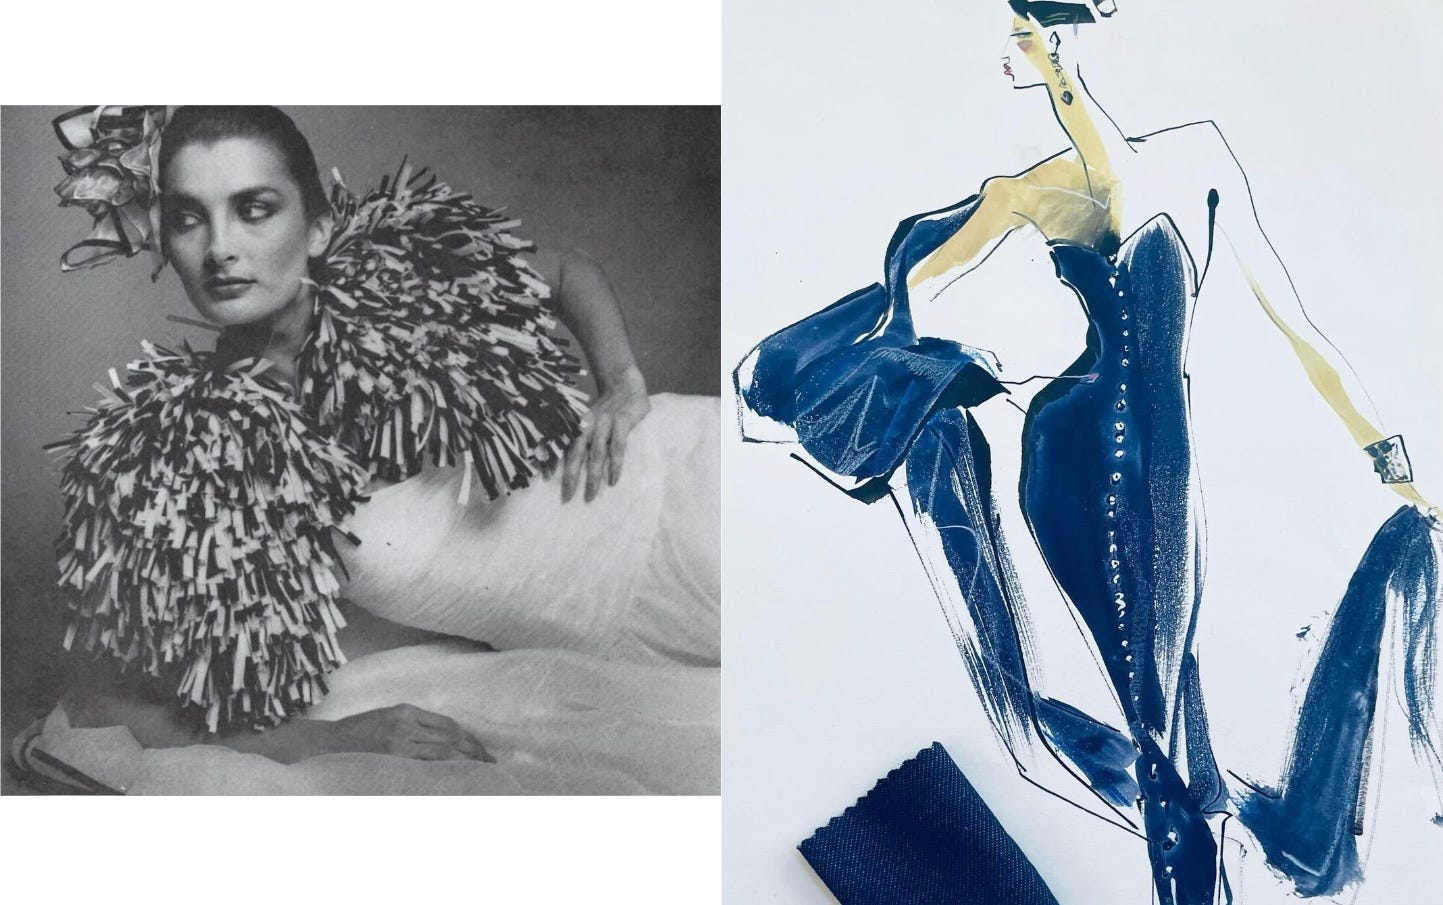
Here are a few of Kenny’s designs that he loved most. They capture the joy and artistry he brought into everything he did.
Thank you for reading and wishing you a beautiful spring week ahead.
Here in LA, the air is heavenly scented with citrus blossoms, mock oranges are bursting into bloom, and the jasmine is just starting to open. It’s that fleeting kind of spring fragrance that makes you pause, and I hope you catch a little of it wherever you are, too.
~ Jane
Everything about this post was delicate and clear. Your tribute to a friend invited the reader to pause and note his life and talent. How very kind of you. I won't match your ability to sew, Jane, but I am in awe of your talent to write about it.