

Create a Puff Sleeve Inspired by Weird Barbie
Step-by-step guide to drafting and sewing your own sculptural sleeve

When Weird Barbie made her entrance in the BARBIE movie, my first thought was I love her sleeve. My second? I want to make it. And here we are.

In Part 1, I’ll start by drafting the sleeve pattern, adding fullness to the sleeve cap and hem. Part 2 will focus on sewing the sleeve in muslin. And for those looking to take it a step further, I’ll show how to mount your sleeve onto tulle for added structure before sewing.
I considered splitting this newsletter into two parts—one for pattern drafting and another for sewing—since there’s a lot to cover. But I think it’s more helpful to see the entire process from start to finish. Take it step by step, and let’s dive in!
Three key points to keep in mind before we begin:
The sleeve has fullness at both the cap and the hem.
It’s designed to hold its shape on its own.
The sleeve is finished with a sleeve band.
Part 1: Drafting the Puff Sleeve
Trace your basic sleeve, including all notches.
Square down from the underarm to hem.
Mark the center and label it the grain line.
Draw lines equally on both sides of grainline to quarter the sleeve. Mark X, and cut out dartless sleeve pattern.

Fold a piece of pattern paper, newsprint, or other lightweight paper in half. Align the sleeve center along the fold, then trace the back half of the sleeve and the front armhole.
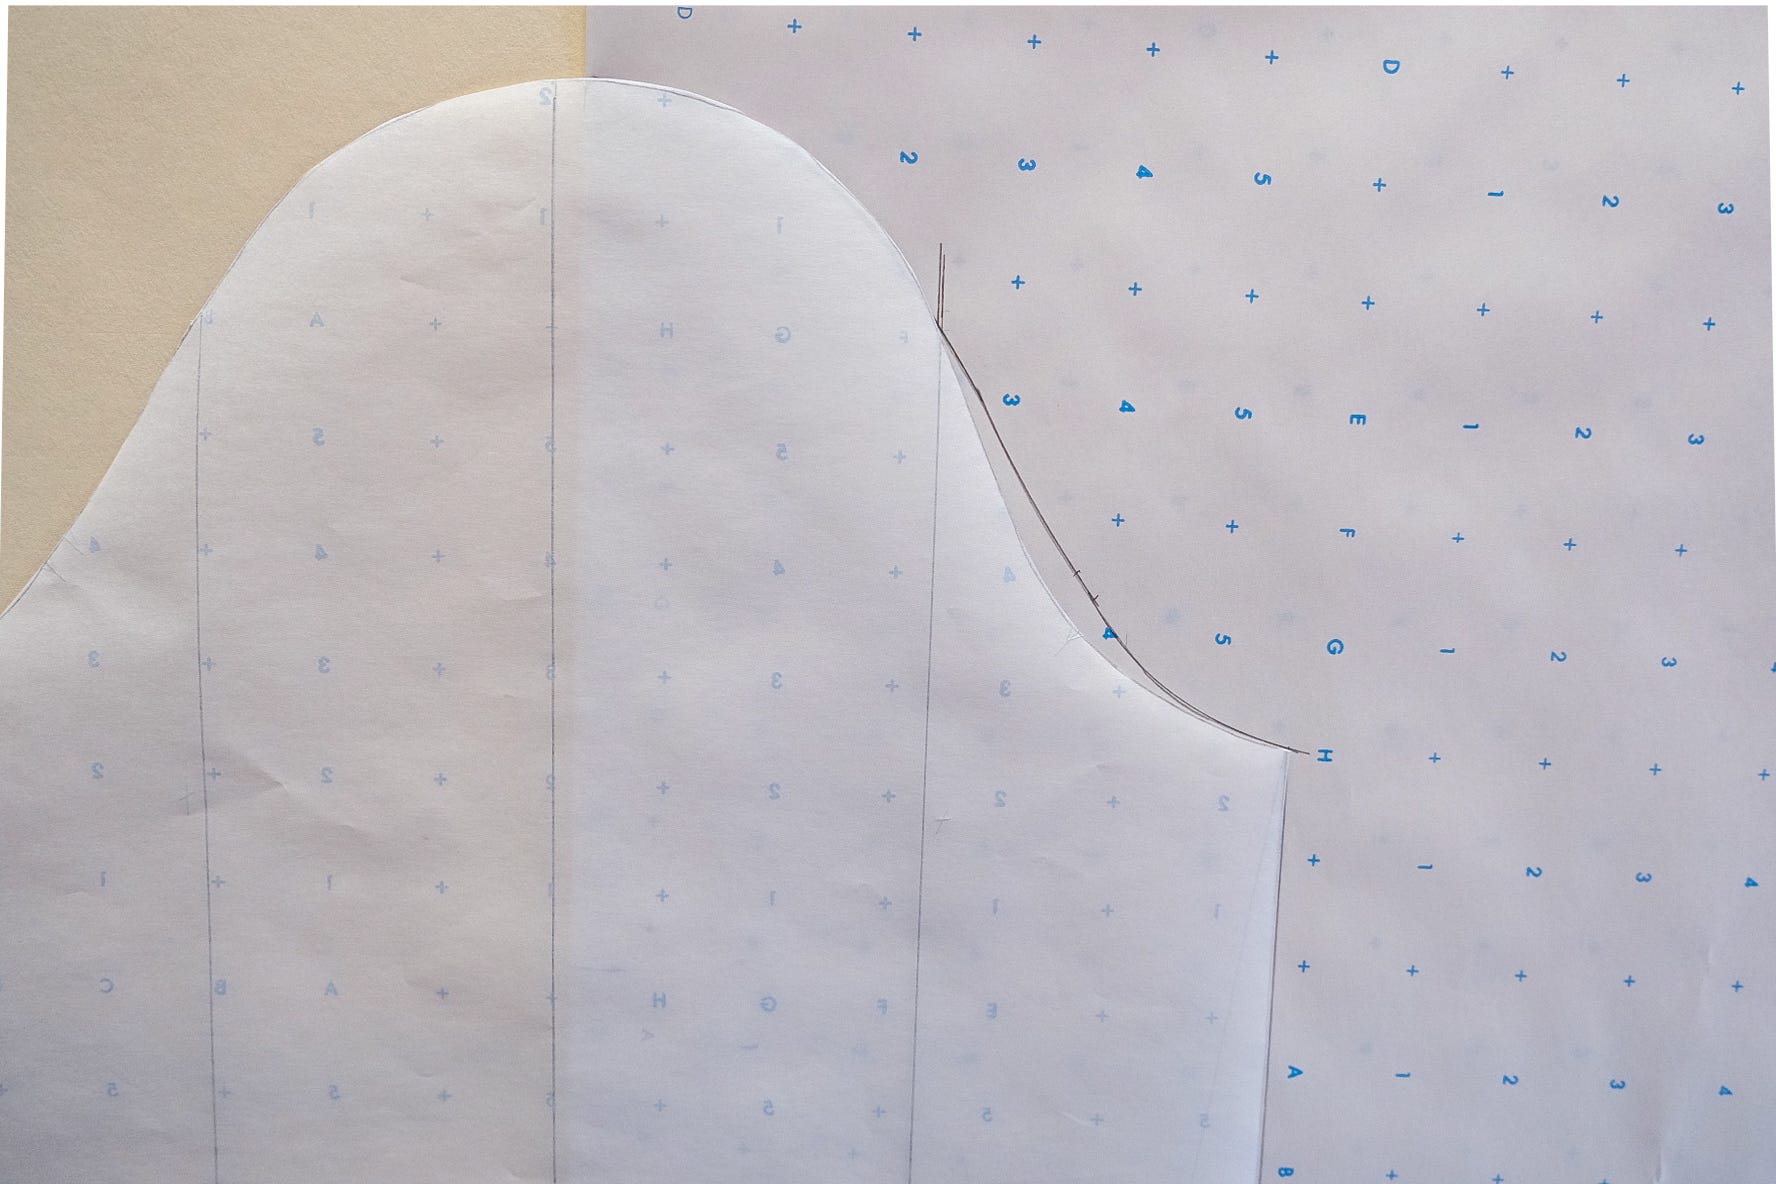
Mark 2 inches down from armhole on the underarm seam, and square a guideline from fold.
On the fold, measure 2 inches up from the sleeve cap and 2 inches down from the hem. Mark both points.
Shift the pattern along the guideline until the center line overlaps the underarm seam. (This doubles the sleeve width for Weird Barbie’s dramatic fullness. For less fullness, shift it less; for more, keep going!)
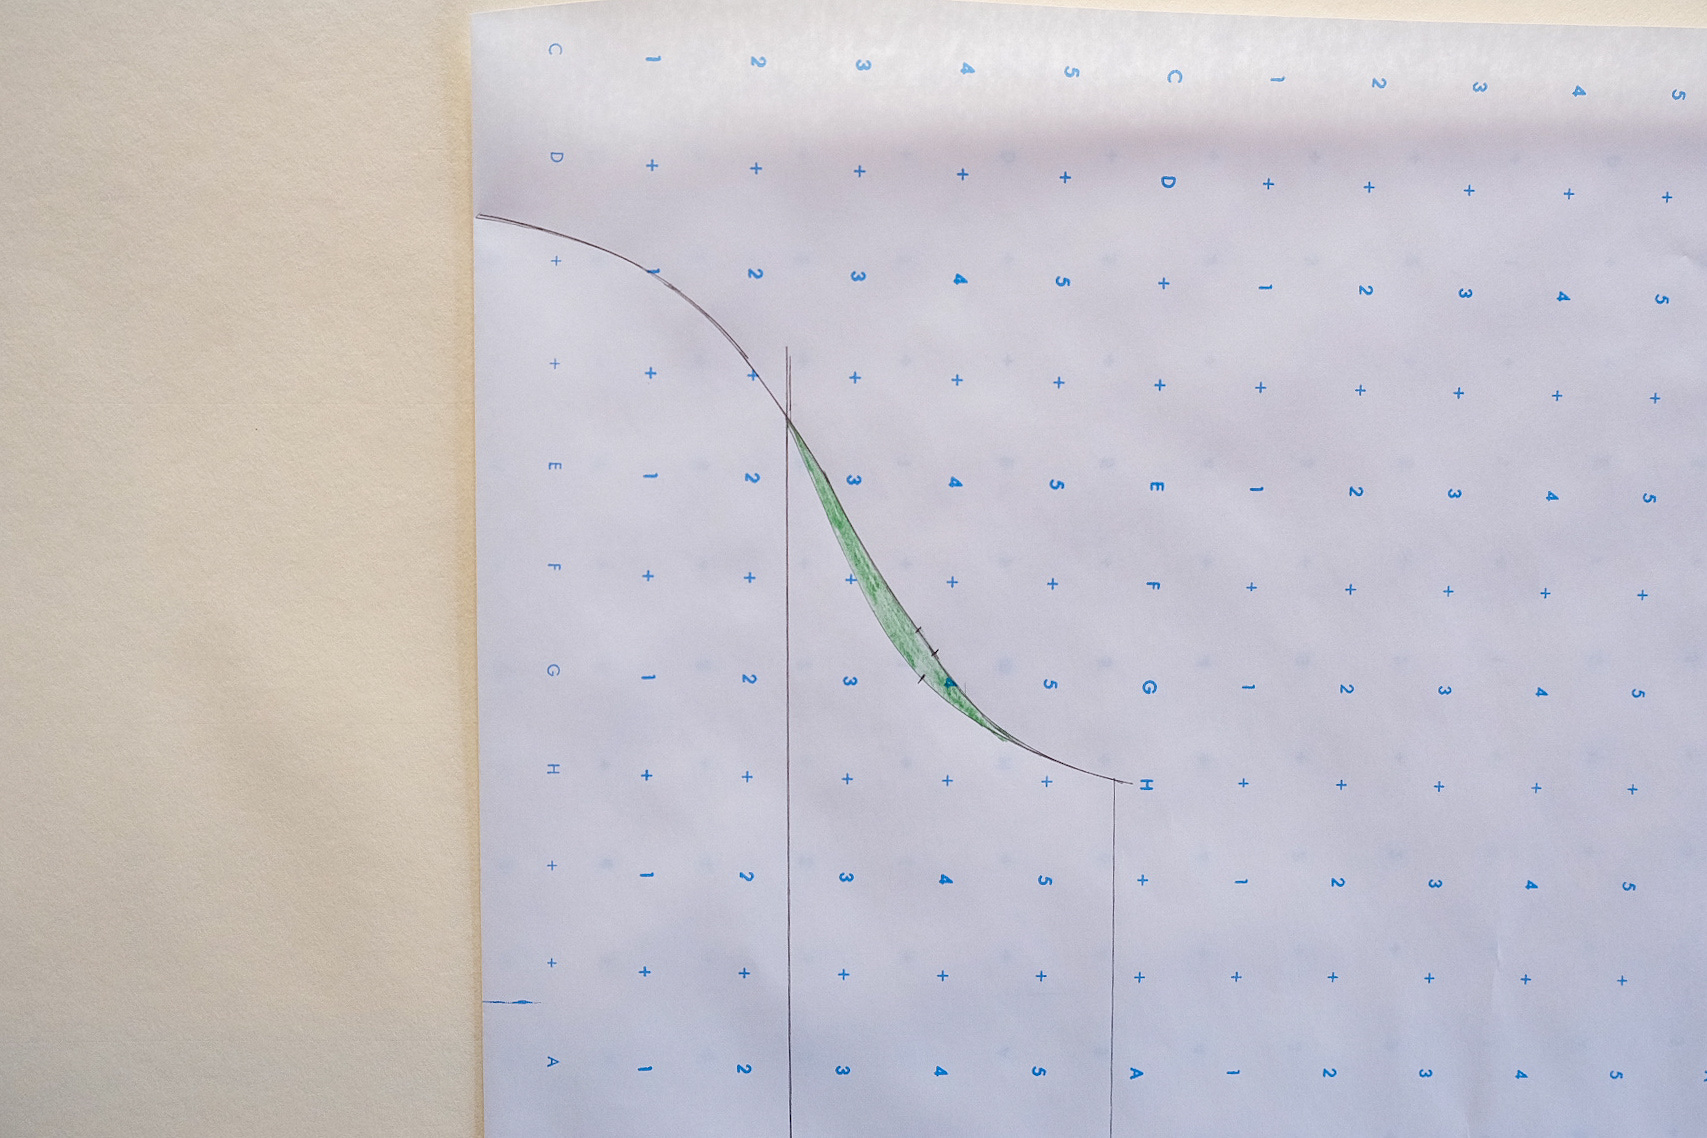
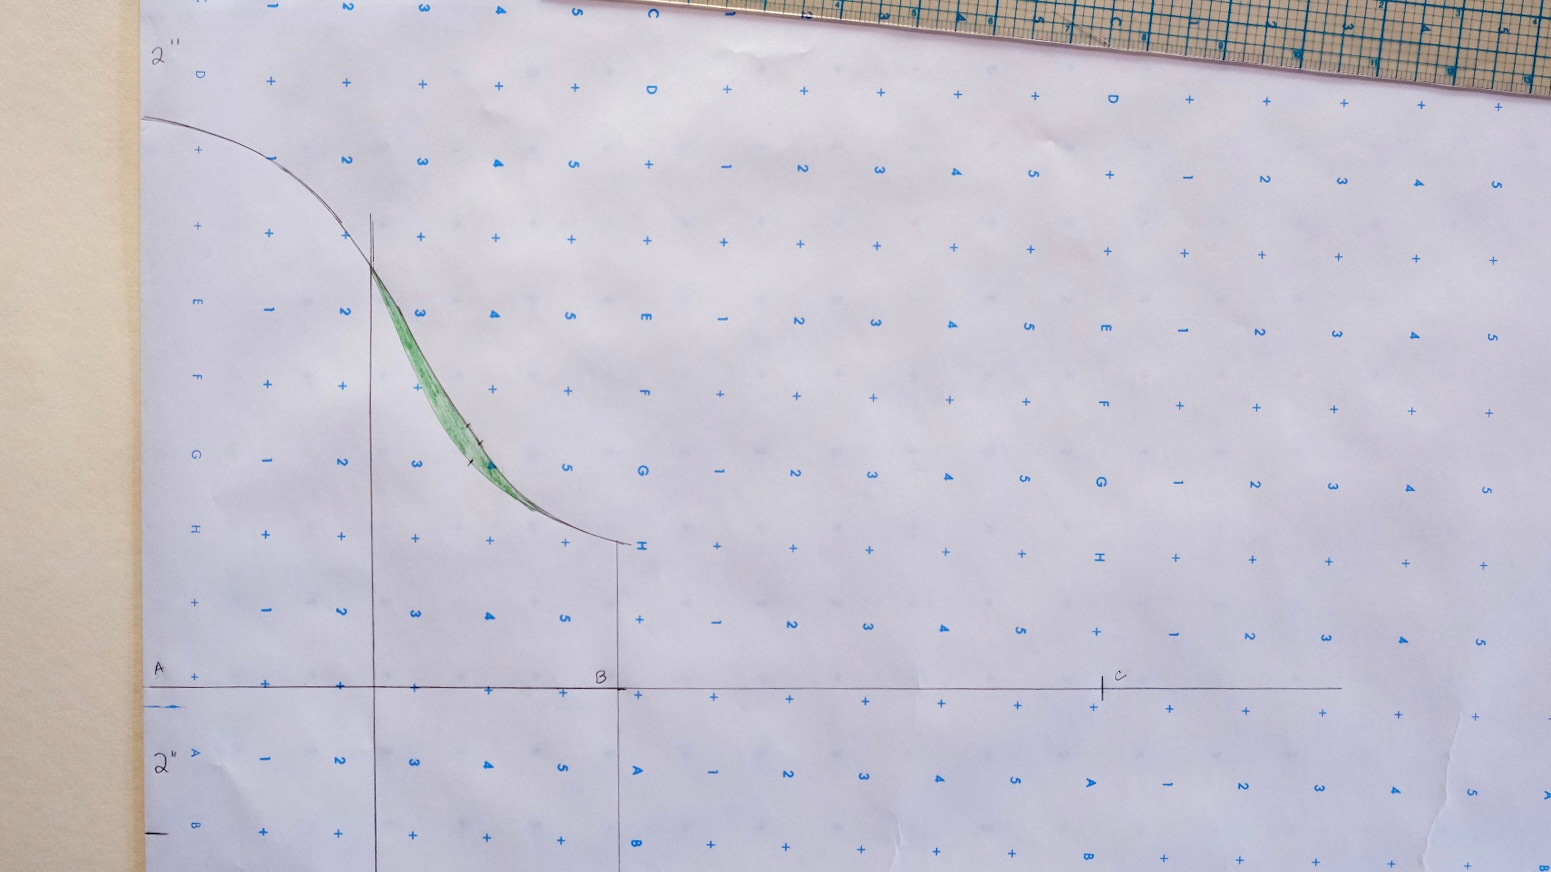
Trace sleeve to the X-guideline, including front sleeve curve (shaded green). Mark the intersection where the vertical X-guideline meets the horizontal guideline; this will serve as a reference point for sewing the sleeve band.
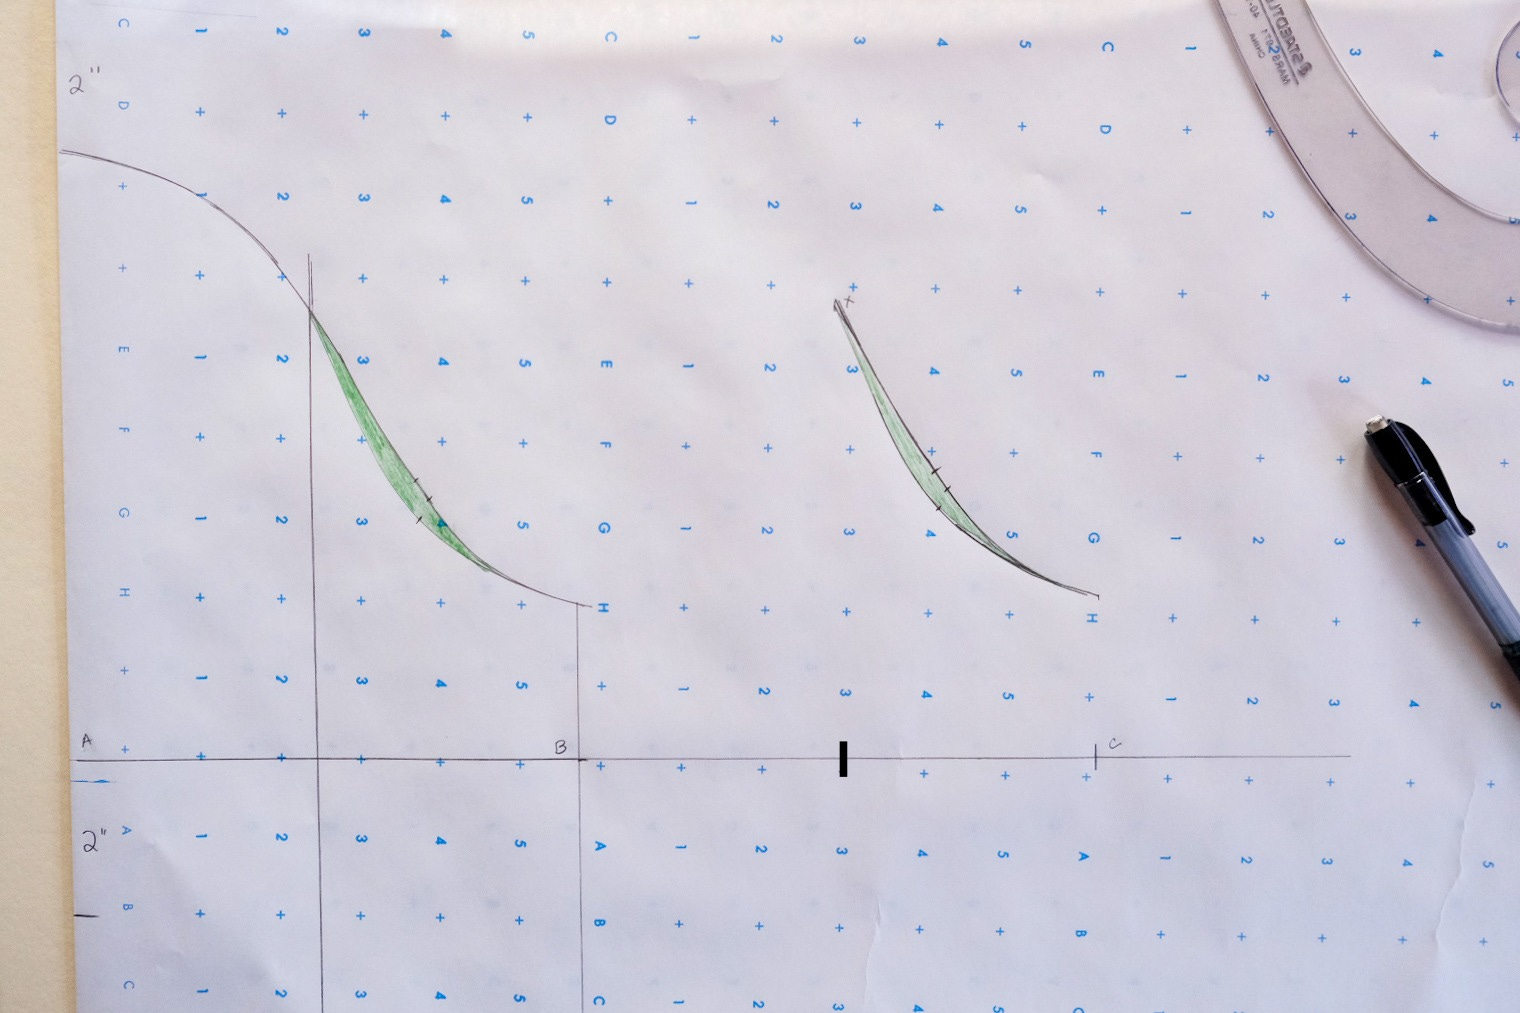
Blend curved lines 2 inches above the cap and 2 inches below the hem.
You can adjust your French curve at various angles to achieve the desired shape. Blending curved lines is more art than science—you’ll often need to shift, eyeball, and refine the curve until it feels just right. It might take a few attempts, and that’s okay!

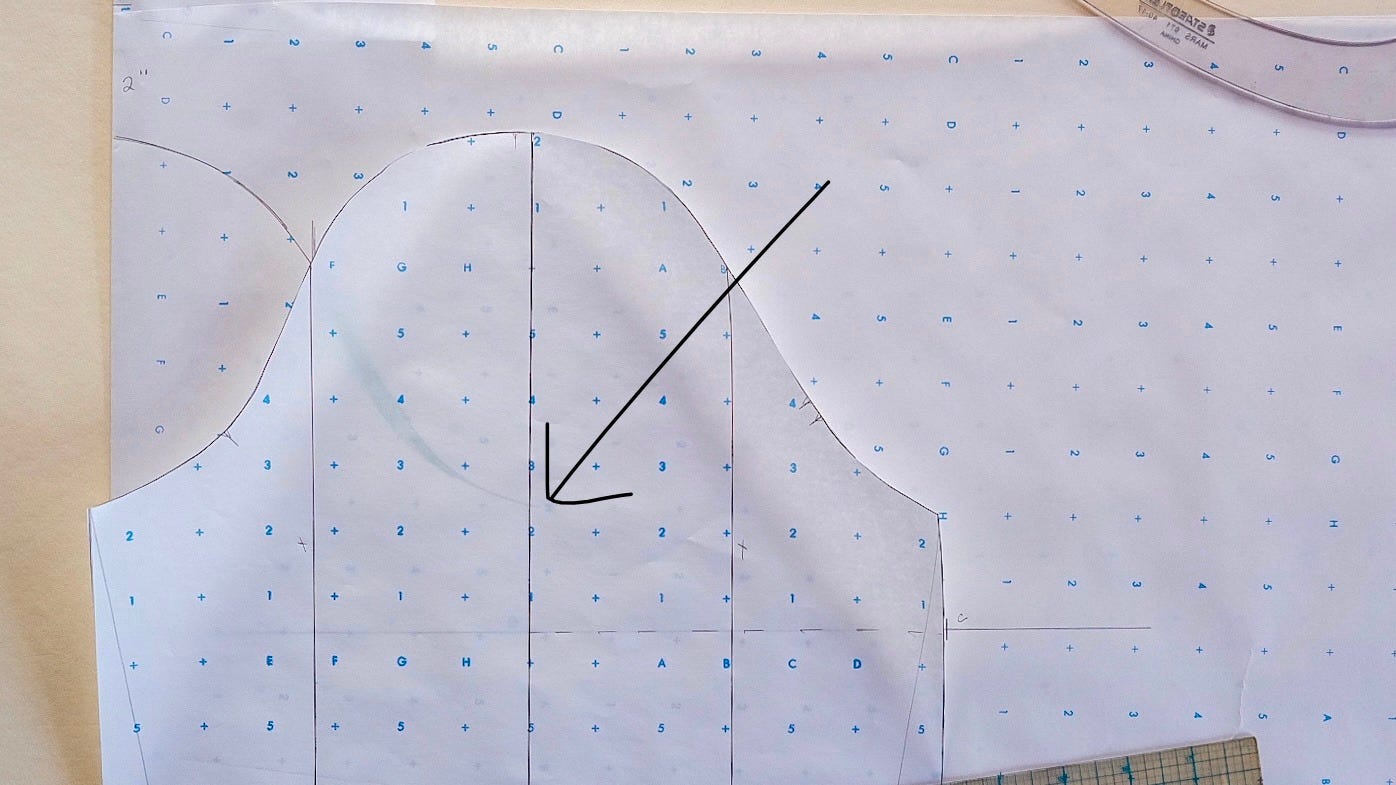
Add ½ inch seam allowances to your pattern and cut on the fold. Once unfolded, mark the grainline, add notches, and cut the front armhole.
*Industry standard is two notches for the back armhole and one for the front—an invaluable guide, especially when it’s hard to distinguish them after cutting the fabric.
Here’s what my finished pattern looks like.
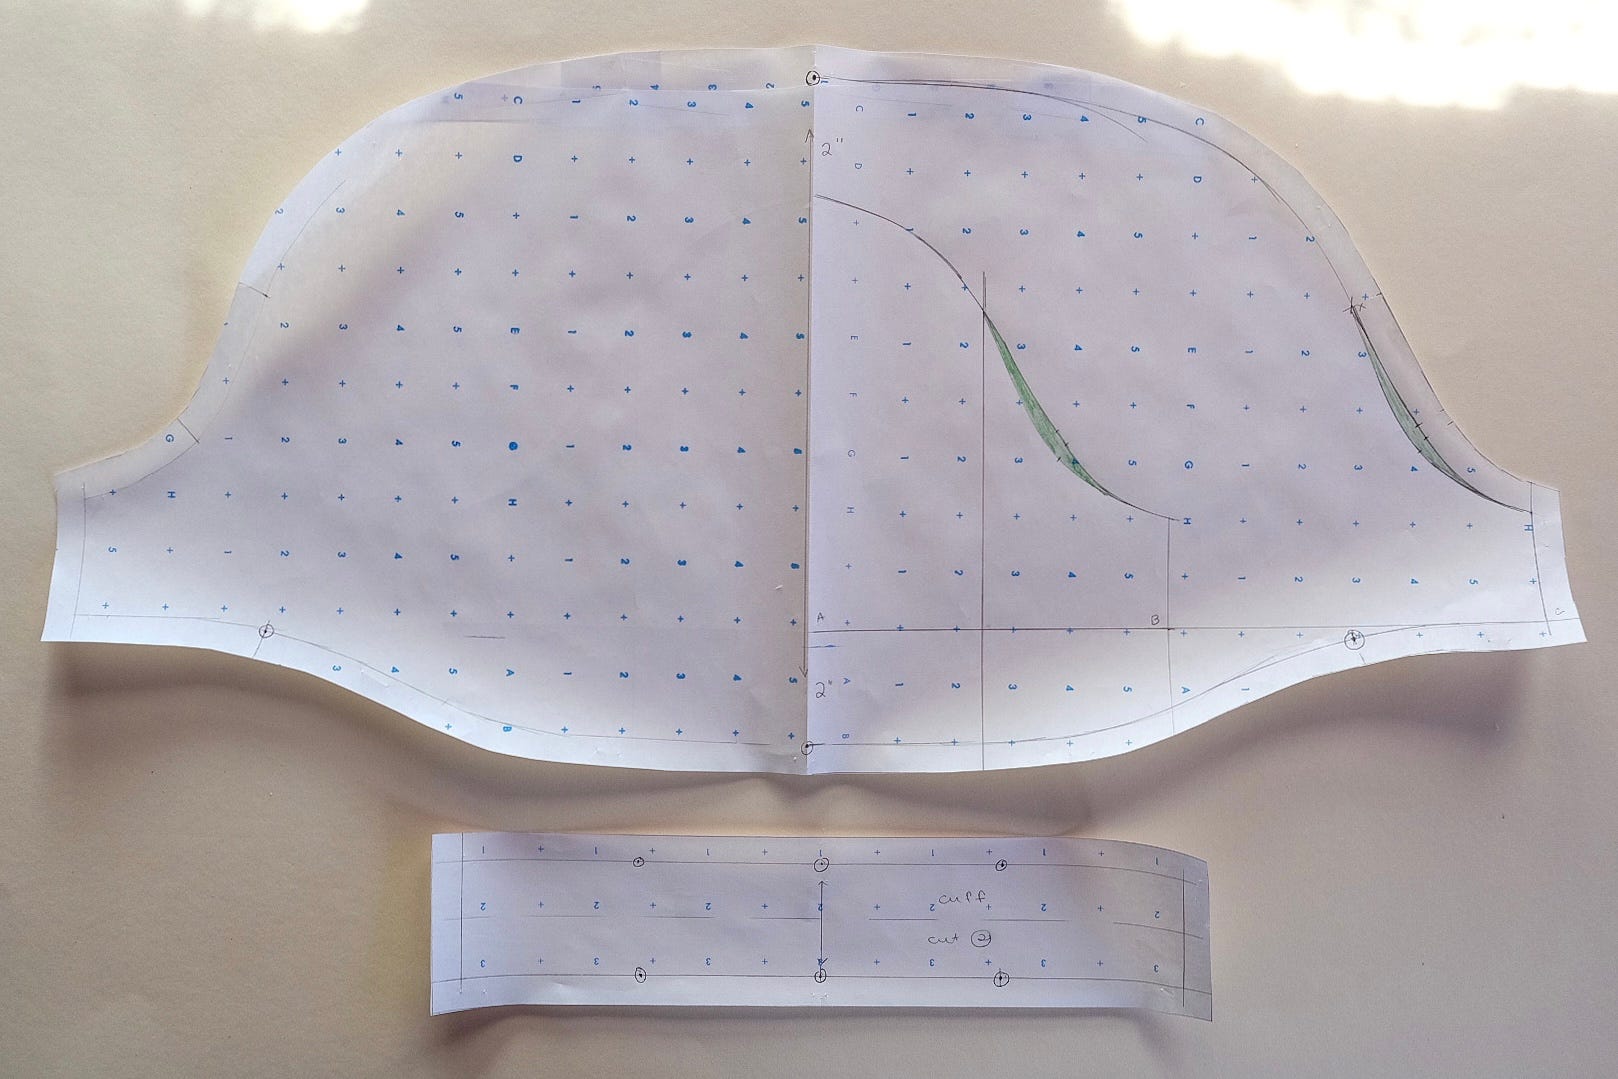
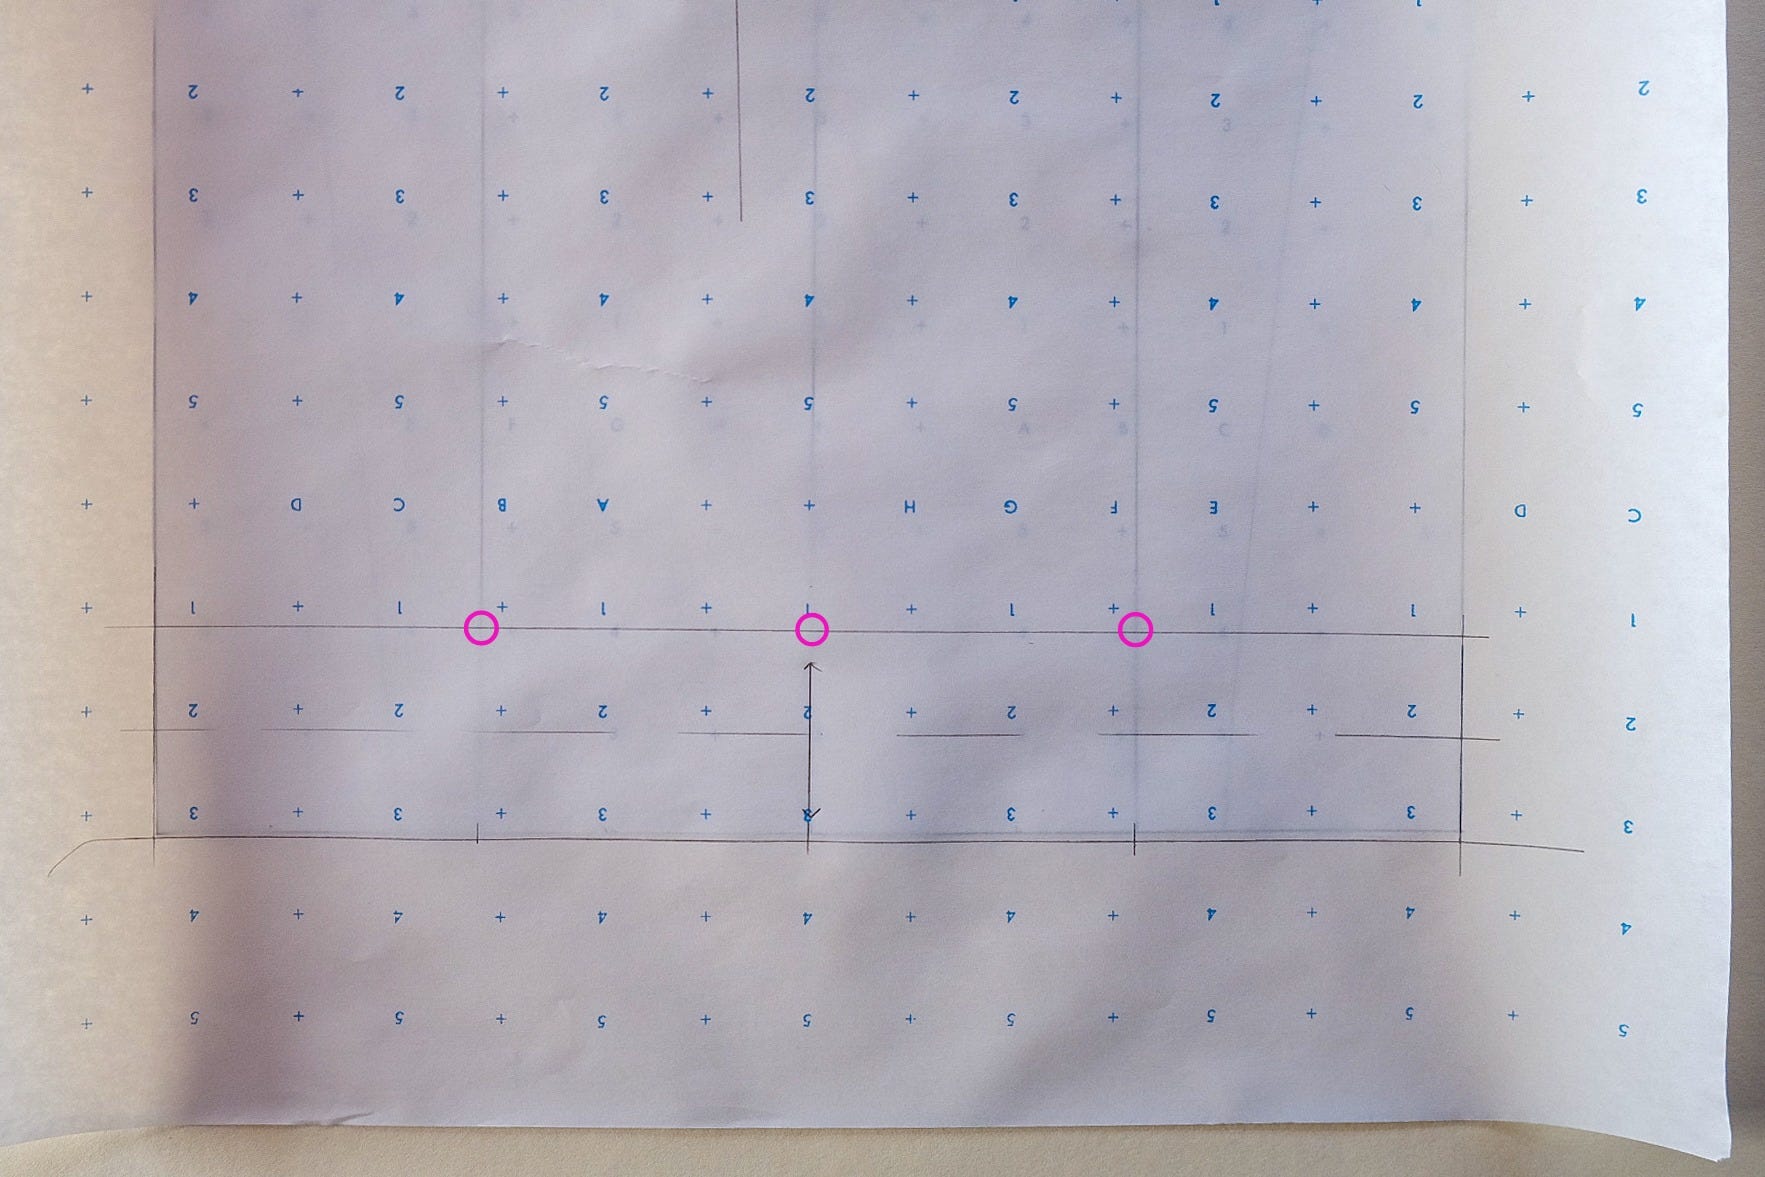
To create a 1-inch sleeve band, start by tracing the bottom 2 inches of your dartless sleeve pattern. Be sure to mark the X lines and center line for sewing, using notches or circles.
Alternatively, you can measure your bicep and add 1 inch for ease, which will give the sleeve a slightly more tailored fit and extra puff at the band. Finally, don’t forget to include seam allowances.
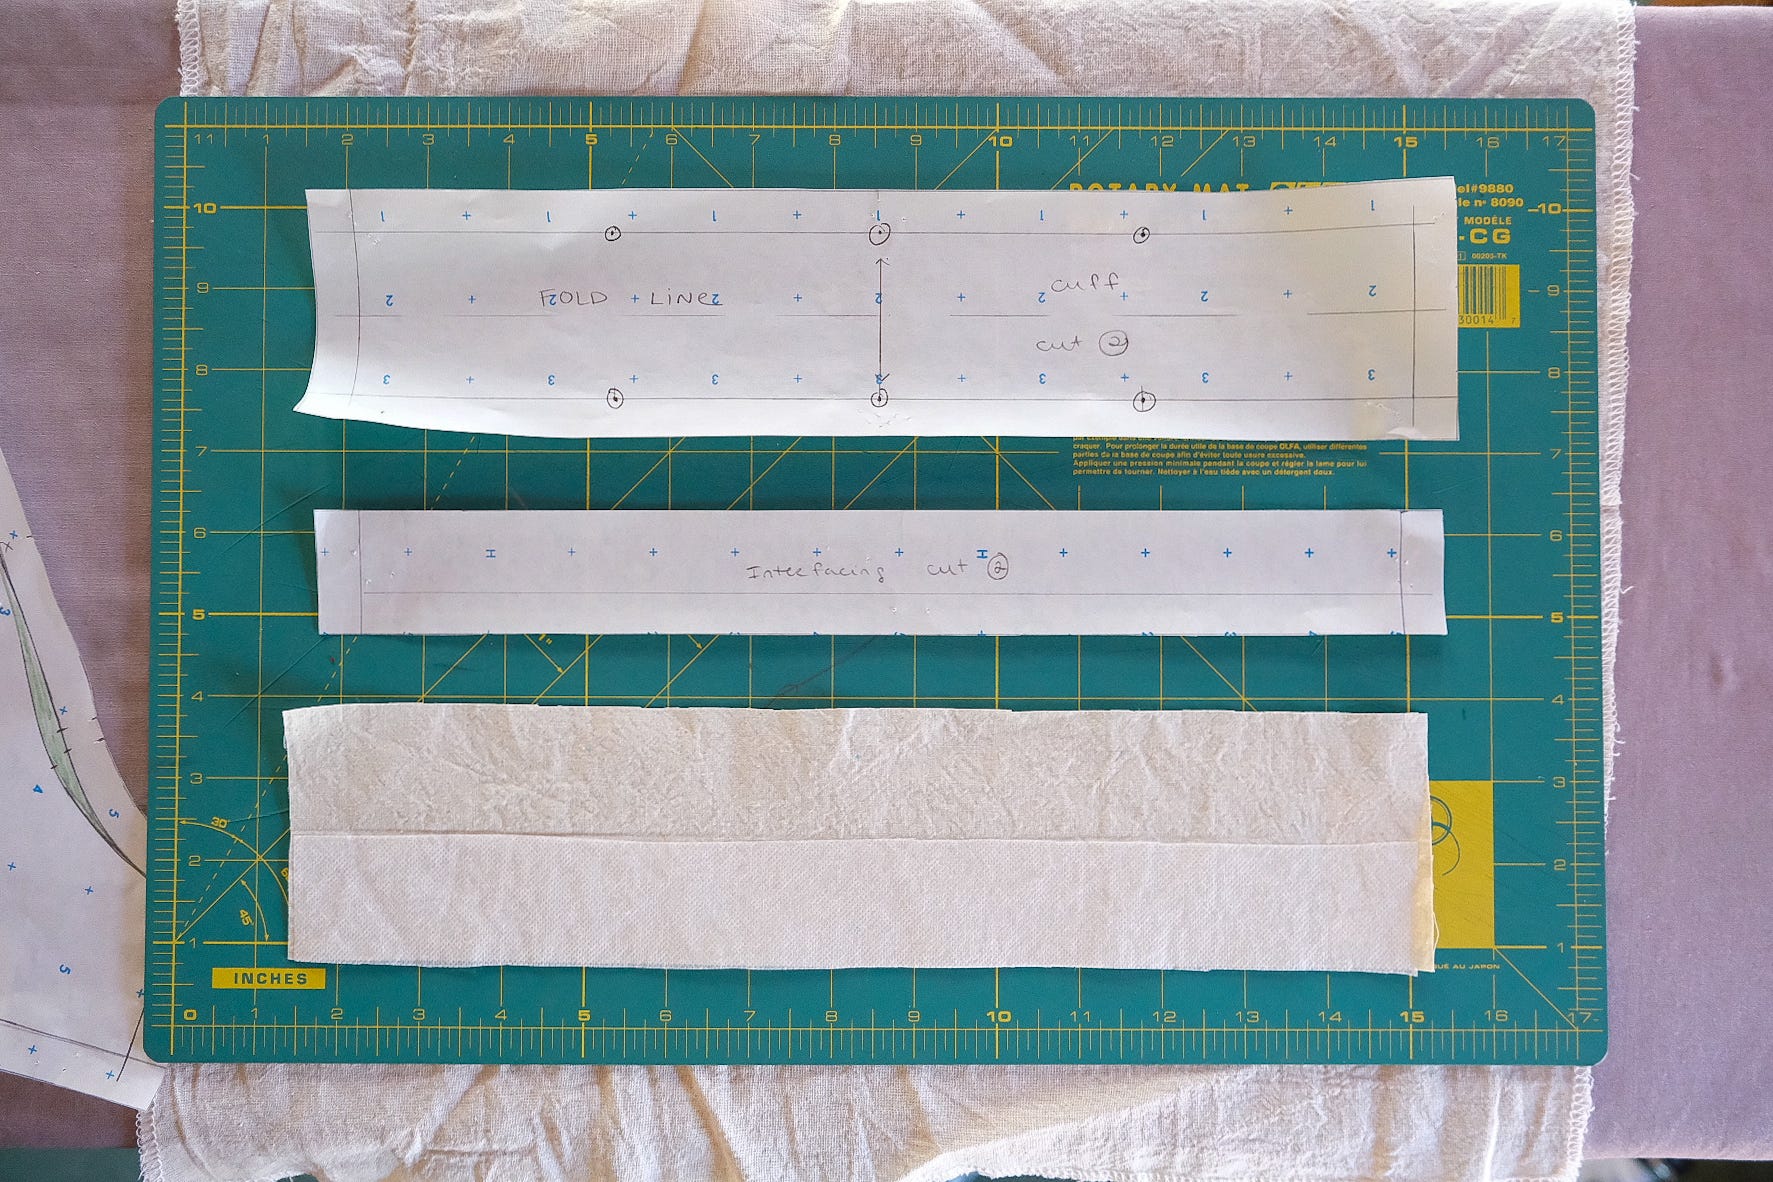
The final step before sewing is preparing the interfacing for the sleeve band. Trace one half of the sleeve band, including the seam allowance. Cut it out, then apply the interfacing to the wrong side of the bottom half. The interfacing can come right to the foldline. I used a lightweight fusible, but if I were to make this again, I’d opt for something sturdier to give the band a crisper finish.
Part 2: Sewing the Sleeve
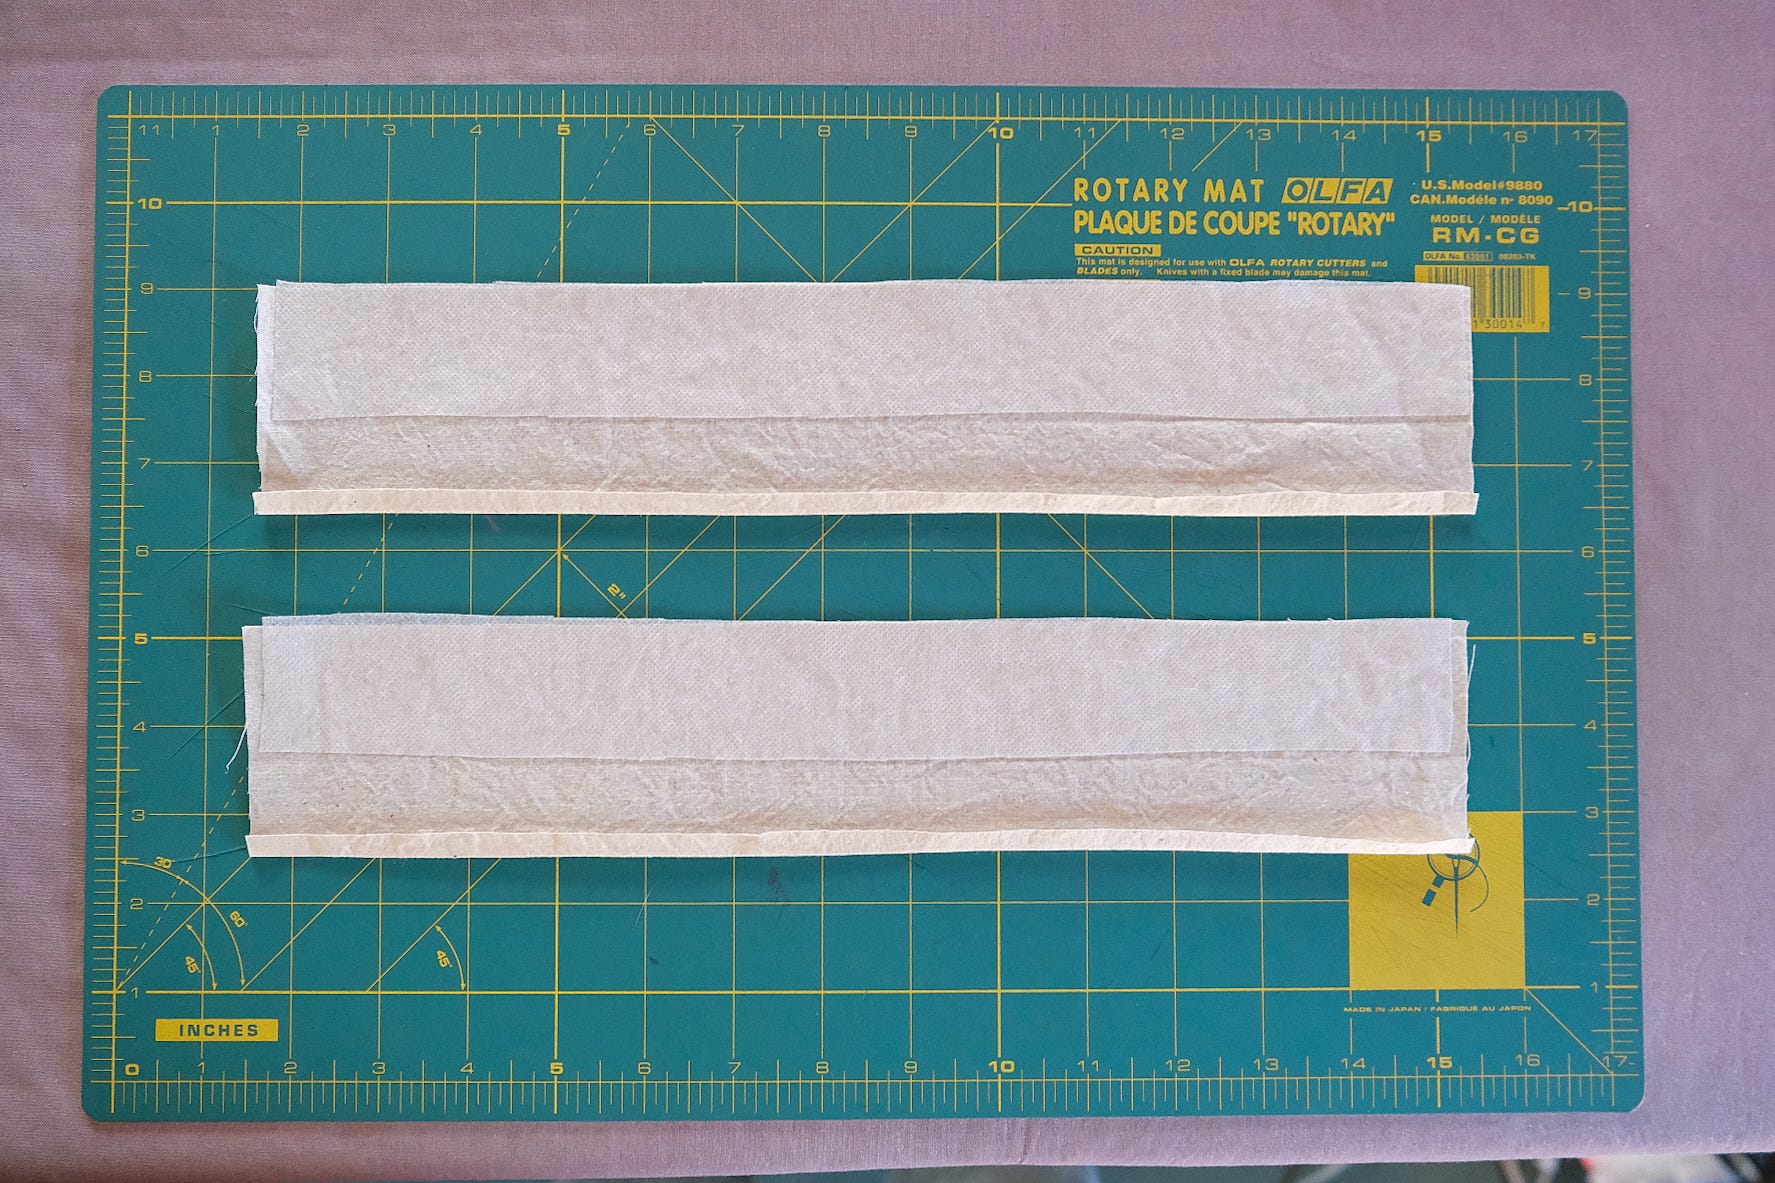
With the sleeve band wrong side up, fold the non-interfaced edge along the seamline and press. Then, trim the folded edge to 1/4 inch.
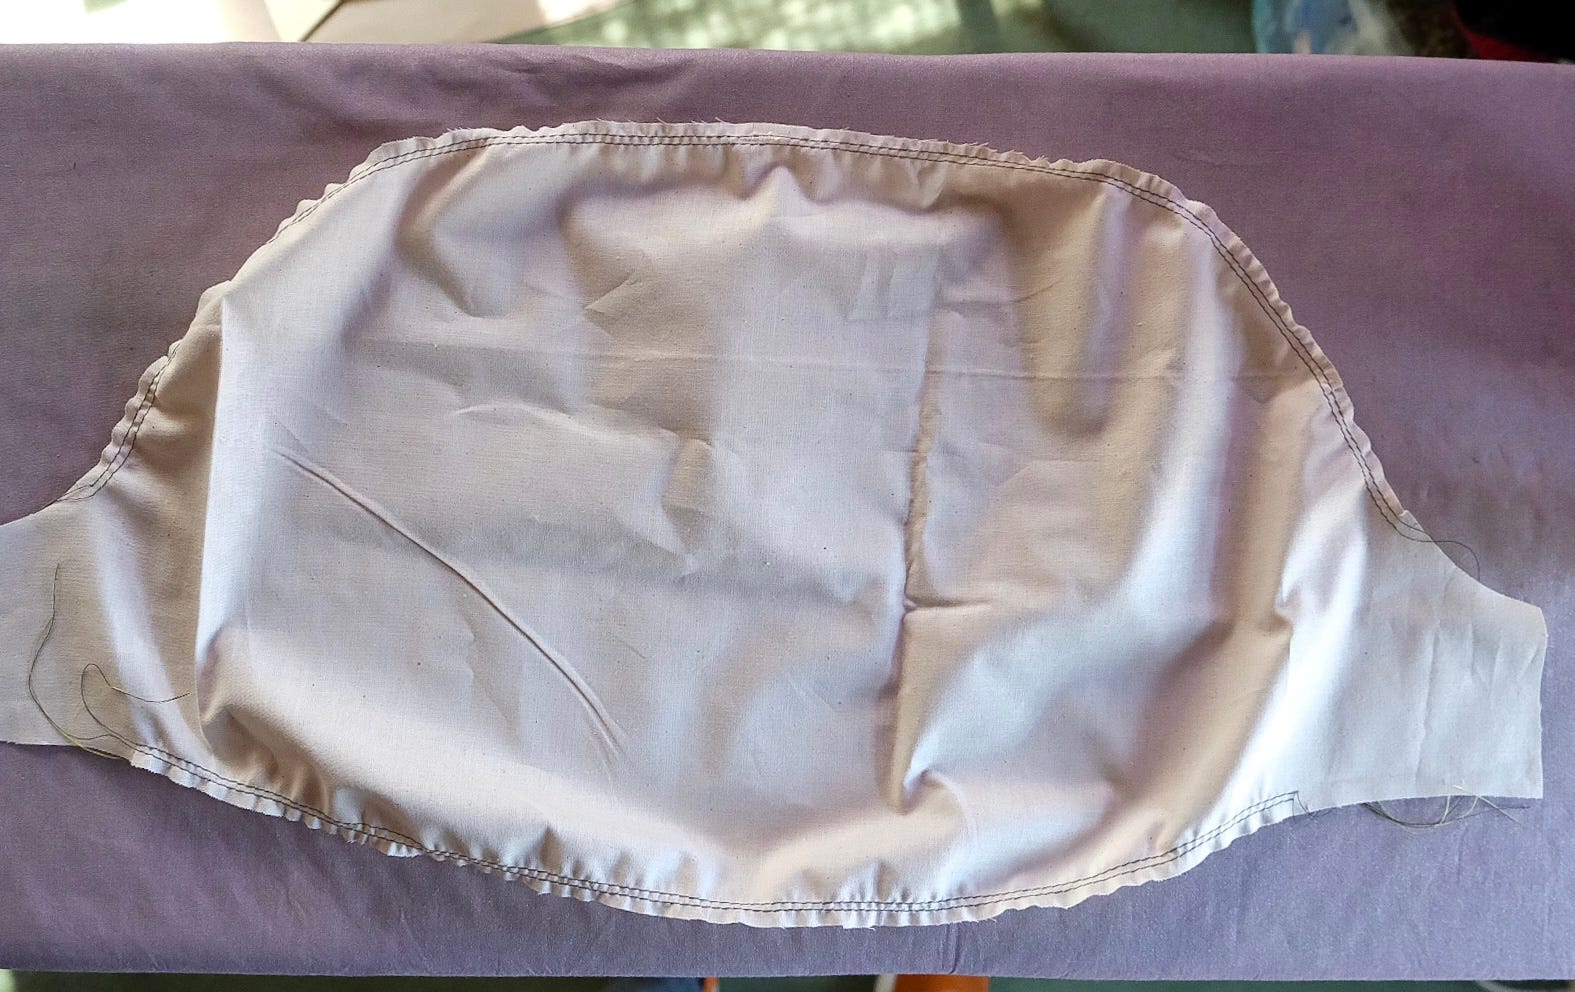
Make two parallel rows of machine basting around the cap of the sleeve between the front and back armhole notches by sewing one line of machine basting just outside the seam line, the other 1/4 inch outside the first. Leave at least 4-inch-long loose threads at each end of the basting.
Repeat along the lower edge of the sleeve, between the pattern markings (X guidelines), where the fullness will be gathered.
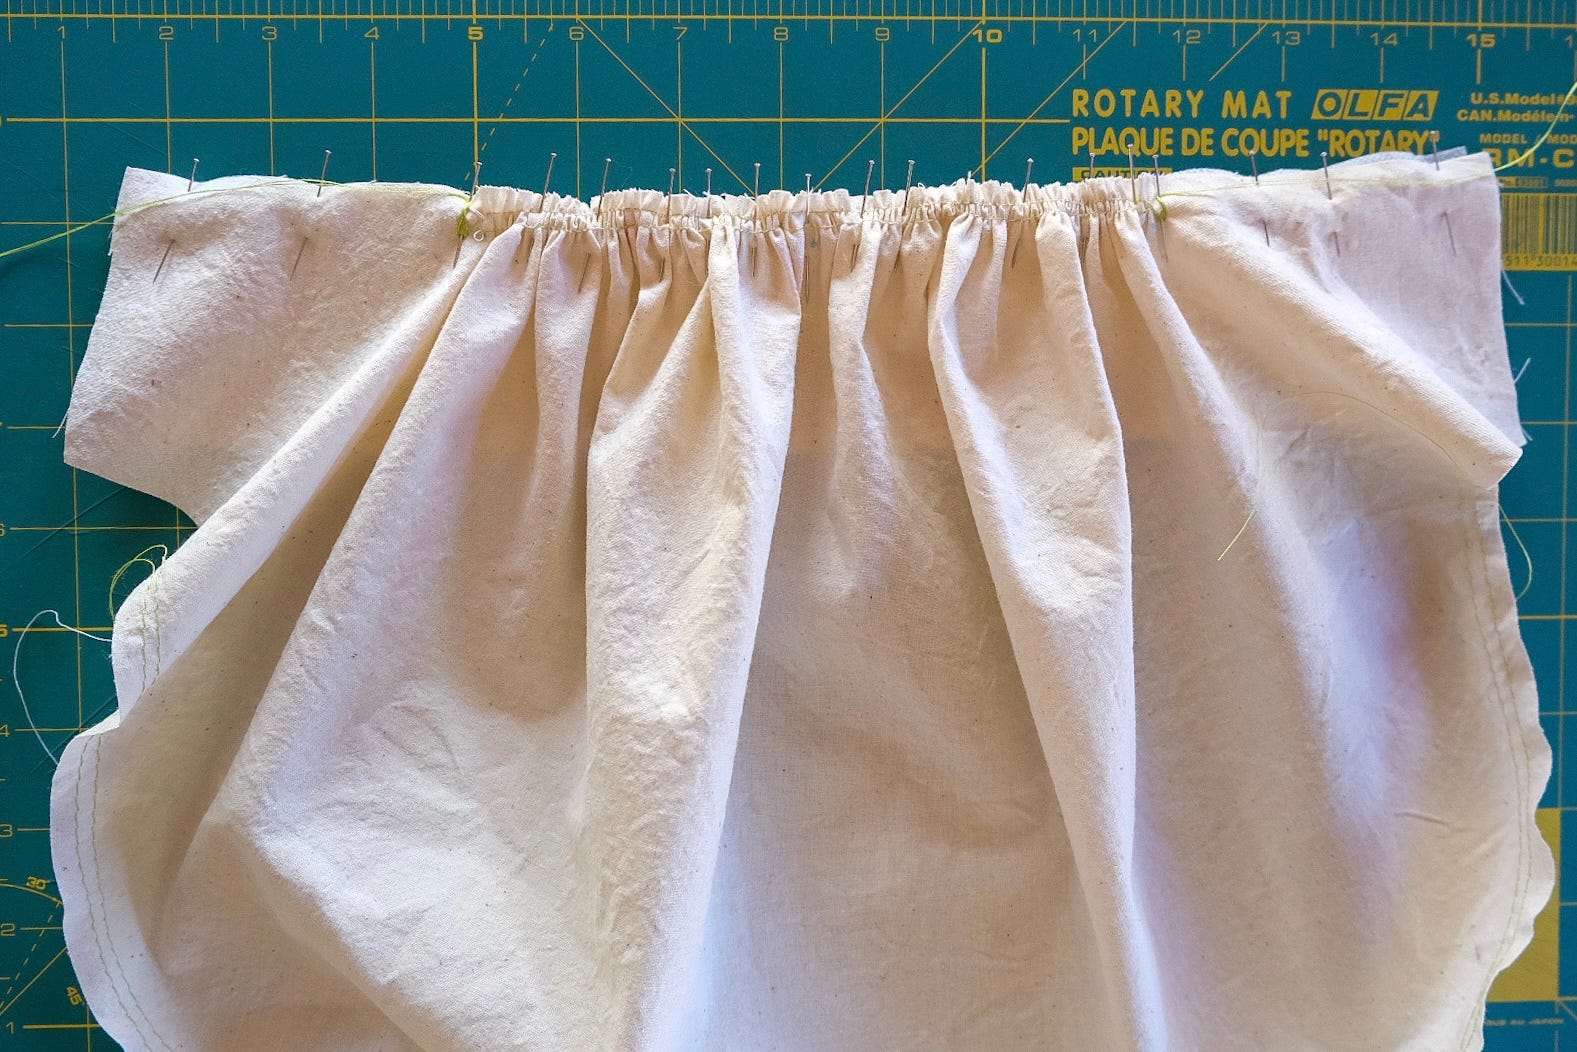
Starting at the lower edge, gently pull the threads on the underside, which came from the machine's bobbin, because the fabric will slide over them more easily. Pull the basting threads first from one end, then from the other, gathering the fullness until it’s about the same size as the sleeve band.
Pin the sleeve band to the sleeve, matching the notches. Pull the ends of the machine basting again if needed and continue to gather the fabric until the sleeve fits the band. Then add more pins at ½-inch intervals. (You can’t have too many pins!)
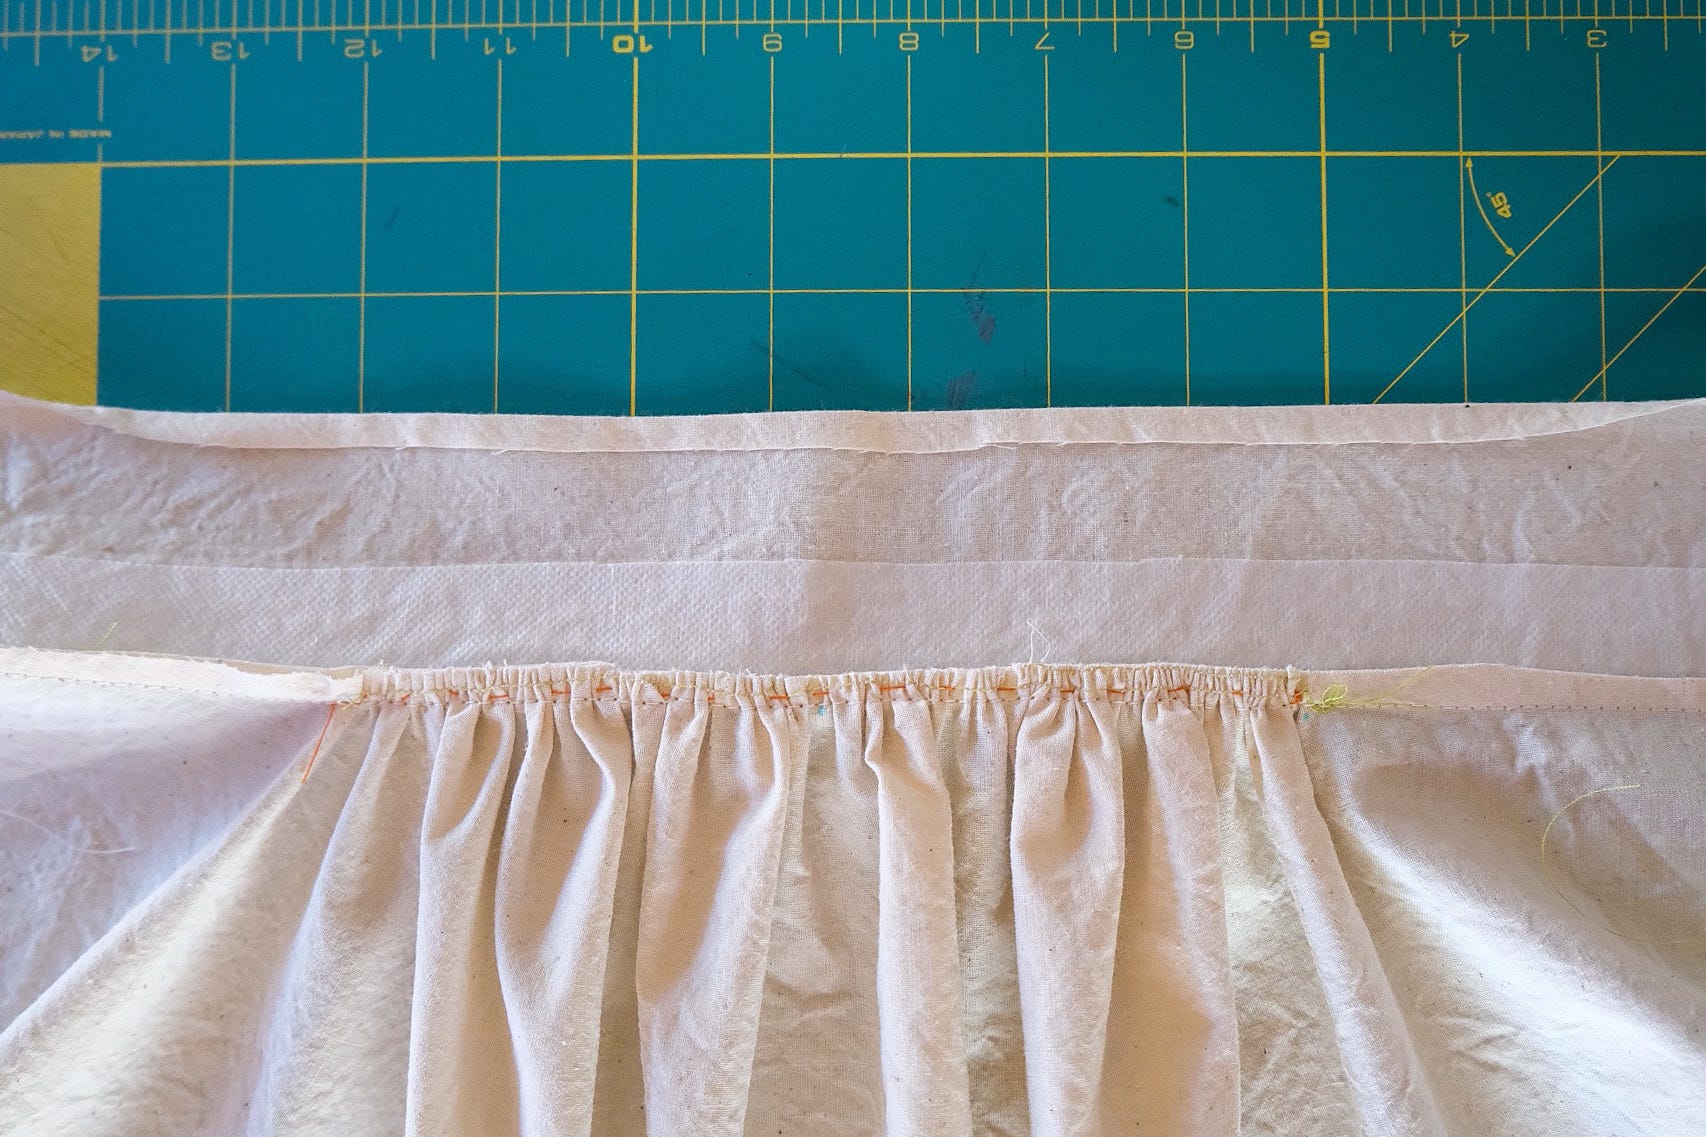
Hand baste the sleeve band to the sleeve, stitching just outside the seam line. As you baste, readjust the gathers as needed to evenly distribute the fabric, and remove the pins along the way. While it’s tempting to skip this step, hand basting is essential—it makes sewing the sleeve easier and more precise.
Trim the seam allowances to 1/4 inch.
Fold the trimmed seam allowances toward the sleeve band and press them lightly with the tip of the iron so you don’t flatten the gathered puff.
Pin and sew the underarm seam, ensuring the sleeve band seam aligns at the underarm. Once stitched, press the seam open.
Trim the band seam allowance to reduce bulk at underarm.

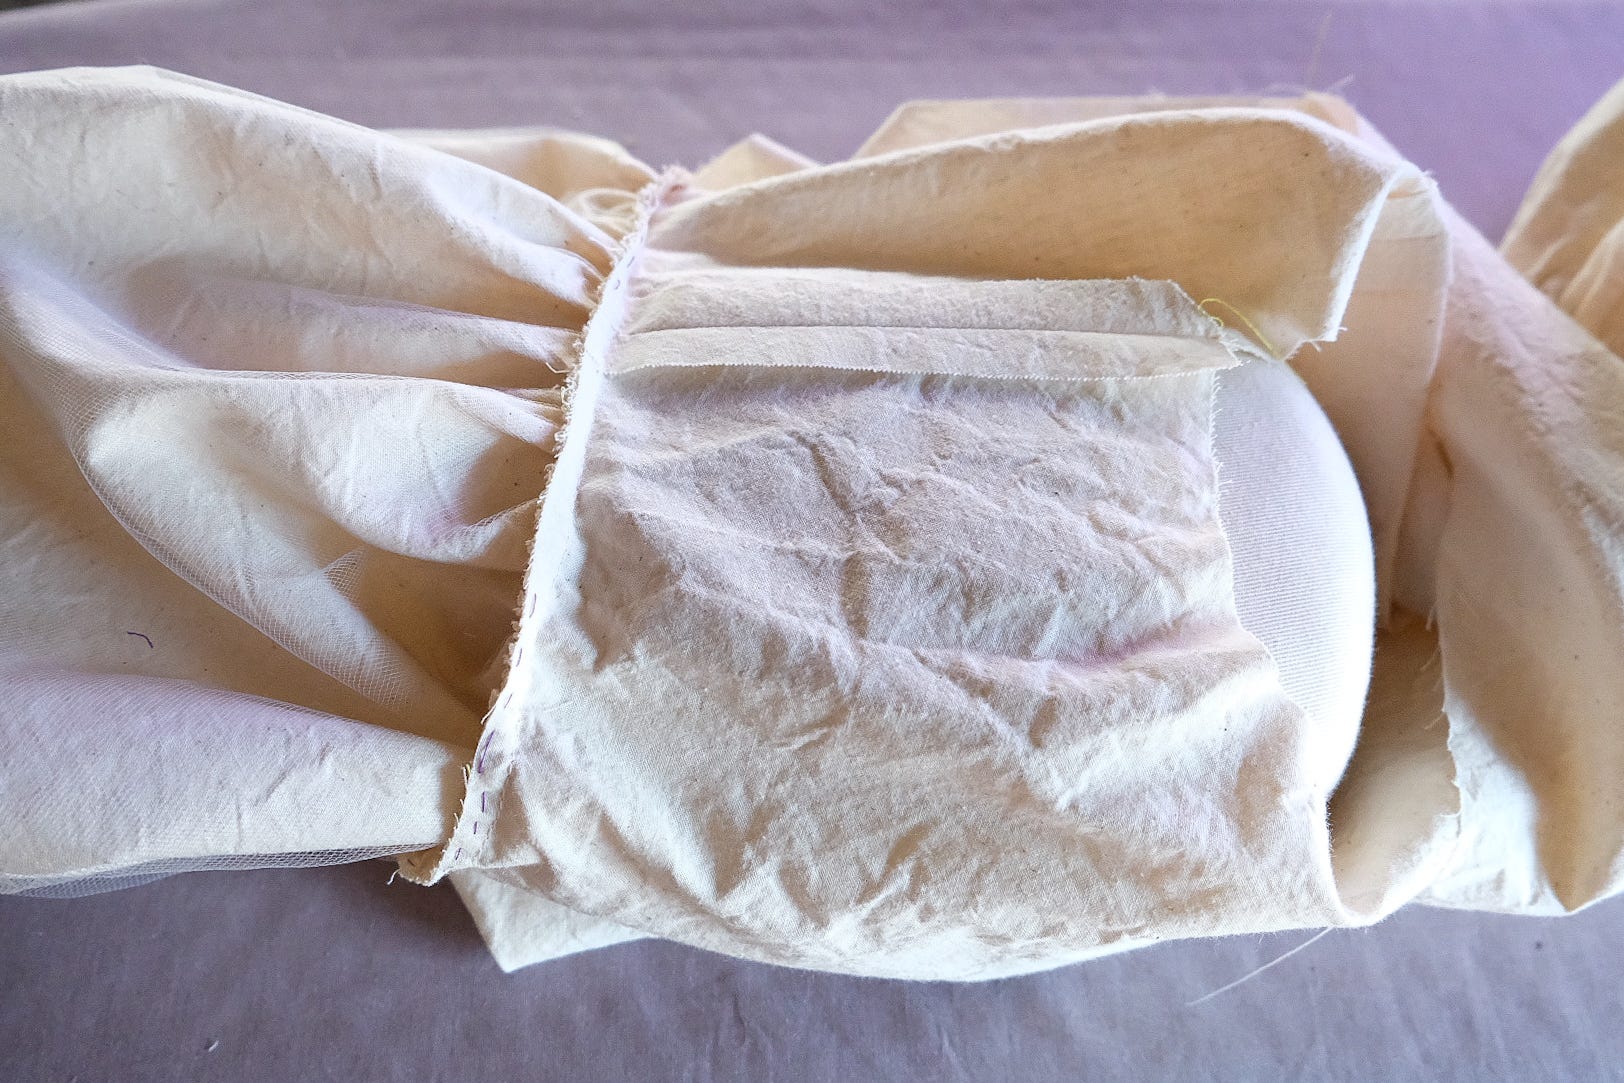
Turn up the folded edge of the sleeve band so that it covers the line of machine stitching. First, hand baste the band to the sleeve, sewing just below the folded edge of the band. Then use a slipstitch to attach the edge of the band to the sleeve. Here’s a short video on how to sew a slipstich hem.

Next, moving onto the sleeve cap: Turn the sleeve right side out and gently pull the loose bobbin threads, starting from one end and then the other. Gather the sleeve cap’s fullness until it’s approximately the same size as the armhole.
Pin the sleeve to the bodice—we didn’t review this, but you’ll need a bodice to attach these sleeves to—matching notches and shoulder seam. Be generous with your pins, then hand baste.

Machine stitch the sleeve to the garment. Start at the underarm seam and continue around the armhole.
Trim the armhole seam to 1/4 inch. To prevent the fabric from raveling, you can sew the trimmed seam allowances together with an overcast stitch (also called a whipstitch). For a quick guide, check out this video on how to sew an overcast stitch.

Fold the seam allowances toward the sleeve and press them lightly with the tip of the iron.
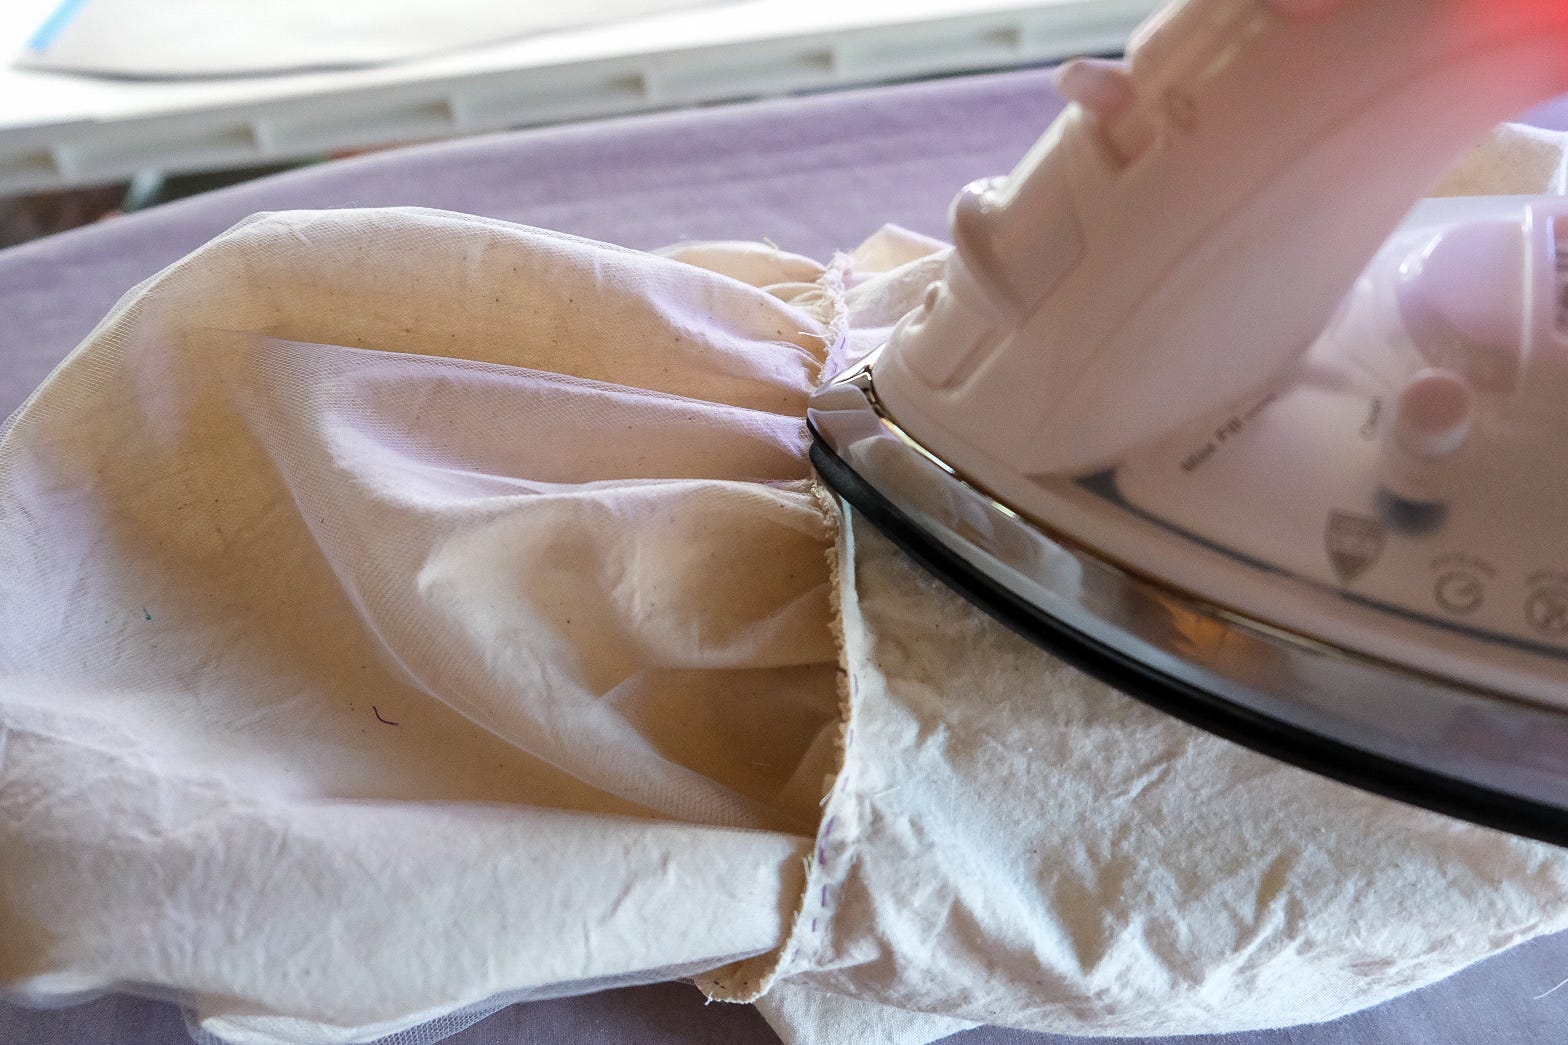
Using a pressing ham inside the sleeve allows you to press and set the seam without flattening the gathered puff.
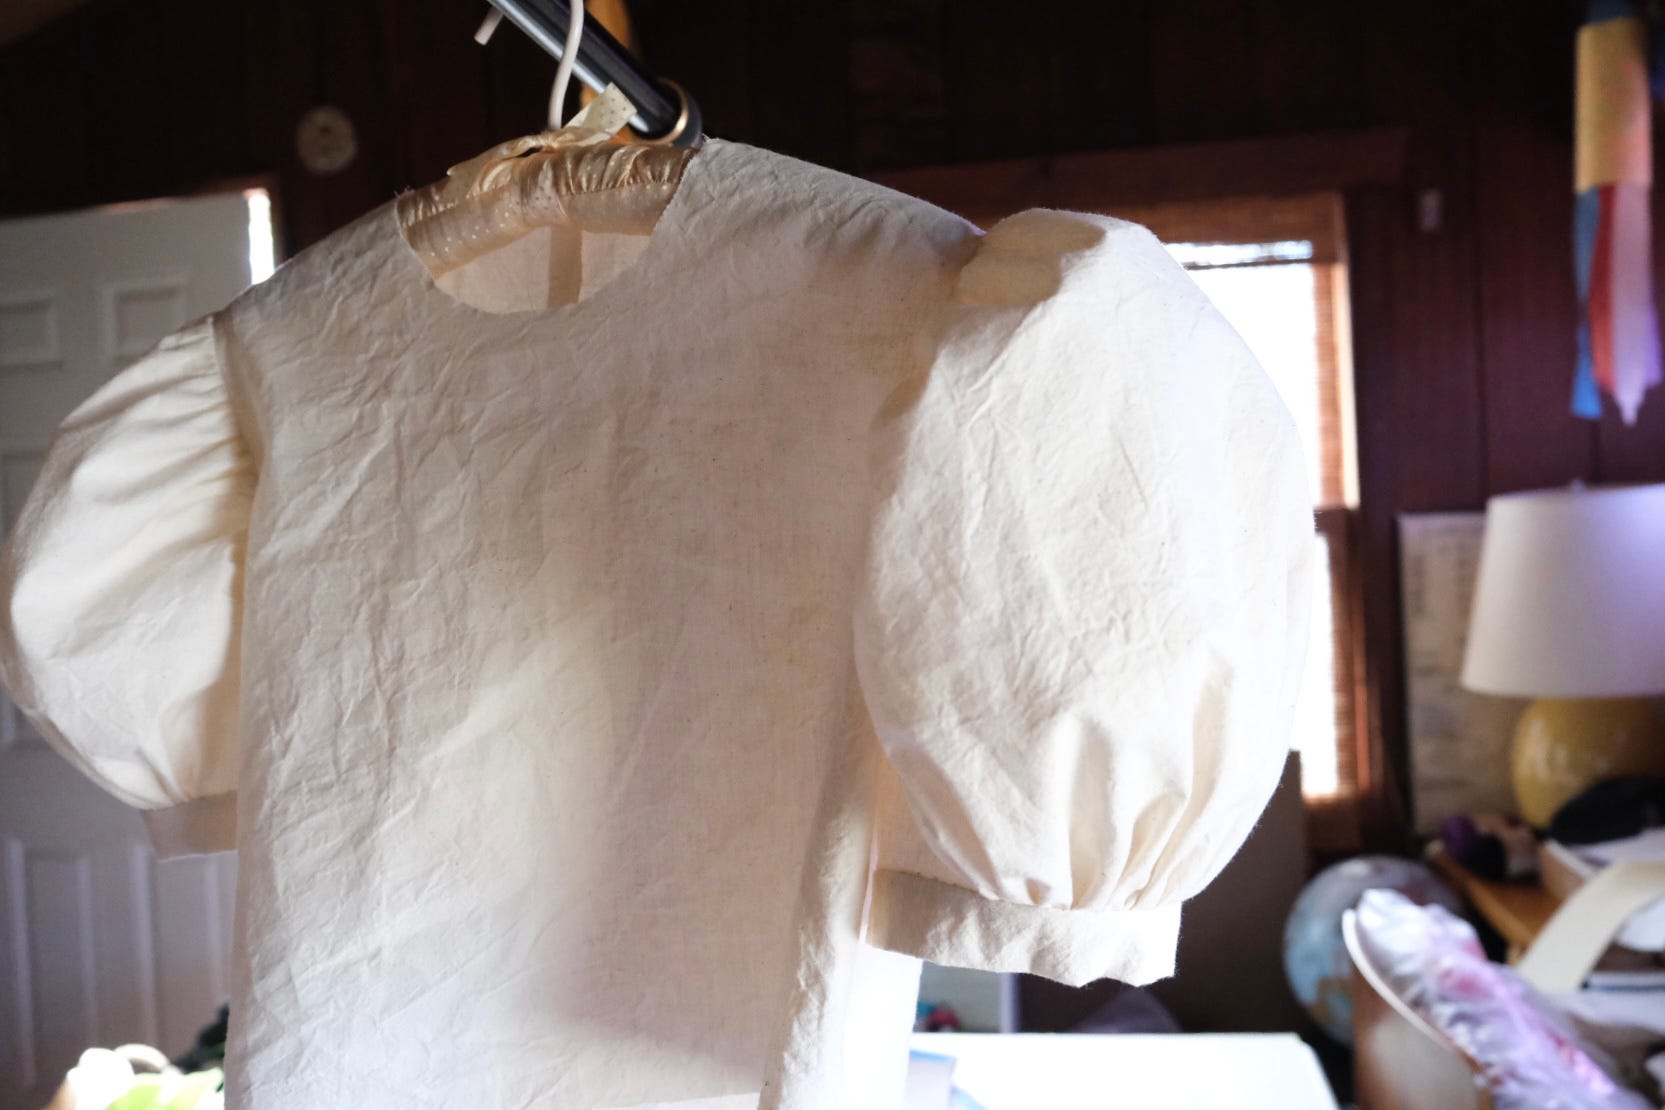
And voila! A Barbie-inspired puff sleeve.
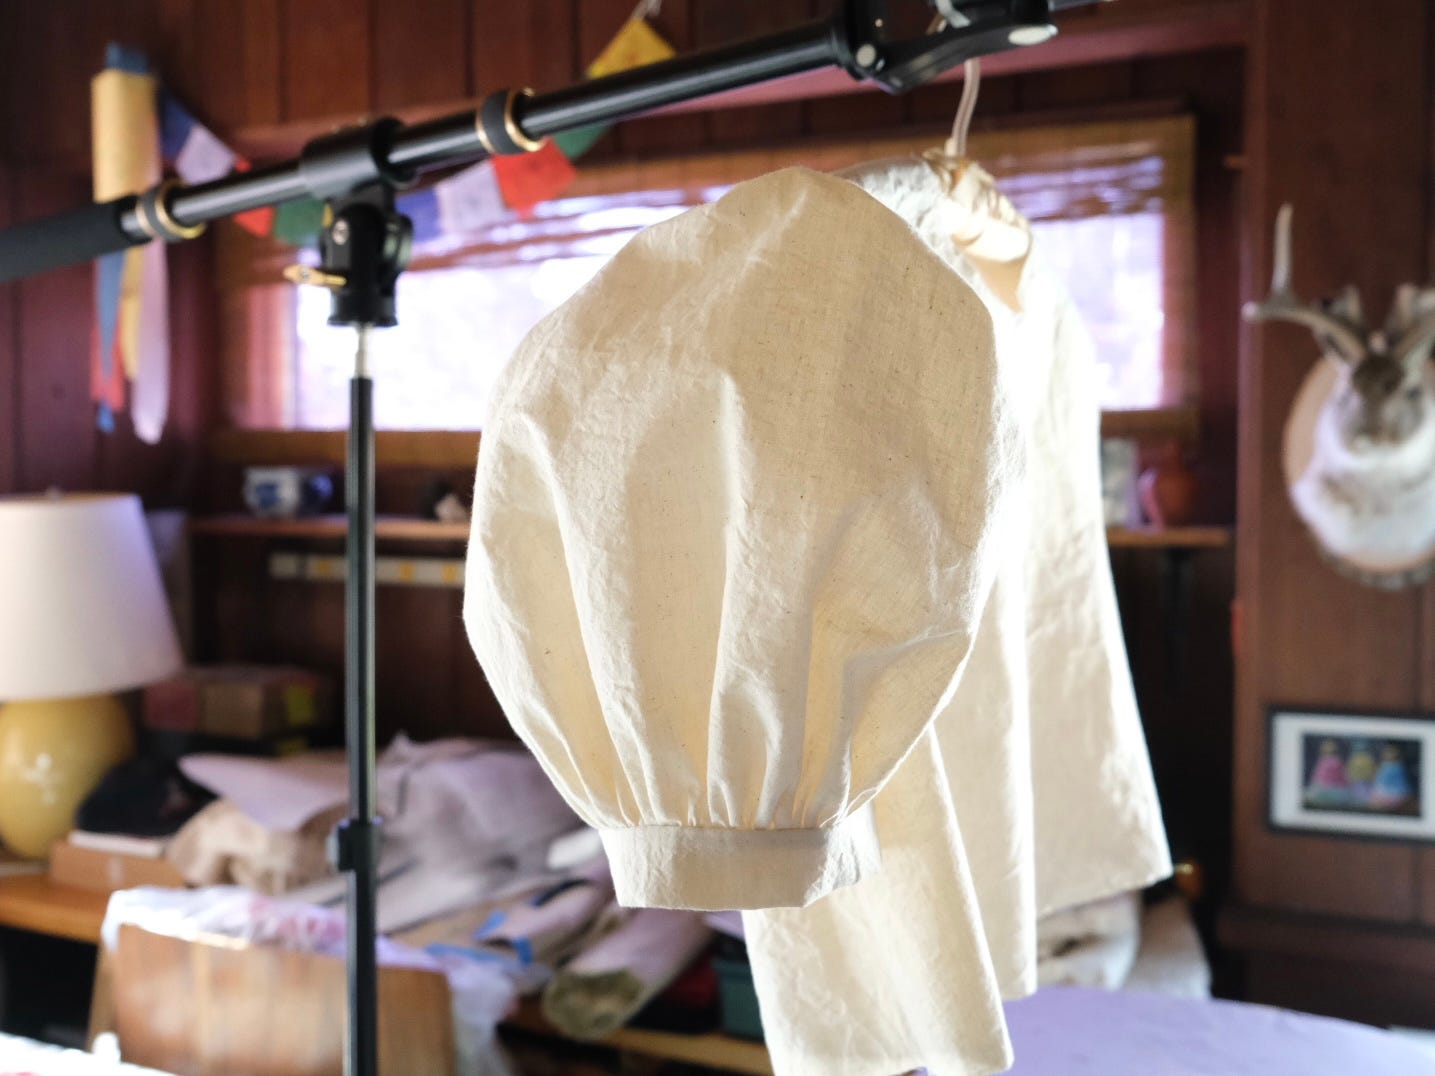
But we’re not done yet!
Tulle Mounting
Mounting the sleeve onto tulle before sewing adds extra support, helping it hold its shape. Tulle is an ideal choice because it's lightweight and flexible.
Start by cutting the tulle using your sleeve pattern, then diagonally baste it to the sleeve fabric. From there, construct the sleeve as outlined above, treating the tulle and fabric as a single piece.
For diagonal basting stitches, the needle points from right to left (or left to right, for a left-hander). I prefer to start basting down the center along the grainline, then work outward, alternating between the left and right sides.
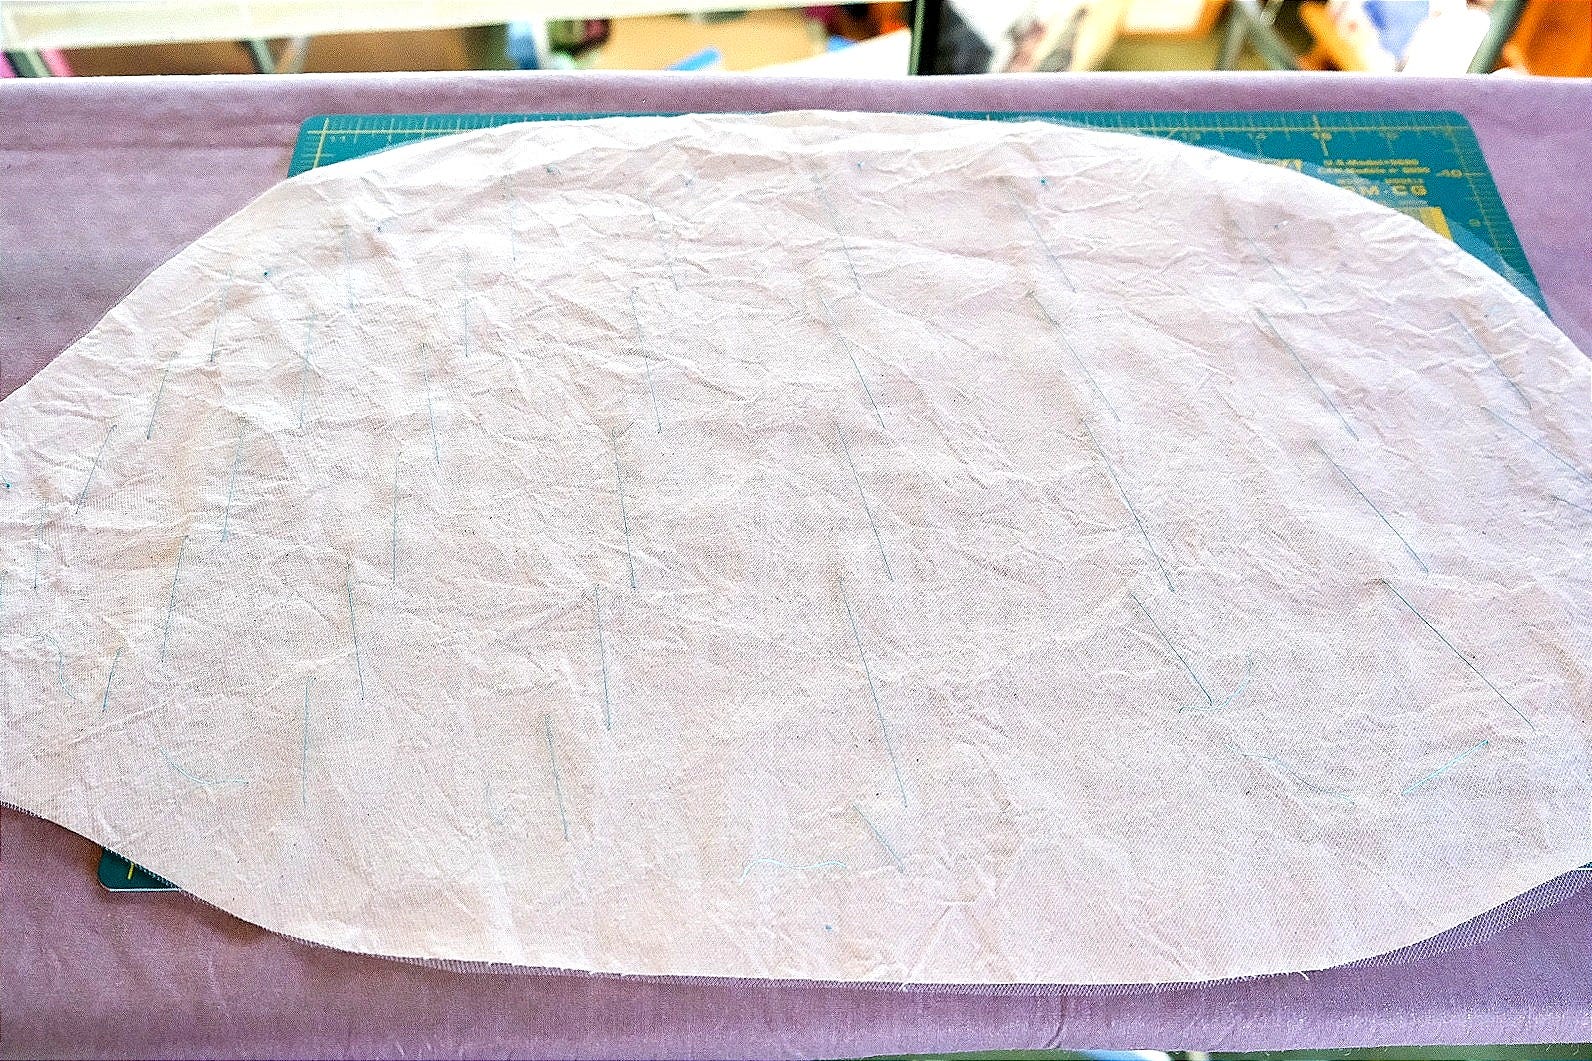
Tulle can be tricky to cut accurately, but don’t worry if there’s some overhang. You can easily trim any excess after basting or sewing.
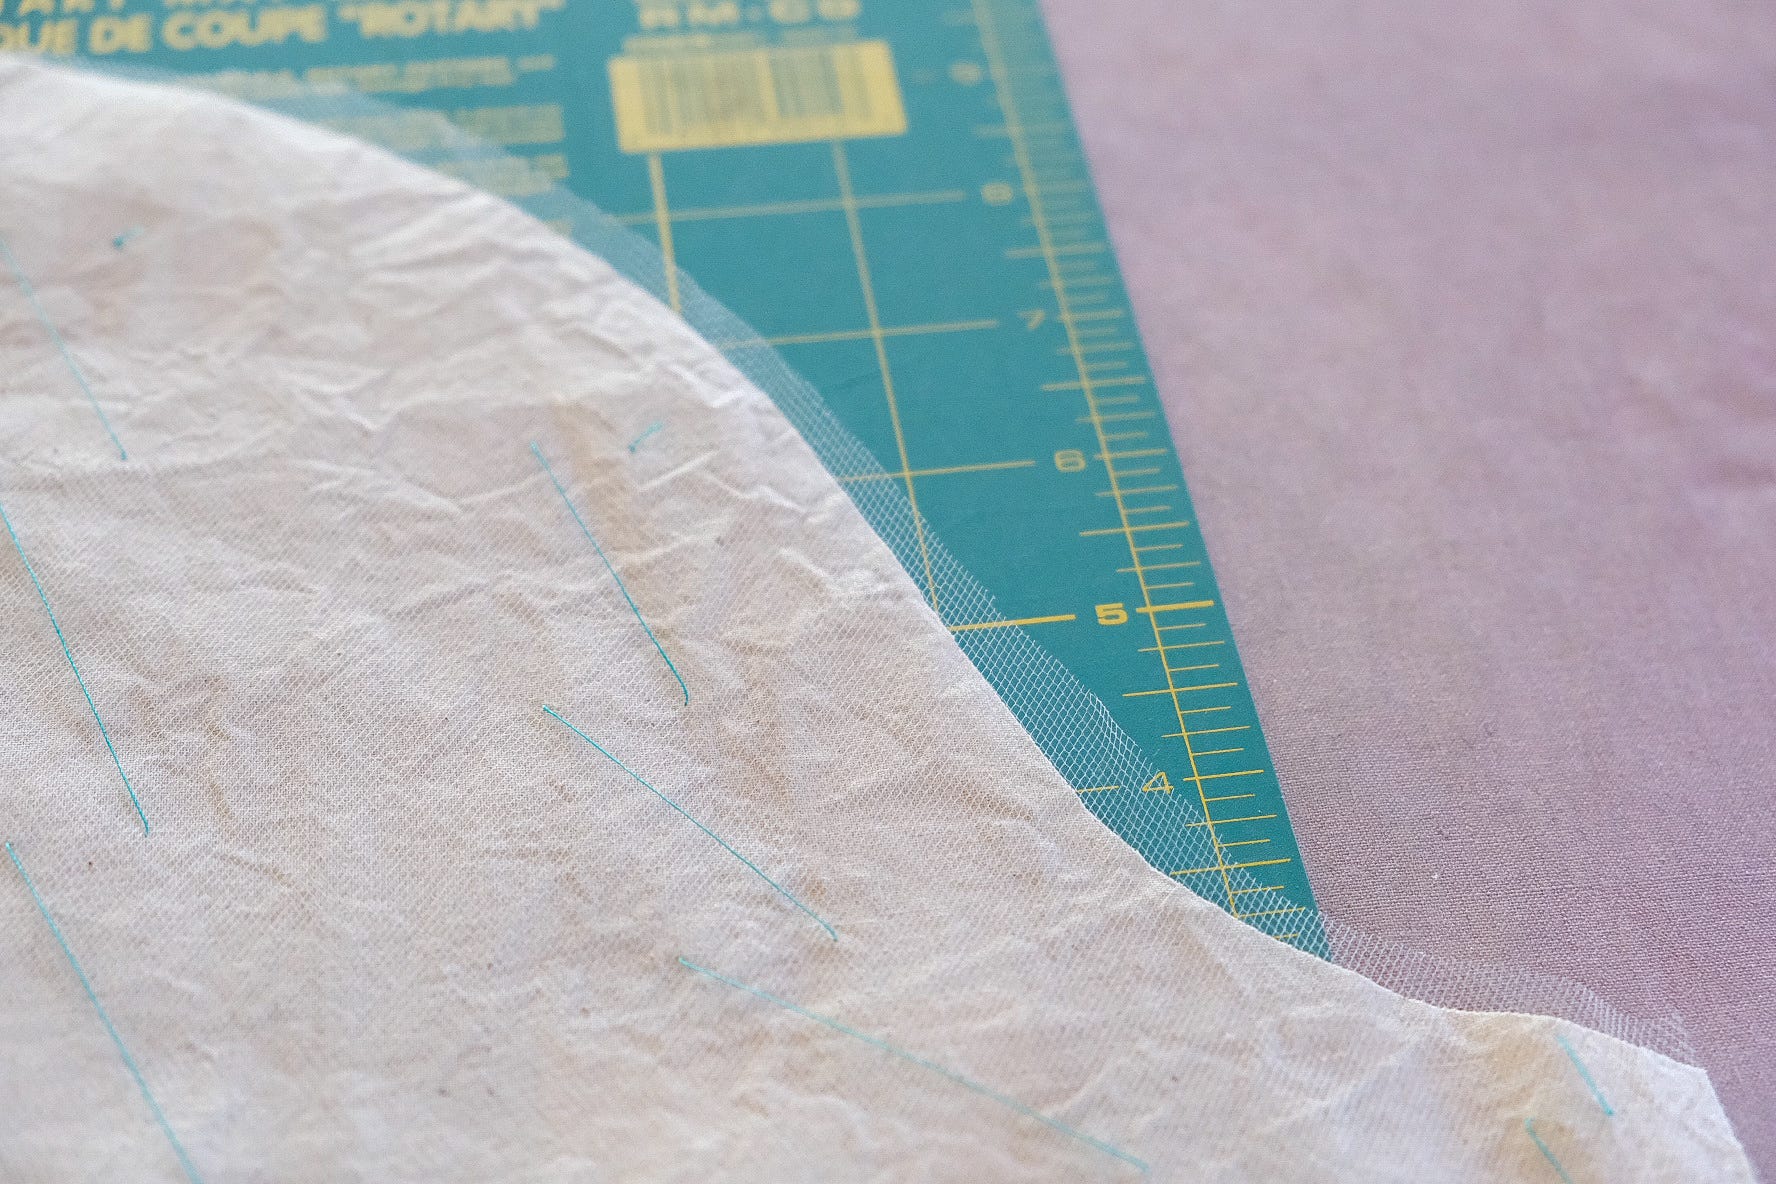
The finished puff sleeve, mounted on tulle, holds its shape just a bit more.
I hope you enjoyed creating Weird Barbie’s sleeve with me. If you have any questions about this tutorial or anything from previous posts, feel free to reach out—I’m always happy to help. See you next time with the decorative and practical French binding technique. <3
~ Jane