


French Bound Shoulder Covers
Trim cotton shoulder covers with this French binding technique & The Paper Bag Princess with preschoolers

French binding, also called double binding, is a bias binding that can add structure to lightweight and sheer fabrics. Both decorative and practical, it provides a polished finish to curved edges without the need for a facing.
In this post, I’ll guide you through preparing and sewing French binding, demonstrate how to use it to finish cotton shoulder covers, and conclude with a story about inspiration and imagination.
French Binding
The following French binding technique is adapted from Claire Shaeffer’s book, HIGH-FASHION SEWING SECRETS FROM THE WORLD’S BEST DESIGNERS.
Measurements given are for a 1/4 inch finished binding width. To create a different width, formulas will also be provided. Lastly, for French binding, I recommend a light or medium-weight woven fabric.
Preparing the Bias
Bias-cut strips are ideal for binding, since bias is flexible and easier to shape and curve than fabric cut on the cross grain or straight grain.
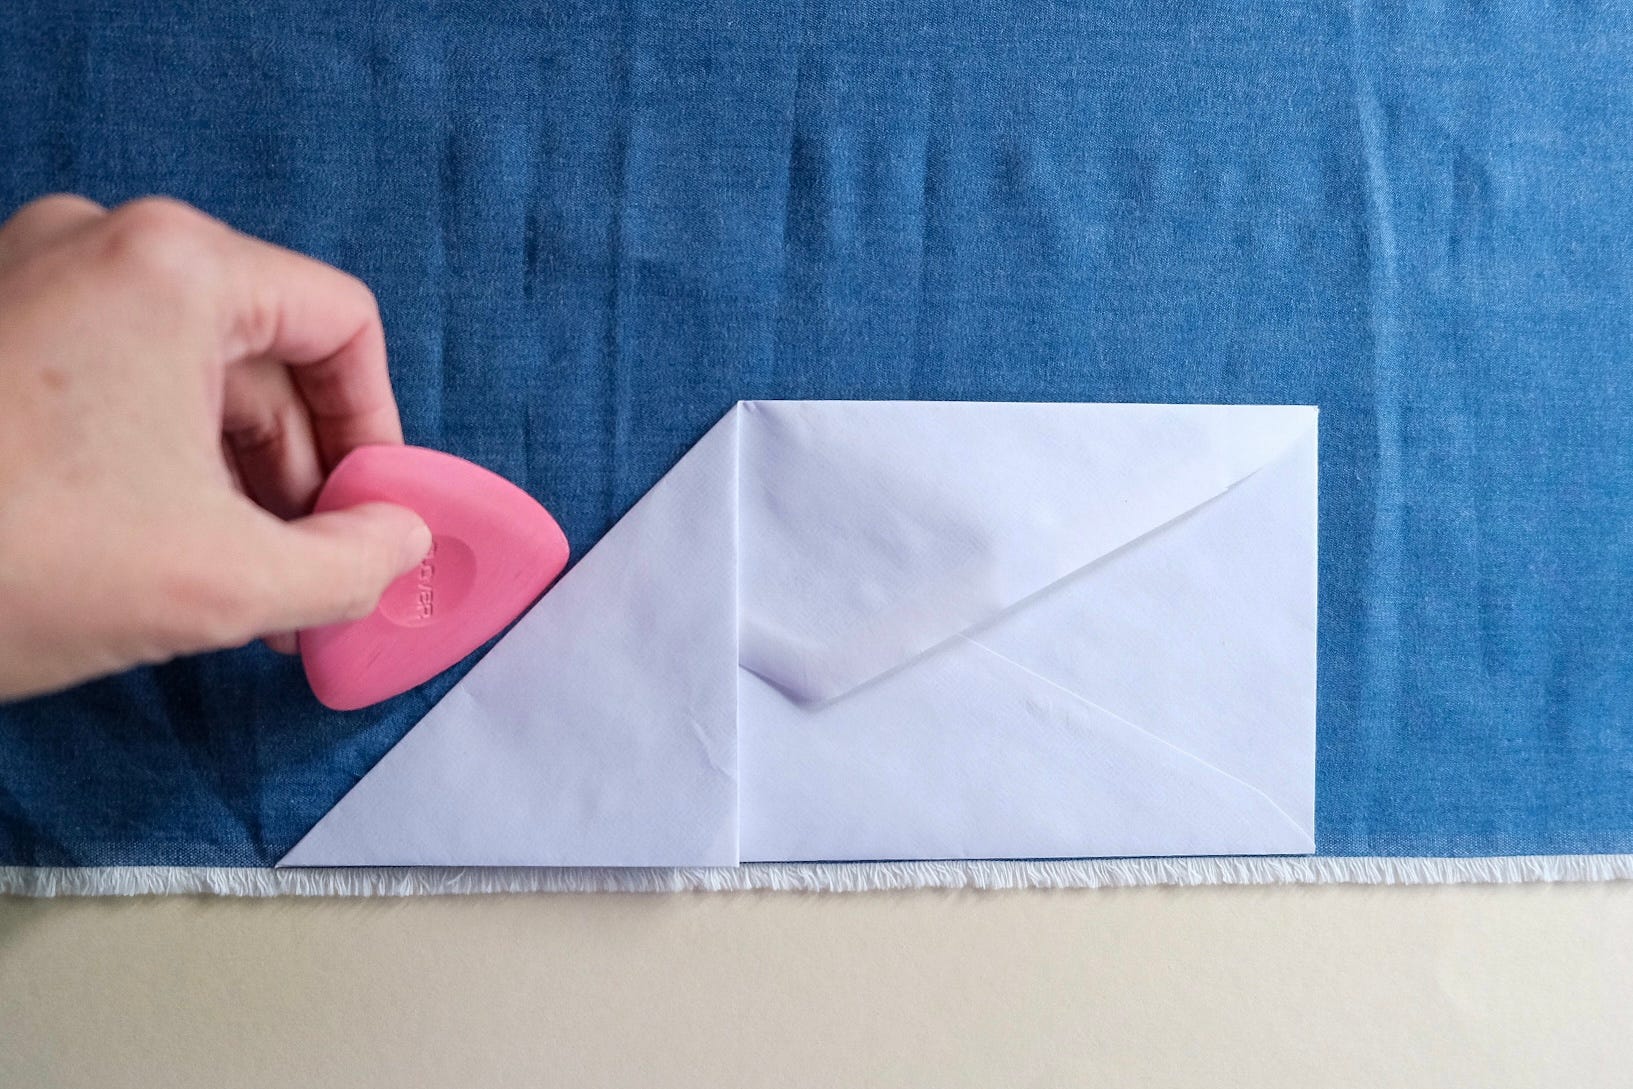
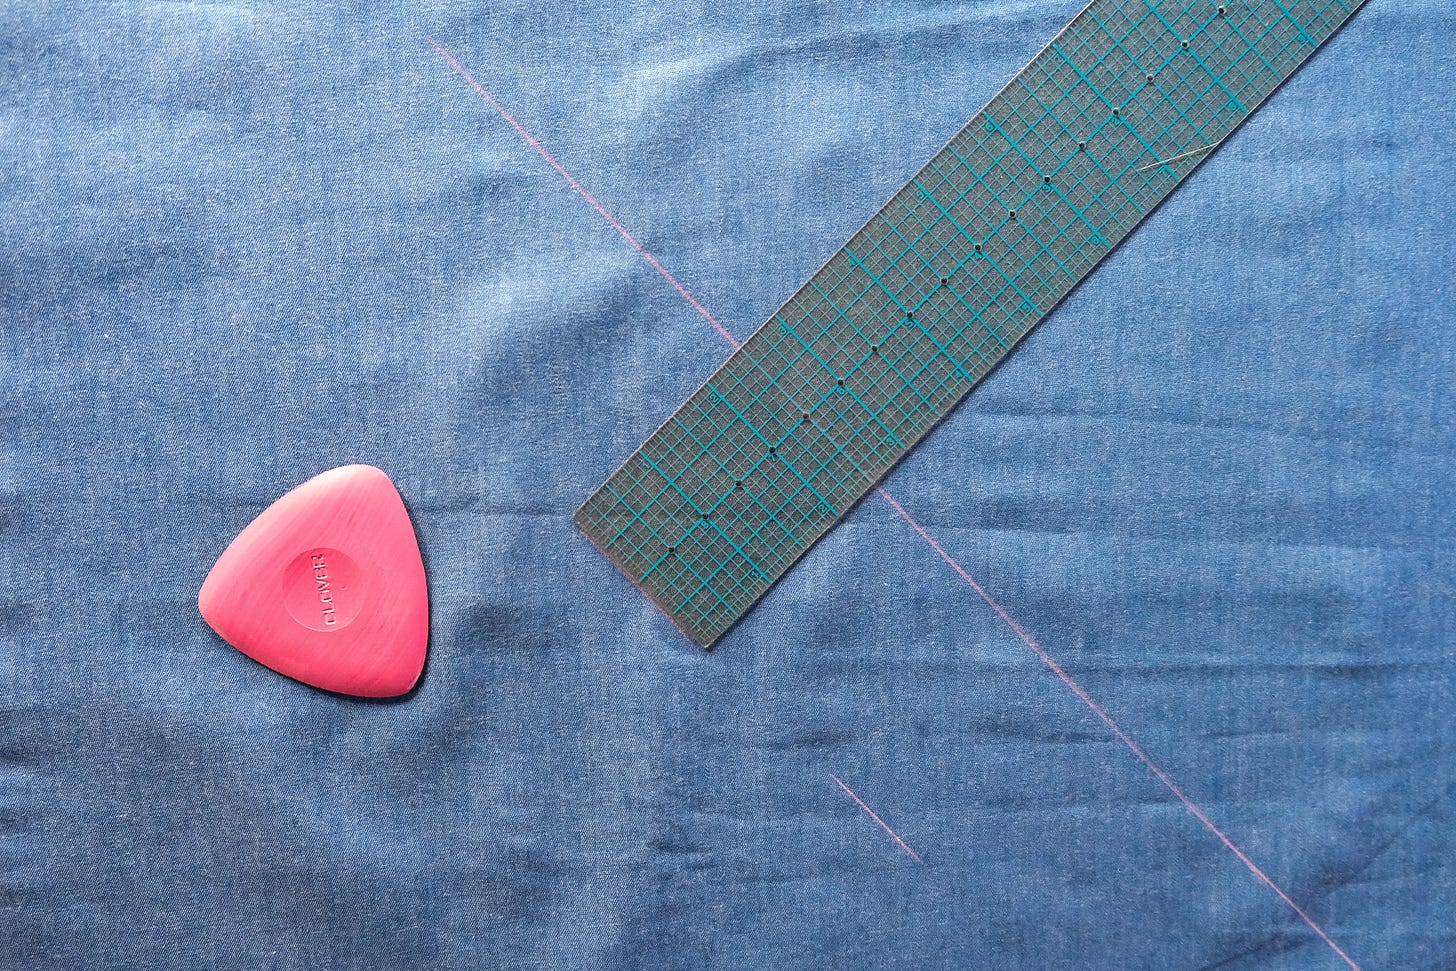
To make bias strips, first mark a diagonal line at 45 degrees to the selvage. You can use a see-through graphing ruler, a 45/90 degree drafting triangle, or a No. 10 envelope.

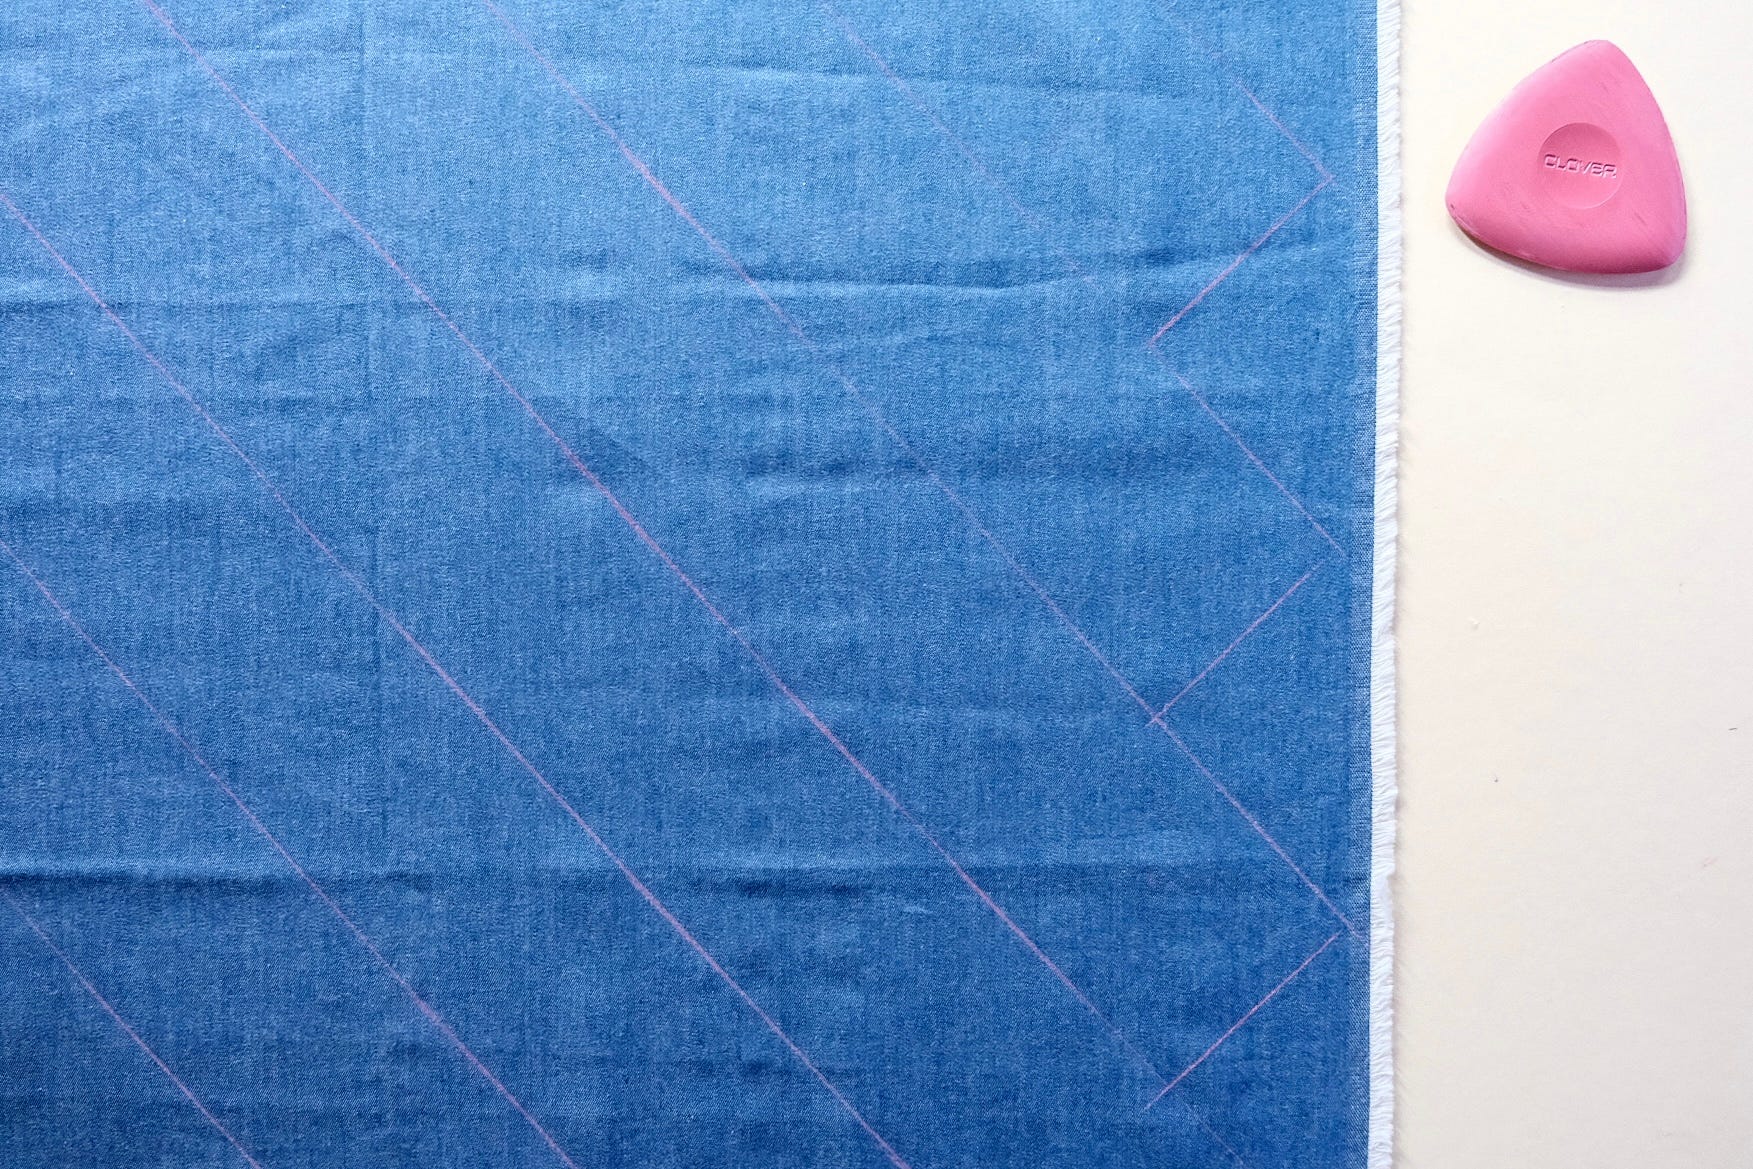
Measure and mark the desired width of the strips, evenly spaced, parallel to the diagonal. For French binding, the bias strip width is ten times the finished width. (For 1/4 inch-wide binding, bias strips are cut 2 1/2 inches wide.)

Square off ends, and cut on the marked lines.

When joining bands to make them longer, pin on the diagonal.
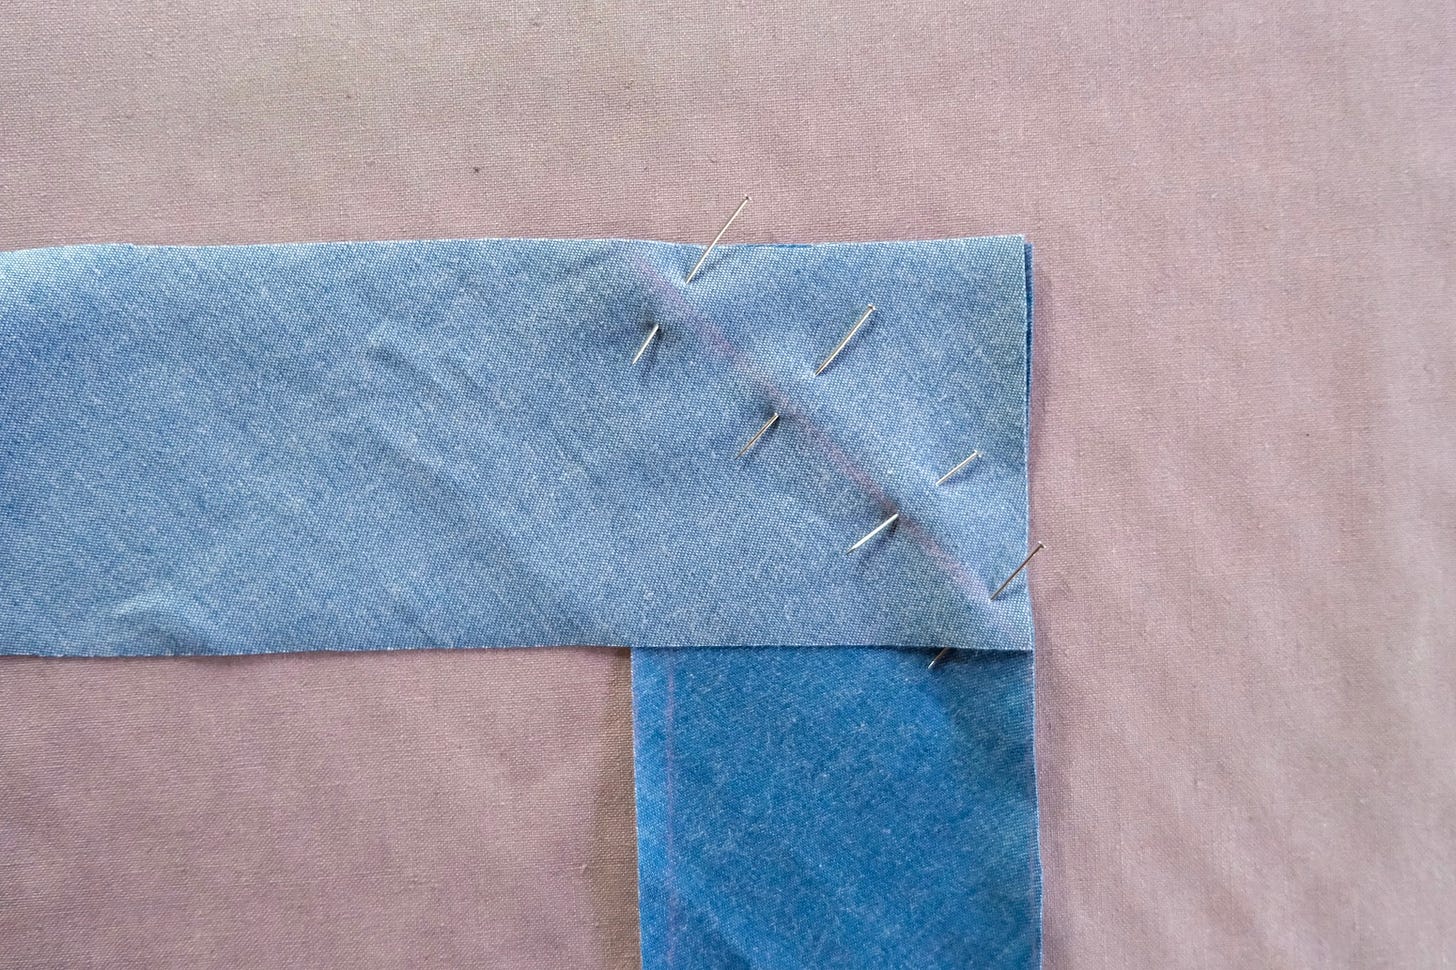
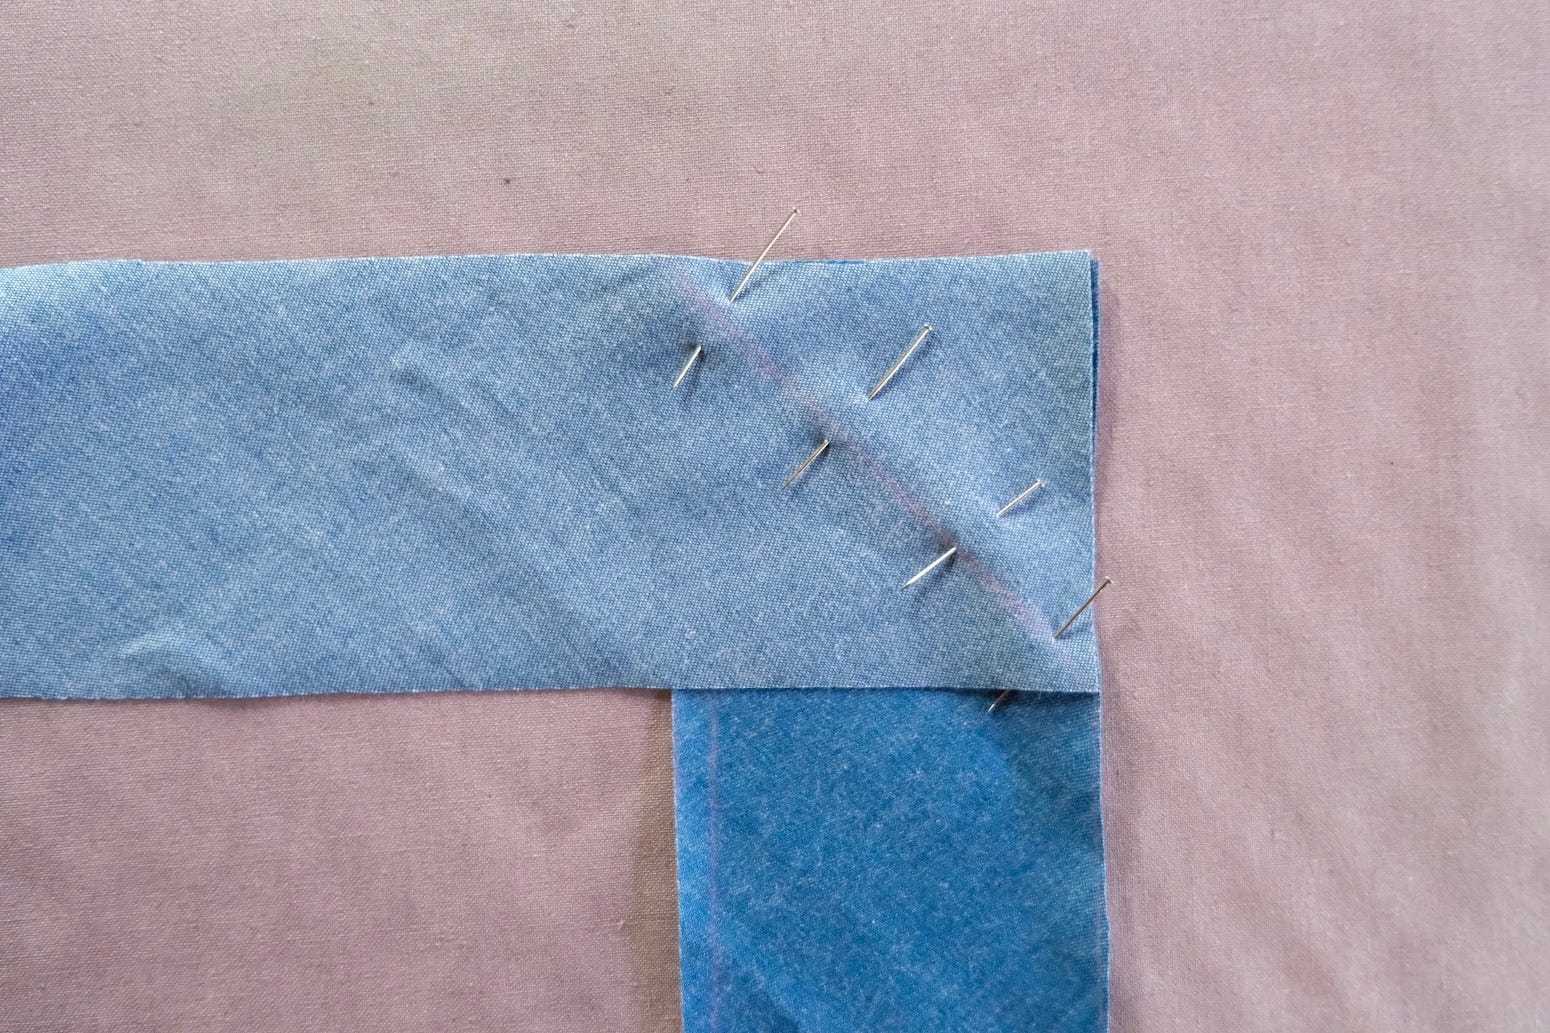
Sew using a short stitch length: 20 stitches per inch (spi), which is about a 1mm stitch length.

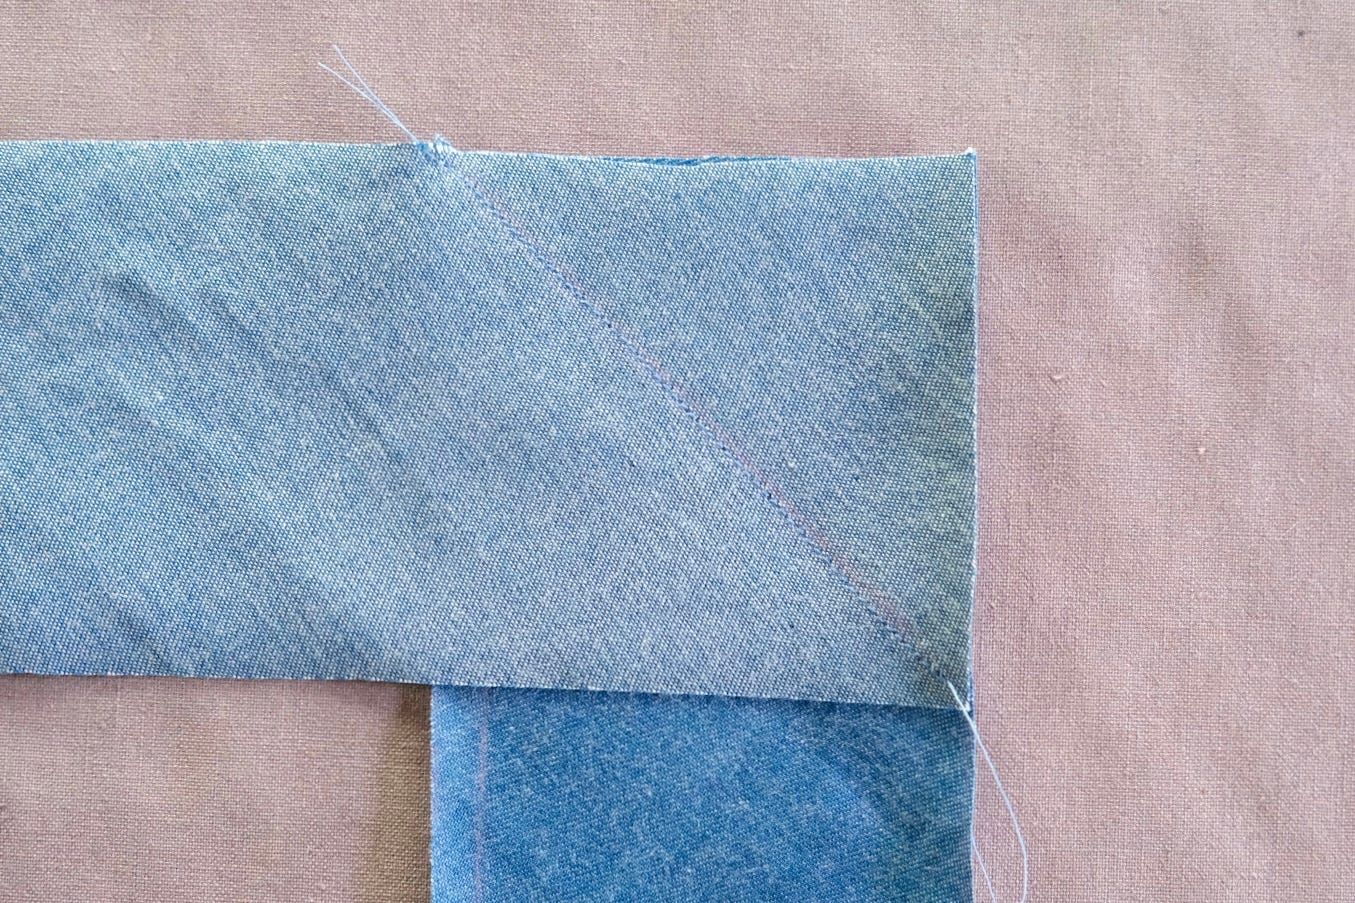
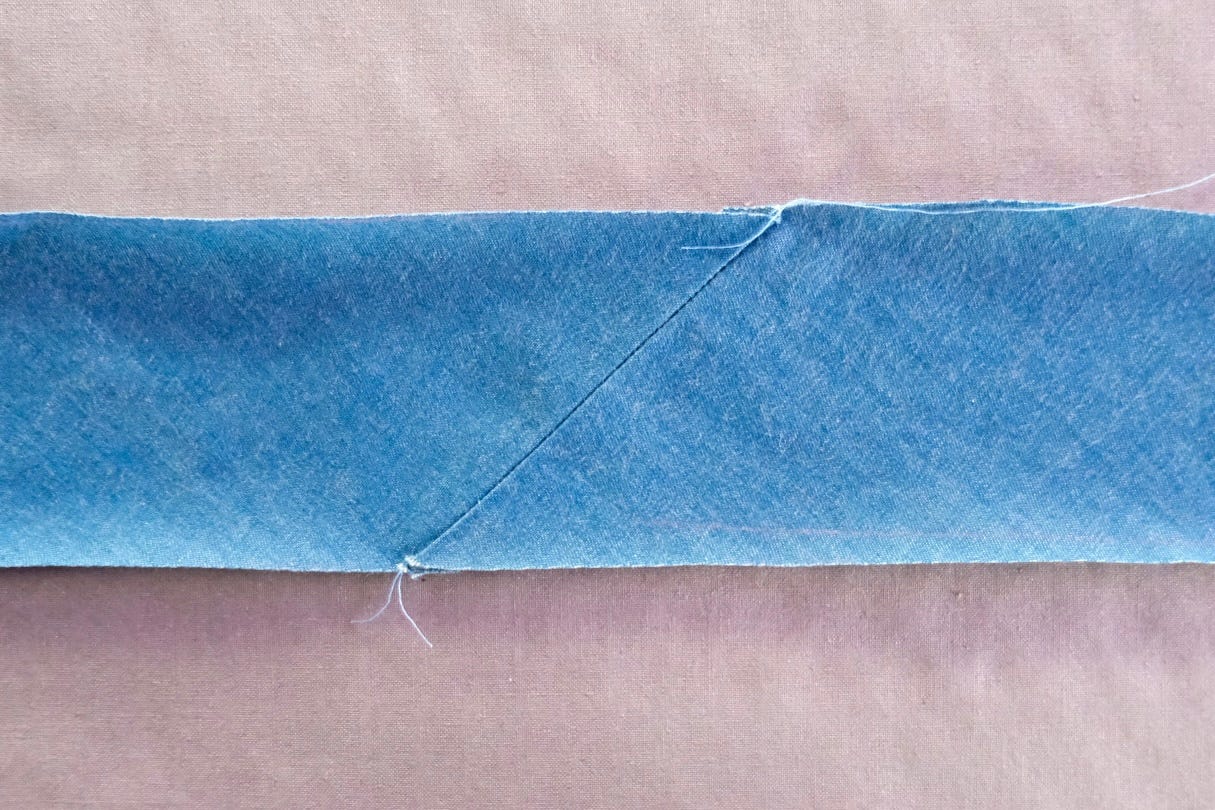
Press seams open and trim seam allowances.
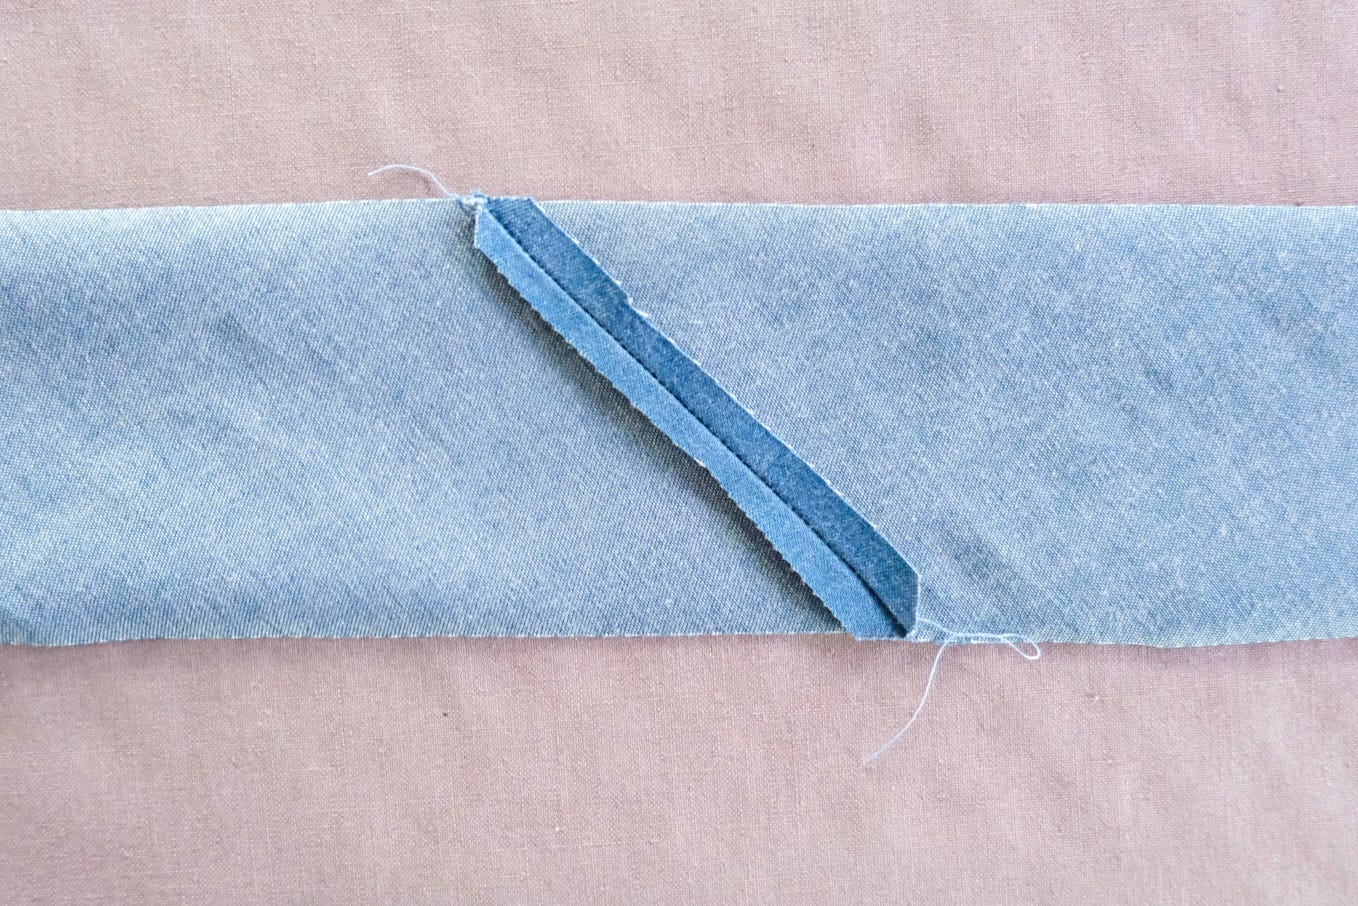
And voila! Bias strips are ready to be used for French binding.


Watch a Quick Tutorial
Here's a 1-minute video on How to Sew French Binding.

Cotton Shoulder Covers
Cotton shoulder covers are like fabric dust shields for infrequently worn clothes stored on hangers. Often, shoulder covers are trimmed with the same color binding and offered at fixed dimensions. Creating your own allows you to customize the binding color and allows you to create custom sizes to accommodate different hanger widths and garment thicknesses.
I cut mine from muslin, but any woven fabric will work—lightweight natural fabrics are ideal. Even if your material feels flimsy, the double binding adds a lovely structure.
To begin,
Staystitch edges just inside the seam line. Then trim seam allowance to 1/4 inch. Staystitching stabilizes fabric and prevents it from stretching while sewing.

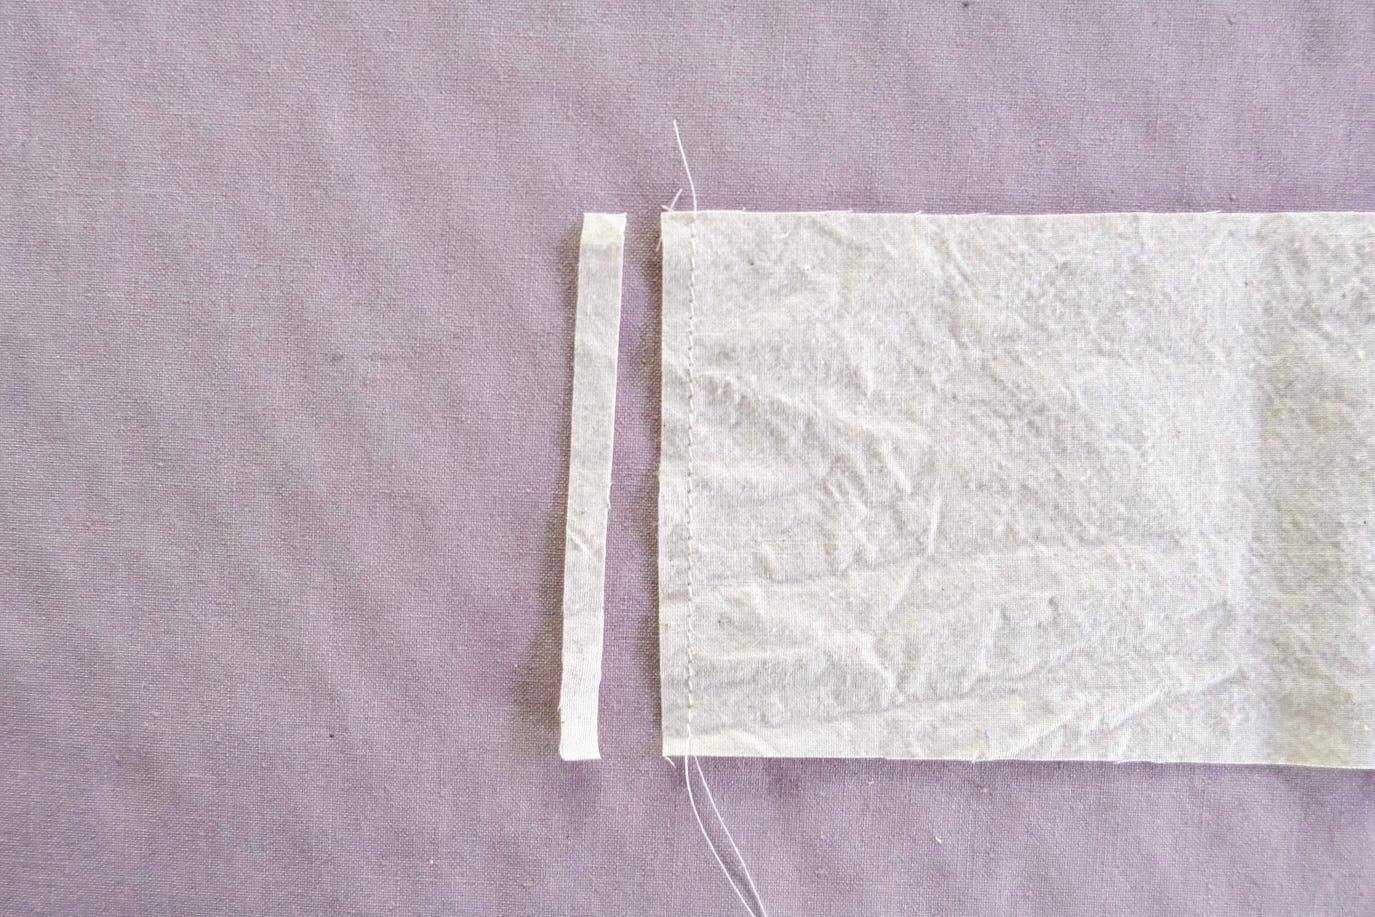
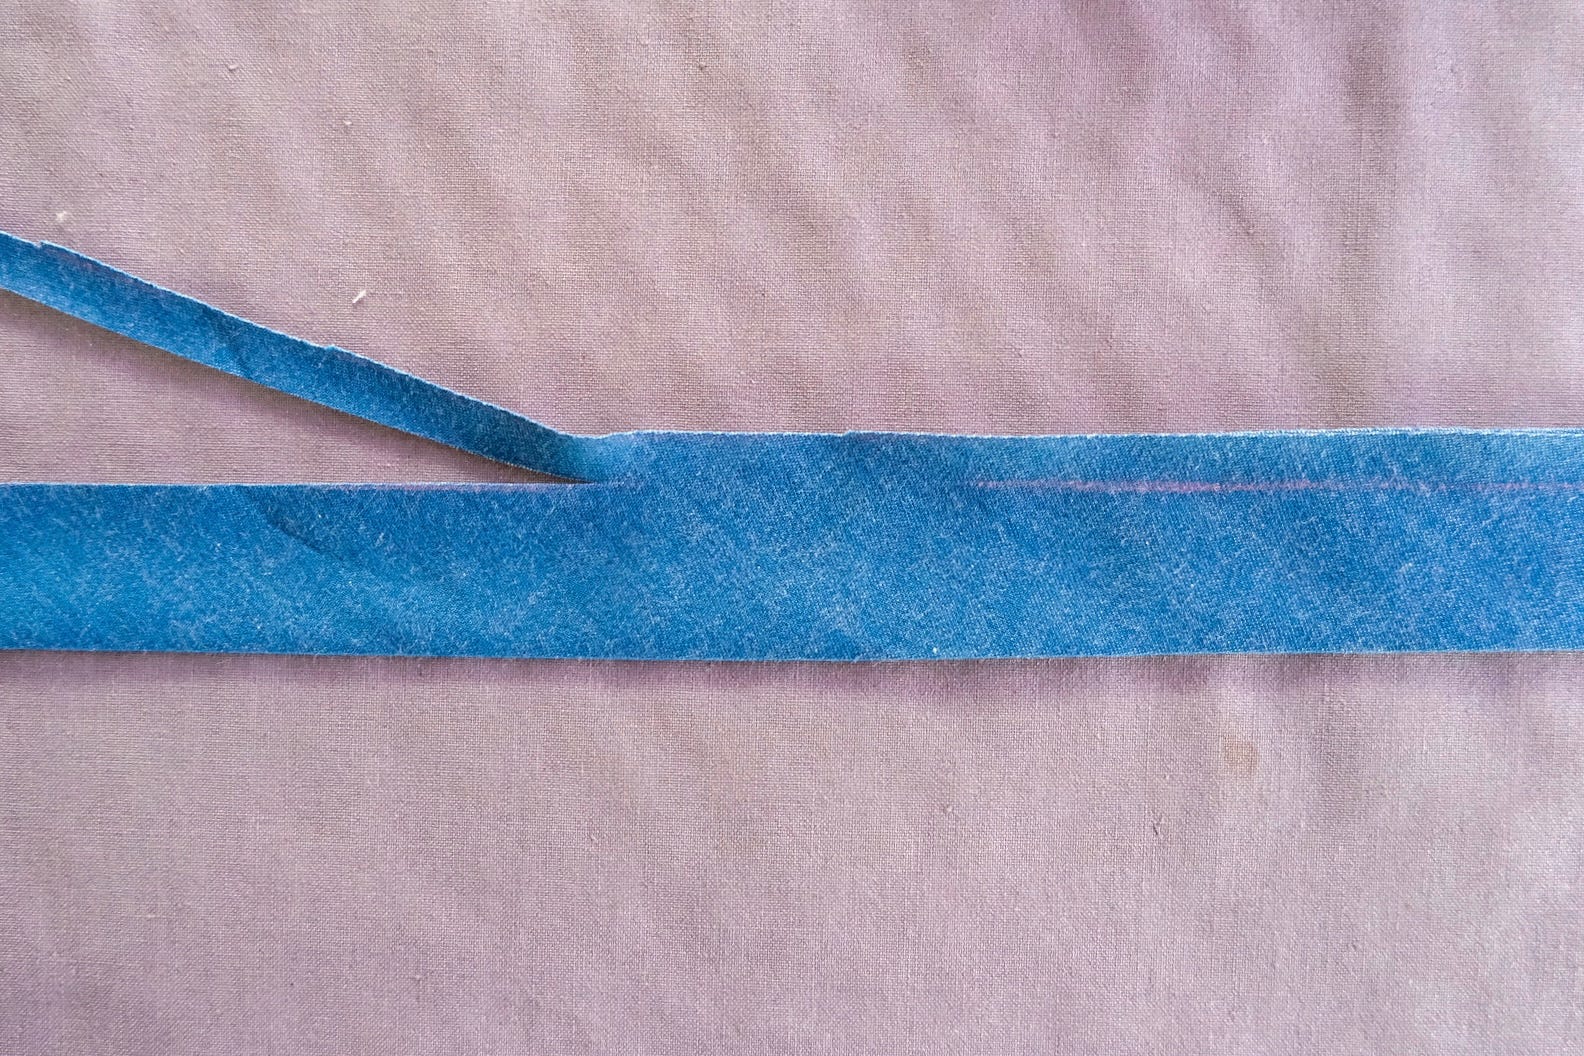
Fold the bias strips lengthwise with wrong sides together and raw edges even. Press, slightly stretching to maintain a straight strip.
Measure from the folded edge three and a half times the finished width of the binding. Chalk-mark the desired width and trim away any excess fabric.

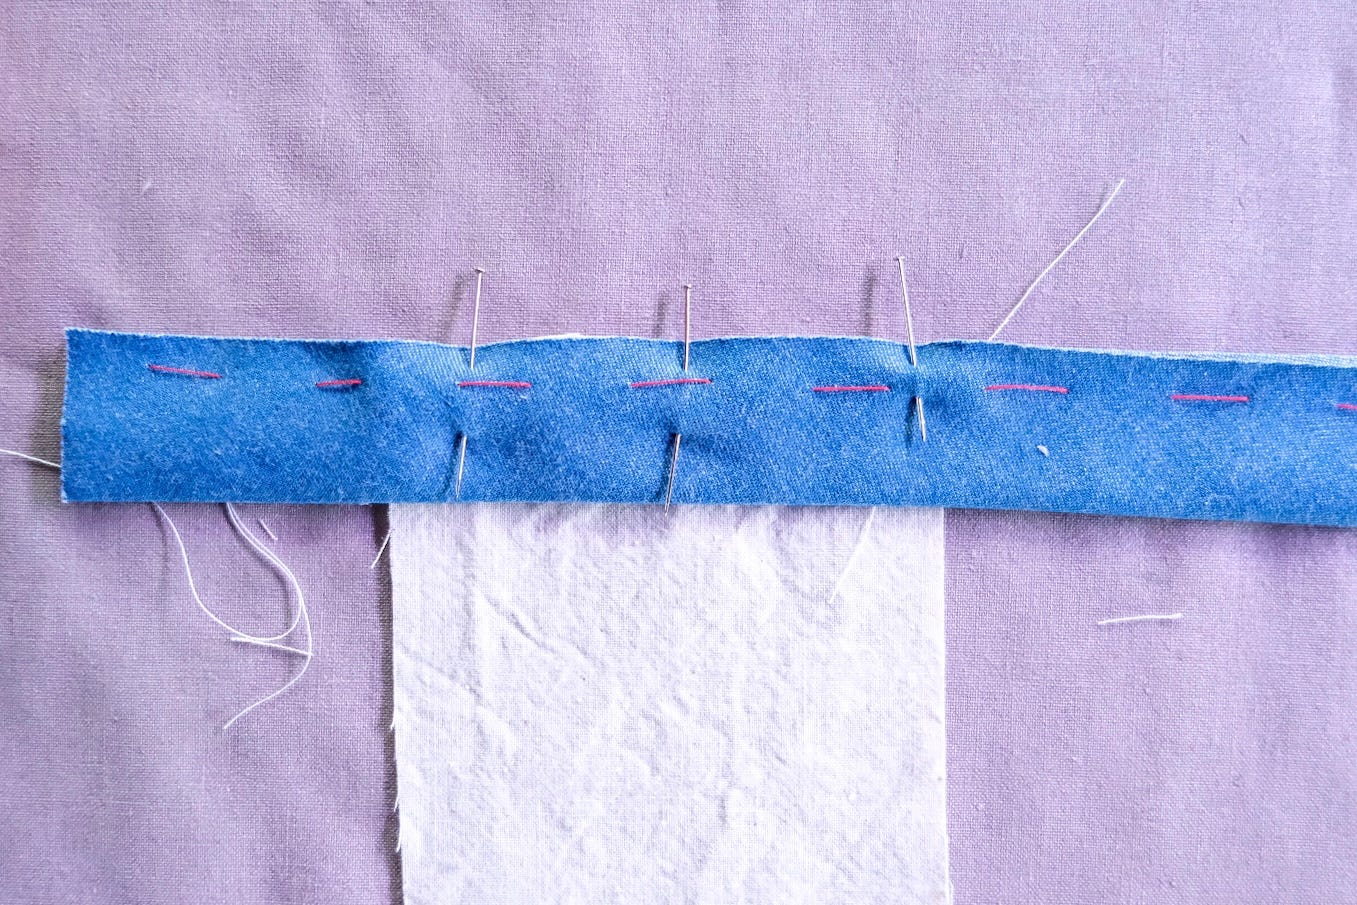
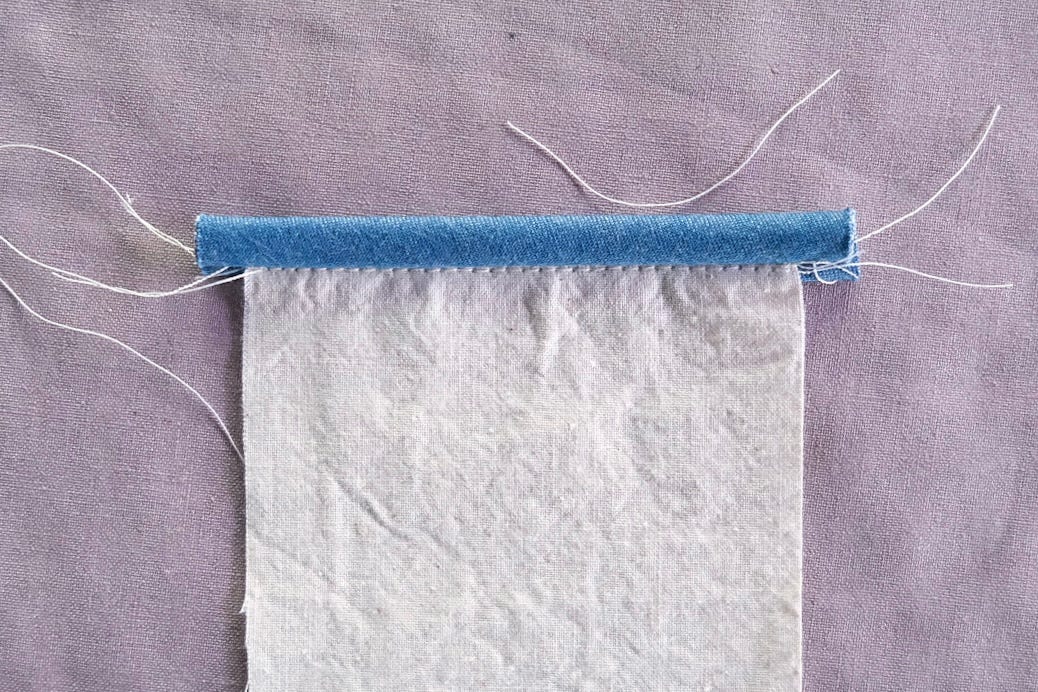
Hand baste the raw edges together just outside the ¼ inch seam line (finished binding width).

With the garment right side up, pin the raw edges together and, if needed, hand-baste the layers just inside the seam line.
Stitch a 1/4 inch seam (finished binding width).
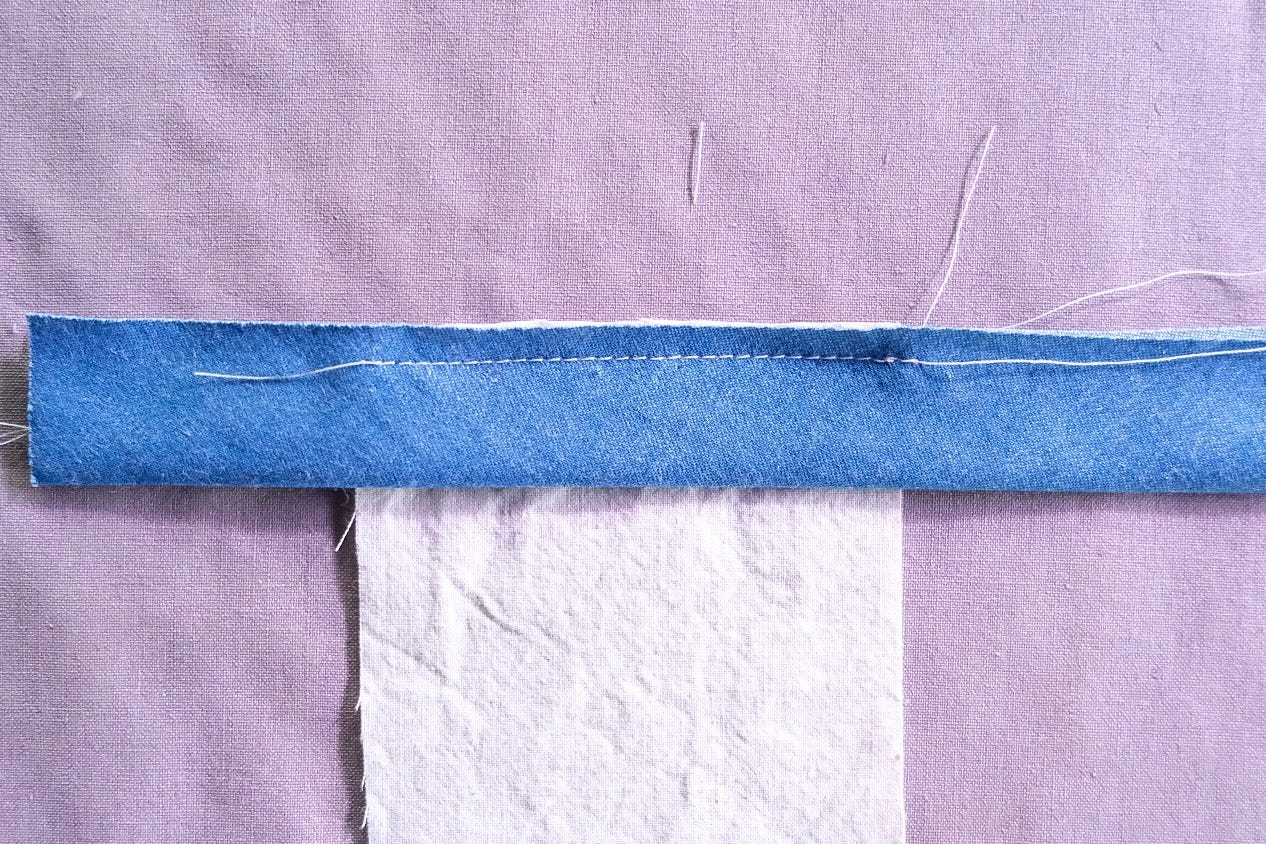
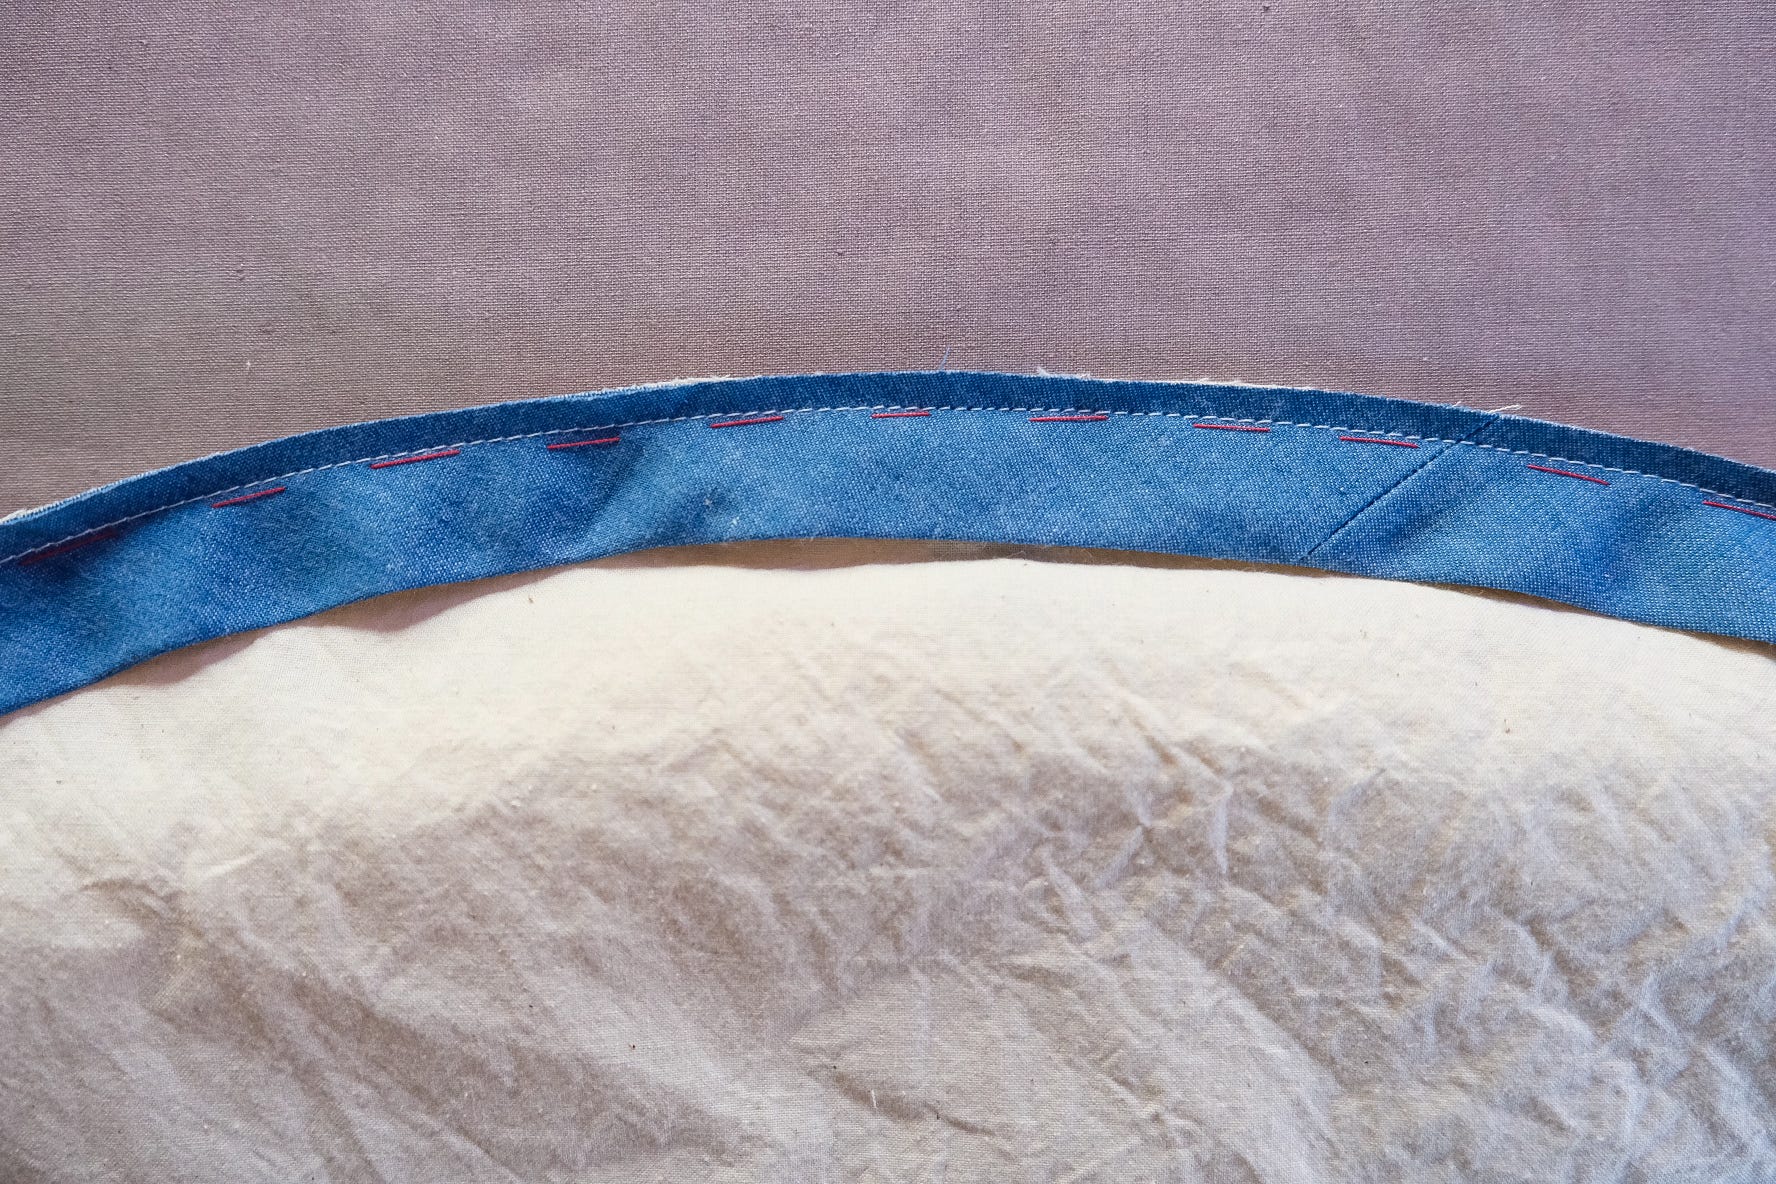
Press the seam flat, then fold the binding toward the raw edges and press lightly. Wrap the binding around the raw edges to the wrong side. The binding should overlap the seam line slightly. With the right side up, hand baste close to the binding seam to secure the binding, while leaving space between binding and basting to stitch-in-the-ditch.
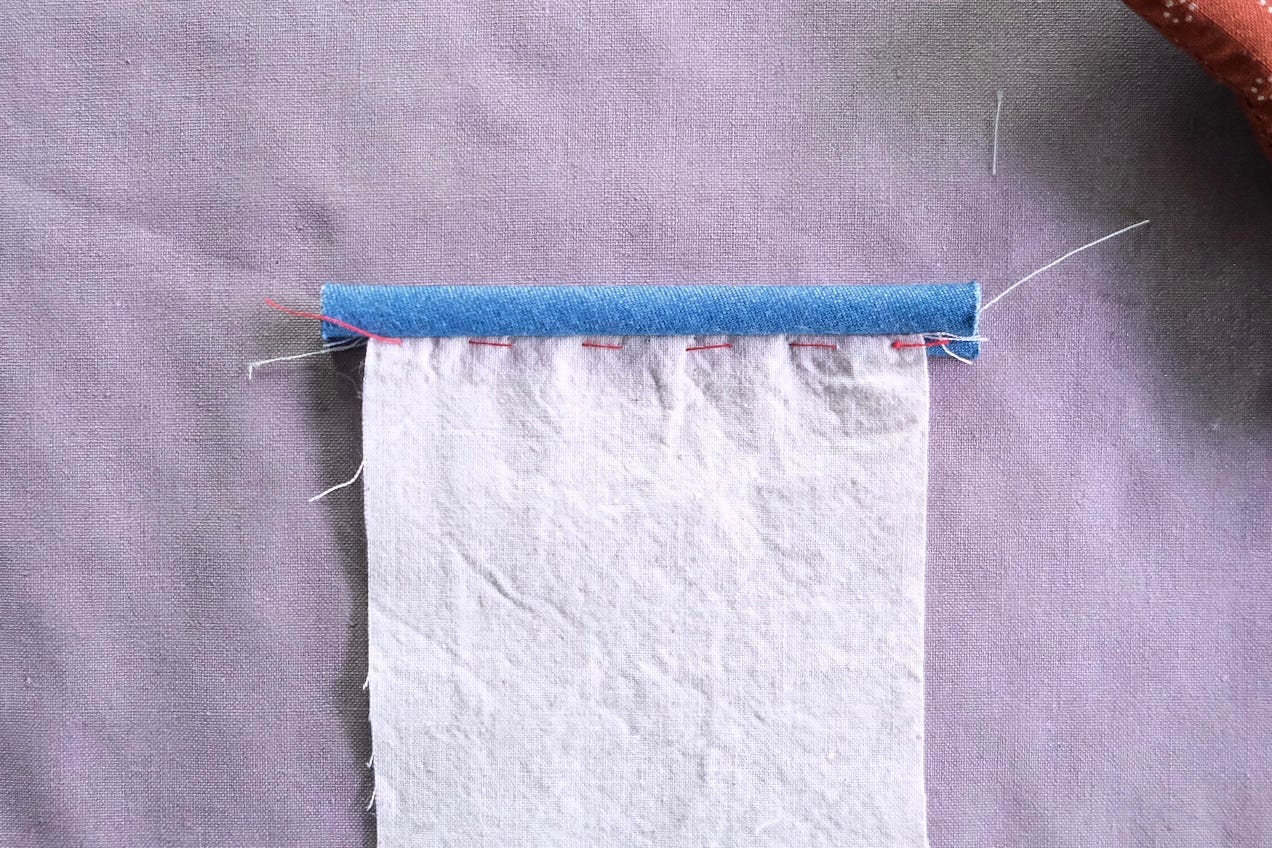
Use a zipper foot to stitch-in-the-ditch.
Since this binding features a raised ridge on one side, the stitching is done just beside the seam line rather than directly in the seam's groove.
Assemble the shoulder cover in this order:
Bind the side panel tops.
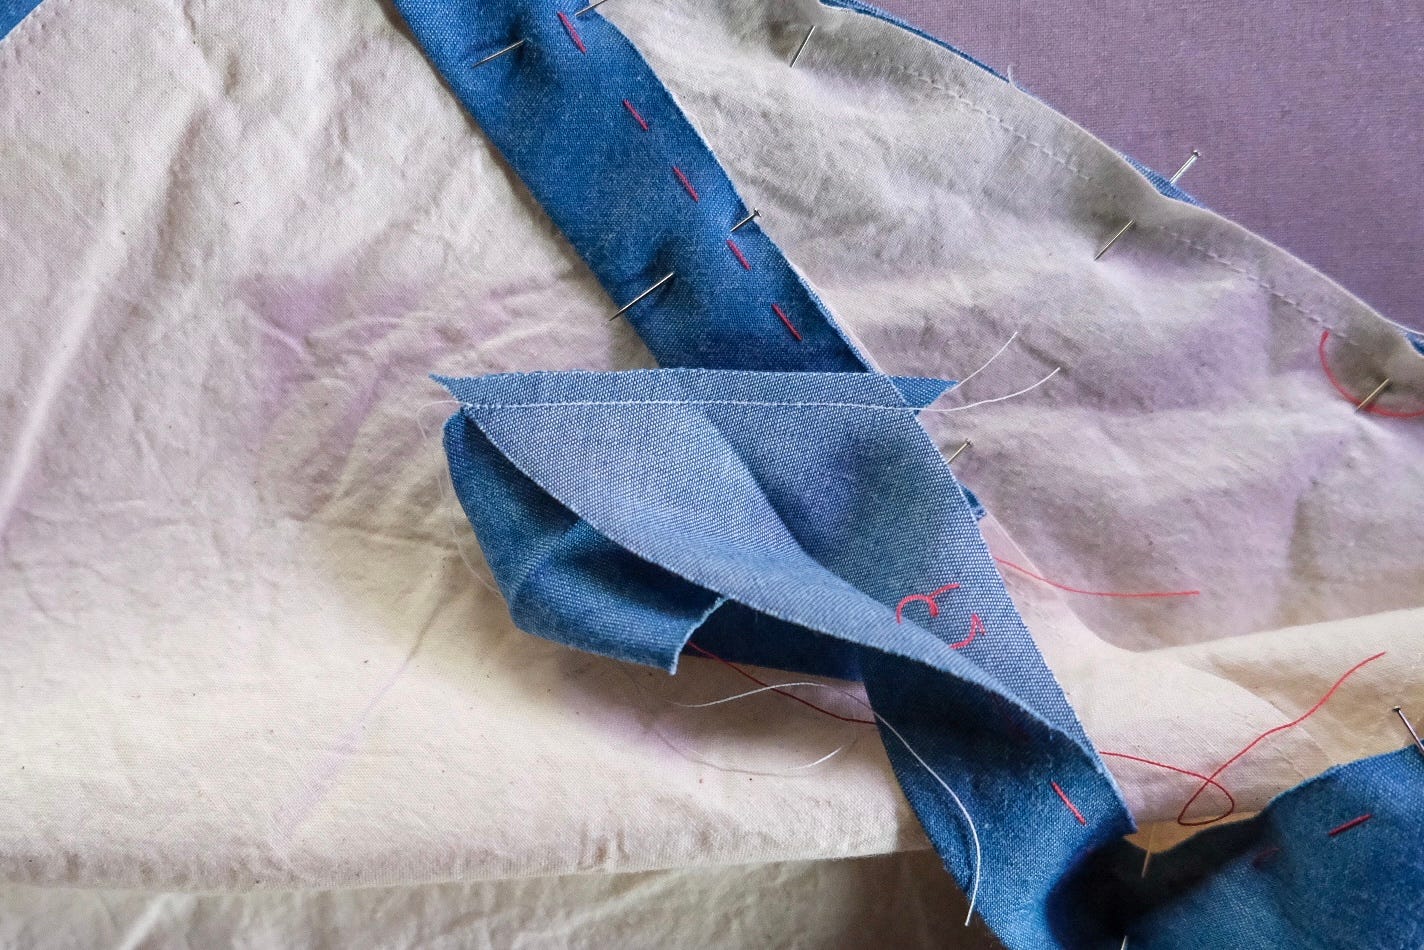
With wrong sides together, sew the front and back pieces to the side panels. The opening between the panels—where the hanger will thread through—aligns with the center of the front and back pieces. Trim the seams to 1/4 inch.

Bind the front and back curved seams.


If you haven’t already done so, staystitch the hem just inside the 1/2 inch seam allowance. Trim seam allowance to 1/4 inch.
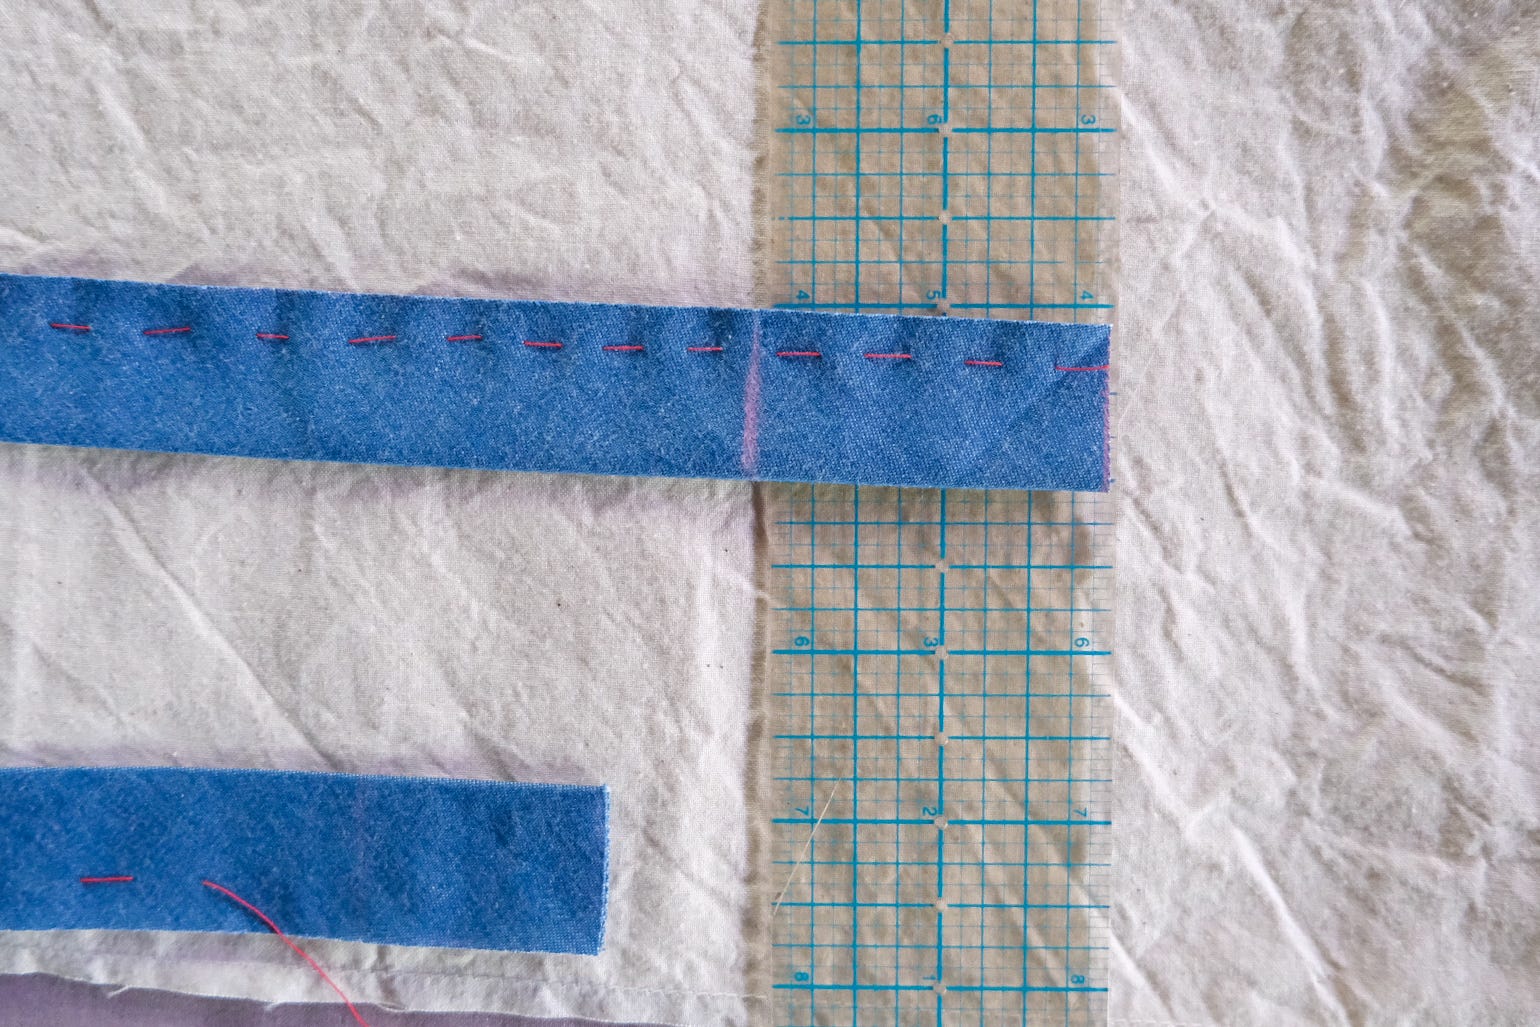
To bind the hem, measure the hem circumference. Cut a bias strip long enough to match the hem circumference, plus bias strip width.

Adding the width of the bias strip to the hem circumference should give you enough length to sew the bias tape on the diagonal. Join the ends of the strip with a diagonal stitch, using the same technique described for attaching bias strips earlier. Trim the seam and press flat.

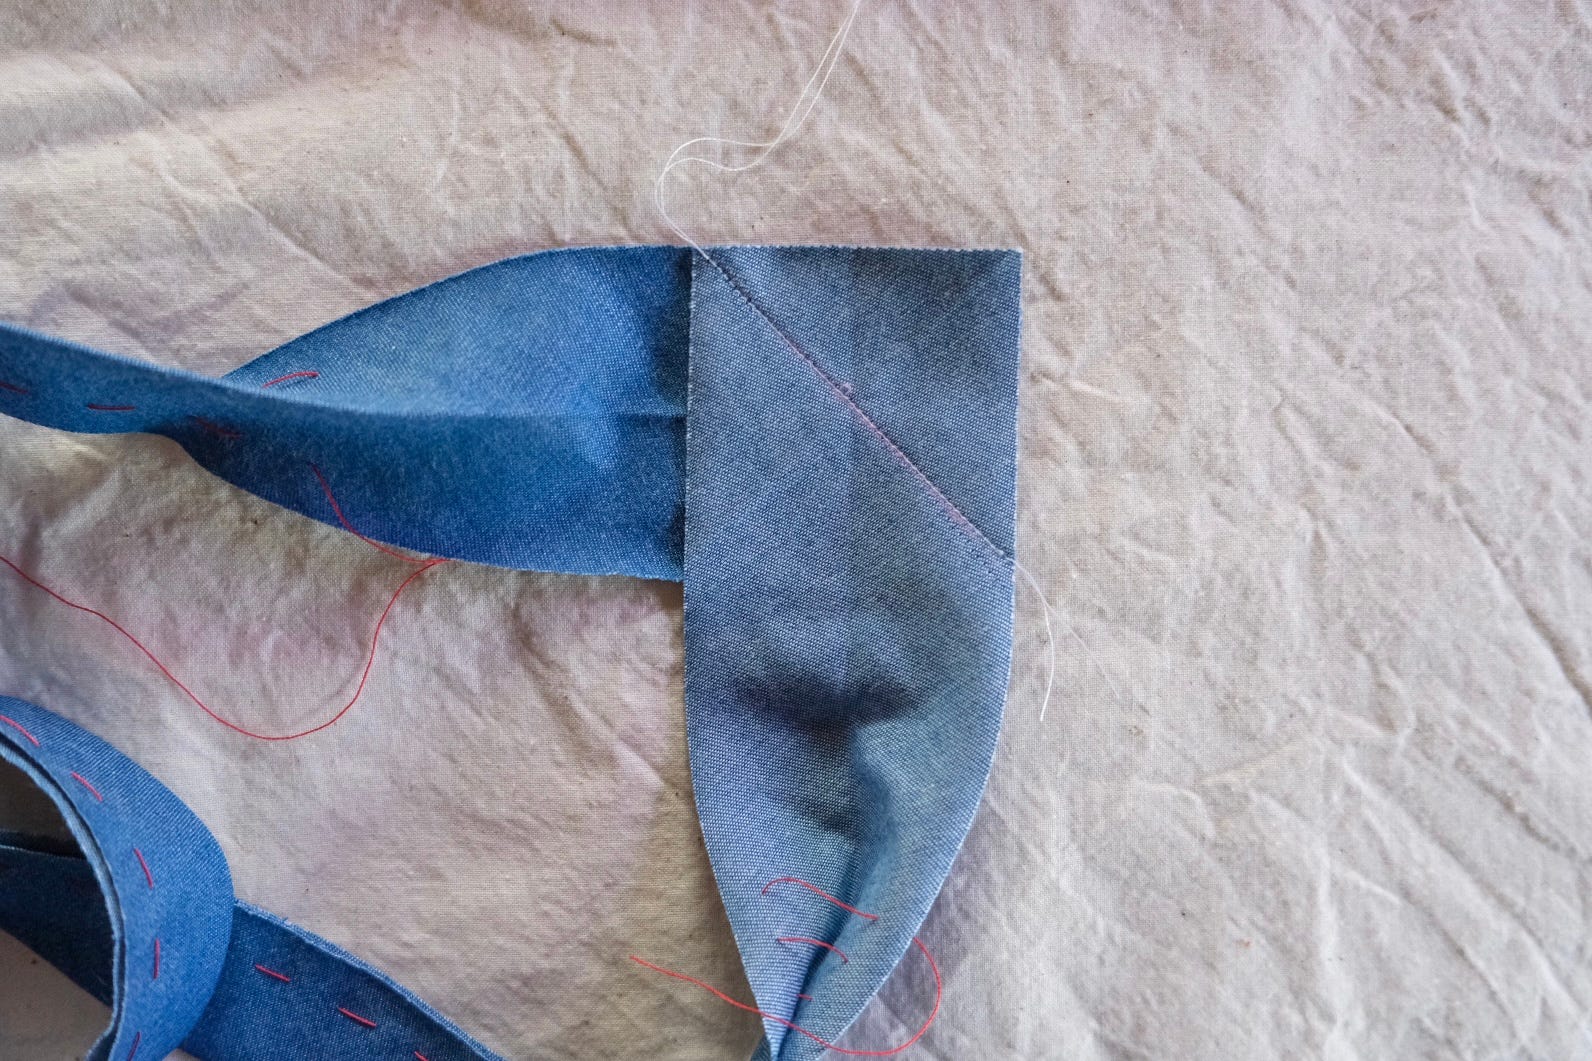
If you made a measuring mistake (like I did!) and don’t have enough fabric to use the previous technique, here’s an alternative way to join bias strips. Cut the ends on the diagonal, leaving enough fabric for a seam allowance. Place the two ends right sides together and at right angles to each other so that a diagonal seam will be on the straight grain of the fabric. Overlap the corners of the strips so that the edges are exactly even at the seam line. Stitch seam and press open. Cut off points that extend beyond the edge of strip. Press the seam open, and trim any excess fabric points that extend beyond the edges of the strip. This method ensures a clean, functional join without needing additional fabric.
Attach the binding loop to the hem, trimming any side panel binding that extends beyond 1/4 inch before wrapping the binding around the edge.

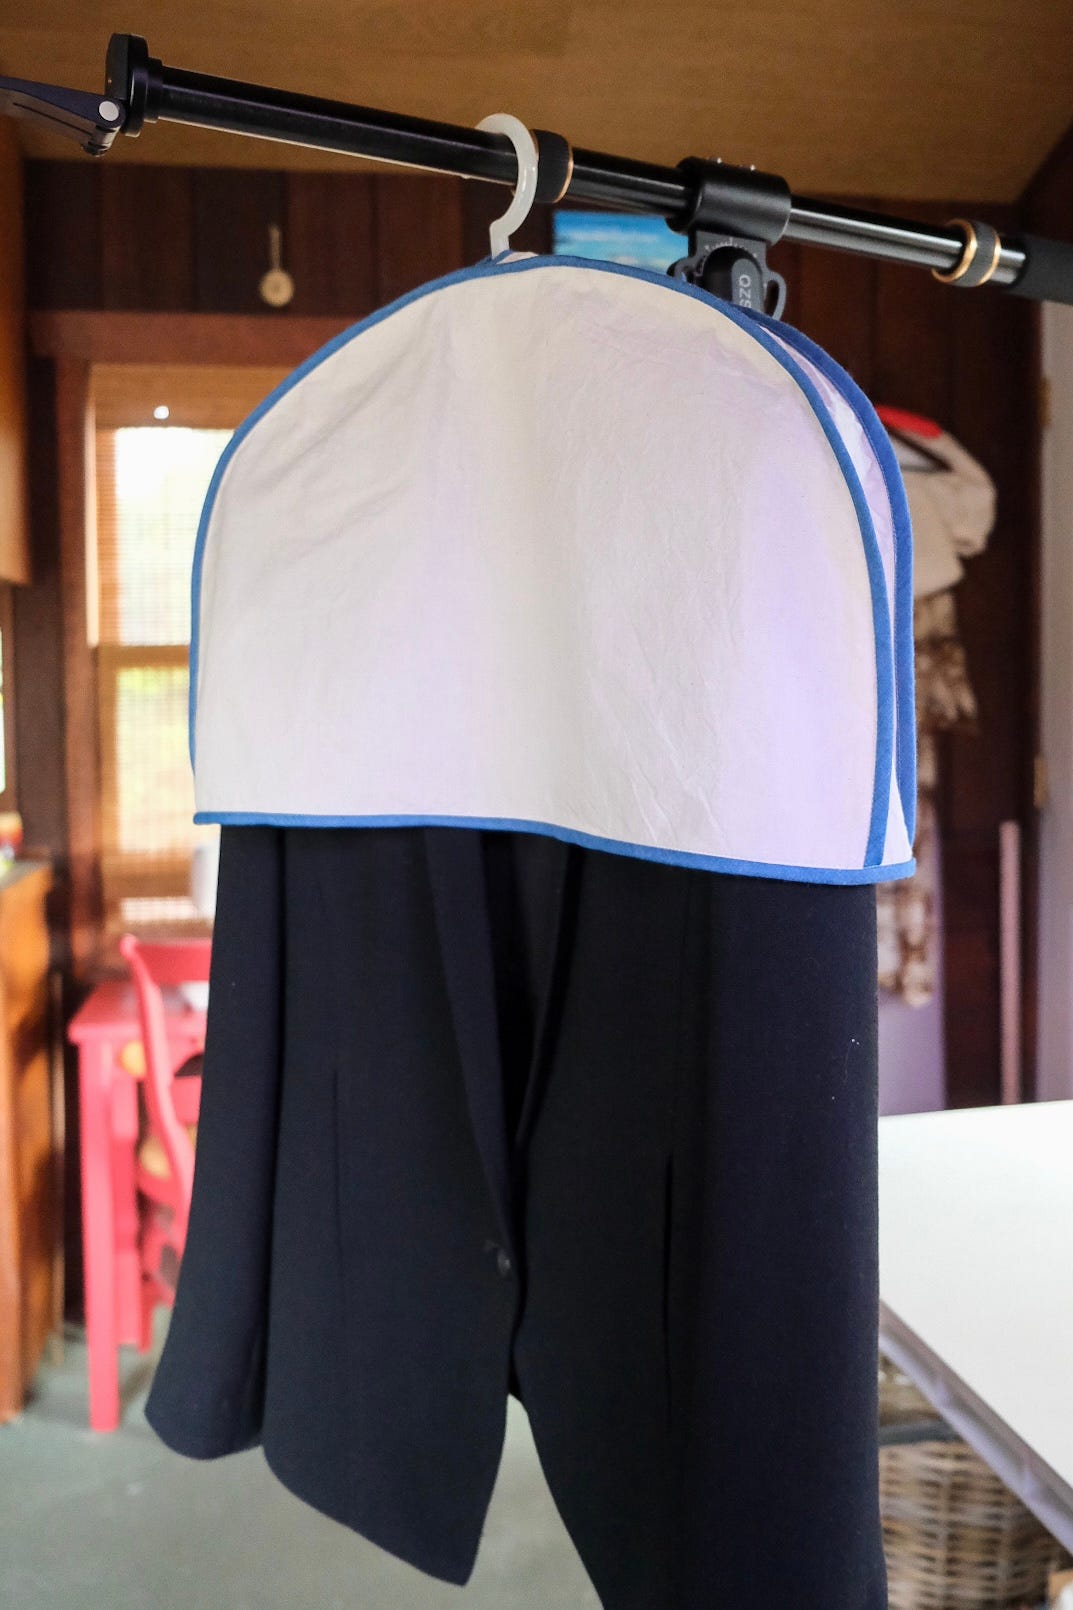
And here it is! A French-bound shoulder cover.


Runway Ready: Preschool Edition
A few weeks ago, I had the pleasure of creating looks inspired by The Paper Bag Princess with my daughter’s preschool class. The eveningwear brand where I previously worked generously donated fabric saved from sample making. Fabrics like sequined lace, embroidered tulle, jersey lamé, and jacquards—perfect for the project.
The plan was this:
Get a roll of builder’s paper from Home Depot.
Prepare two basic shapes: a dress and a vest.
Provide the kids with materials like sparkly scraps, recycled packing materials, dot markers, and their work boxes.
Let the students “sew” the side seams by lacing them up with yarn.
The project culminated in an impromptu fashion show after the school’s potluck Thanksgiving feast. What started as a spontaneous idea became a reality when we saw how much the kids enjoyed wearing and showcasing their creations.
Families flanked the makeshift runway in the play yard, where each look was introduced with descriptions written by the students—complete with “wear-to-where” details like “fancy parties and fancy runway shows.” (Isn’t that often true? Clothes that walk down the runway are sometimes hard to imagine being worn. But these are the pieces that set the season’s tone, the style, the fantasy!)
The students considered things like composition, balance, variety, repetition, pattern, proportion, and emphasis. But these kids didn’t care about principles of design. Yet they did. They intuitively felt them.
They changed fabric colors with paint. They made shoulder accents and shaped waist details. They created functional pockets, and incorporated surface design, texture, and twist drapes. If you want to see raw, unfiltered creativity, watch a 4- or 5-year-old work.
Each child had such a distinct vision. Their determination to cut foil-printed jersey with preschool scissors. Their curiosity. Their excitement. Their occasional frustration and the occasional disappointment (“I have to choose? I can’t use everything?!”). But that’s part of the design process: editing. Many designers struggle with this—they have so many ideas!—which is a reason why stylists and muses are so helpful.
It was pure joy to see how their faces lit up when wearing their creations. With just builder’s paper, painter’s tape and glue, and saved eveningwear scraps, they created something magical and uniquely their own.
~ Jane