

How to Alter a Commercial Pattern for Kiki's Delivery Service
Plus, Kiki’s signature red bow, a thread chain button loop tutorial, and a few creative Halloween adaptations.

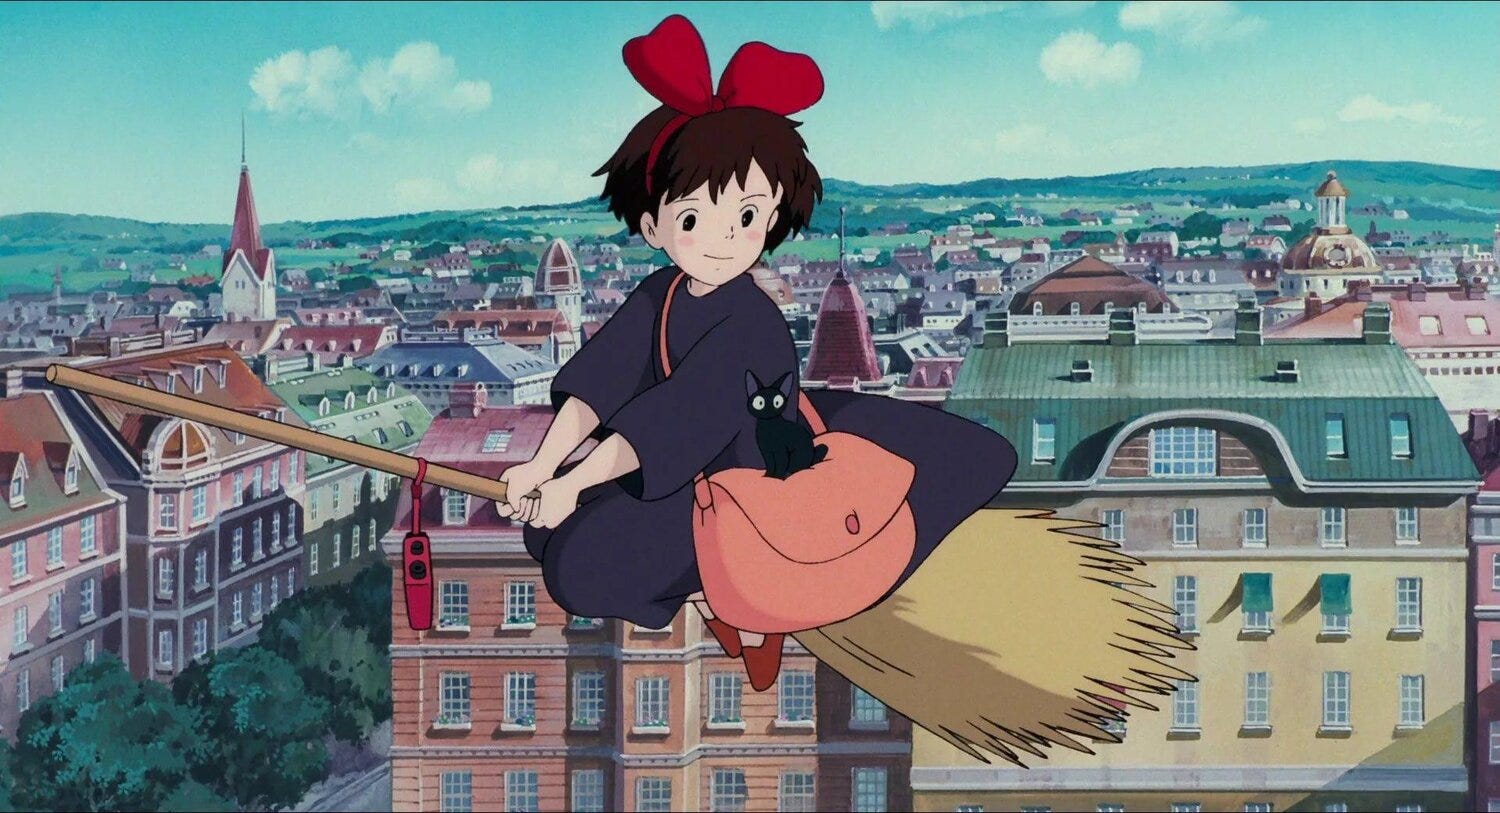
Kiki's Delivery Service follows a young witch named Kiki who, as part of her witch training, moves to a new city with her talking cat, Jiji. There, she starts a flying delivery service and learns important lessons about self-confidence and finding her place in the world. It’s a delightful film that inspired my daughter’s Halloween costume this year—so I had to make a Kiki dress!
Rather than drafting from scratch, I started with a commercial pattern. You might recognize companies like Simplicity, Butterick, Vogue, and McCall’s, who offer these pre-graded tissue paper patterns.
Why use a commercial pattern? It’s a real time-saver. Select your size, and you’ll have a pre-tested fit with built-in garment ease. While I favor the basic pattern set for its fit control, design versatility, and skill development, commercial patterns work well in a pinch.
When starting with a commercial pattern, choose a silhouette that closely matches your final design—it’ll make adjustments much easier.
Kiki’s black dress is a simple shape. It has a slightly oversized fit with a rounded neckline, subtly flared elbow-ish length sleeves, and a flared skirt that finishes below the knee. So I chose this New Look Pattern for its A-line shape, set-in sleeves, and minimal seams.
For Kiki’s dress, I needed to make three adjustments to the original pattern:
Add flare to the skirt.
Add flare to the sleeves.
Shorten sleeves.
Now, let’s create a witch-in-training dress!
Pattern Adjustments
Record the side seam length from armhole to hem. This measurement will come in later.
On both front and back, draw two straight lines (slash lines) to the waist. This is a pattern without darts, so we won’t need to close or manipulate darts this time.
Cut the slash lines to the waist, and cut waist line to, not through, the center line (A).

Place pattern on a large piece of paper, spreading sections equally. Keep the top corners of each touching, and spread the bottom ends to create wedge shapes. Tape down. The side seam will overlap at the waist, shortening the side seam. But we’ll add this back in Step 6.
Blend side seam at waist.
Refer to the measurement recorded in Step 1. Extend side seam measurement at hem to equal original side seam length, and redraw hemline.

Equalize hemline sweep. Place the back pattern piece over the front, matching the side seams.
In this case, there was no overhang. If, for example, you have a front skirt that flares more than the back, divide the overhang in half—add half the difference to the back and subtract half from the front. Then, blend the side seams.

Now it’s time to ‘walk the pattern’ to double-check our work. Place one pattern piece over the other, as we did when equalizing the hem. Start at the armhole, aligning the side seam and checking that the notches match. Walking the pattern lets you trace the exact path your stitch line will follow.

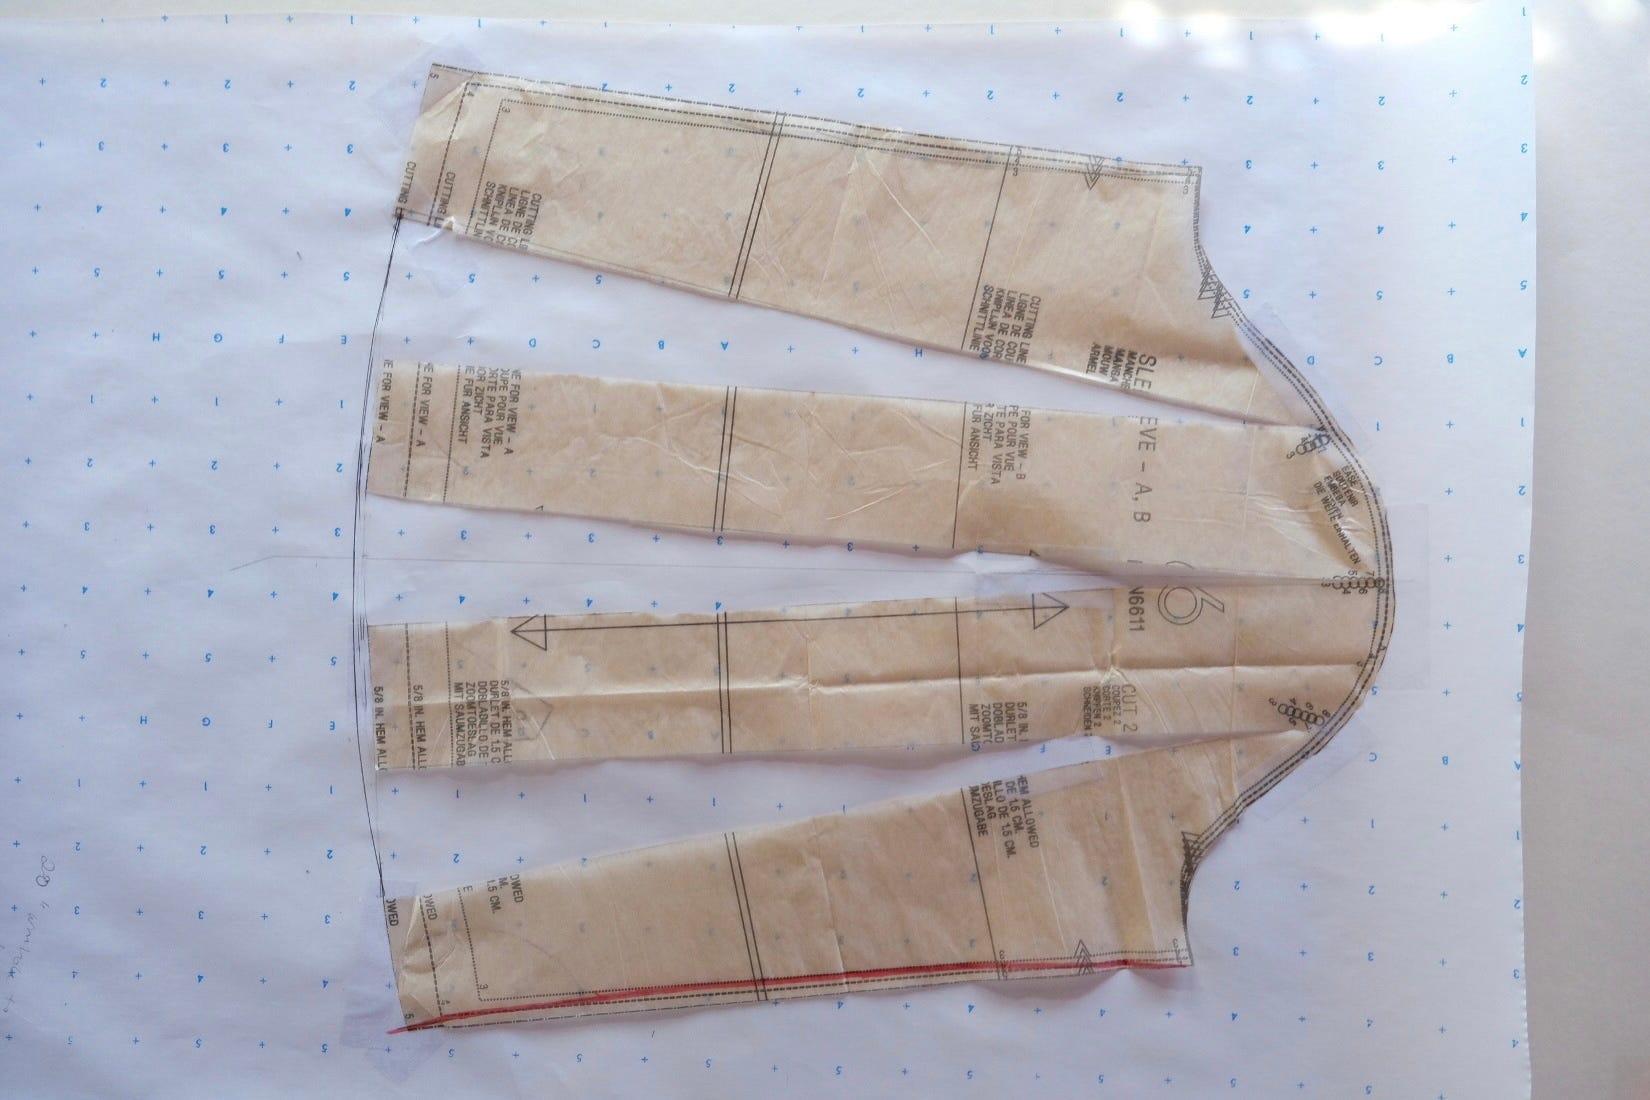
For the Sleeve:
Draw slash lines from cap to hem, and cut slash lines to, not through, the cap.
Place pattern on paper, spreading sections equally. Tape down.
Redraw sleeve hem.
I won’t dive into sewing details this time. There’s lots to share about facings and hems, and they’ll have their own dedicated newsletters. However, I did swap the elastic loop button closure for a thread chain loop. It’s a simple, delicate option for a neckline that won’t experience much strain.
Tips:
Use a single strand of heavy-duty thread or buttonhole twist to create a thread chain loop.
If the thread is very thick, try using an embroidery needle with a larger eye, which makes it easier to thread.
Secure it firmly with two or three overlapping stitches before snipping the thread.
Here’s how to make a thread chain button loop.

For the fabric, I chose a heavy twill—perhaps a bit too heavy, but I wanted the sleeves and flared skirt to hold their shape and stand away from the body, just like in the animated film. I also used the fabric’s wrong side as the face to achieve a smoother texture. Here’s the dress ready for its wearer!

Kiki’s Signature Red Bow
No Kiki costume is complete without her signature red bow! Here’s how I made it.

Kiki Needs Jiji
Jiji is her loyal, talking black cat who accompanies her on her adventures. So, starring my youngest as Jiji, I customized a bonnet pattern from this Etsy shop by adding kitten ears. Here’s a quick tutorial on how I put it together.

Then, I used the same pattern to make an alien bonnet, since my youngest will also be joining me for a Men in Black costume. We love our Halloweekends—it’s the perfect excuse to wear more than one costume! This bonnet hat is giving TOY STORY aliens, no?

That’s all for now! With a few more costumes to finish before Halloween, it’s time for me to sign off. Thank you so much for being here, and I’ll see you next time.
~ Jane