

Patrick Kelly’s One-Seam Coat (Pattern Included!)
A pattern download and the groundbreaking designer behind it.

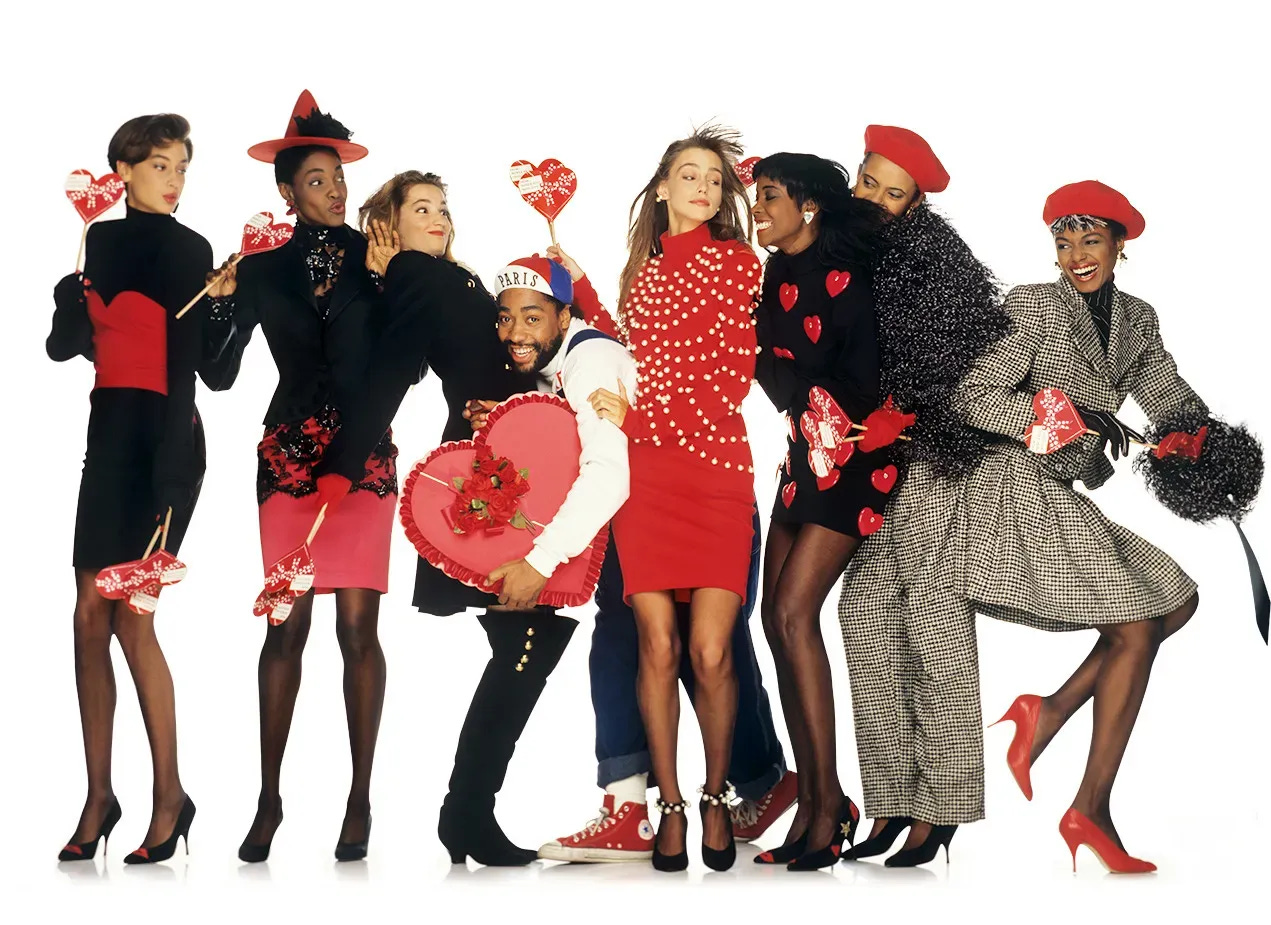
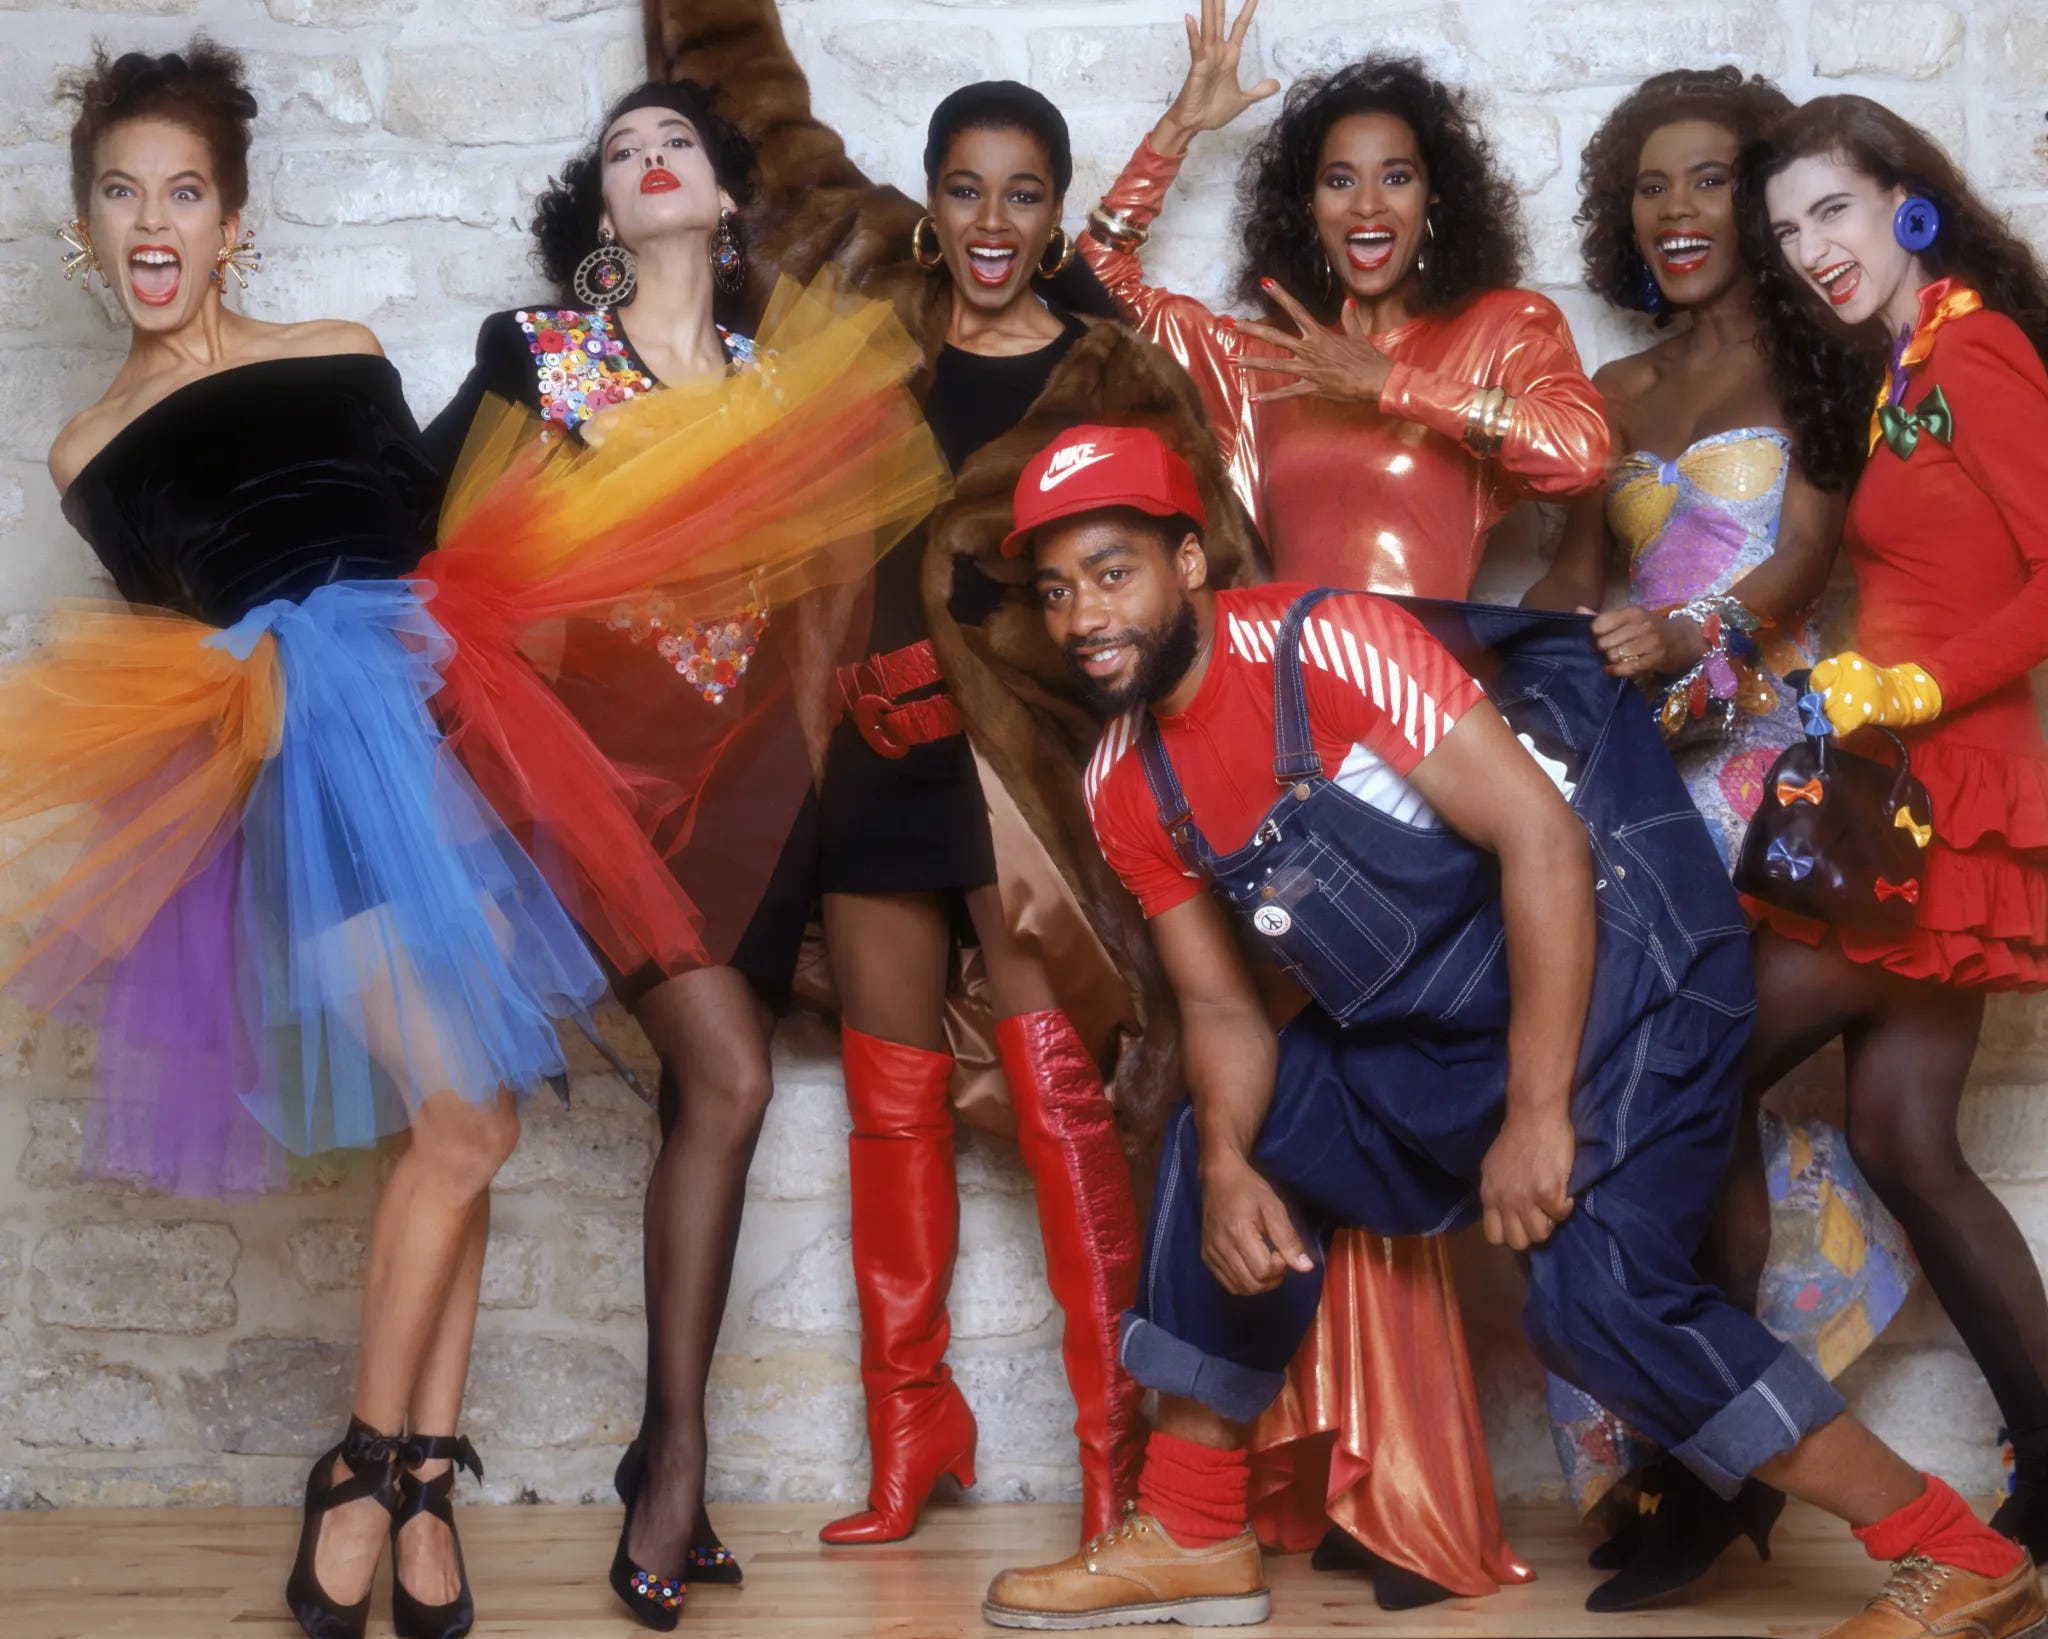
Before reading this post, take a moment to take in Patrick Kelly’s clothes. There’s so much joy in his designs. It’s bright and exuberant, and you can feel it in the bows and buttons, in the hem lengths and hearts. Distilling his life and work into one post is an impossible task. Still, I’ll begin with his clothes. It’s a good place to start.
“I want my clothes to make you smile!” —Patrick Kelly
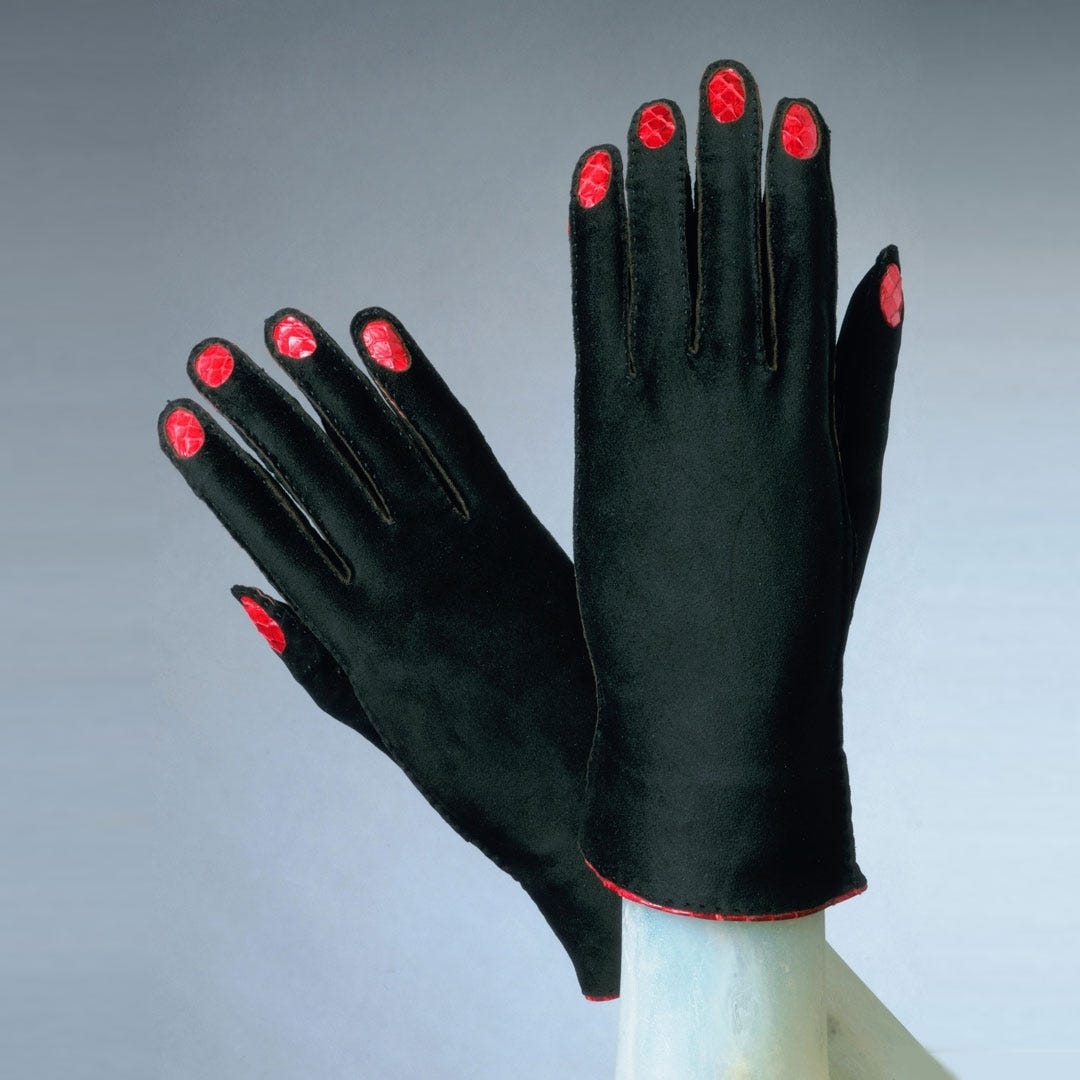
I first learned about Patrick Kelly when visiting the ASU FIDM museum with my dear friend Donald. I’d spotted these gauntlet-esque gloves with shiny red plastic button hearts at their fingertips, and thought, So playful! So fun!
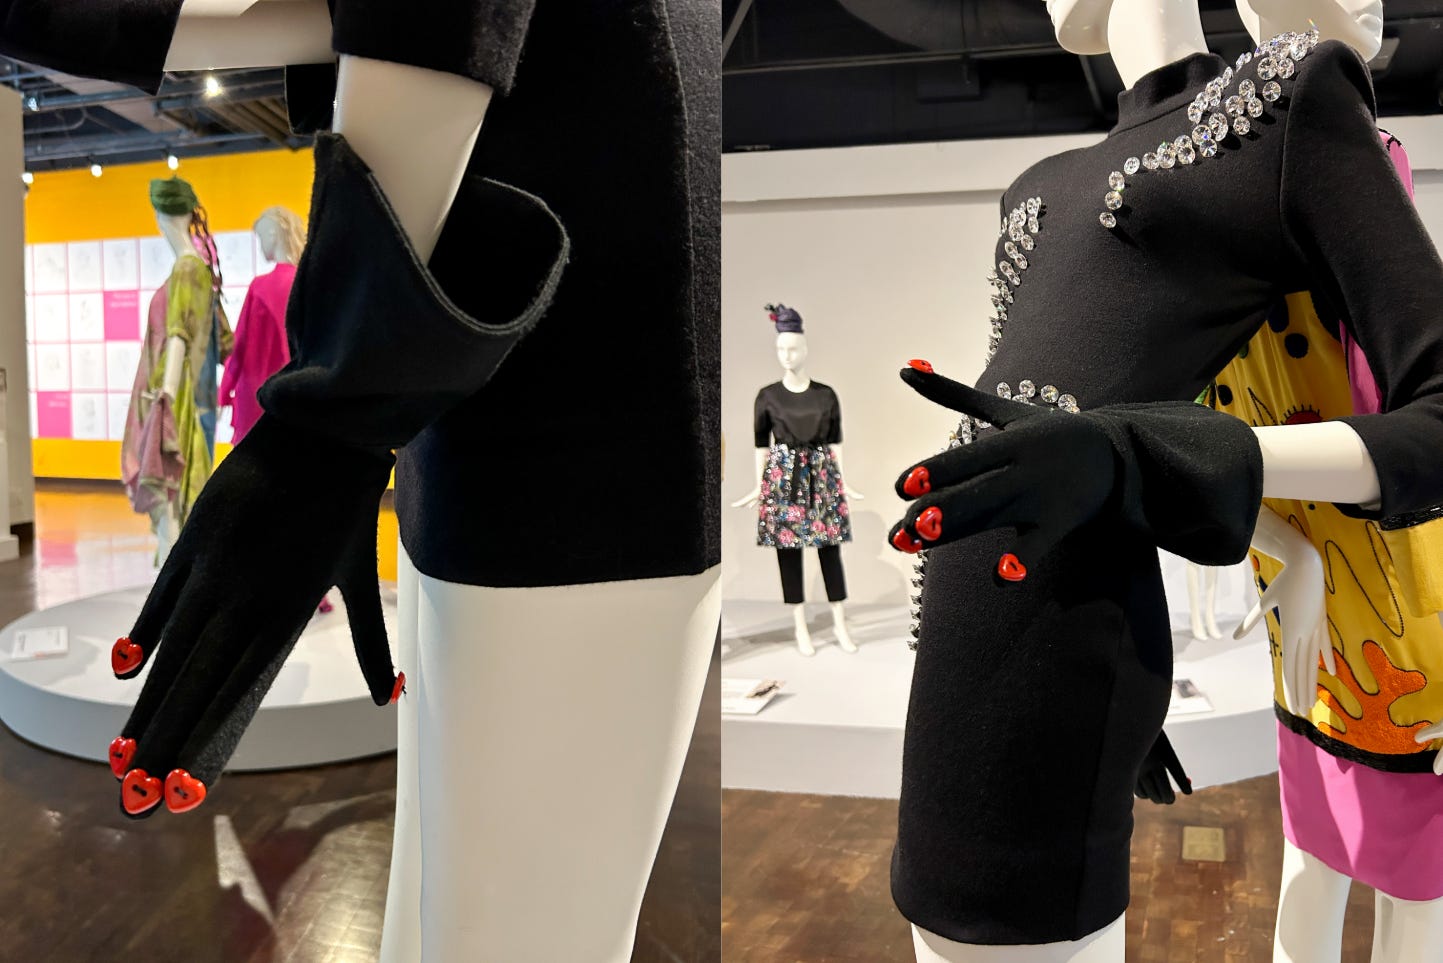
Patrick once said he dreamed of calling his collections “Schiaparelli by Kelly.” Elsa Schiaparelli influenced his work, and you can see that reference here: her gloves with red snakeskin fingernails reinterpreted in Patrick’s version.
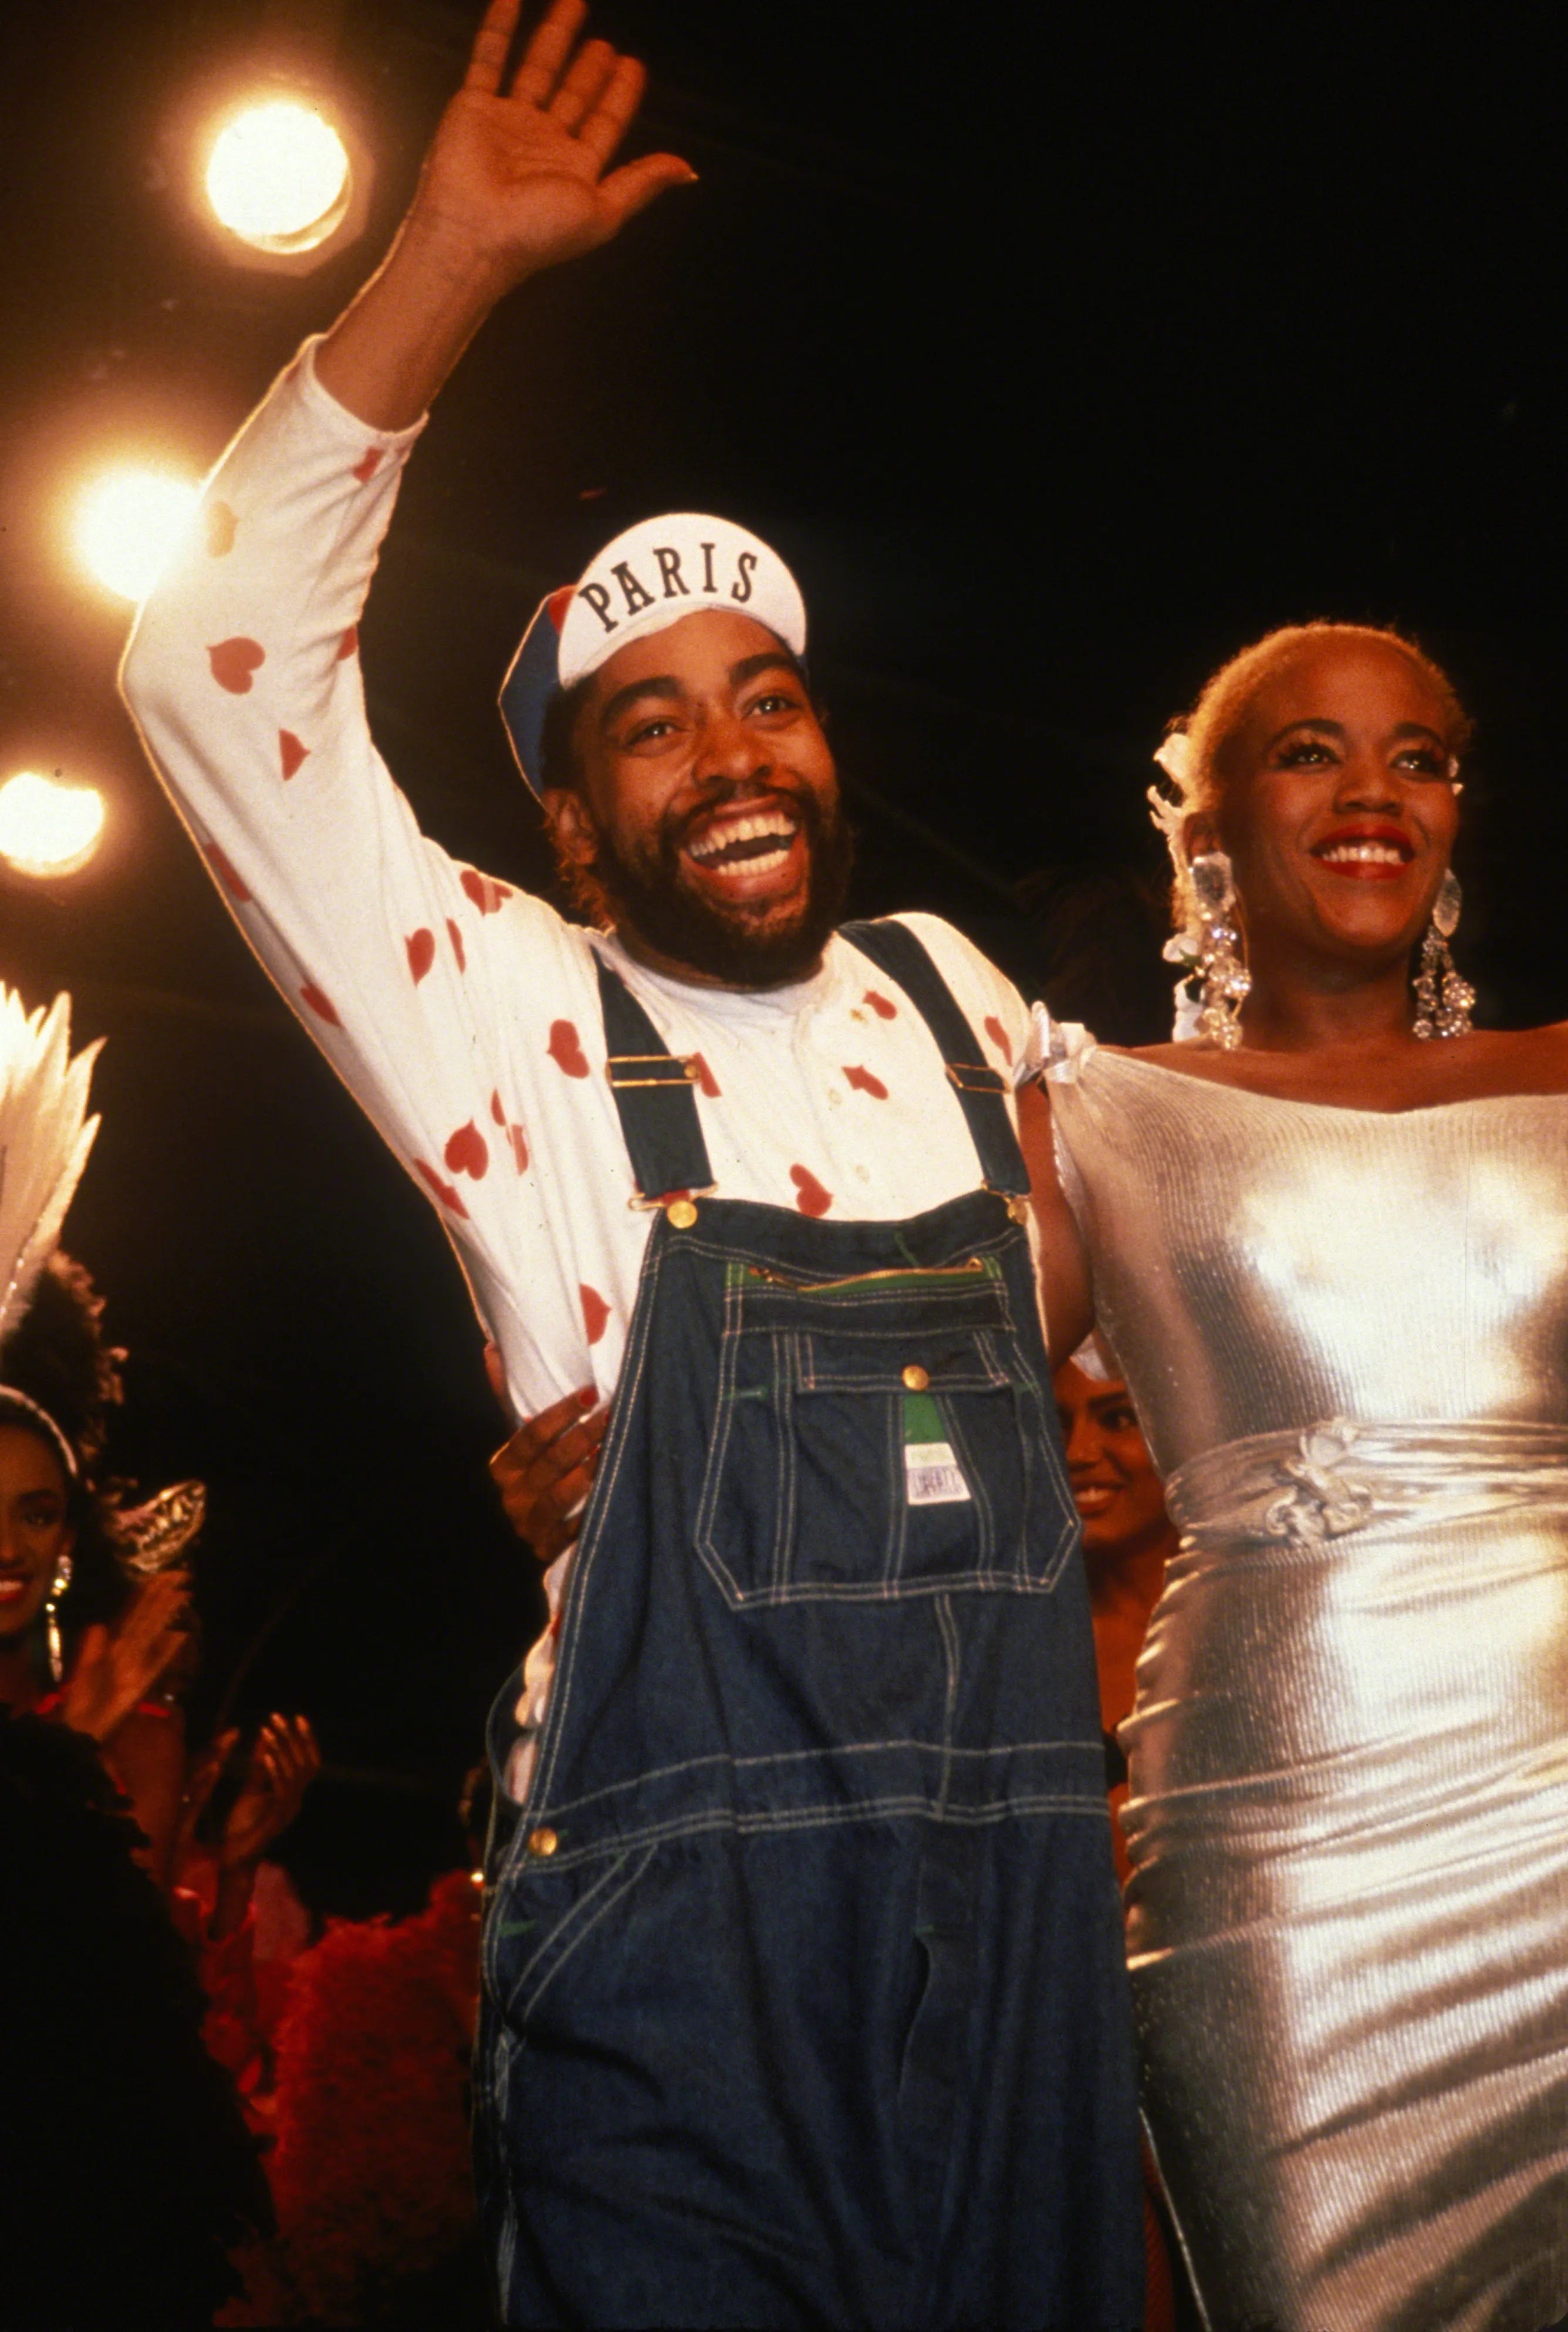
Patrick Kelly was born in Mississippi in 1954 and moved to Paris in 1979. In 1988, he became the first American and the first Black designer accepted into the Chambre Syndicale, the elite governing body of the French ready-to-wear industry. This allowed him to present his collections alongside fellow members in the tents set up in the courtyard of the Musée du Louvre.
Buttons were one of Patrick’s signatures, inspired by his grandmother’s button jars. Growing up, if he lost a button, she’d replace it with whatever she had on hand.

Patrick wanted his clothes to be affordable and attainable. “My idea is to make a fashionable line, like [Claude] Montana, like [Thierry] Mugler, like everybody, but at a real price,” he once said.
His More Love collection (1985) featured designs with embroidered hearts, sequin hearts, and plastic heart brooches. To keep wholesale costs down, the dresses were sold with separately packaged buttons that you could pin on yourself.
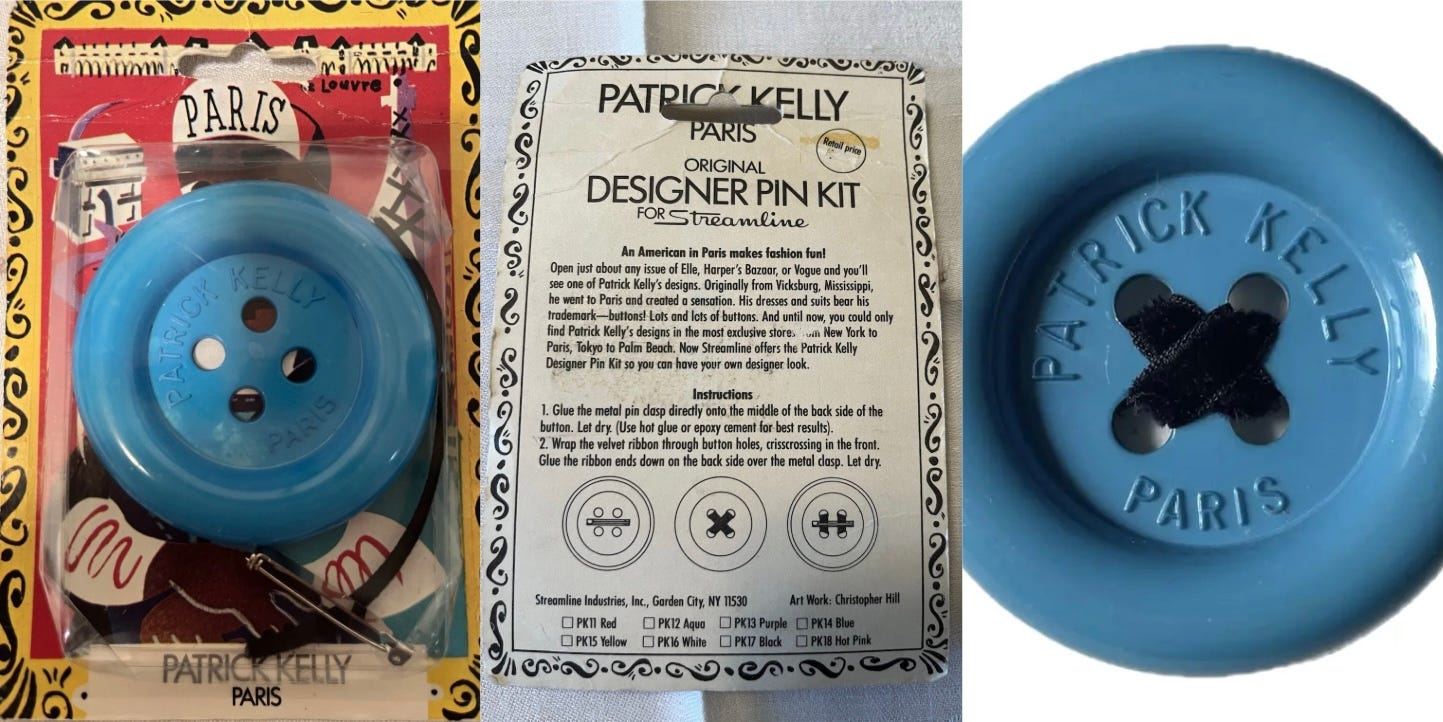
This workaround avoided duties placed on embellished garments imported into the United States. With tariffs affecting so many designers today, I wonder if this is still an option.

That same promise to accessibility extended beyond his collections. Vogue Patterns also offered his designs. Pattern 2077 might be my favorite: a peplum jacket with a back bow!
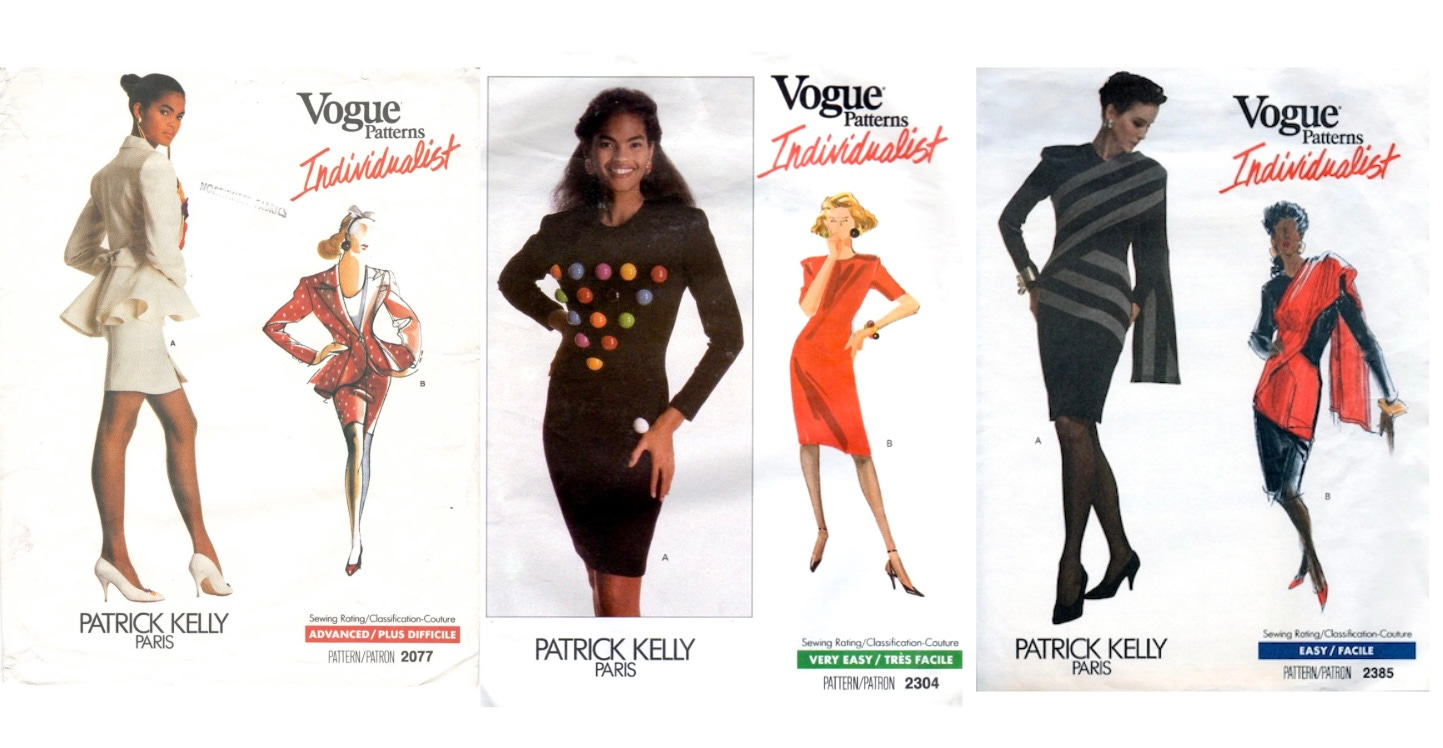
I also adore that he modeled in his own ad campaigns.

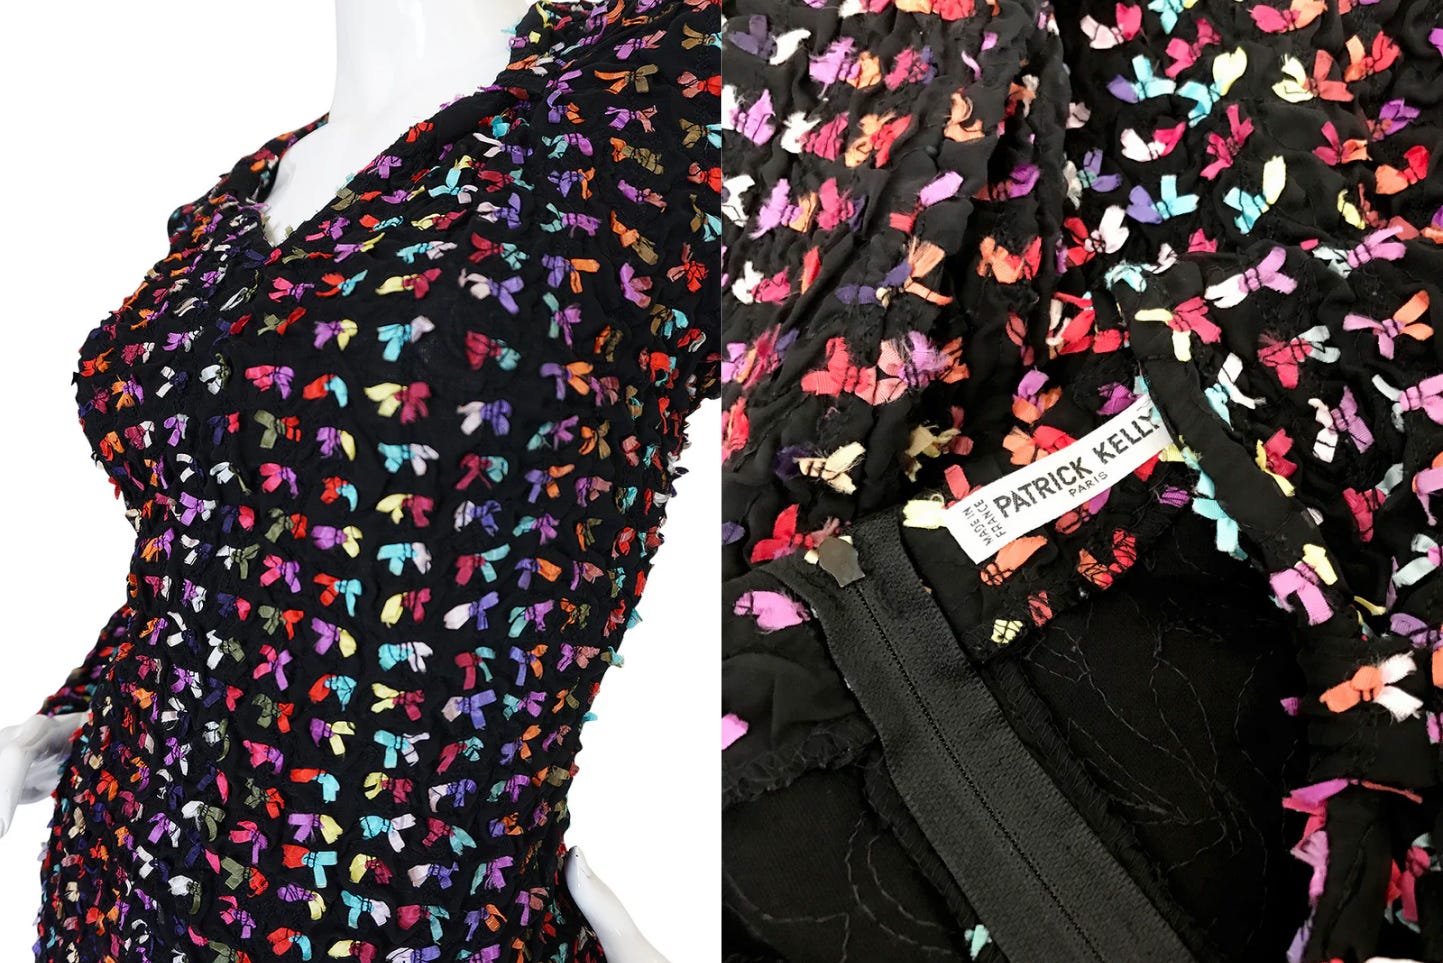
Shrimpton Couture featured this dress from Patrick’s Fall/Winter 1988 collection and shared the following: “For this collection he spoofed on the work of Coco Chanel, something he was known for and did often with a variety of designers. The collection was called "Miss CouCou" and the dress also showcases another of his signatures - the use of the bow. Each bow you see is hand sewn into place and the dress is literally covered in bows in all of the colors of the rainbow.”
On New Year’s Day in 1990, Patrick’s life was tragically cut short. He was just 35 when he died from AIDS-related complications.
Watch Patrick Kelly: The American in Paris

Patrick Kelly’s One-Seam Coat
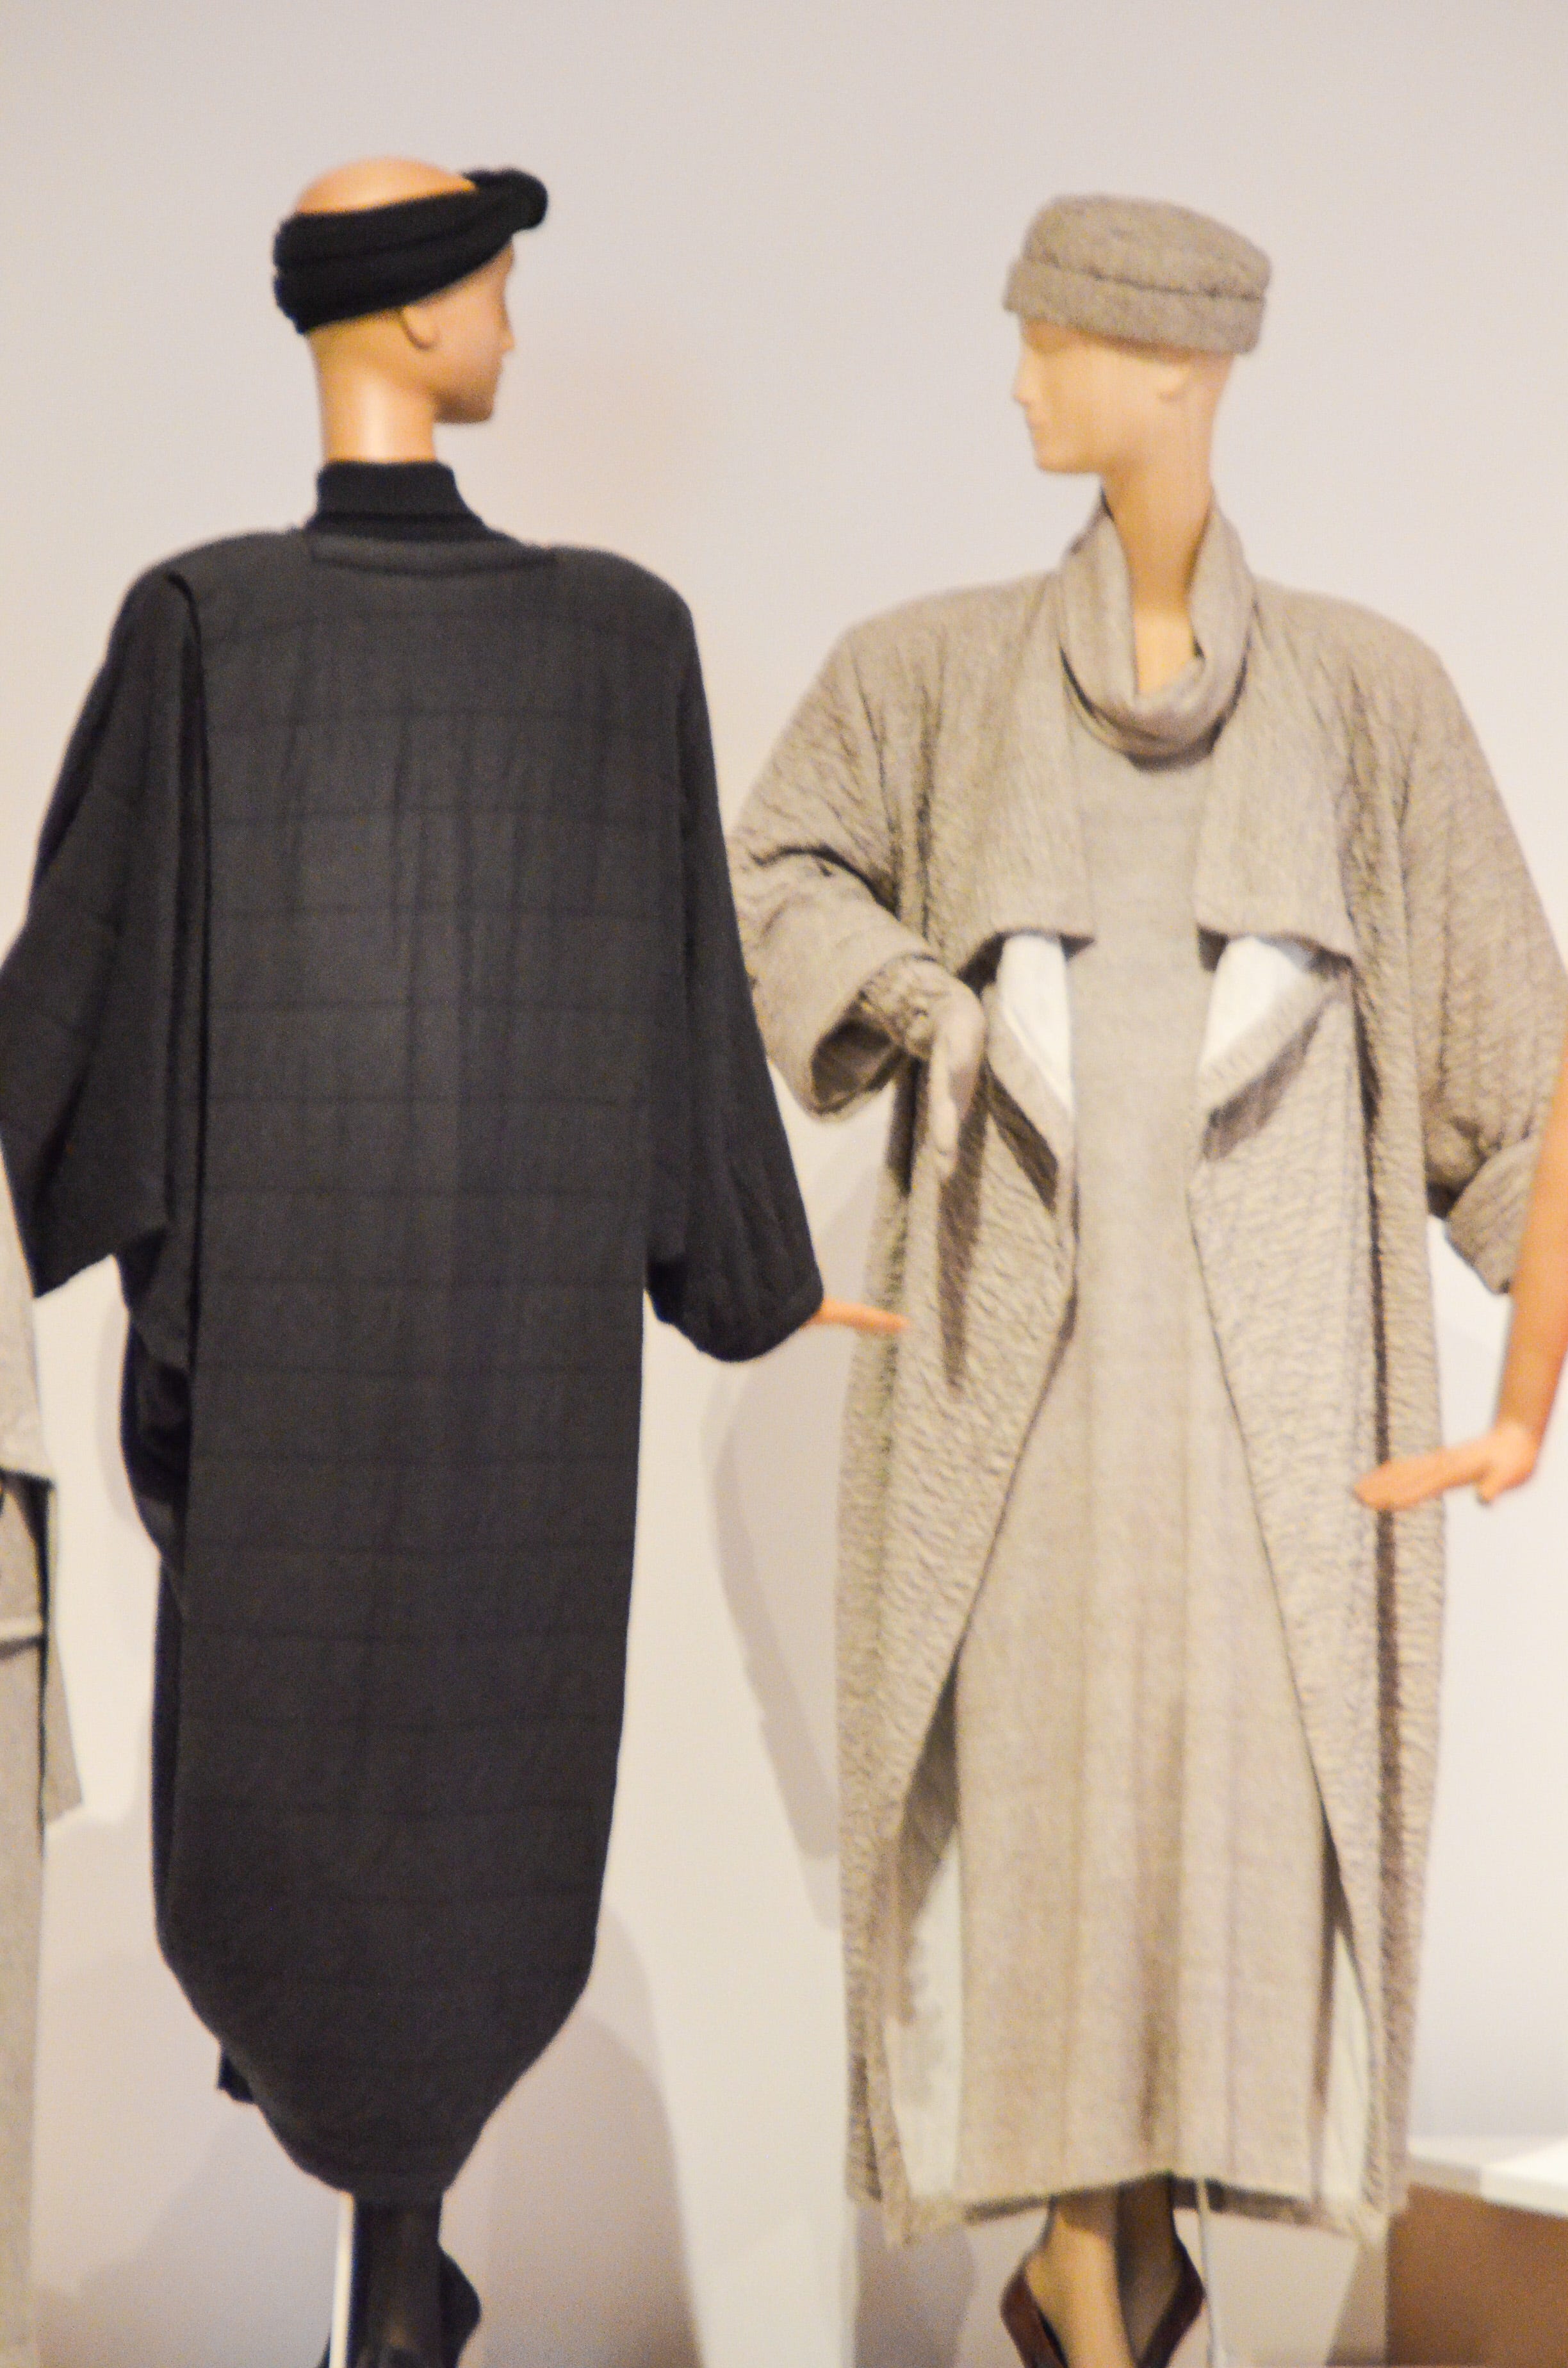
Paul Poiret introduced his one-seam coat in 1919, Cristóbal Balenciaga in 1961, and Issey Miyake in 1976. Patrick, too, created his version. A study in minimal cutting and economy of line, his one-seam coat became a staple of his collections.
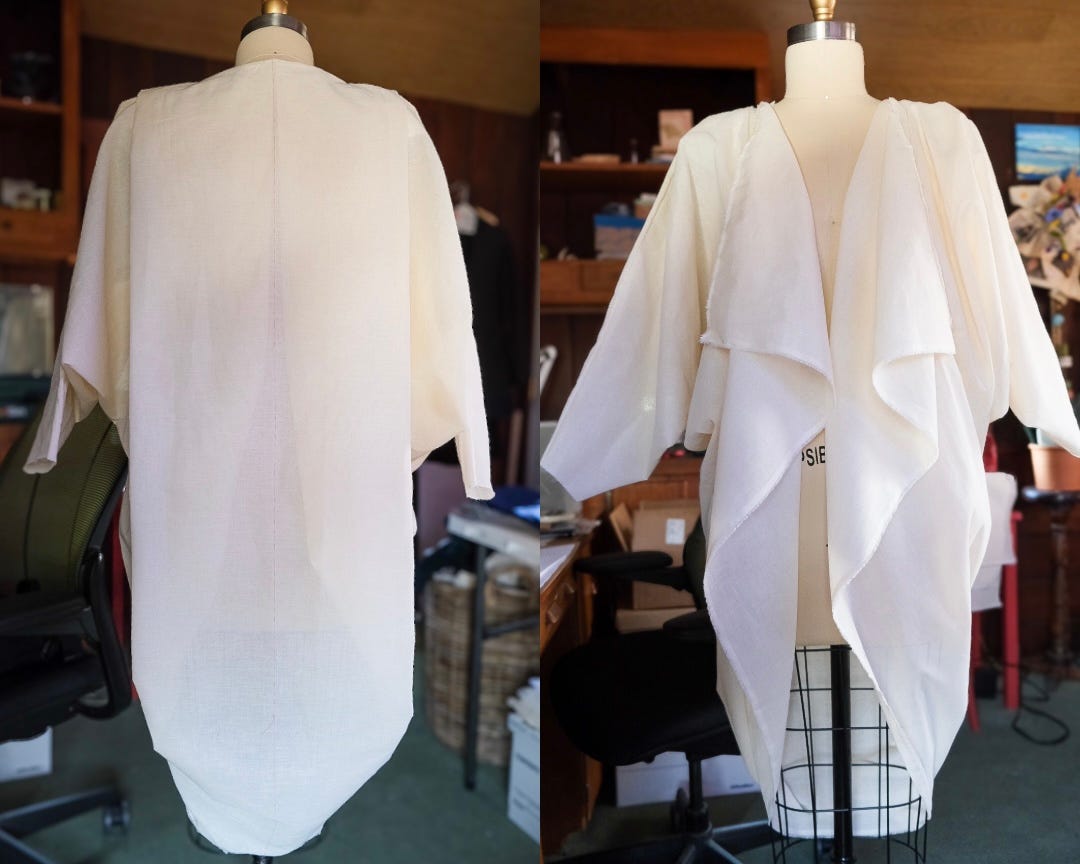
The coat shown here is the same design he sold on the sidewalks of Paris in 1984.
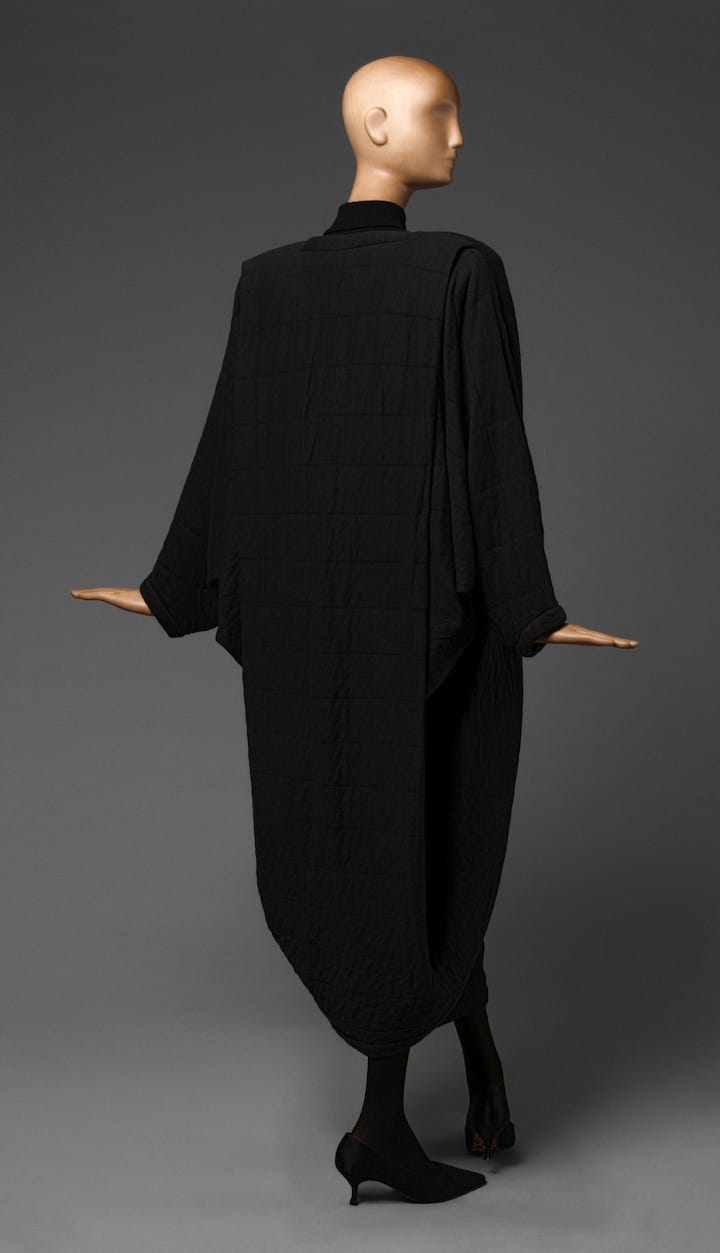
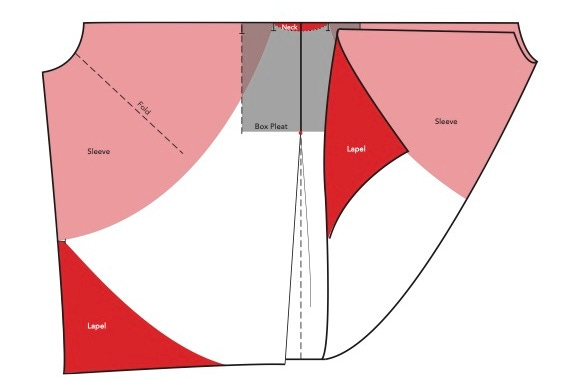
The Philadelphia Museum of Art, as part of the Patrick Kelly: Runway of Love exhibit in 2014, shared the pattern for his origami-style cocoon coat. Cut in a quilted cotton knit, it has a simple revers opening, inverted pleat in the back, and batwing sleeves formed by the shoulder seams.
Measurements aren’t given, and I think that’s good. You can tailor the coat and explore your own approach. I made a muslin toile, but a soft fabric with a drapey weight that truly cocoons around you would be lovely.
Here’s how I worked with the pattern and put it together, including:
Calculating Fabric Yardage
Making the Inverted Pleat
Determining Sleeve Length
Sewing the Coat
Have fun, enjoy, and if you make one, please share! I’d love to see your coat!

Download the Pattern
Fabric Yardage
The coat is cut on the crossgrain, which means the coat’s length will be the fabric’s width.
Patrick’s coat is long on the mannequin. So I guesstimated that a 60-inch-wide fabric was used.
Looking at the proportions, the pattern appears to double the fabric width to give you the cut length. (Patrick worked out his first version with a napkin, so maybe that helps visualize.) 60 inches doubled is 120 inches. Divide by 36 inches to get yardage, and you’d need approximately 3 1/3 yards for the coat with a 60-inch-wide fabric.

I used 45-inch-wide muslin and cut 90 inches, which gives a shorter coat and shorter sleeves.
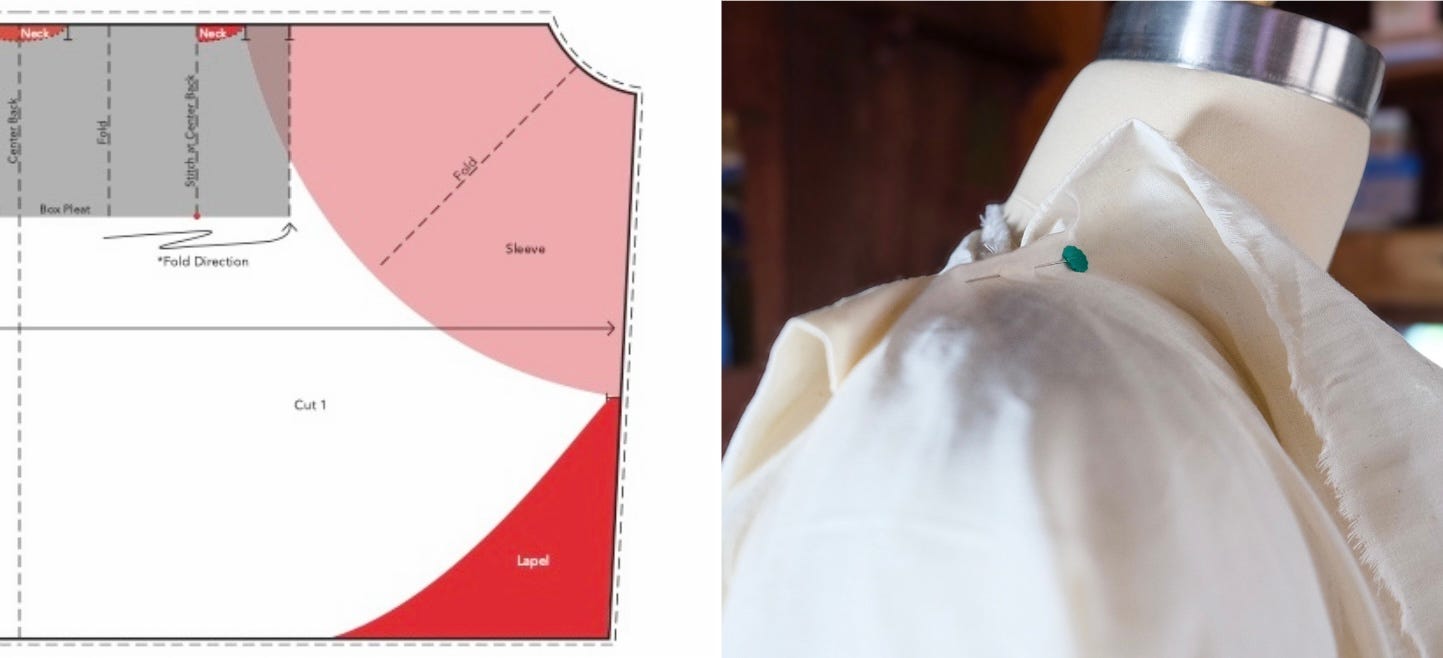
As the pattern shows, the sleeve openings are cut out. I chose to cut the sleeve openings after working out the back pleat and sleeve length. It’s also not a perfect rectangle. I left mine as a rectangle with straight sides. (More on this farther down.)
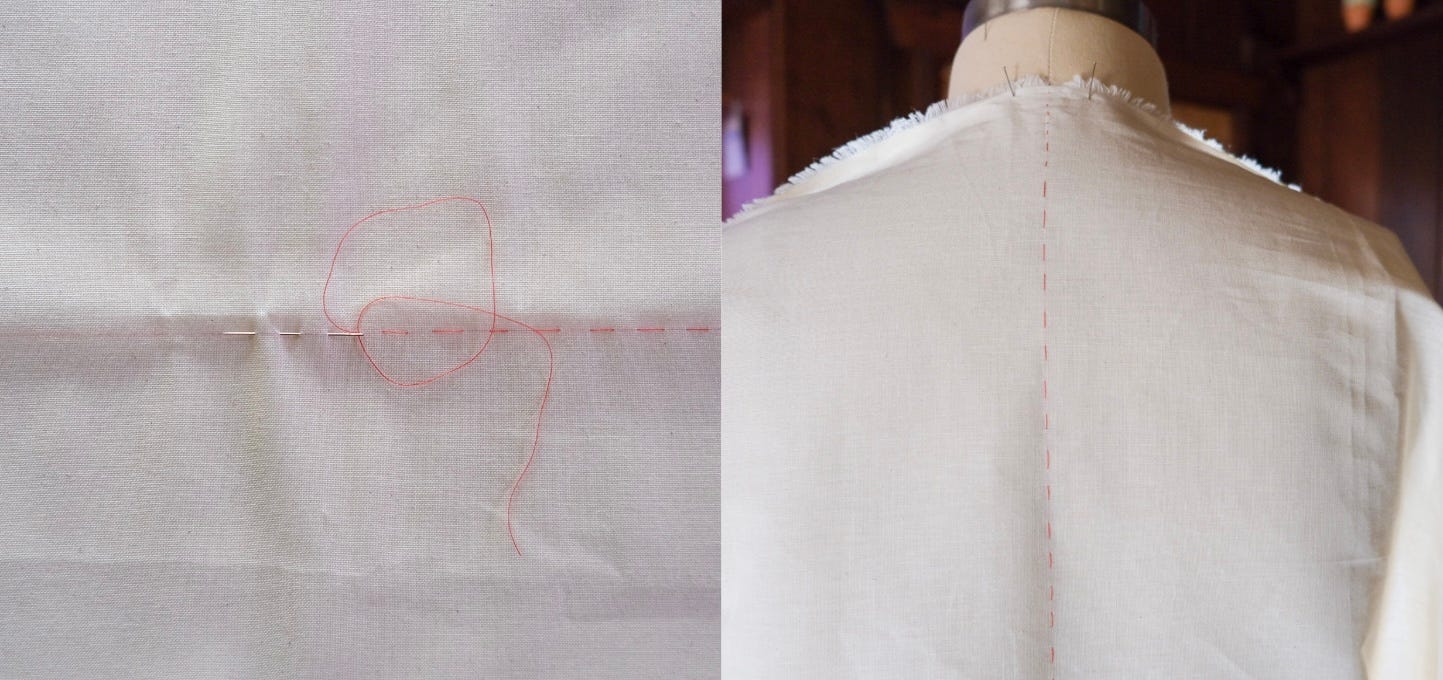
To prep, I ran a basting down the center of the yardage to create a visual marker that will align with the center back to keep the coat symmetrical and balanced as I sew and fit.
Shoulder-to-Shoulder Back Pleat
Start with the inverted pleat and everything else follows from here.
On Patrick’s original, the pleat is shoulder to shoulder. (Also, the pleat looks a bit lifted. So, I added shoulder pads to my form. A child of the 80s, I eschewed shoulder pads, but now I love them!)
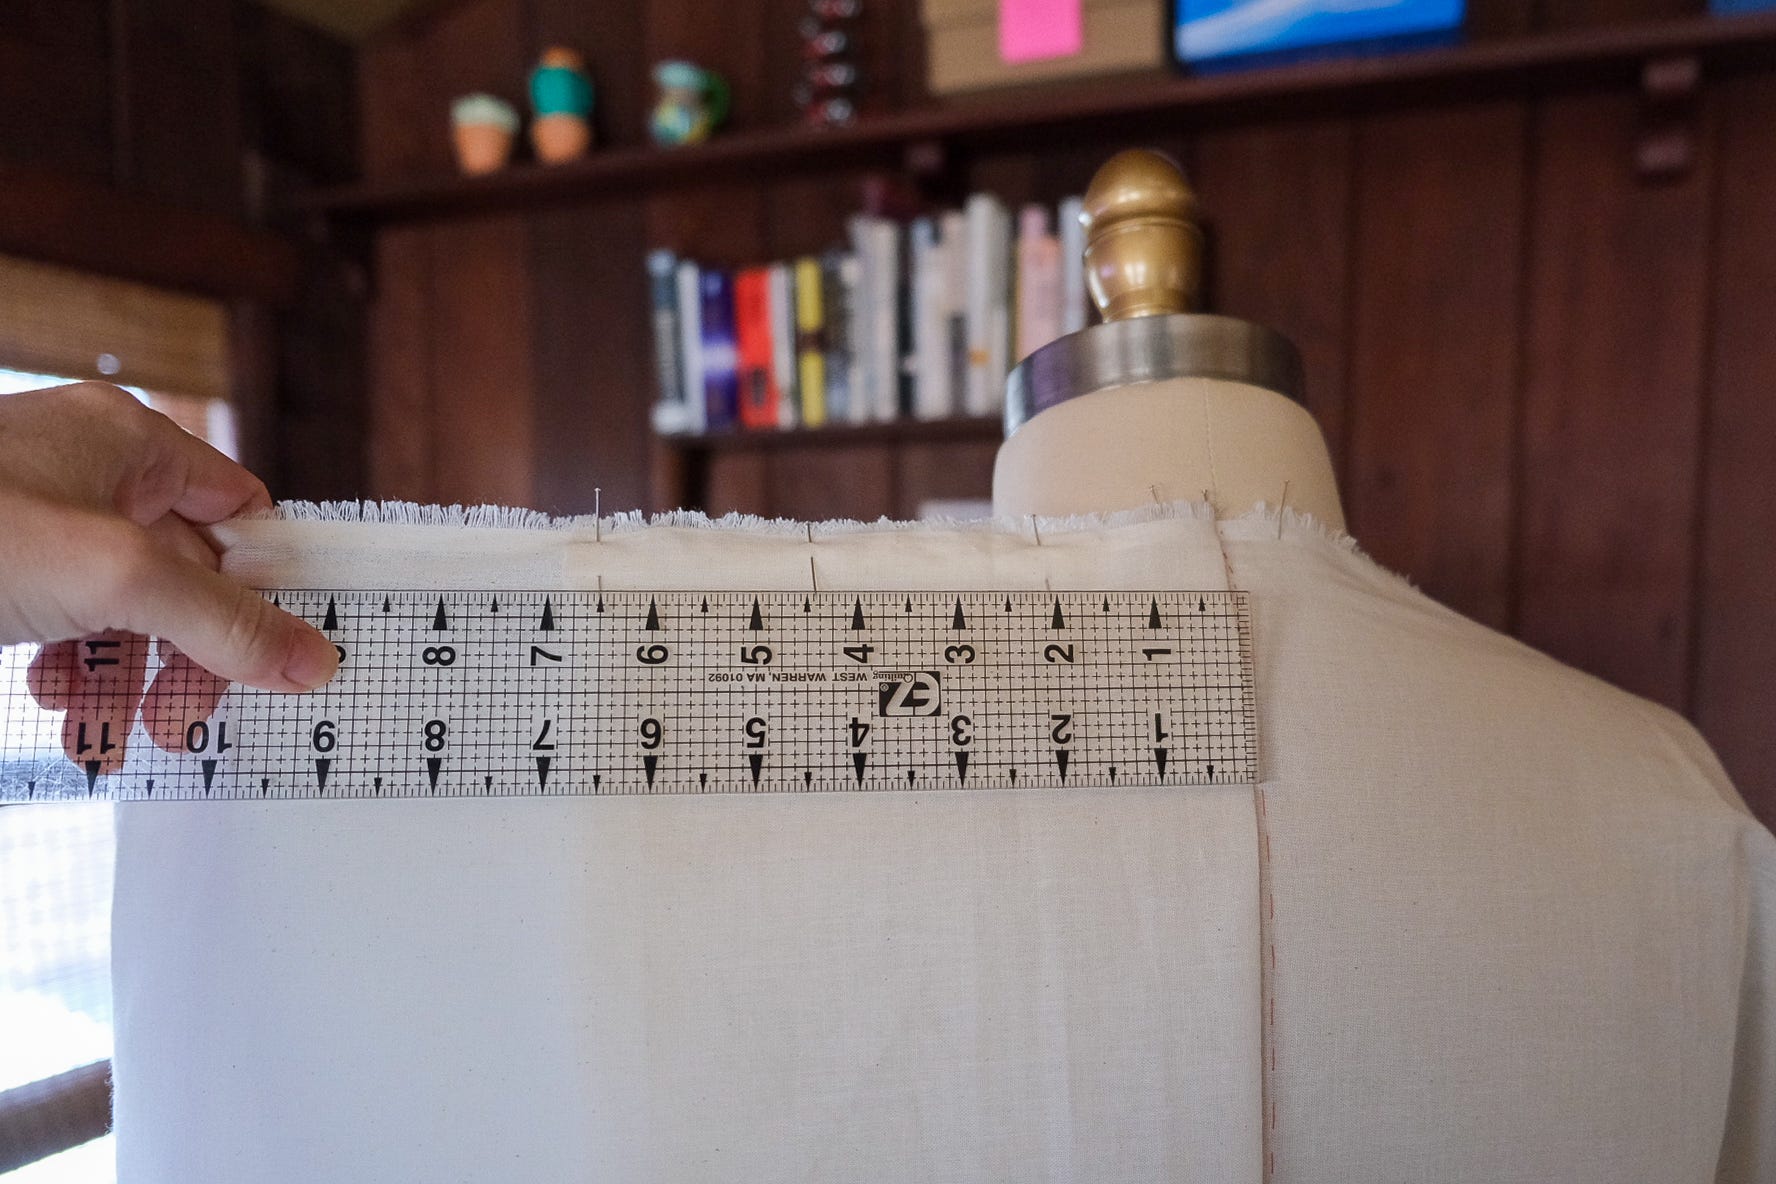
Use your shoulder measurement (the straight distance across your back from outer shoulder bone to outer shoulder bone, or seam to seam if referencing a garment), to determine the pleat width.
To do this, take your shoulder-to-shoulder measurement, divide it in half, and multiply by three for each side. For example, if your shoulders measure 14 inches across, you’ll need about 21 inches on each side to form the pleat (14 ÷ 2 × 3).
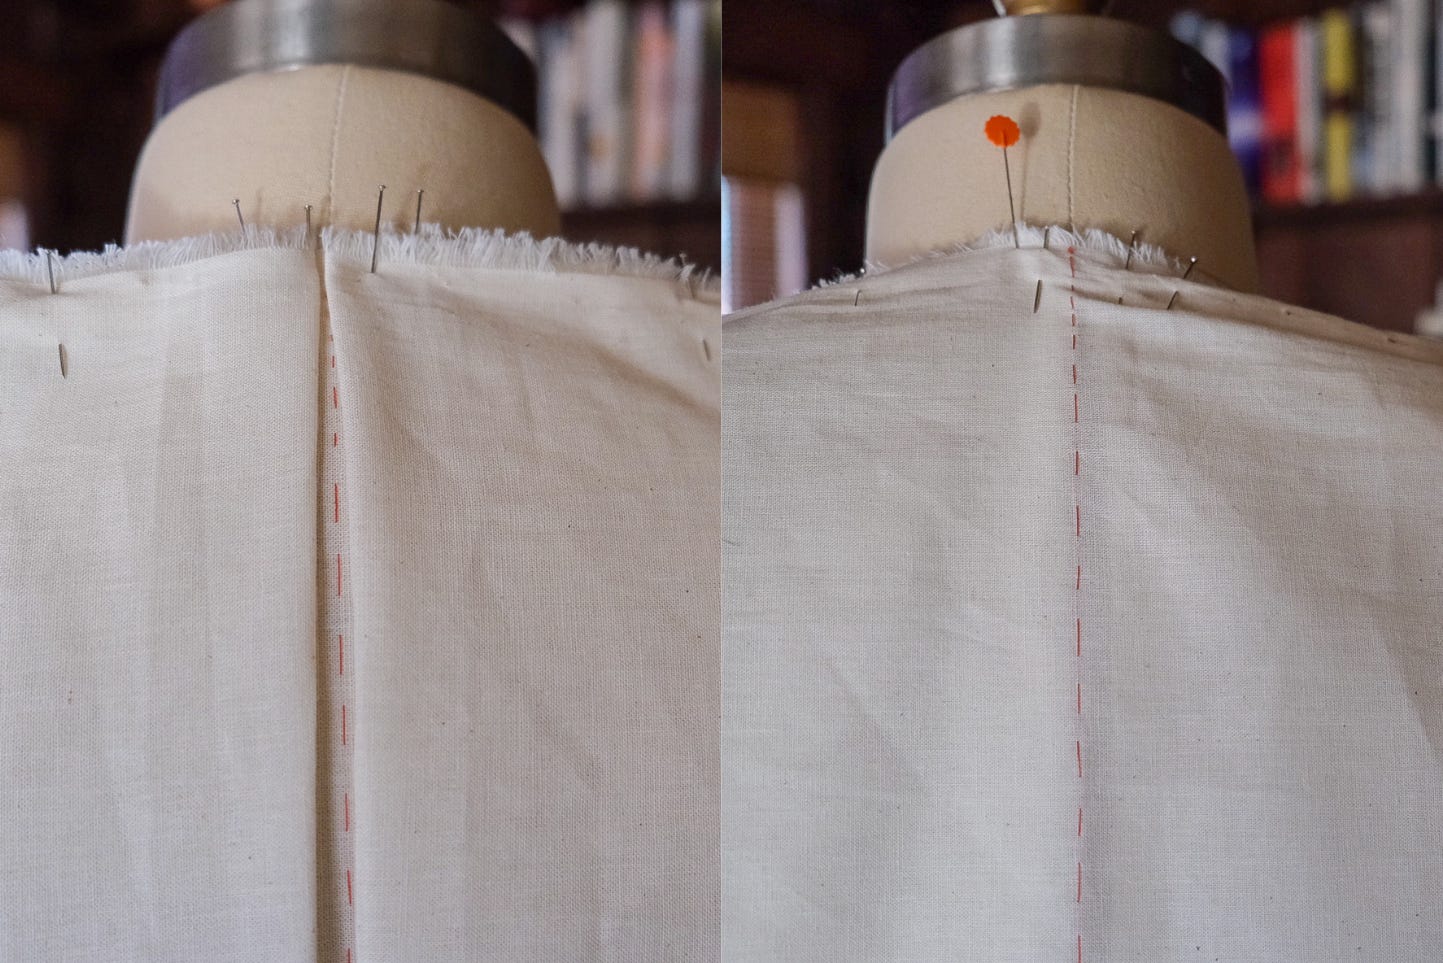
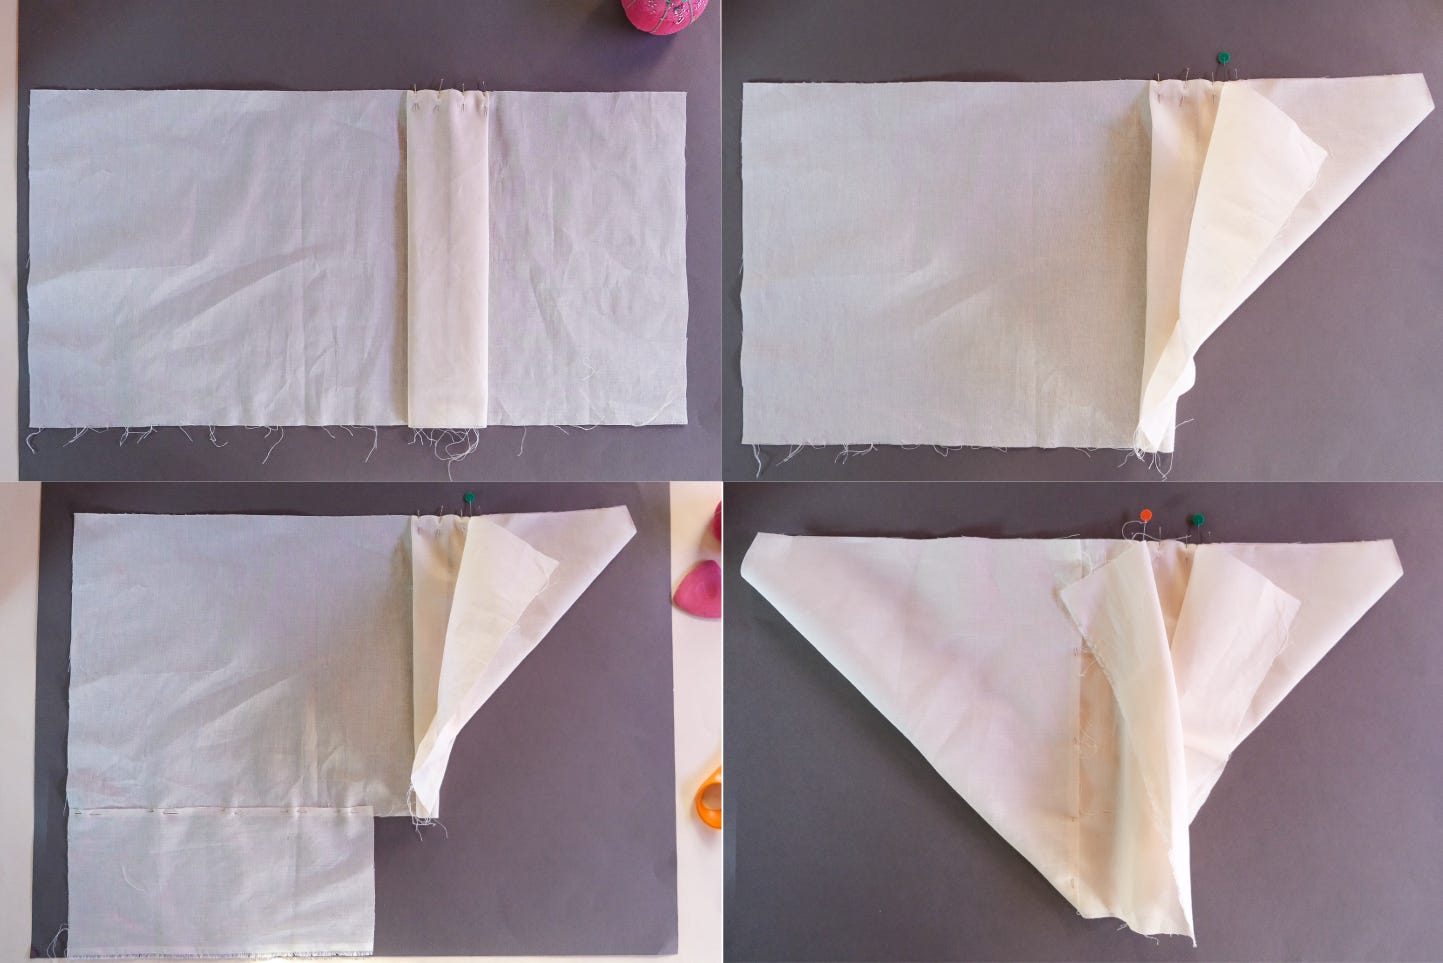
Patrick used an inverted pleat for a clean back with fullness hidden inside the coat, but you can do either a box pleat or an inverted pleat. Your call!
I found it easiest to pin a box pleat, flip the fabric over to get my inverted pleat.
Sleeve Length
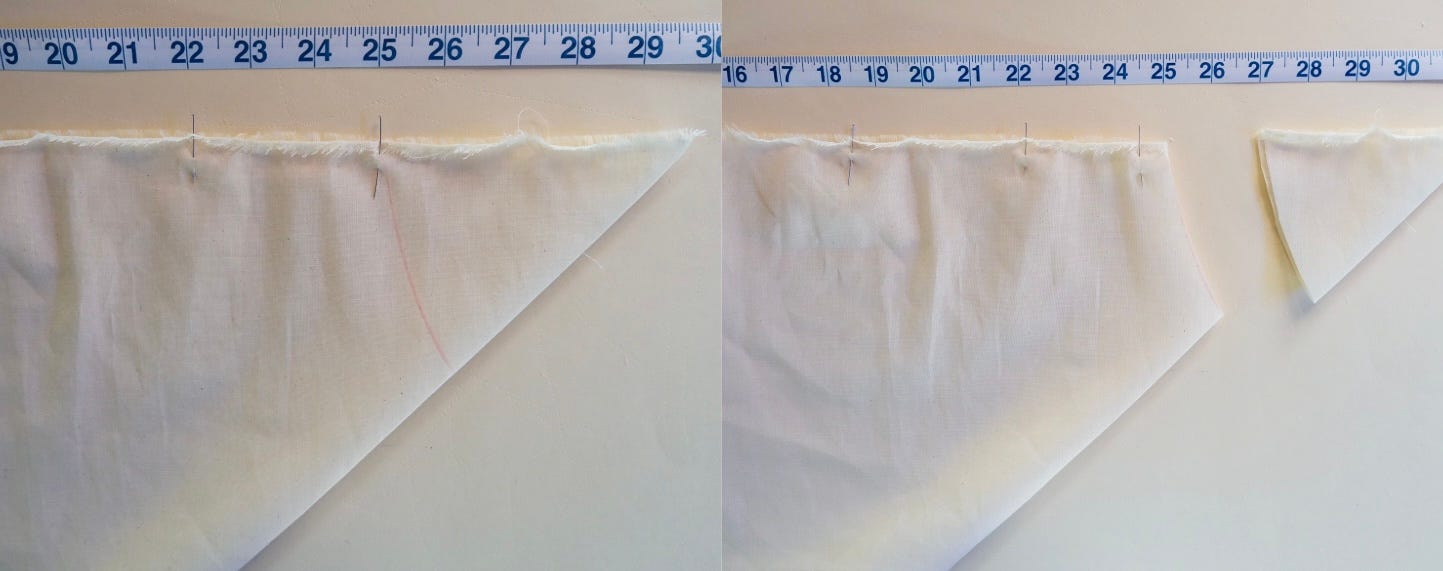
After the pleat comes the sleeves. The sides fold up to form both the shoulder and sleeve seam. Looking at the pattern, you’ll see notches on either side of the back neck. This is where your sleeve seam starts.
To get my distance between the notches, I measured from my shoulder at the neck, along the back neckline, to the opposite shoulder.
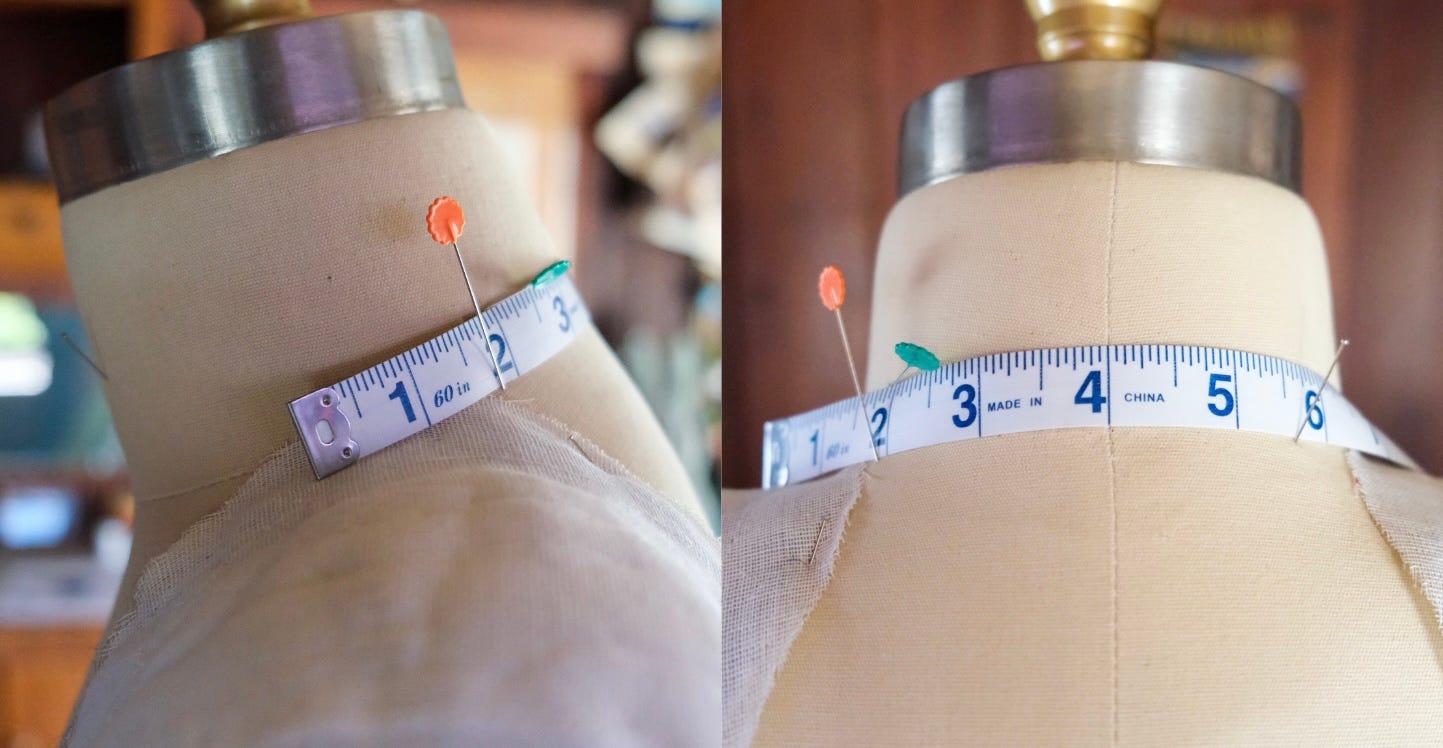
…and transferred that measurement to the coat.

Next, think origami. Bring the corner up so it aligns with the top edge of the shoulder seam along the selvage, pinning to your neck notch.
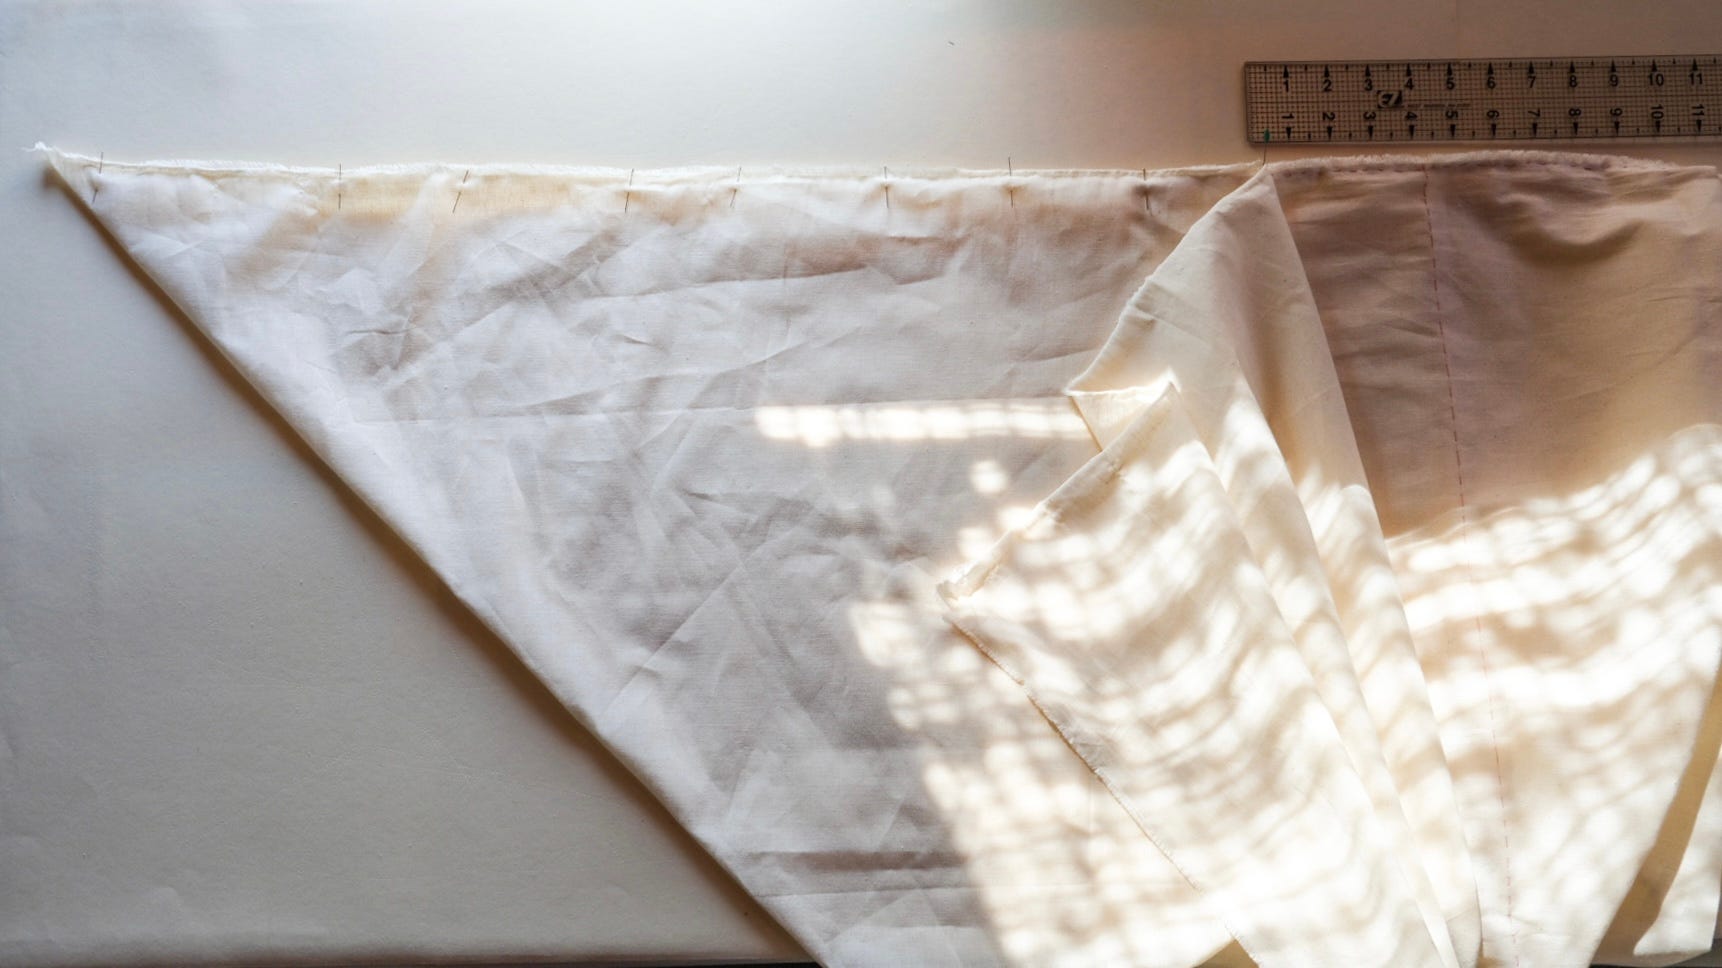
Determine your sleeve length plus shoulder, then measure and mark that distance starting at the neck notch, and cut your sleeve openings.
Press your seams, flip it right side out, and see how it fits!
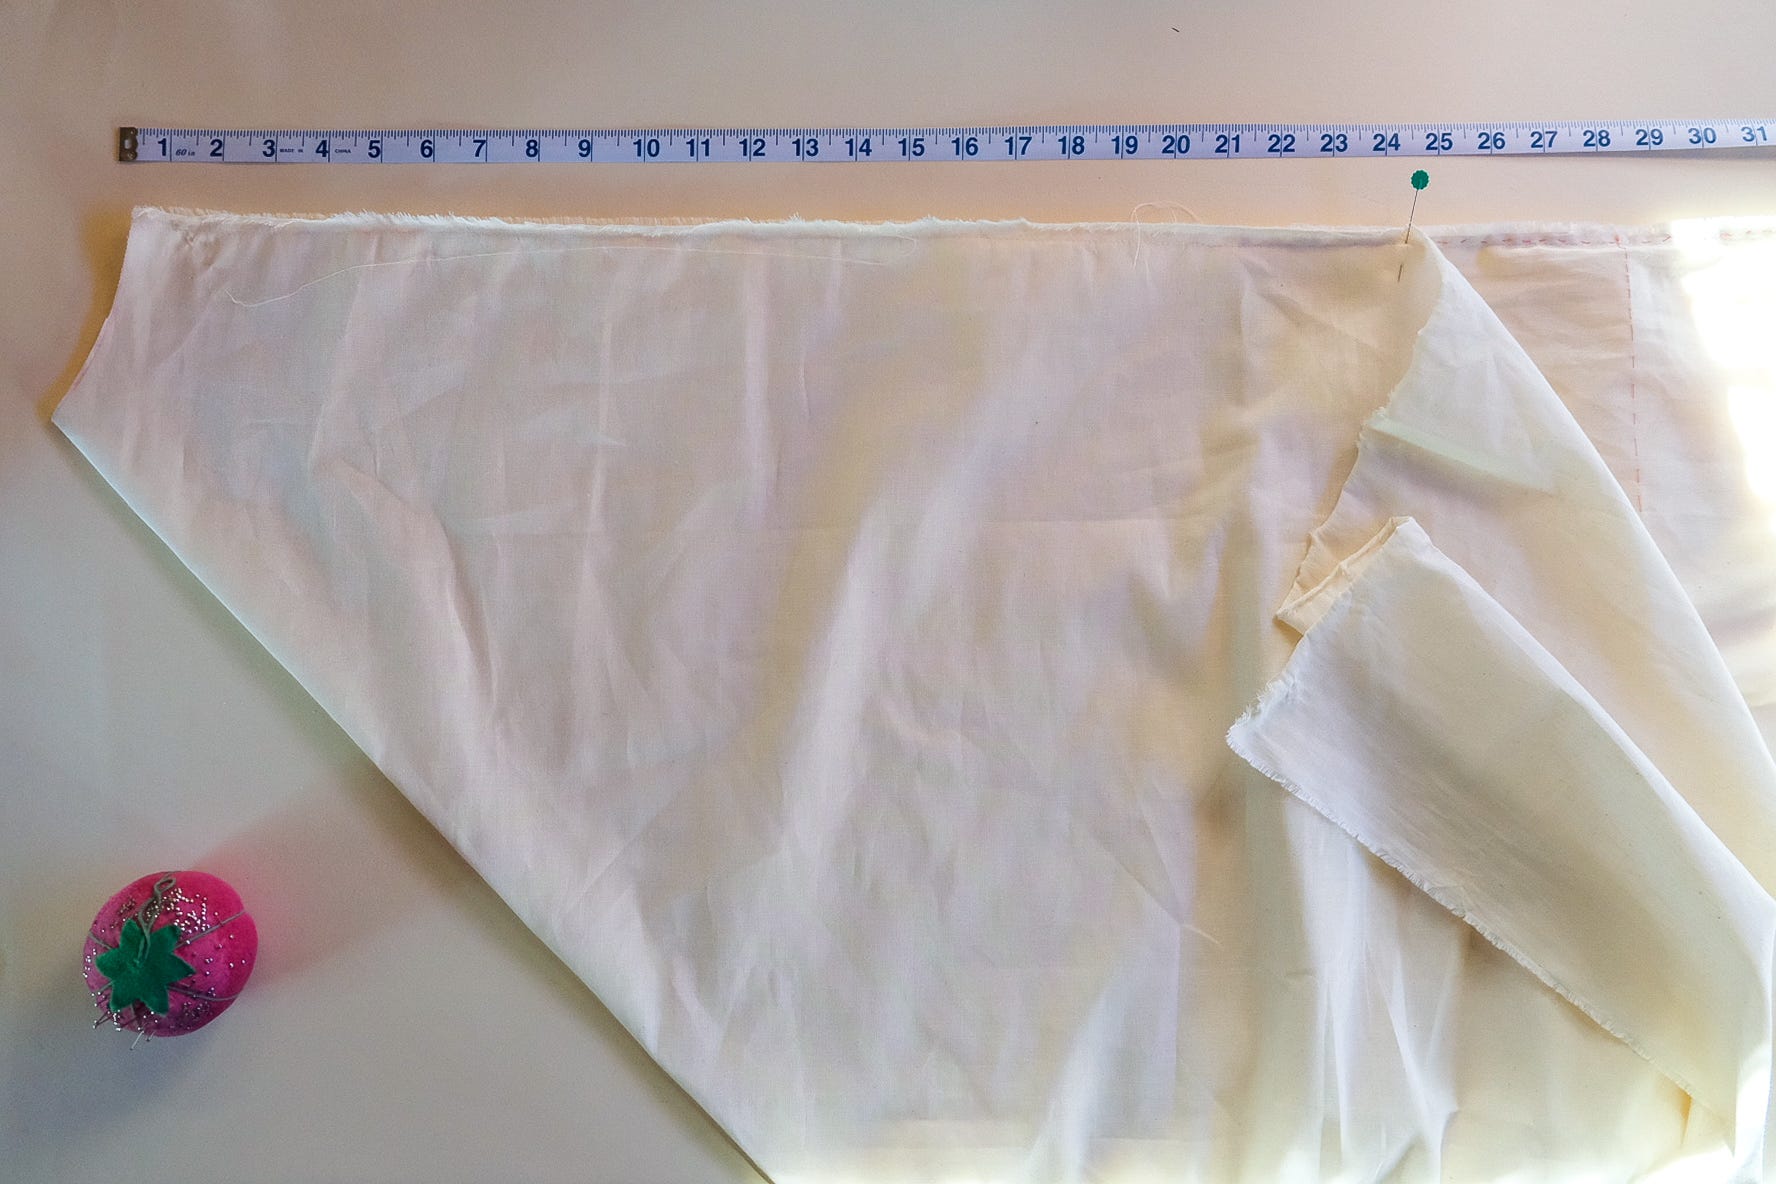
Want Longer Sleeves? Increase Fabric Width at the Start
The wider your fabric, the longer your sleeves, and the longer your coat.
I used a 45-inch-wide fabric, but if you begin with a 60-inch-wide fabric, you’ll gain sleeve length when you bring the corners up to make your seams.
Remember to keep proportions in mind for this crossgrain-cut coat: longer sleeves mean a longer coat length as well.
Here’s a quick (and rough!) small scale mockup to show how increasing the fabric size gives you longer sleeves.
A few more notes:
Selvage: Consider trimming off the selvage, or clipping into it at 1-inch intervals to release any tension.
Tapering: The pattern shows tapering along the sides, but I kept my version as a true rectangle. Adjusting these lines slightly changes how the coat will hang on the body. It’s something to keep in mind, and to experiment with!
If you’re unsure about tapering, try pinching out from zero at the shoulder to about an inch at the lapel point to see how it makes your coat look and feel.

Construction Sequence
To summarize:
Fold, baste, and sew the back pleat.
Mark your neckline notches on the coat.
Sew the sleeve by:
Bring corner up to align with top edge.
Mark sleeve+shoulder length, starting at neck notch.
Cut sleeve opening.
Sew seam.
Finish the lapel front and arm openings.
For finishing the sleeve opening, you could apply binding, create facings, or add a ribbed cuff! For the lapel front, try a simple folded hem or even a fringe edge, depending on your fabric.
Use Patrick’s coat as inspiration, and put your own spin on it!
In the spirit of Patrick, I hope this edition of Classic Cool Sewing made you smile!
~Jane


I love the drama of this coat with the ease of less than full length sleeves and no bulky front closure.
What an intriguing design! Thank you for introducing us to Patrick Kelly. This was a lovely and inspiring article to start my Saturday. My thoughts are churning on the possibilities with this coat design!