


Reverse Engineering a Vintage Evening Jacket Part 1
Deconstructing the design and drafting the pattern.

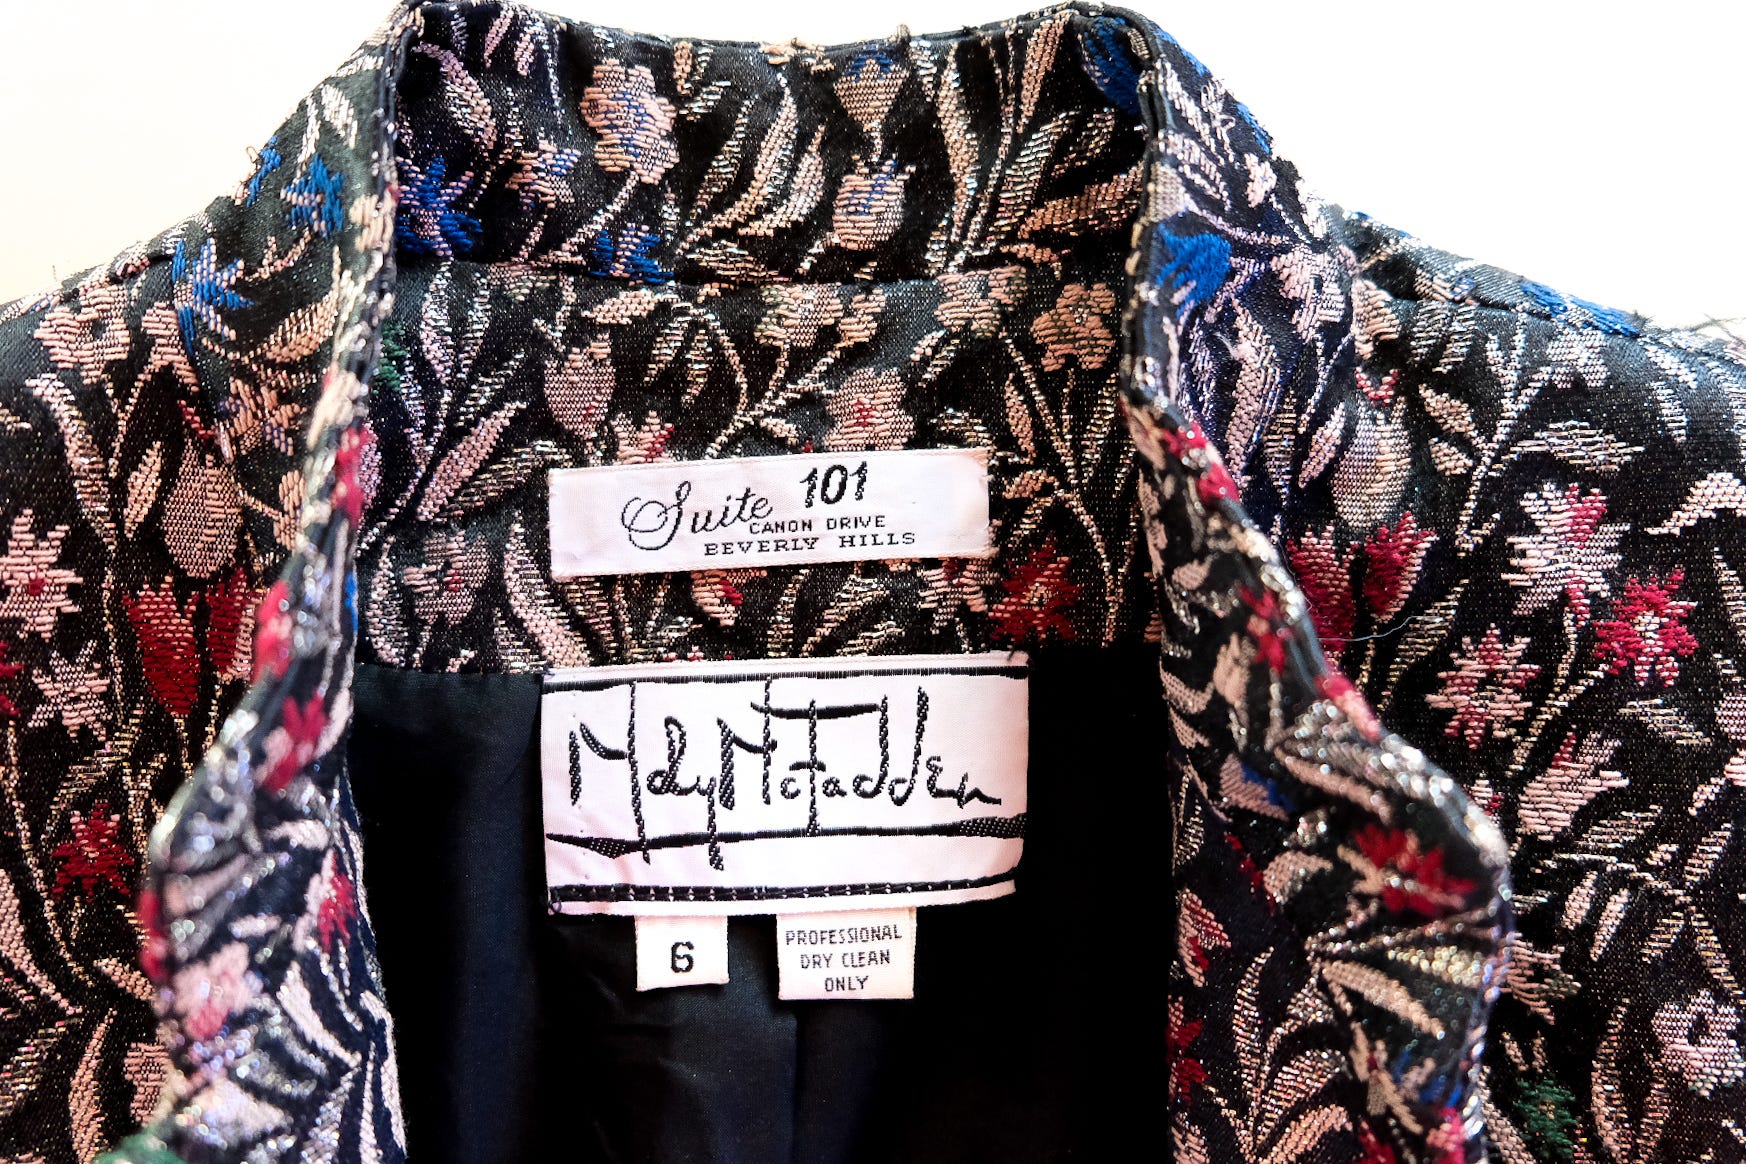
This letter is the first in a series where I’ll reverse-engineer a vintage Mary McFadden evening jacket.
Mary McFadden was an American designer known for her distinctive pleated fabric and ancient-culture-inspired designs. She launched her sculptural label in the mid-1970s, with her signature Marii pleated fabric—an Australian poly charmeuse, hand-dyed in Japan and machine-pressed in the U.S. She insisted it had to “fall like liquid gold on the body.”
But this letter isn’t about pleats or Mary McFadden, though it begins with one of her vintage evening jackets. I first discovered her designs on The RealReal, hunting for “as is” treasures. These pieces are perfect for studying pattern shapes, fit, and construction.
Since the jacket didn’t fit, I thought it would be fun to reverse engineer it—take it apart completely, grade the pattern for size and fit, reimagine the jacket in new fabrics and proportions, and sew it back together. Today, we’ll explore McFadden’s construction details and start drafting flat patterns from the pieces.
Fortunately, the fabric had pulls, so I didn’t feel too guilty about taking it apart—especially since I couldn’t wear it. It’s too small. I made the classic mistake of checking the size but not the actual measurements. You can’t do that with vintage.
Before we get started, a quick digression about finding your vintage fit.
Shrimpton Couture, who specializes in finding rare, museum-quality gowns, has a great Instagram story in which she shares in detail how to find your sizing with measuring tips.
Here’s the broad-stroke summary: Find a piece of clothing you already own that fits you really well and measure it. These measurements will be your base measurements for comparing other garments. If, for example, you’re measuring a sleeveless dress but need a sleeve measurement, find a garment with sleeves and measure that for a sleeve. The key? Don’t measure yourself—measure the garment.
Deconstructing the Jacket
There’s a language to sewing, and I so love the terms and vocabulary. This language is just as essential as the act of sewing itself—it helps us describe garments, highlight the details that make them unique, and guide how we construct them.
This Mary McFadden piece is a fully-lined, floral metallic jacquard evening jacket with a high-hip hem. It has a Mandarin collar, gathered puff sleeves, princess seams, a peplum-styled waist, and a lapped zipper at the center front.

And what I appreciate just as much are the hidden details—the ones you can’t see unless you look closely… or take it apart. This jacket also has four tiny fabric-covered snaps to hold the placket closed, interior strap holders to keep straps from slipping off the shoulders, and meticulous handwork: lots of whipstitching, catch stitching, and hand tacking. It also features carefully constructed shoulder pads and sleeve heads (both of which can be reused for the remake), plus a faced hem.
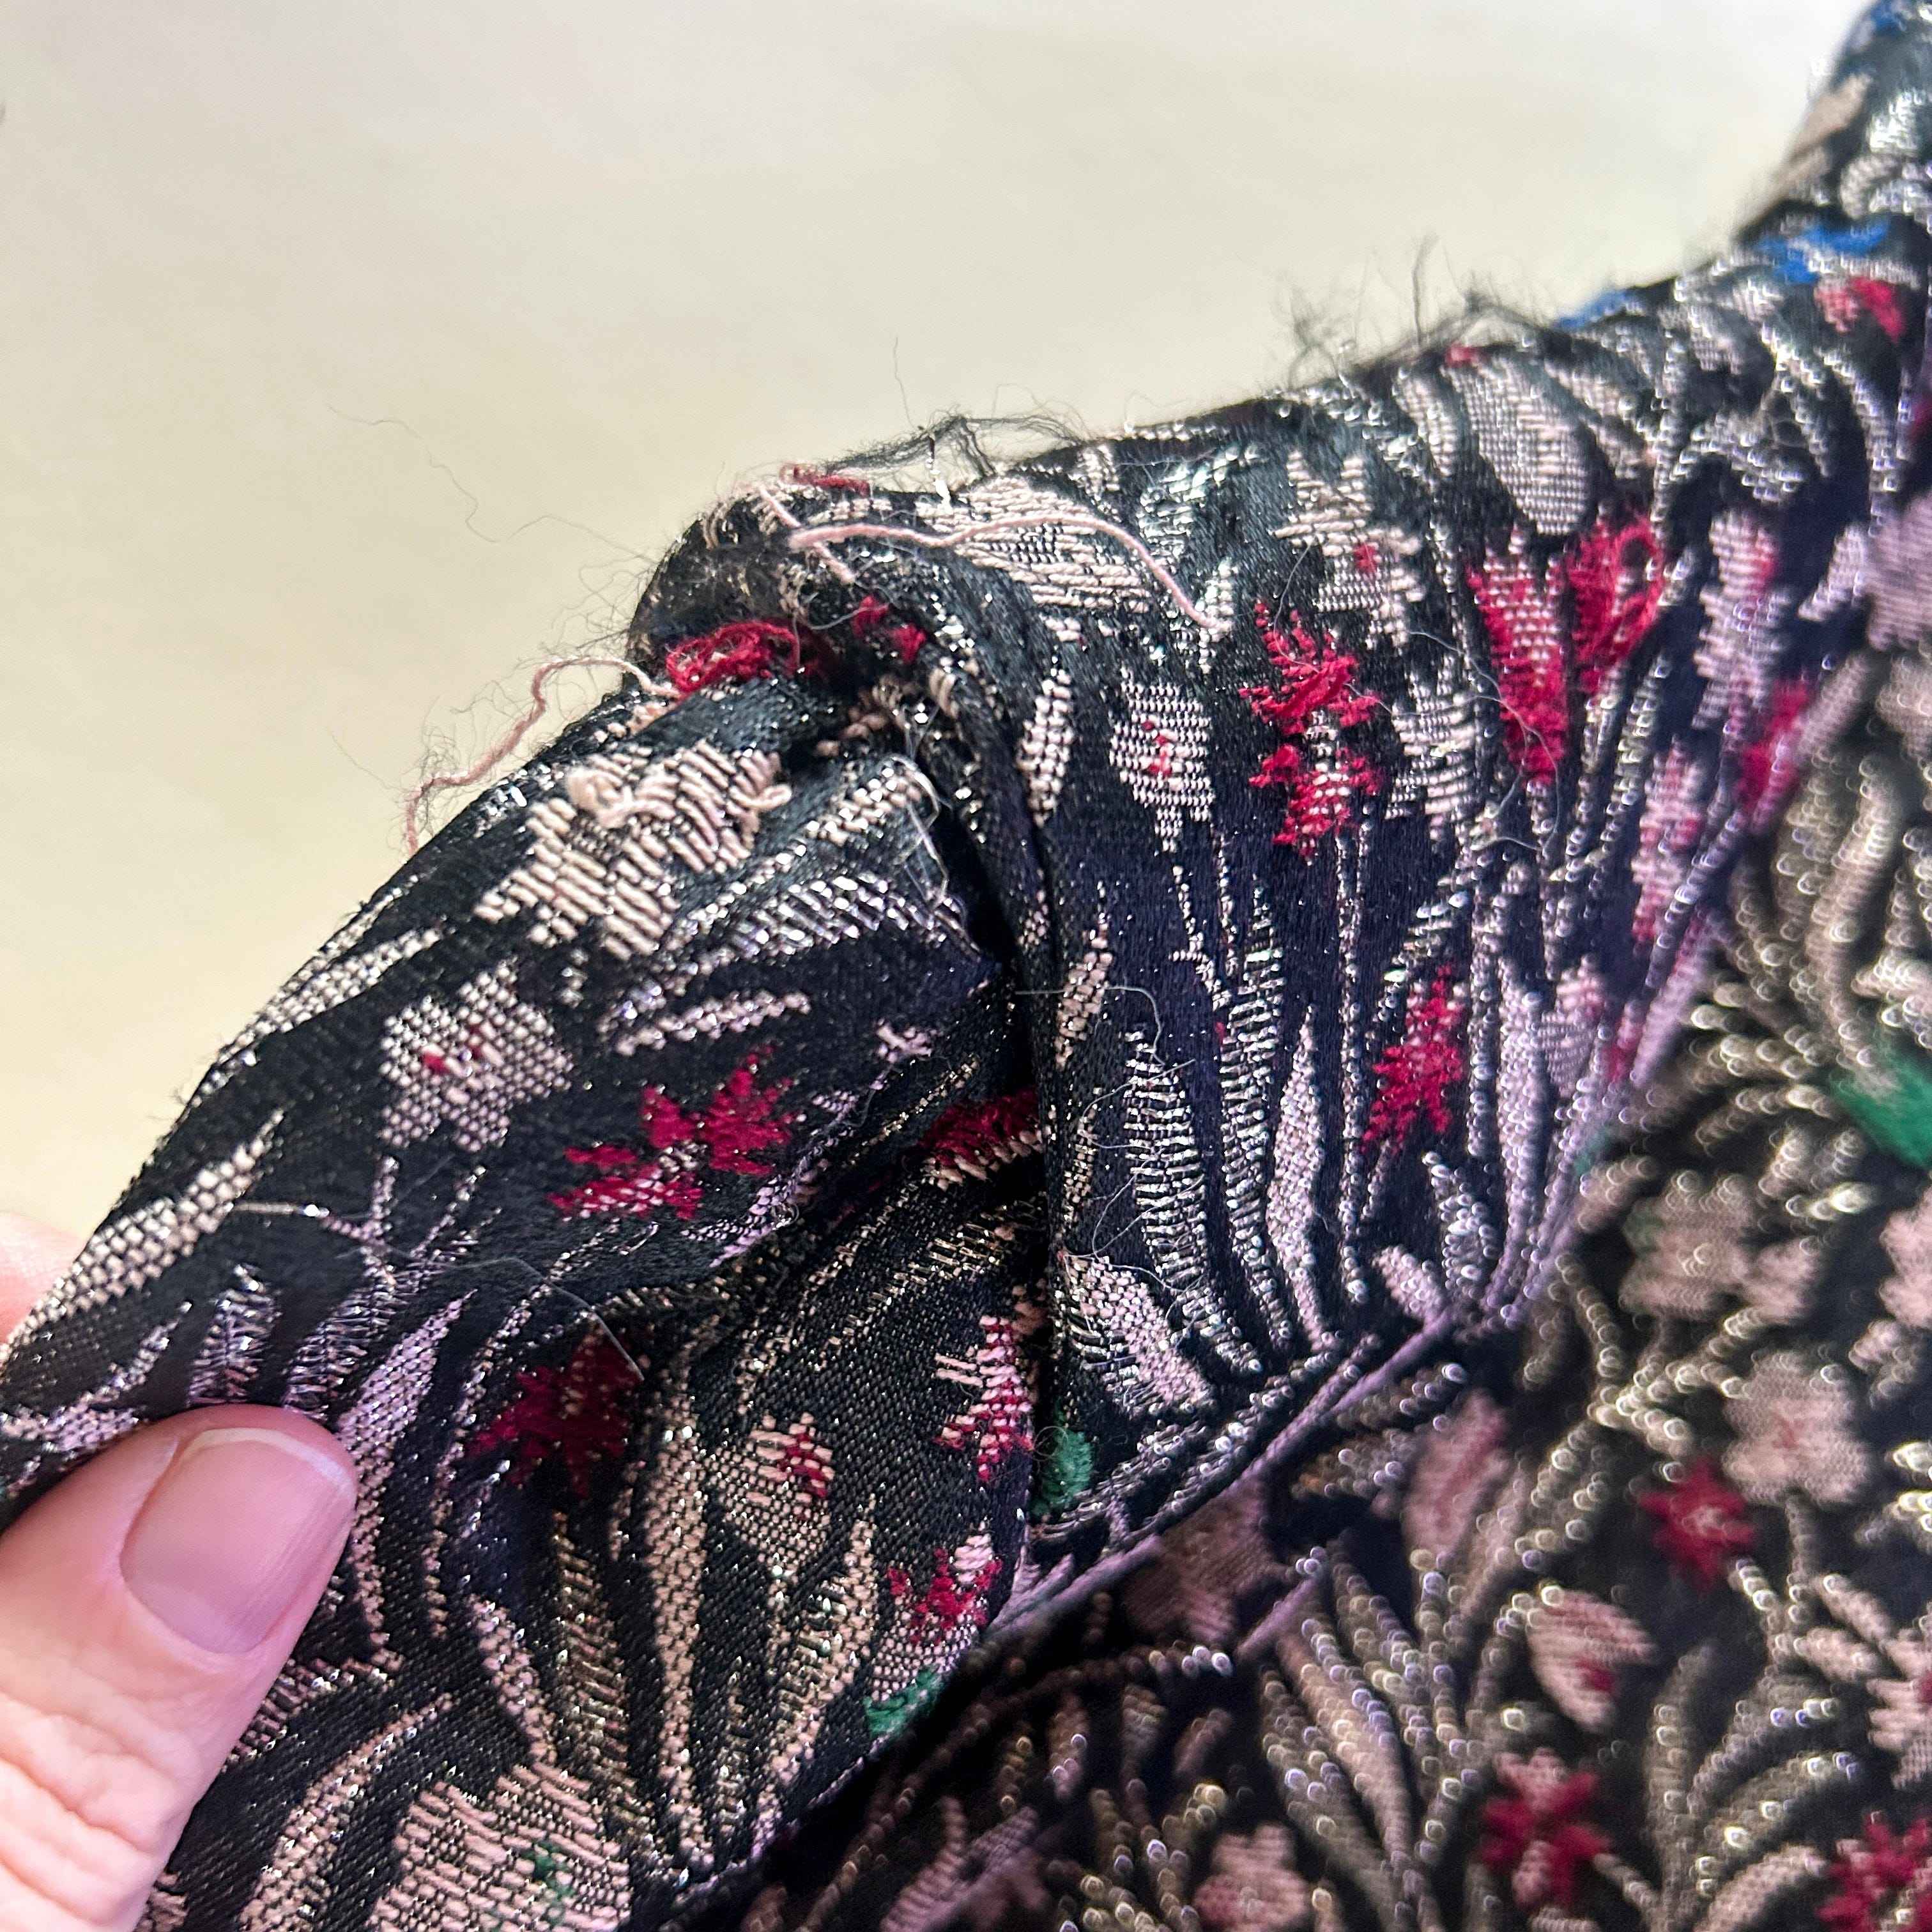
Phew! That’s a lot—and it’s not even everything. We’ll get into all the nitty-gritty when it’s time to reconstruct, but for now, here are a few photos of the interior.


There’s also a folded, crescent-shaped piece sewn between the sleeve cap and shoulder to create a lifted sleeve cap. I couldn’t find the name for this detail, so if you know, please message me! :)
A few tips if you’re deconstructing a garment.
Record measurements before starting to take the garment apart. You may need them for reference later!
There’s a sequence to sewing a garment, so just take it apart in reverse of how you’d construct it. If you’re not sure where to begin, start with the lining, then move to the sleeves, followed by the shoulder pads and hems. Let the garment guide you from there.
Take photos and maybe a few videos, too, especially if construction is complex.
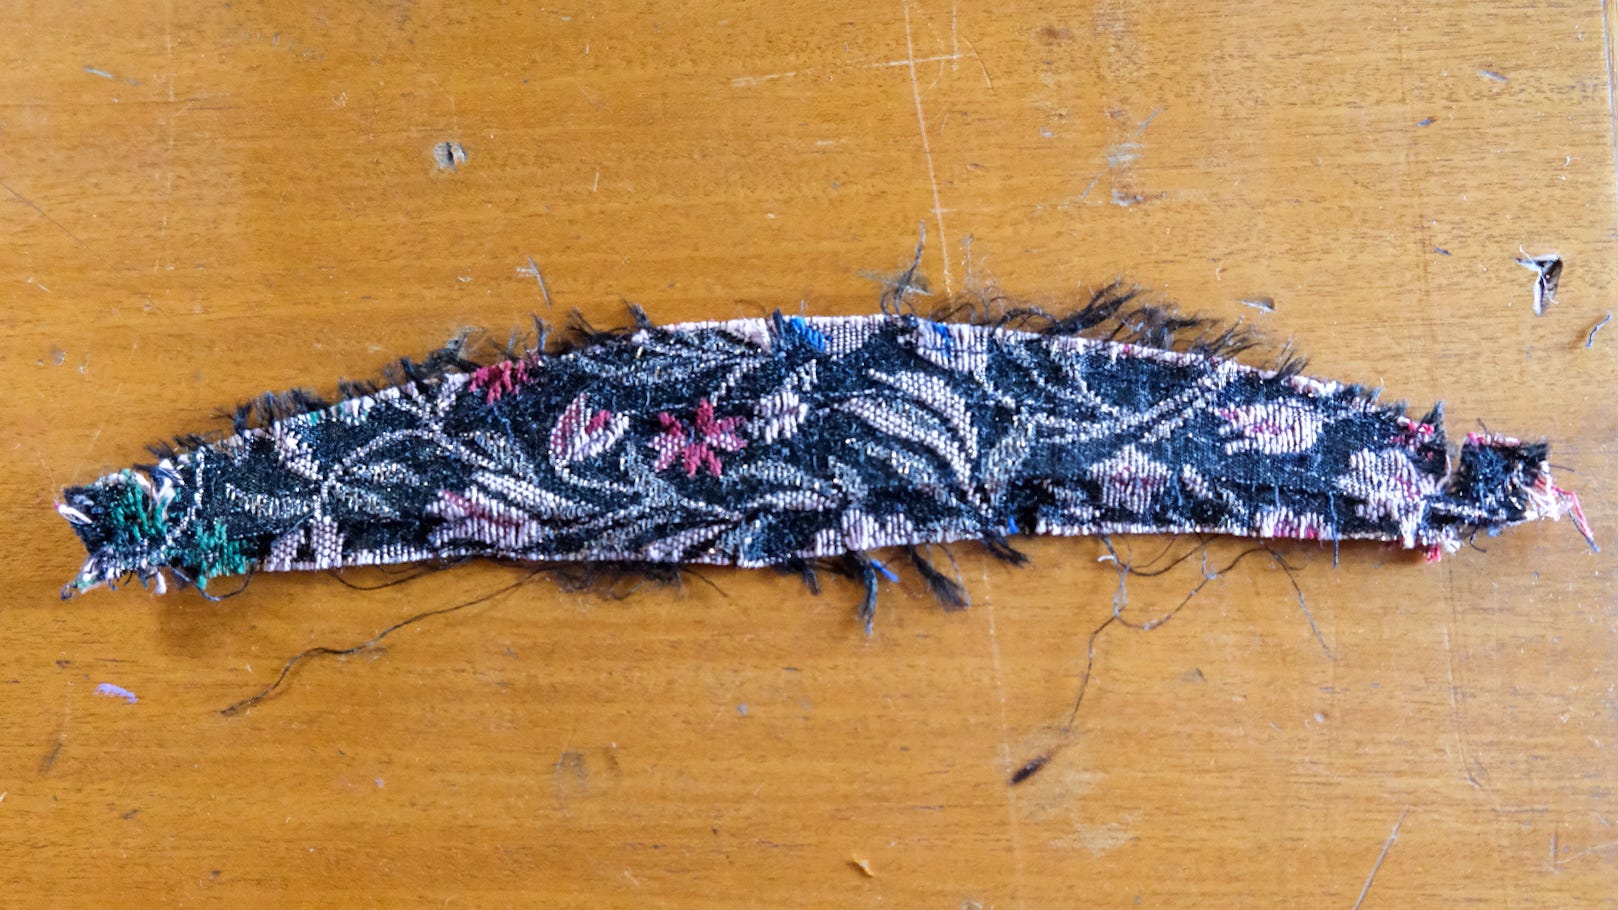
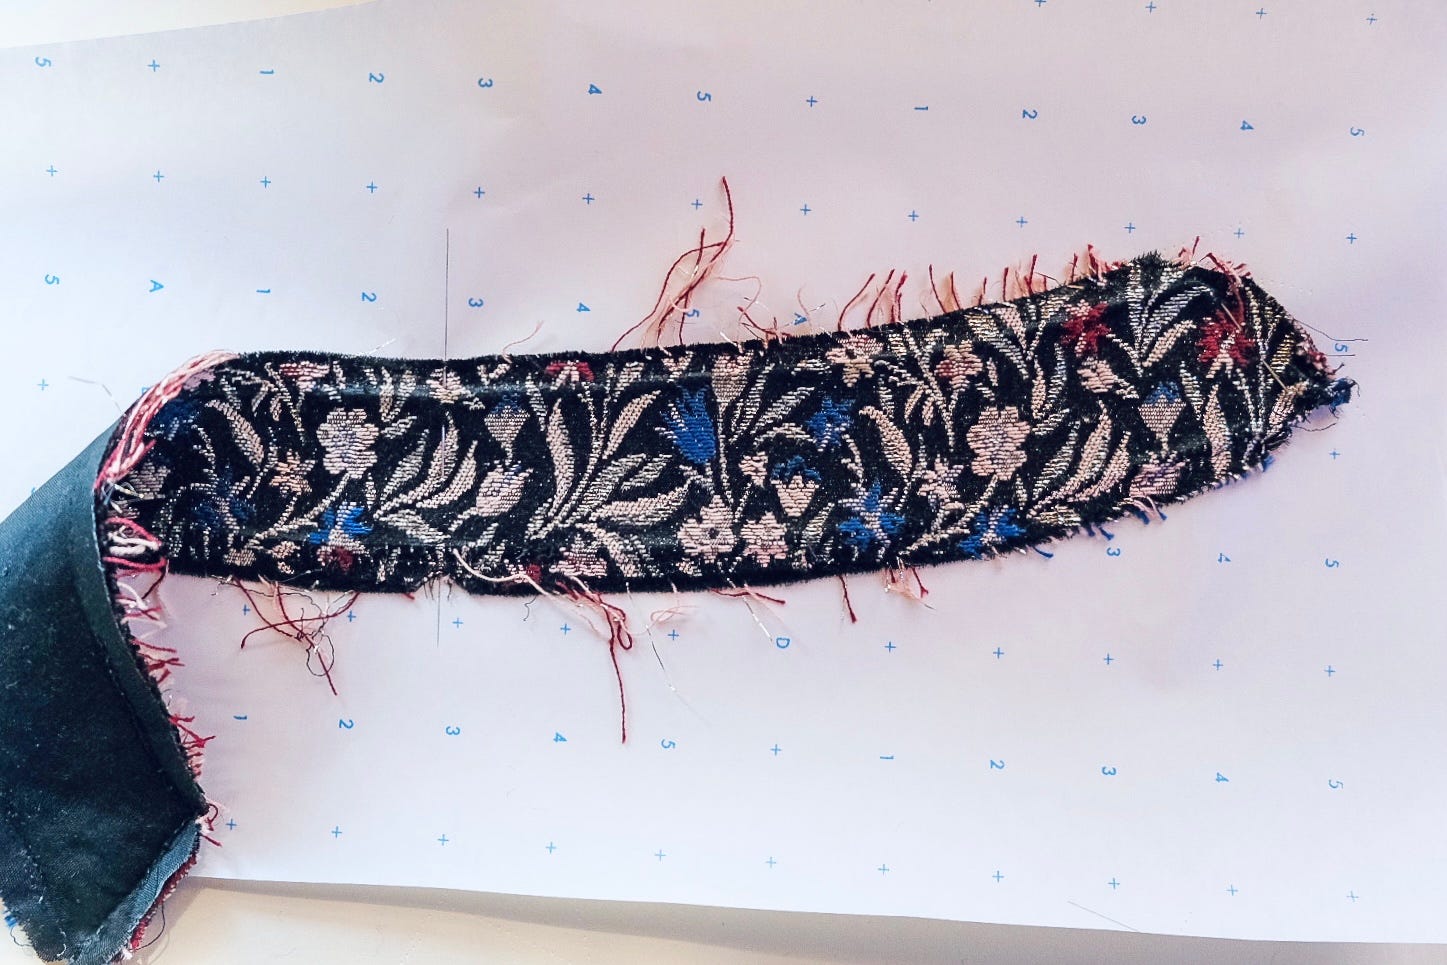
After you’re done, save the fabric pieces for future sewing projects. (I see some fancy little jacquard jewelry pouches in my future!)
Drafting Patterns
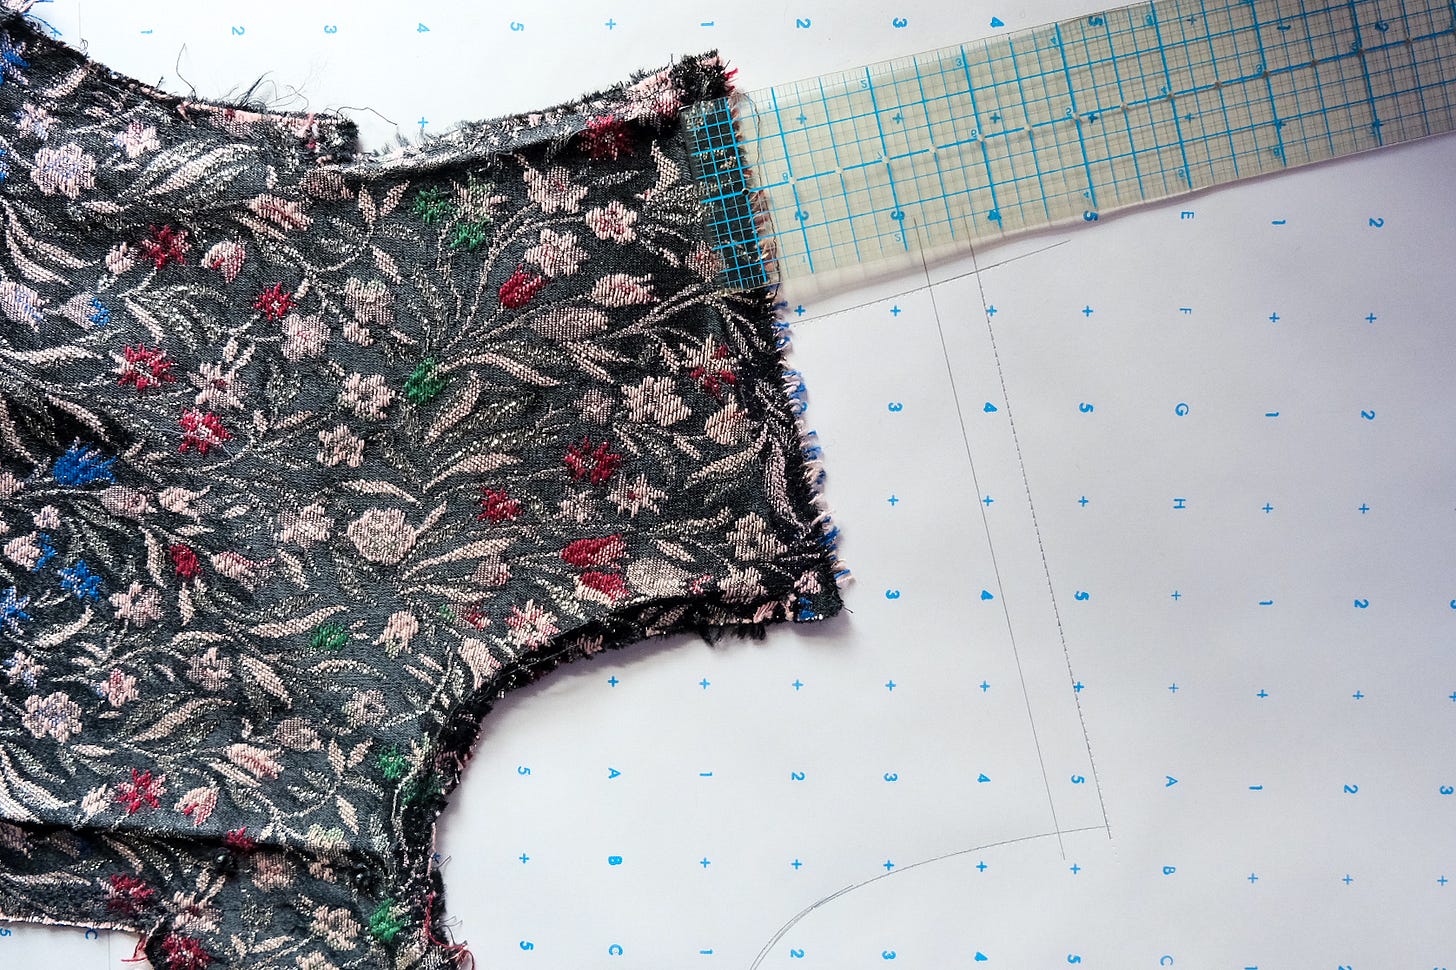
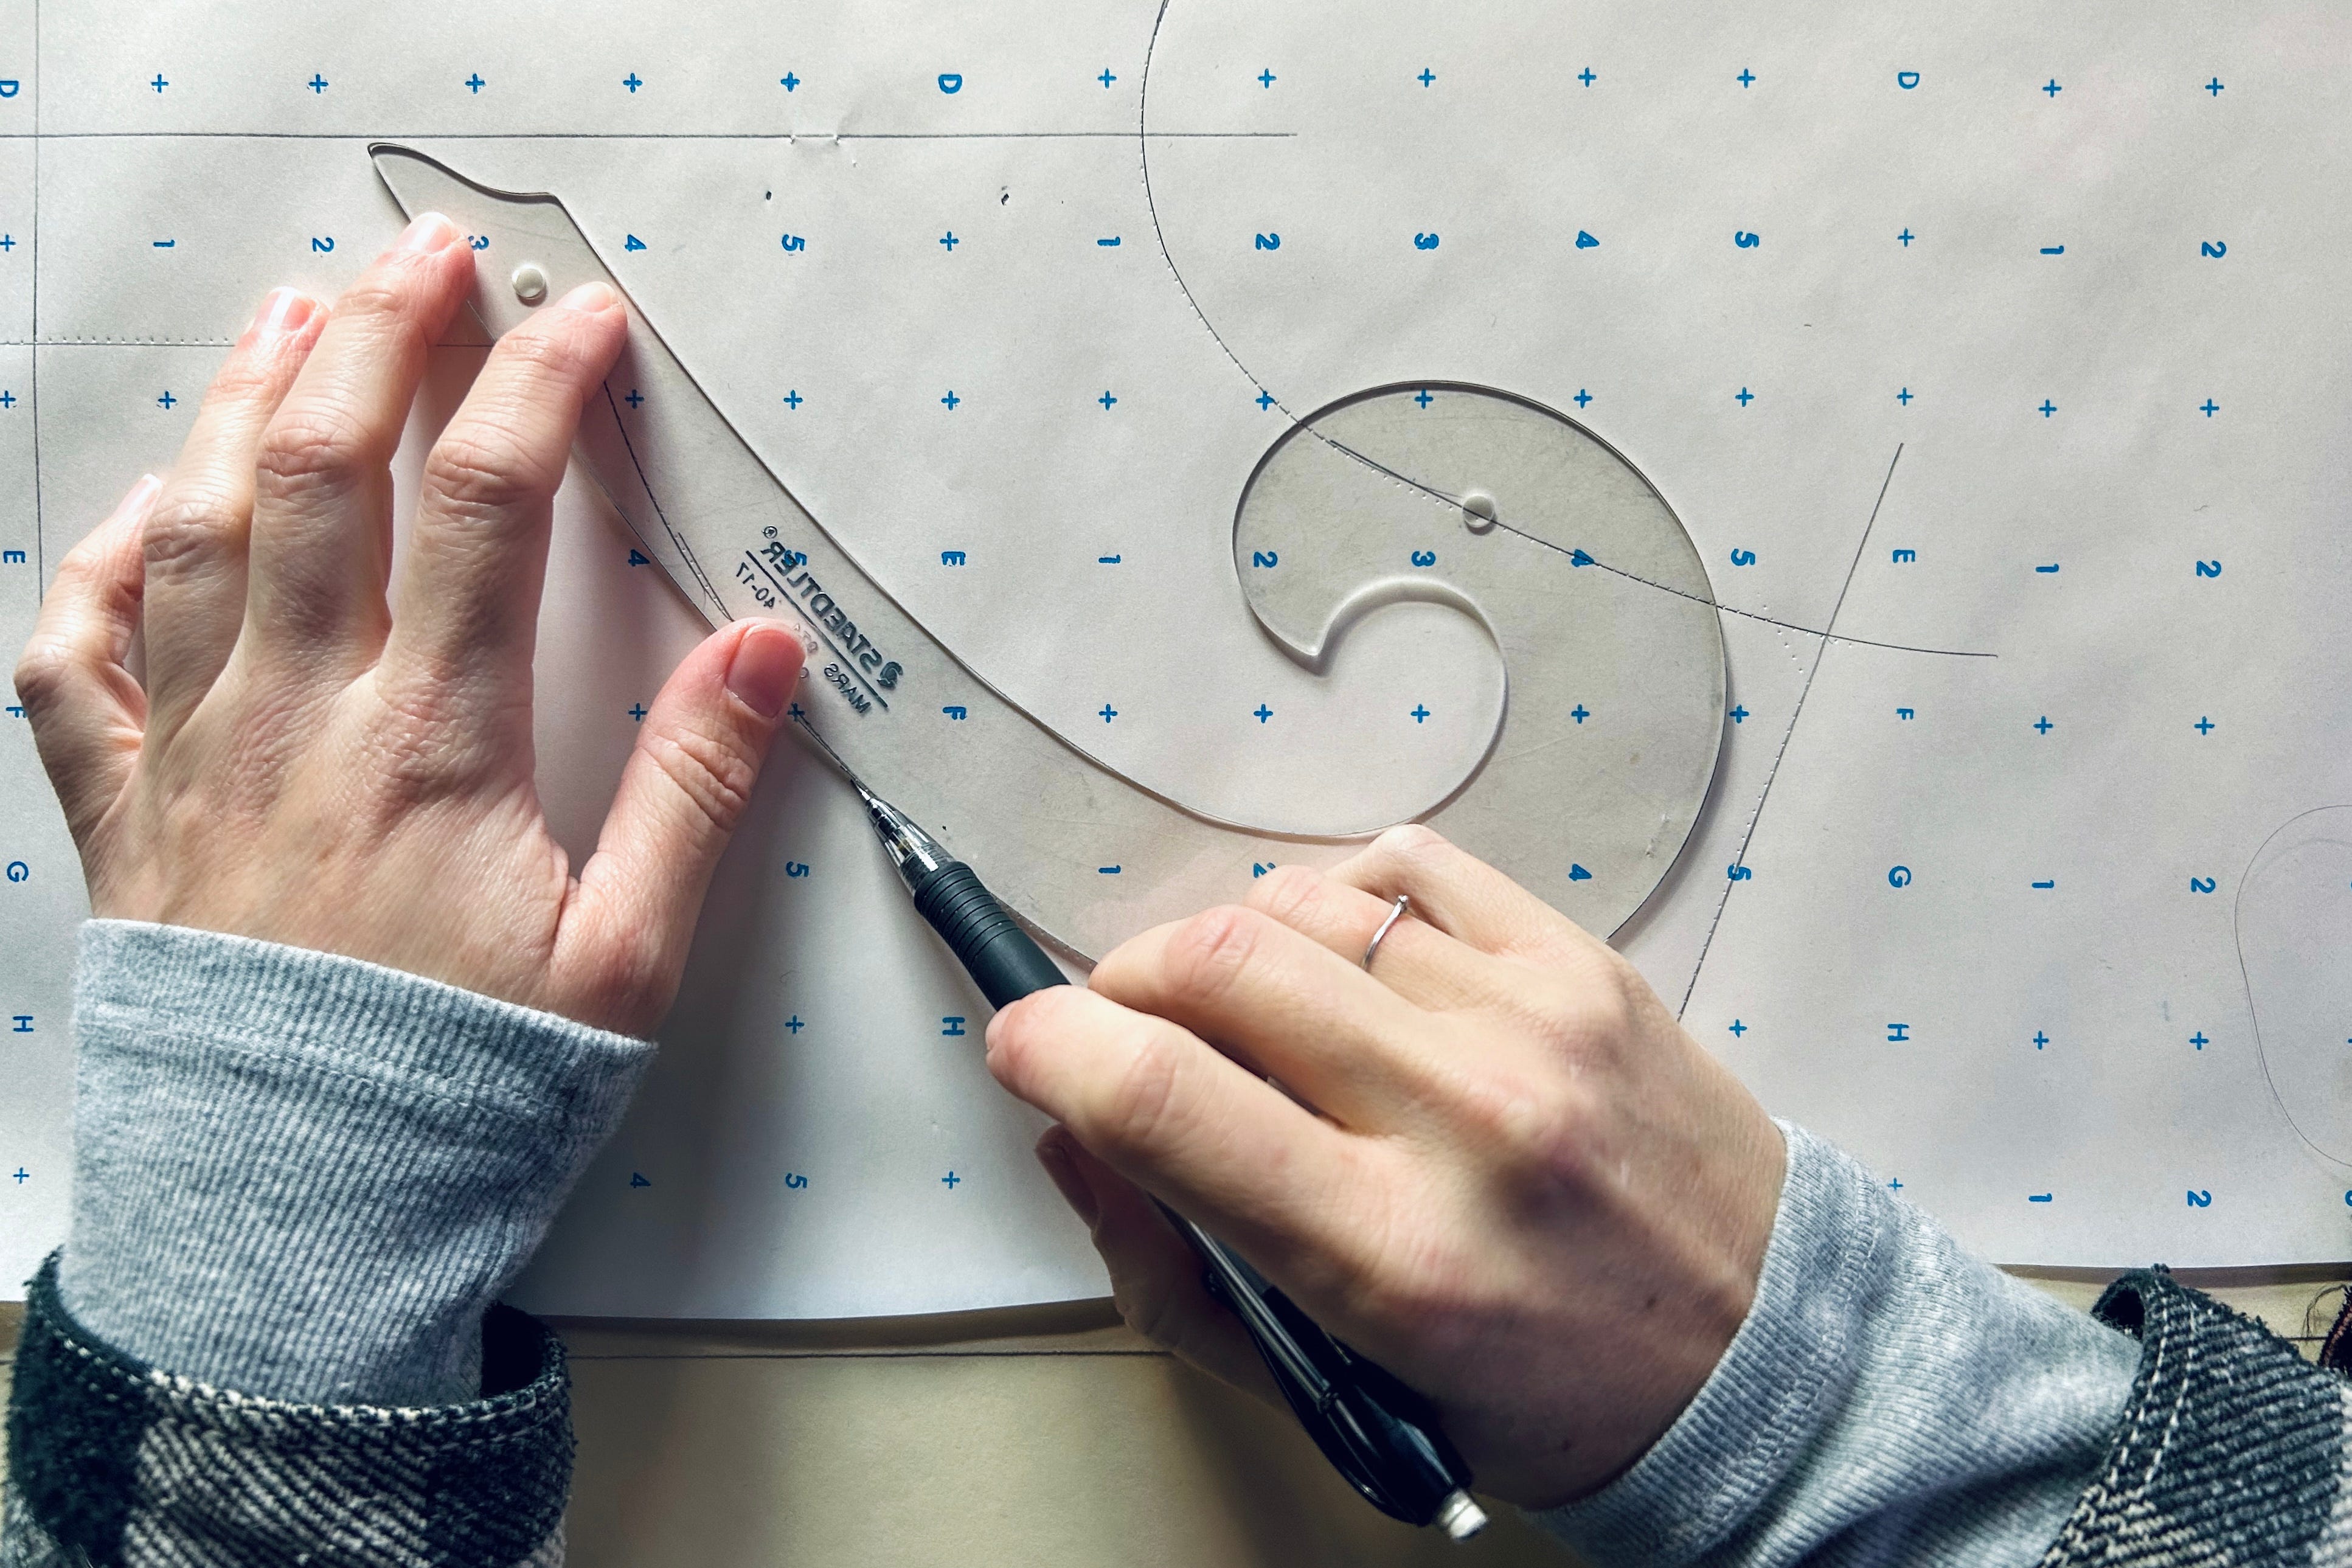
To draft patterns from the garment you’ll need pattern paper or similar, a stiletto tracing wheel, drafting rulers (a French curve and a see-through graph ruler), and a pencil.
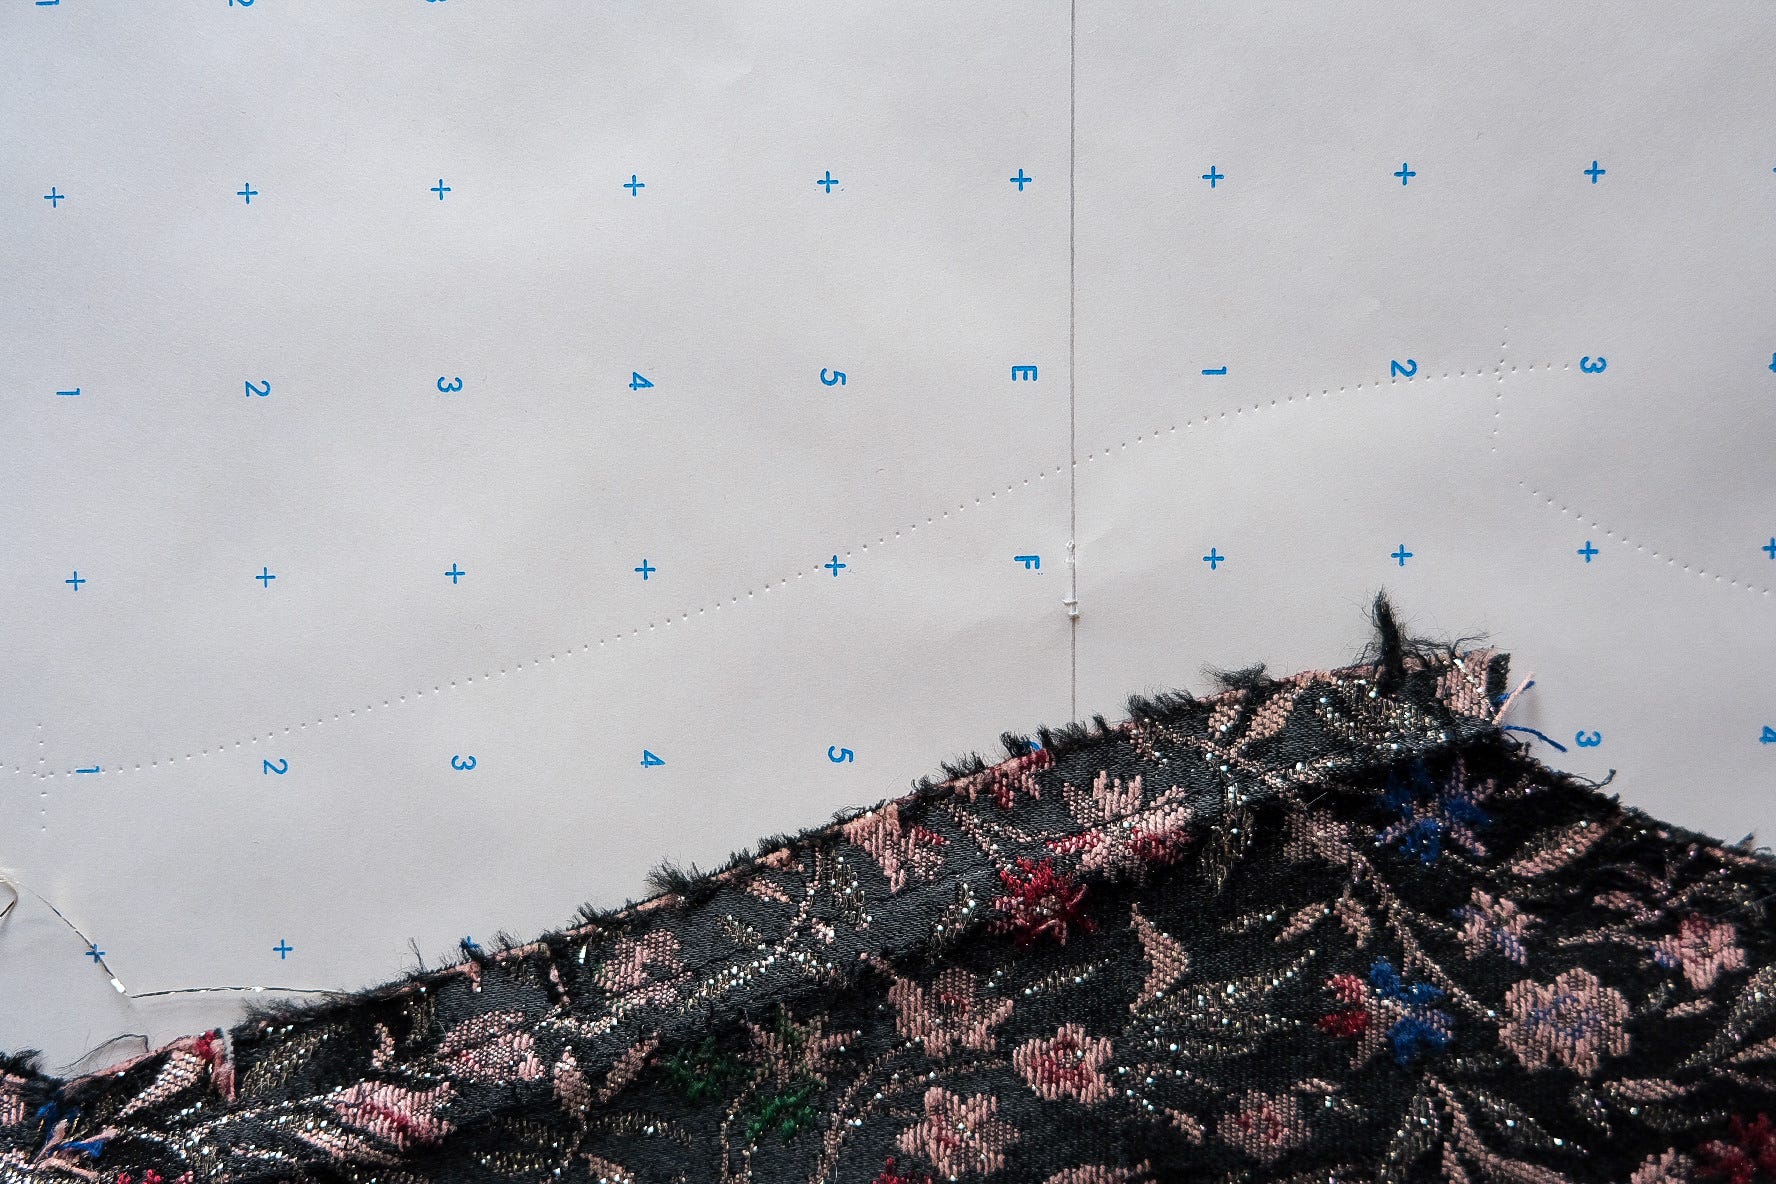
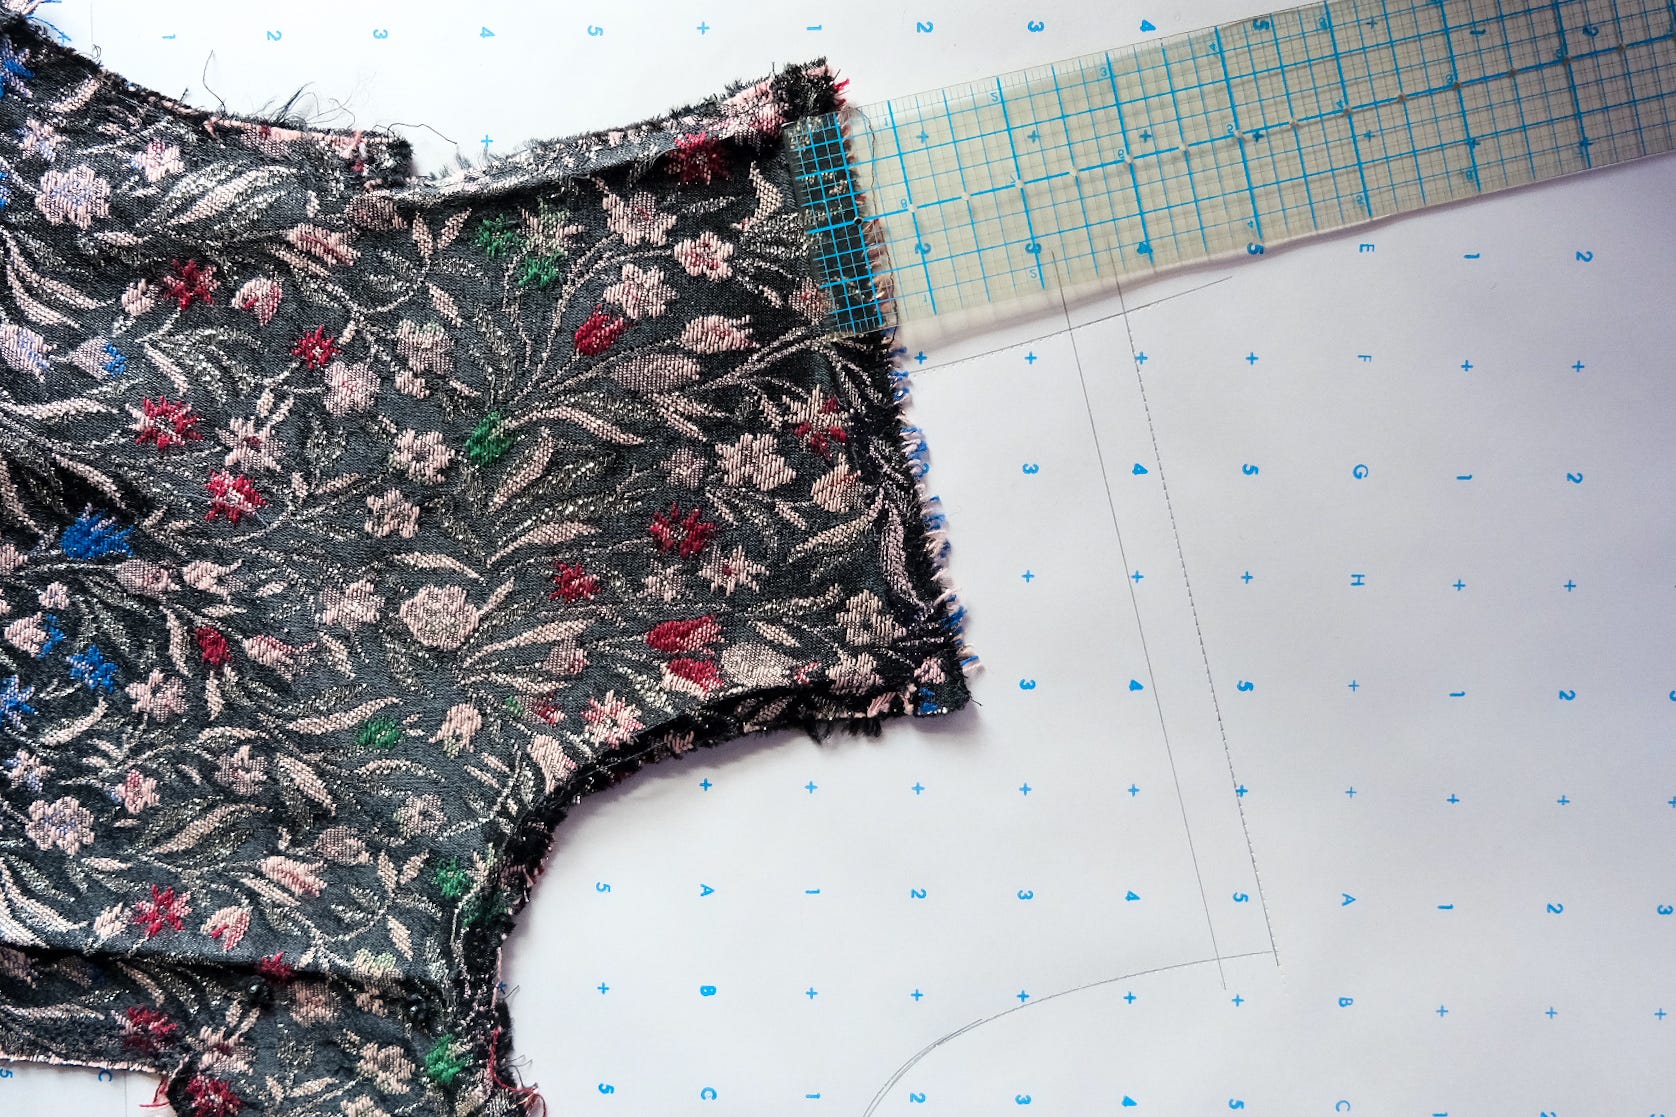
Before tracing, draw a pencil line longer than the pattern piece to represent the grainline.
For larger pieces, also draw a perpendicular line to indicate the crossgrain. Lay the pattern piece so its fabric grainline aligns with the drawn grainline, and the crossgrain matches the perpendicular line. Use a few pins to anchor the piece on these lines.
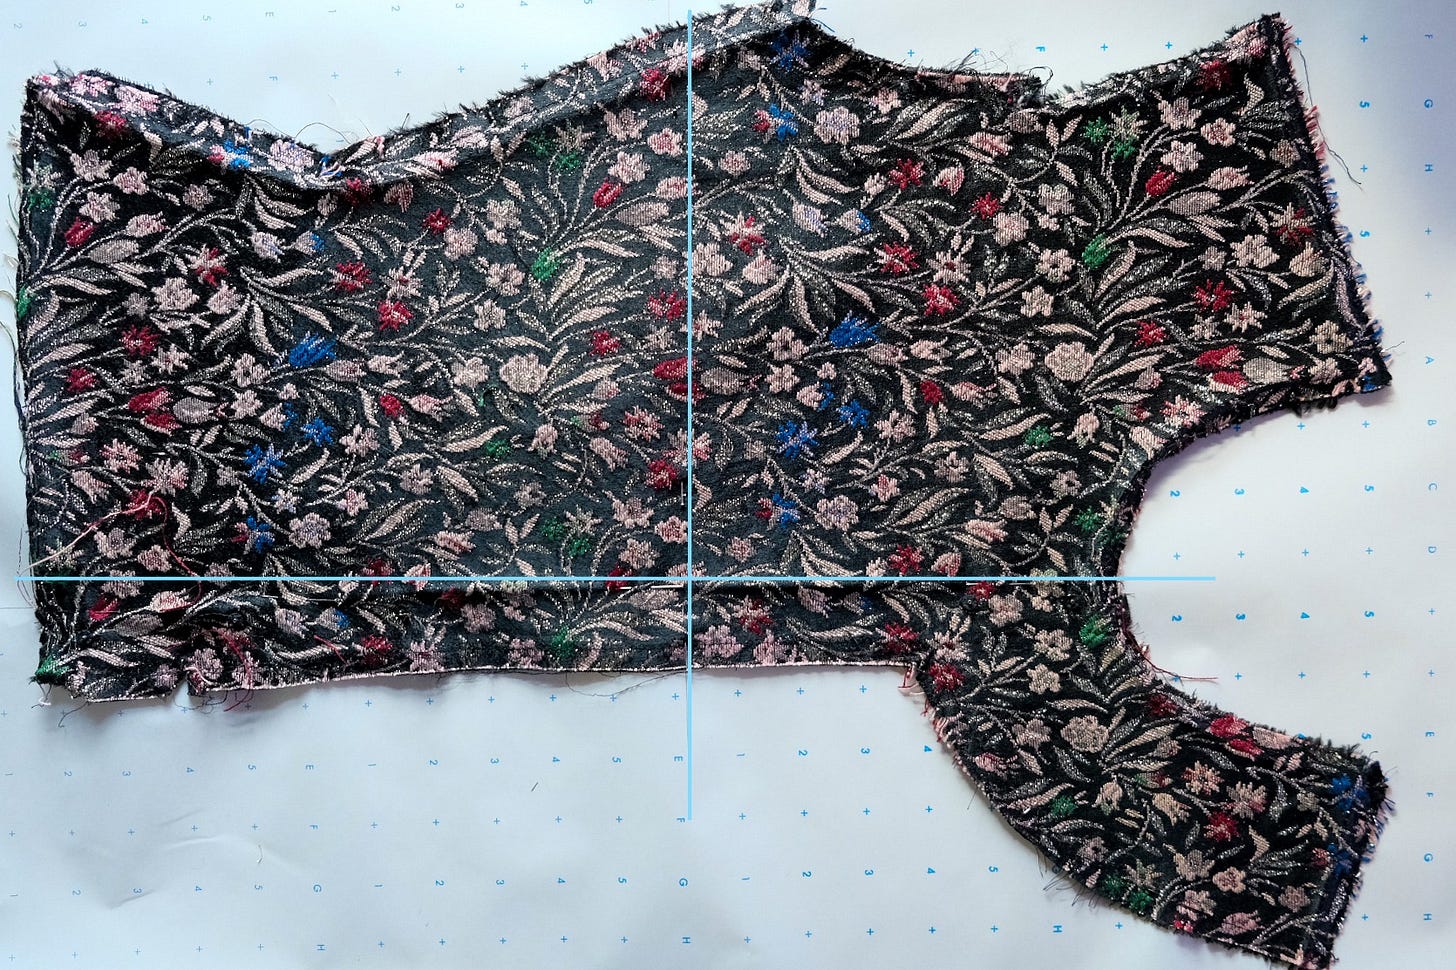
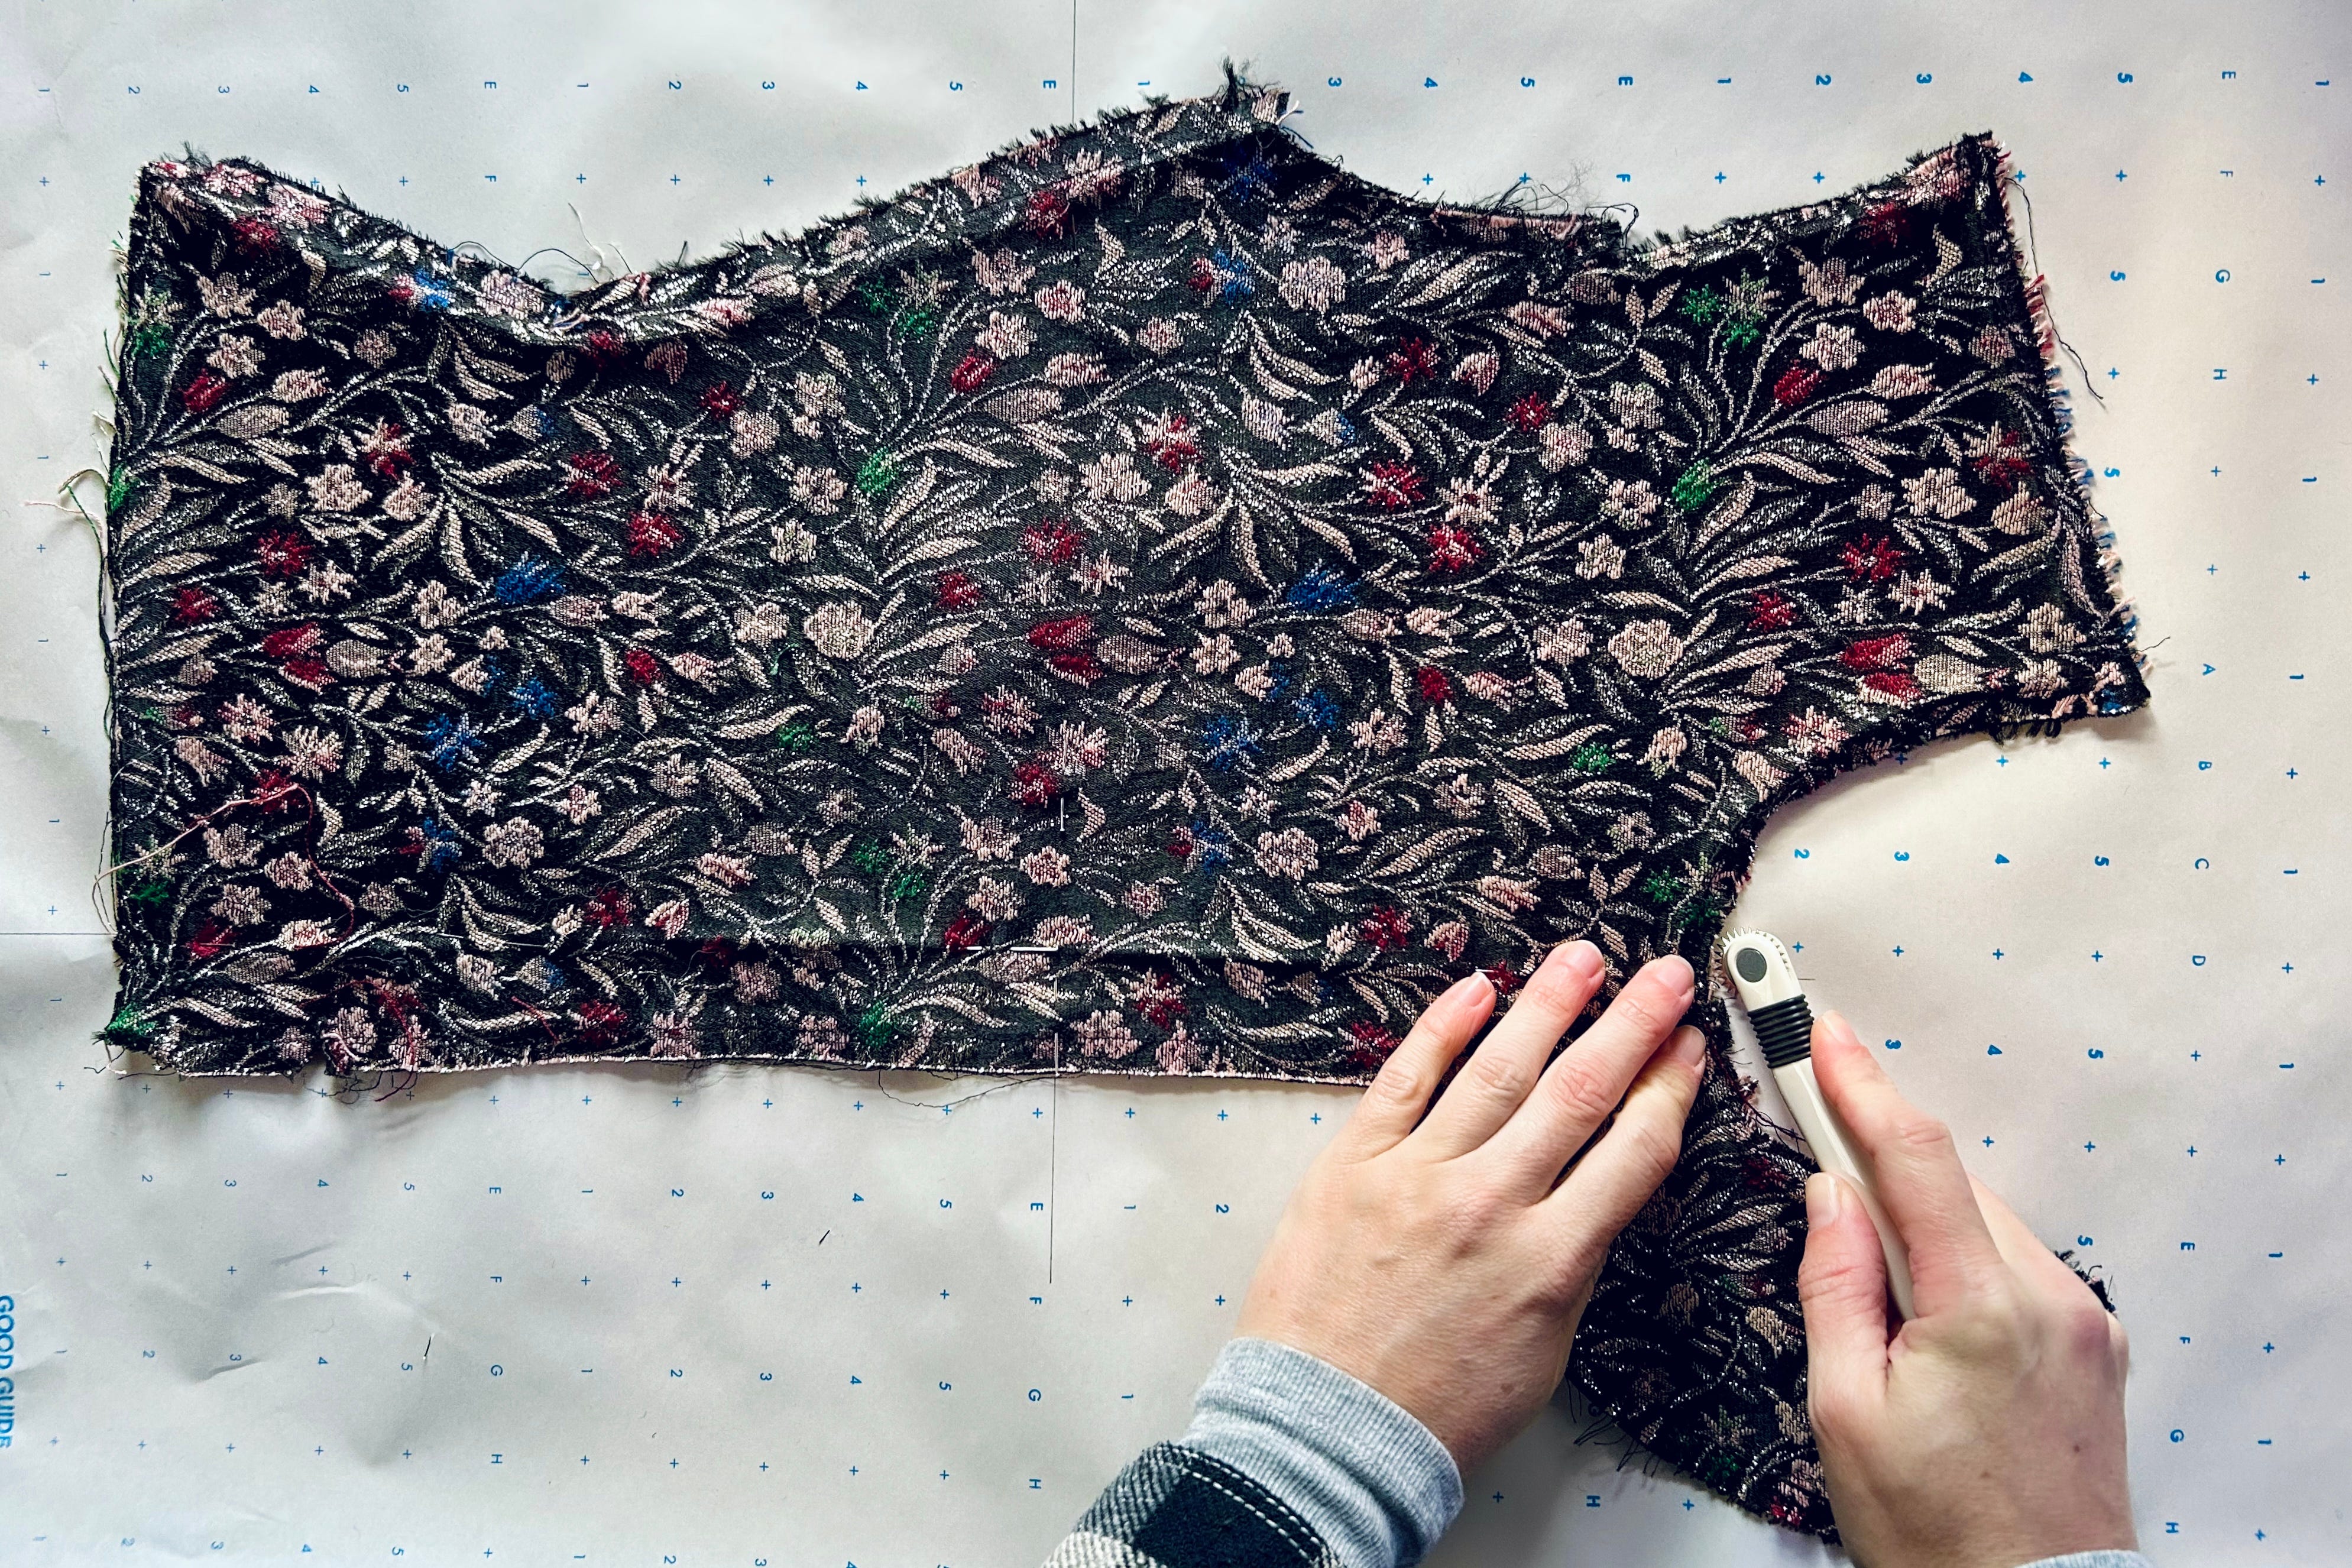
Use a tracing wheel to trace each piece onto pattern paper.
You want to be accurate, but you don’t have to be surgically precise. Work in small sections. Gently press the fabric down as you trace.


A stiletto tracing wheel leaves a clear, easy-to-trace pricked line. With a pencil, French curve, and ruler, trace over the pricked lines.
Let the shapes guide you, and get the general tracing down.

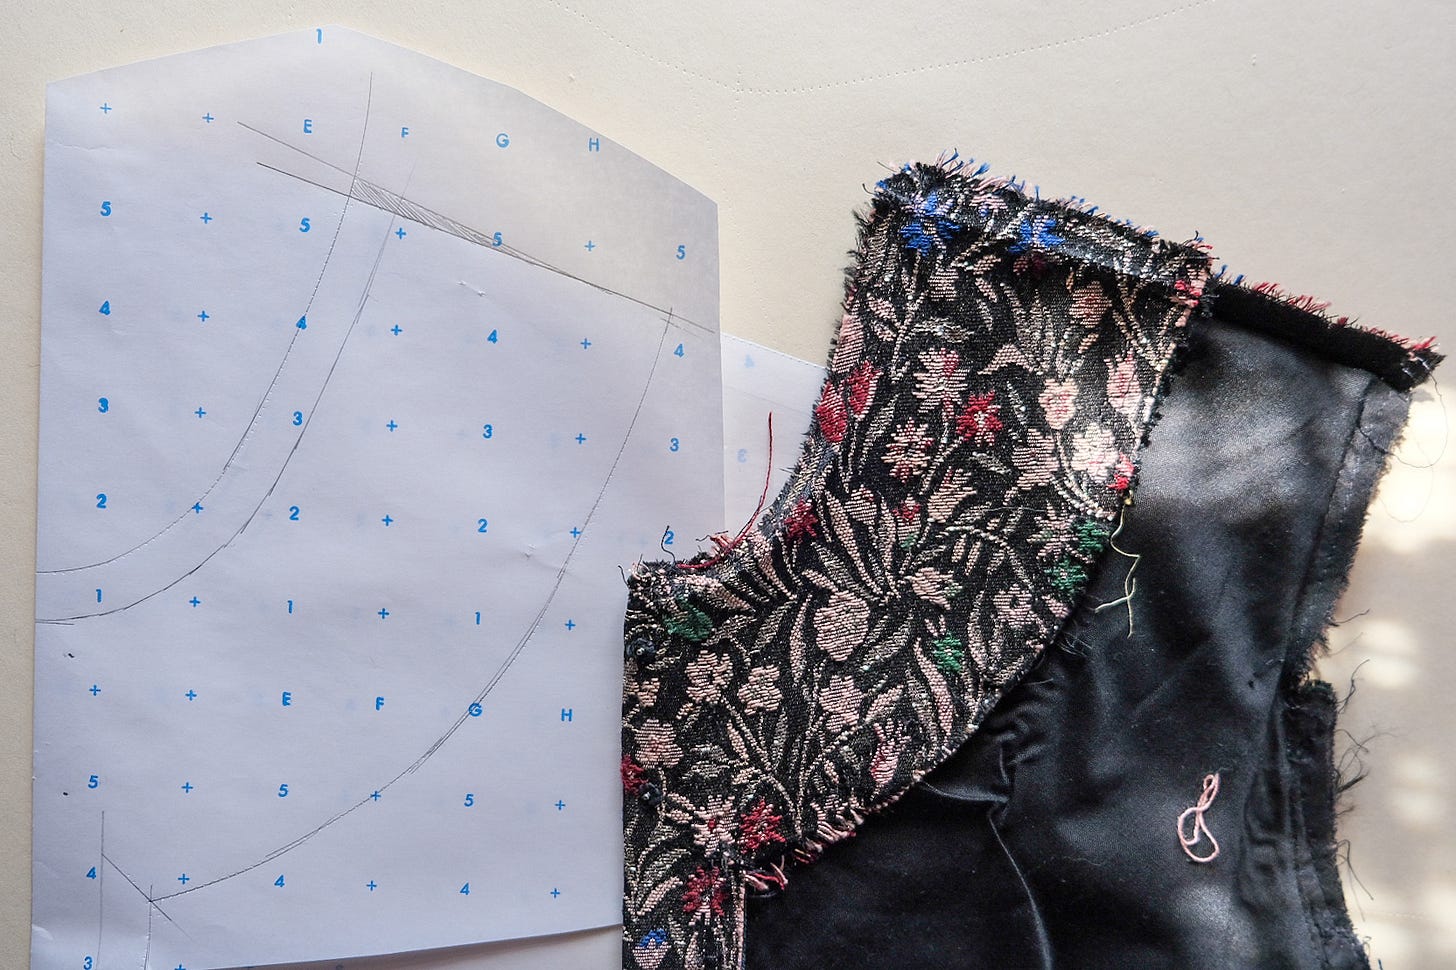
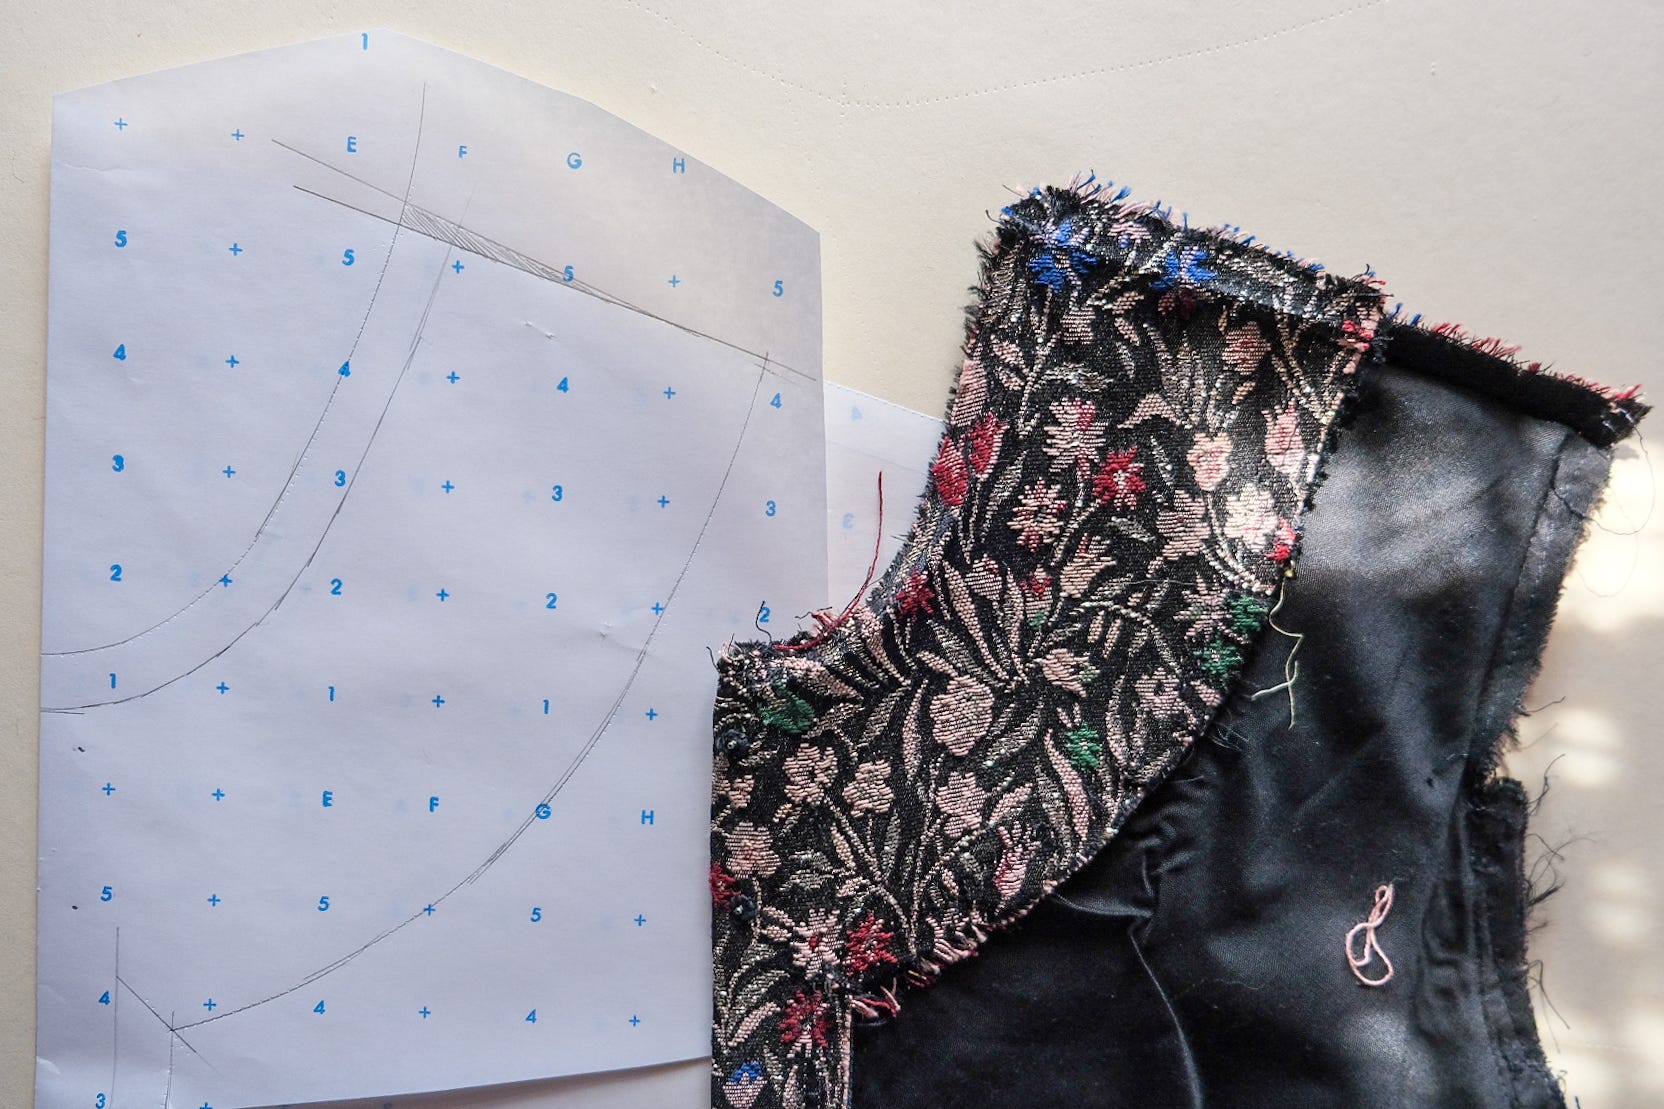
This is also a good time to double-check measurements from the fabric piece against the paper pattern for accuracy. Compare the hem sweep, armscye, shoulder seam—you get the idea. If something doesn’t add up, adjust the line or curve as needed and blend it into your traced line. Honestly, I wish I had a more exact science for this—it’s a little trial and error, but that’s part of the fun!
Add stitch lines to each pattern piece.
Ordinarily, seam allowances would be drawn, but since this is a reverse engineer, seam allowances are already included. Since some seams have been trimmed, I’ll rely on stitch lines as my guide.
Notches
Transfer any notches you can find, although these might be hard—or impossible—to spot, so you’ll have to place your own now or when you true your patterns as notches help align corresponding pattern pieces. Notches mark key points on the pattern, such as the center front or center back and help you match pattern pieces to each other, especially on curved seams and sleeves.
Mark key points, such as match points and gather points.
These are often marked as dots or circles on commercial patterns. A match point shows where two fabric pieces should meet and align perfectly, usually at a corner or seam intersection. This is especially important for seams where you can’t rely on the edges to match up for sewing.
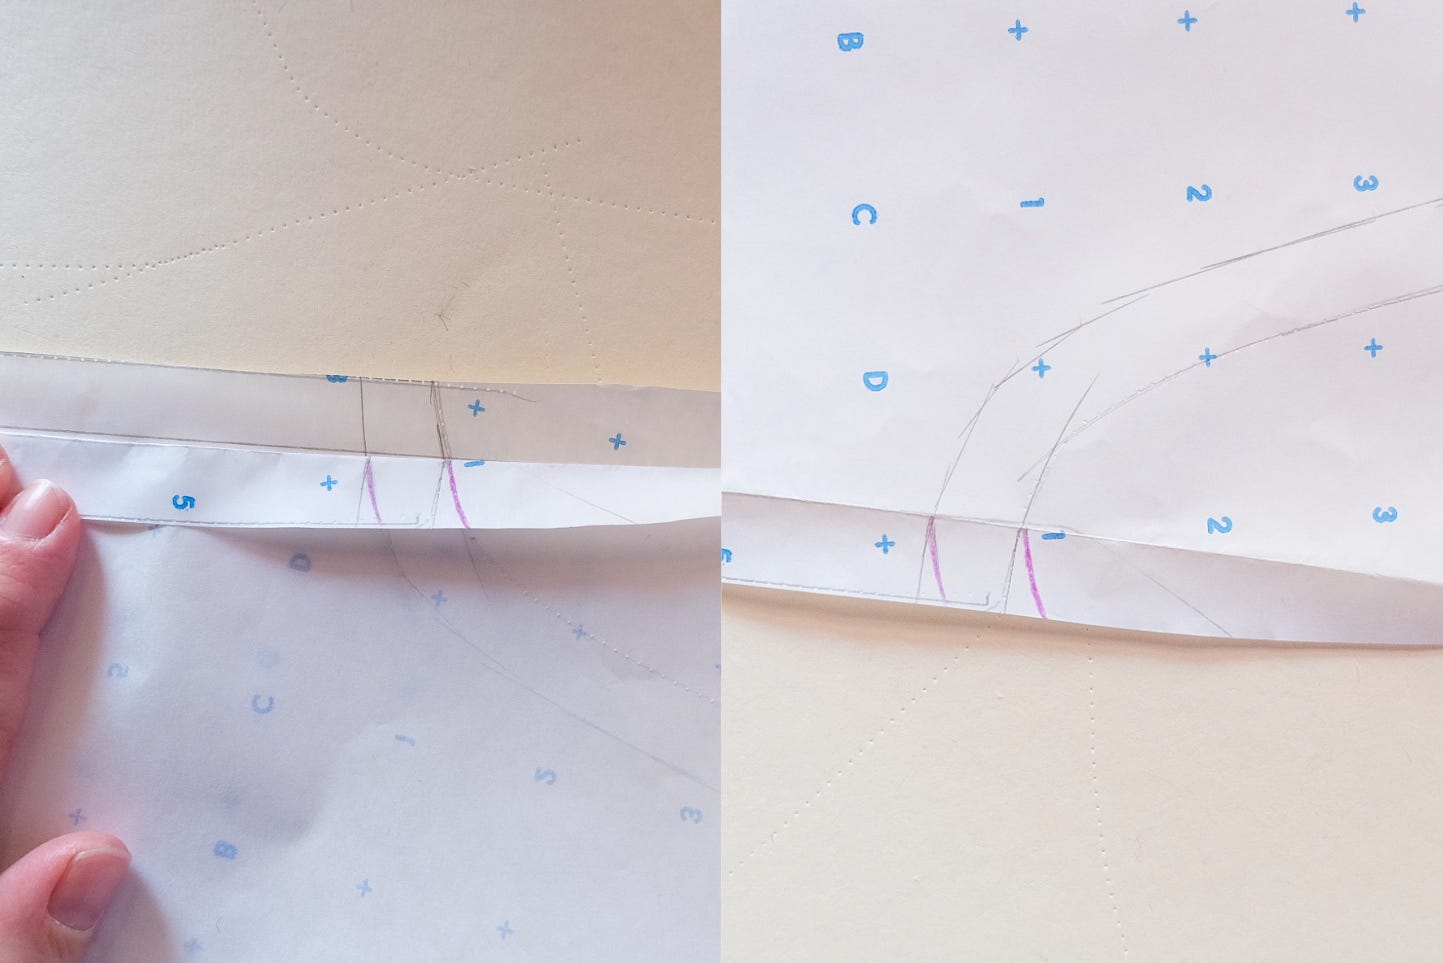
True the seamlines.
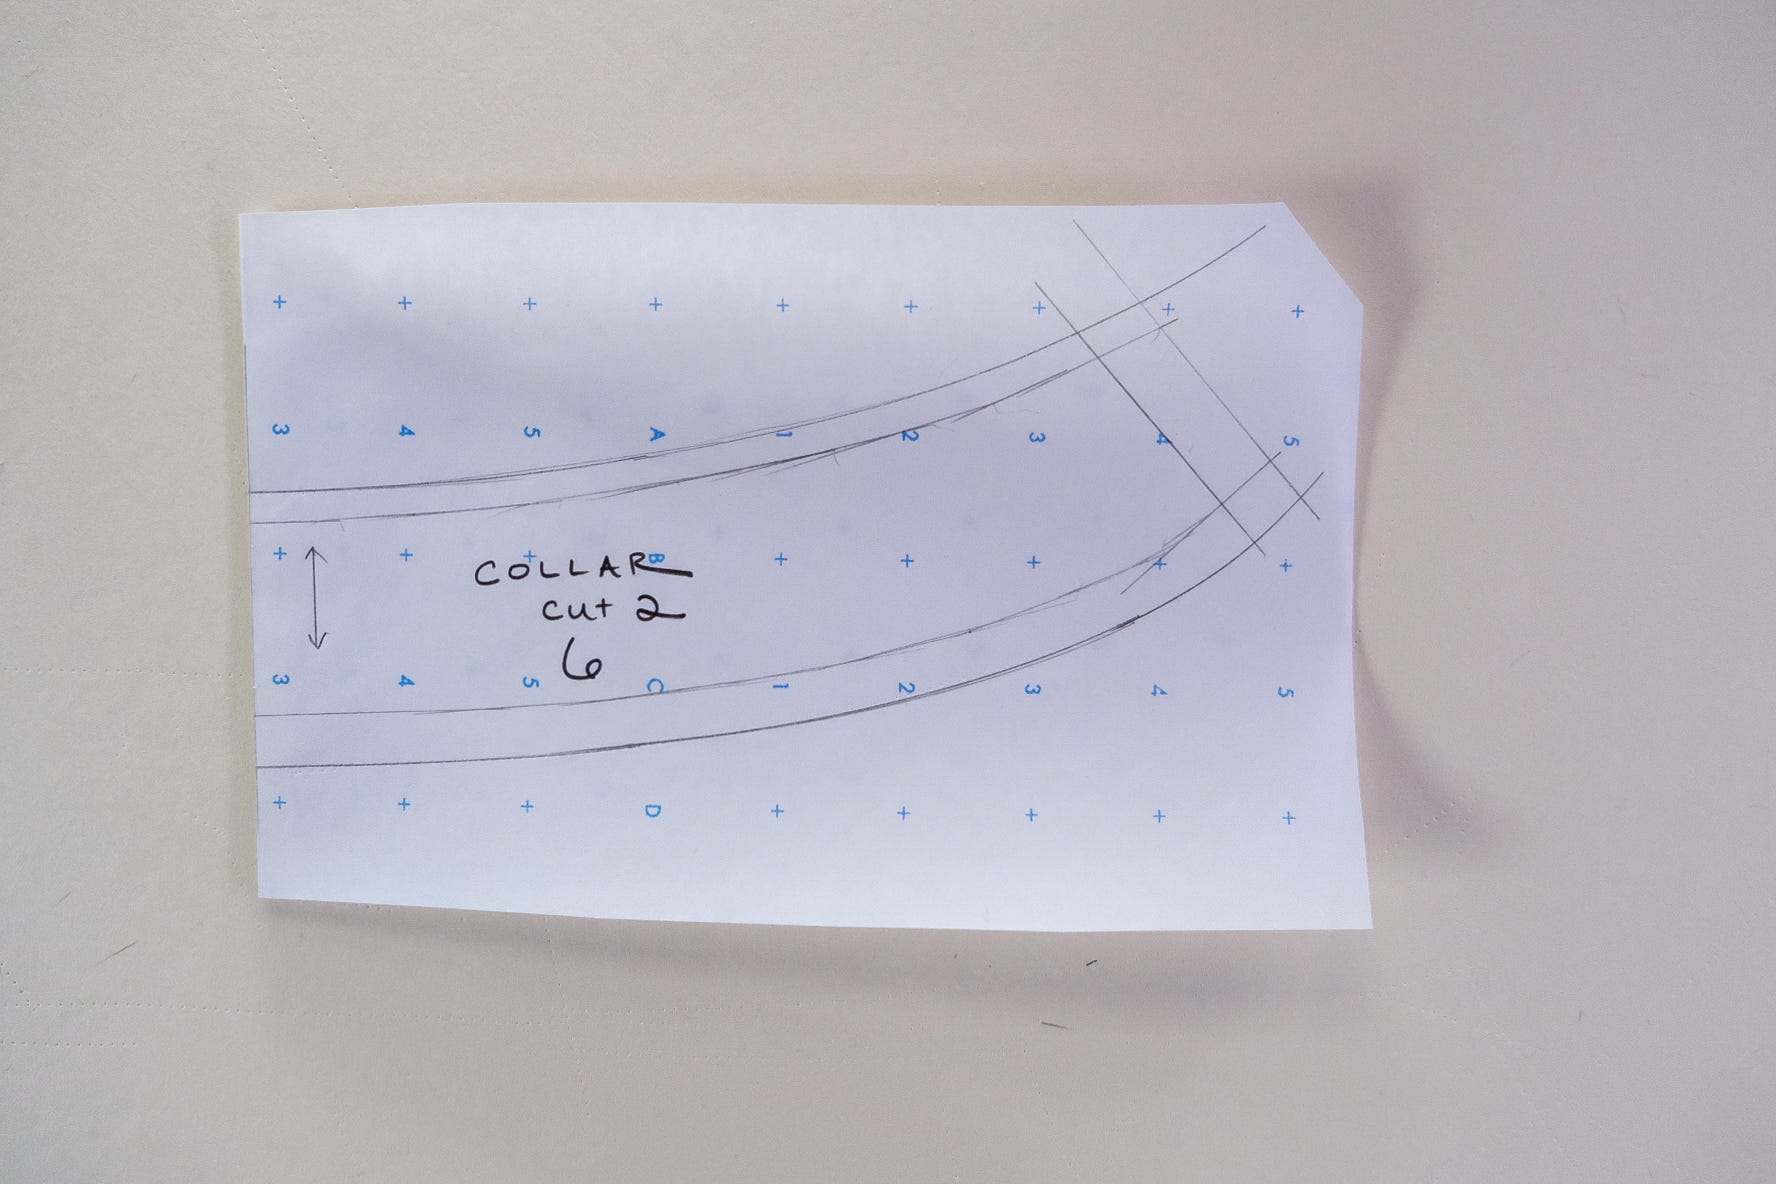
This step makes sure the stitch lines match up when sewn, keeping seam lengths aligned and transitions between pattern pieces smooth—no weird bumps or distortions. One way to true a seamline is to match it with its corresponding seam, fold it like you’d press it, and trace the pattern underneath with a pencil or tracing wheel.

Truing, in a general sense, is all about blending and straightening your pencil lines to ensure correct seam lengths. I think of it as making sure everything lines up and matches. In the picture below, after tracing, I noticed the extended facing didn’t line up with the neckline and shoulder seam when folded along the fold line like its fabric piece. So, I made adjustments on the paper—another way to check and true patterns.

Labeling a Pattern
A pattern’s labels and markings communicate how to cut and sew, so you want include as much info as you need to assemble your garment later. Common labels and markings include:
Cutting lines
Stitching lines
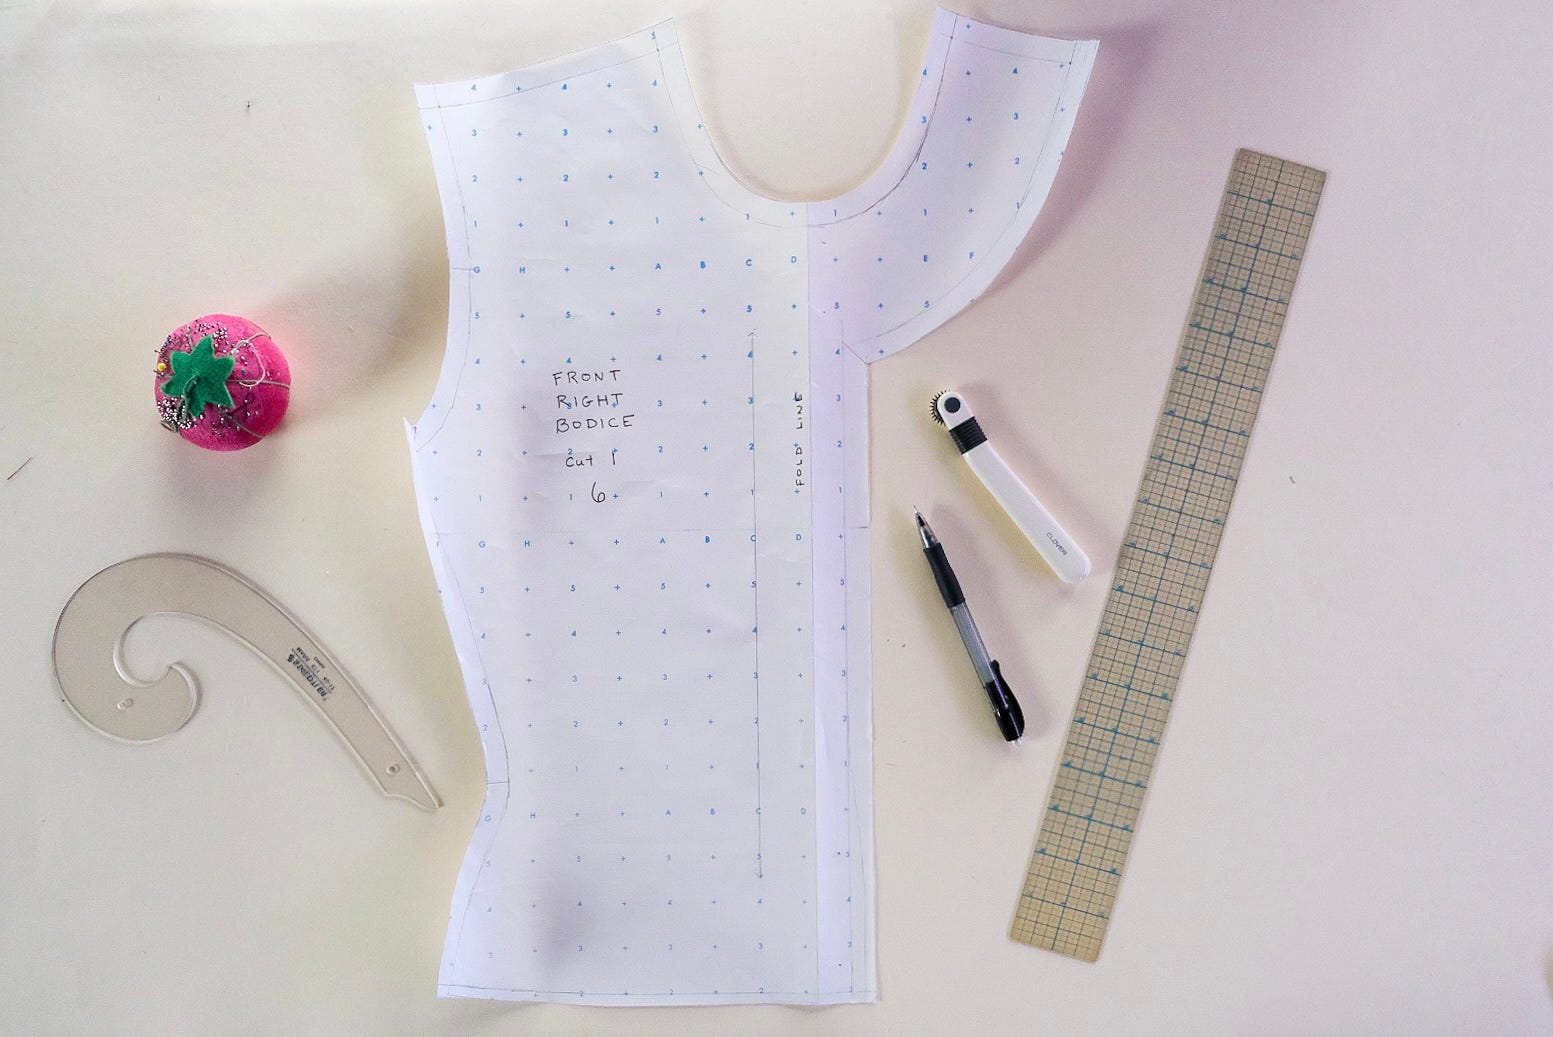
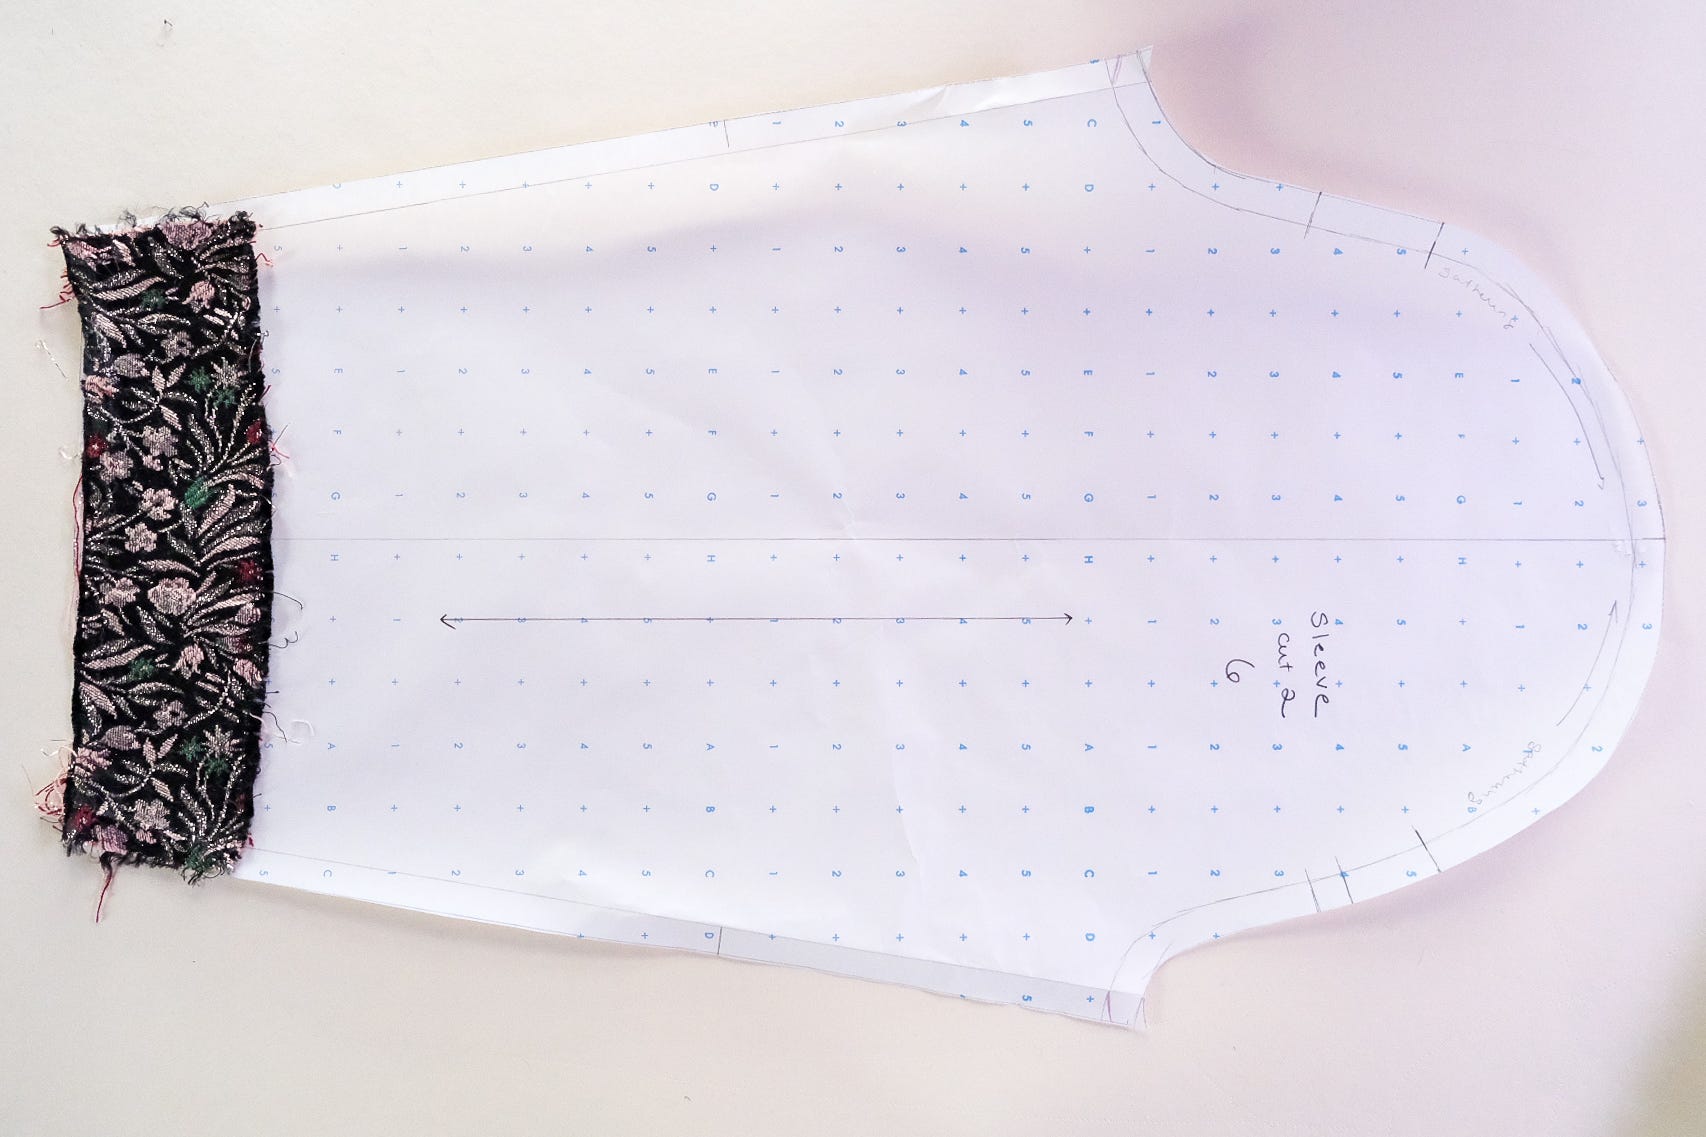
The pattern piece name: BODICE FRONT LEFT
Size
Material (lining, mounting, etc.)
Number of pieces to cut
Center Front CF / Center Back CB
Waistline
Foldline
Notches
Match Points & Gather Points
Snap Placements & Button / Buttonhole Placements
Grainline (lengthwise grain)
Dart Lines & Dart End
Cut with Nap
Cut with Right Side Up (RSU)
A Few More Things
For a symmetrical piece, like this collar, fold it to find the middle and mark the fold line with a pin(s). Align the fold with your drawn grainline and trace half the piece. Once traced, fold the paper along the grainline and cut it out.
Some pieces you can skip tracing altogether. For example, the sleeves have faced cuffs, and the bodice has a faced hem. Instead of tracing the facings, measure the width of each and trace them off directly from your sleeve and bodice patterns.
Lastly, it’s helpful to check patterns before cutting them out. Think of them as a puzzle and walk the patterns by matching seams. If something doesn’t line up, adjust and blend the seamline.
I know I have more truing and notching ahead as I figure out how all these pieces fit back together!
Thank you so much for reading! I truly love writing this newsletter and am so happy you’re here.
Next time, we’ll wrap up the lining patterns and dive into grading—adjusting the measurements to create different sizes while preserving the original style and proportions.
Until then, happy sewing!
~ Jane
This is fabulous advice, and a gorgeous jacket!
I would love to see the progress you make with this project - fabulous