


Sewing Vintage Barbie Clothes
Making Tiny Outfits Cut from Vintage Vogue Patterns

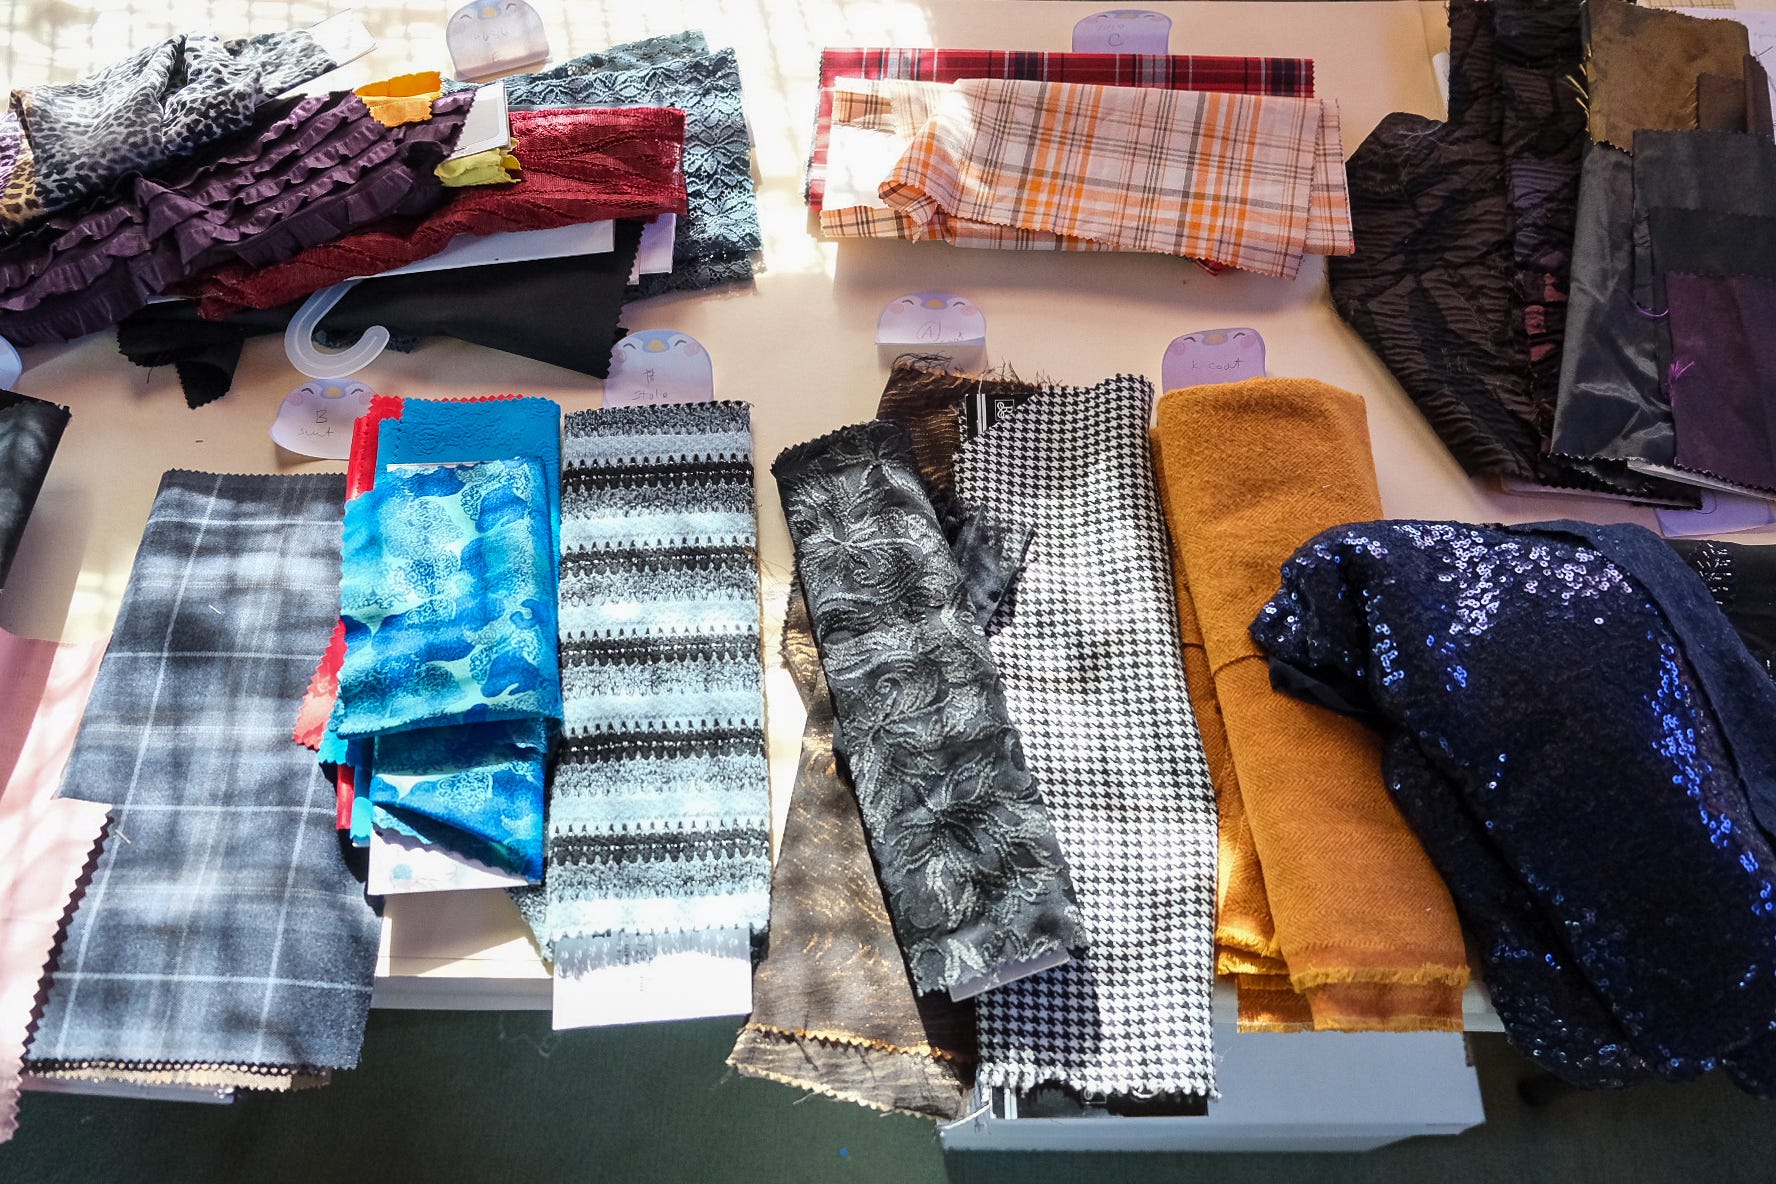
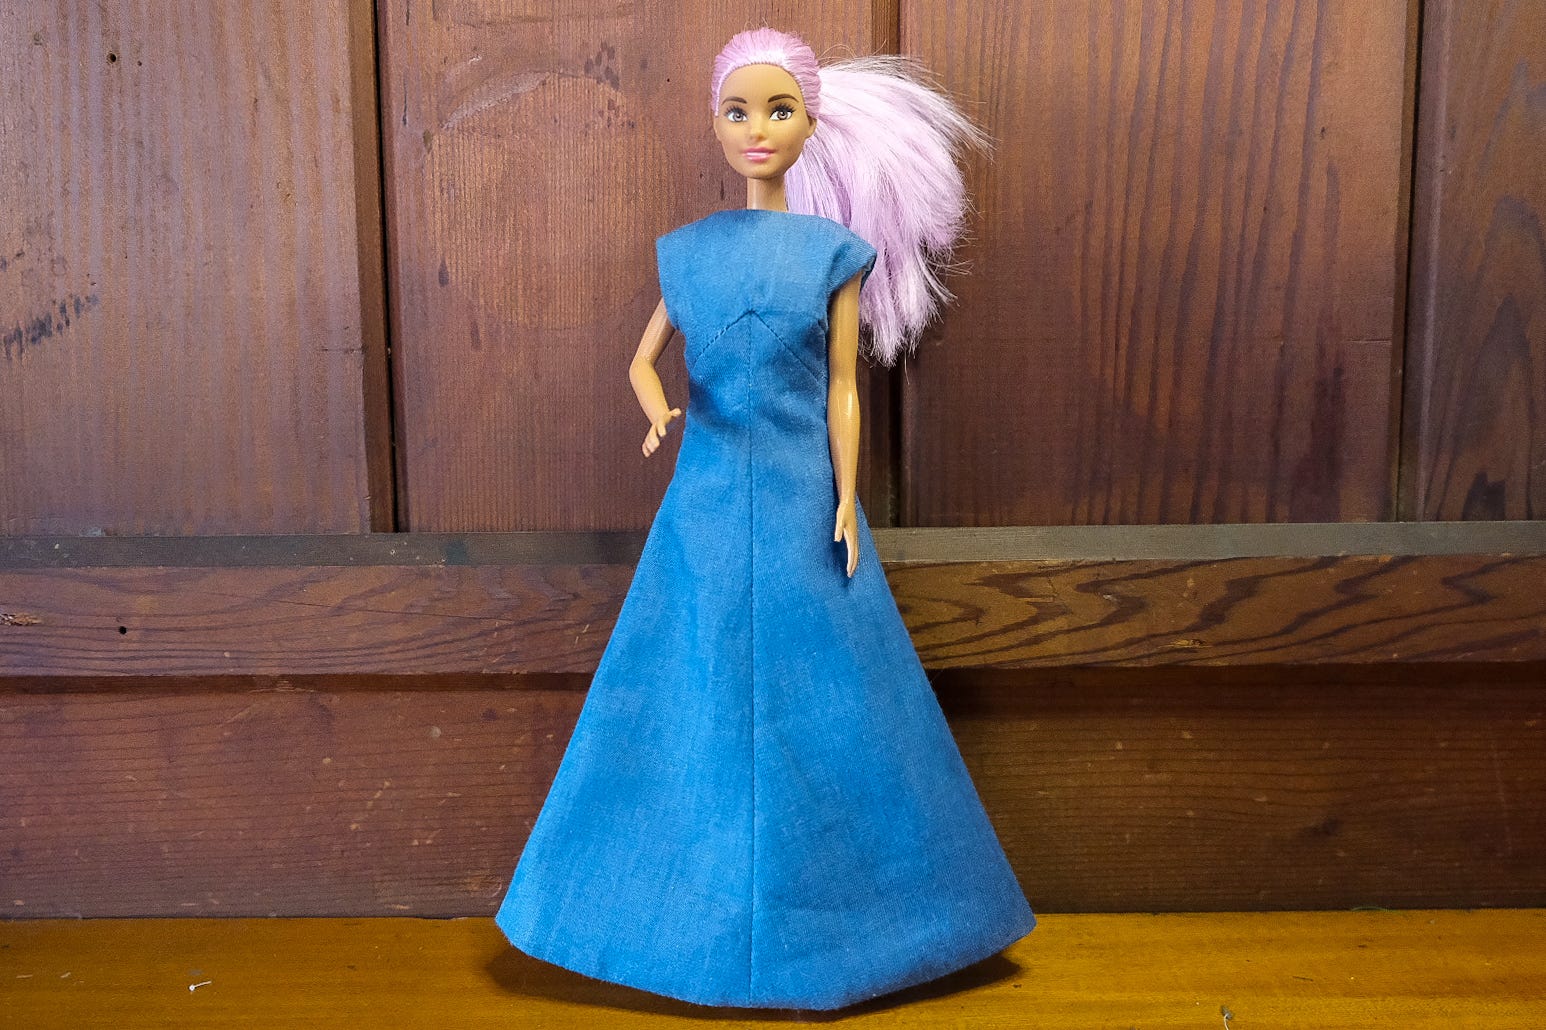
Today’s letter is all about making tiny clothes. My daughter is at the age of Barbies—and all the clothes and accessories that come with them. So, when I came across these vintage Vogue Barbie patterns on Etsy, I couldn’t resist.

I truly appreciated the level of detail in these pattern packs. These clothes had linings and jacket extensions, coordinating accessories, and teeny-tiny cuffs and collars.
Working with vintage Barbie patterns also offers an excellent overview of pattern making. With such a variety of flat patterns, you can see the different ways darts are manipulated, fullness is added, and silhouettes are shaped. What a fun and inspiring project!
Who doesn’t love a good listicle? Here are eight tips and techniques I used to make these small-scale clothes—many of which can also be applied to constructing full-size garments.
1. Proportion & Placement
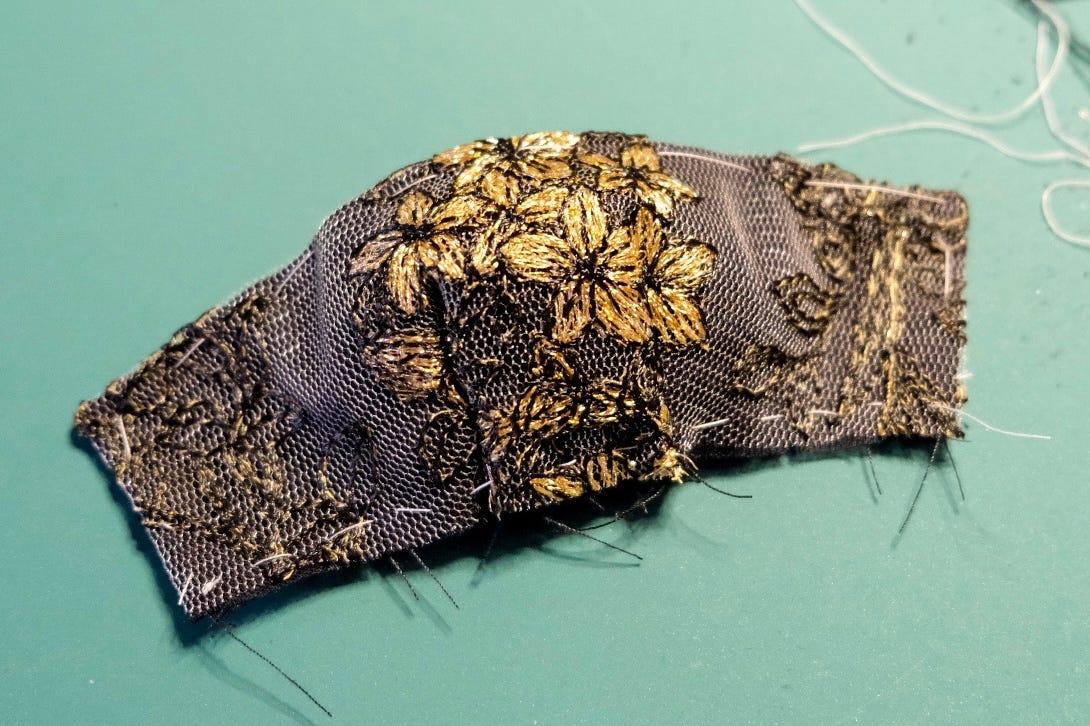
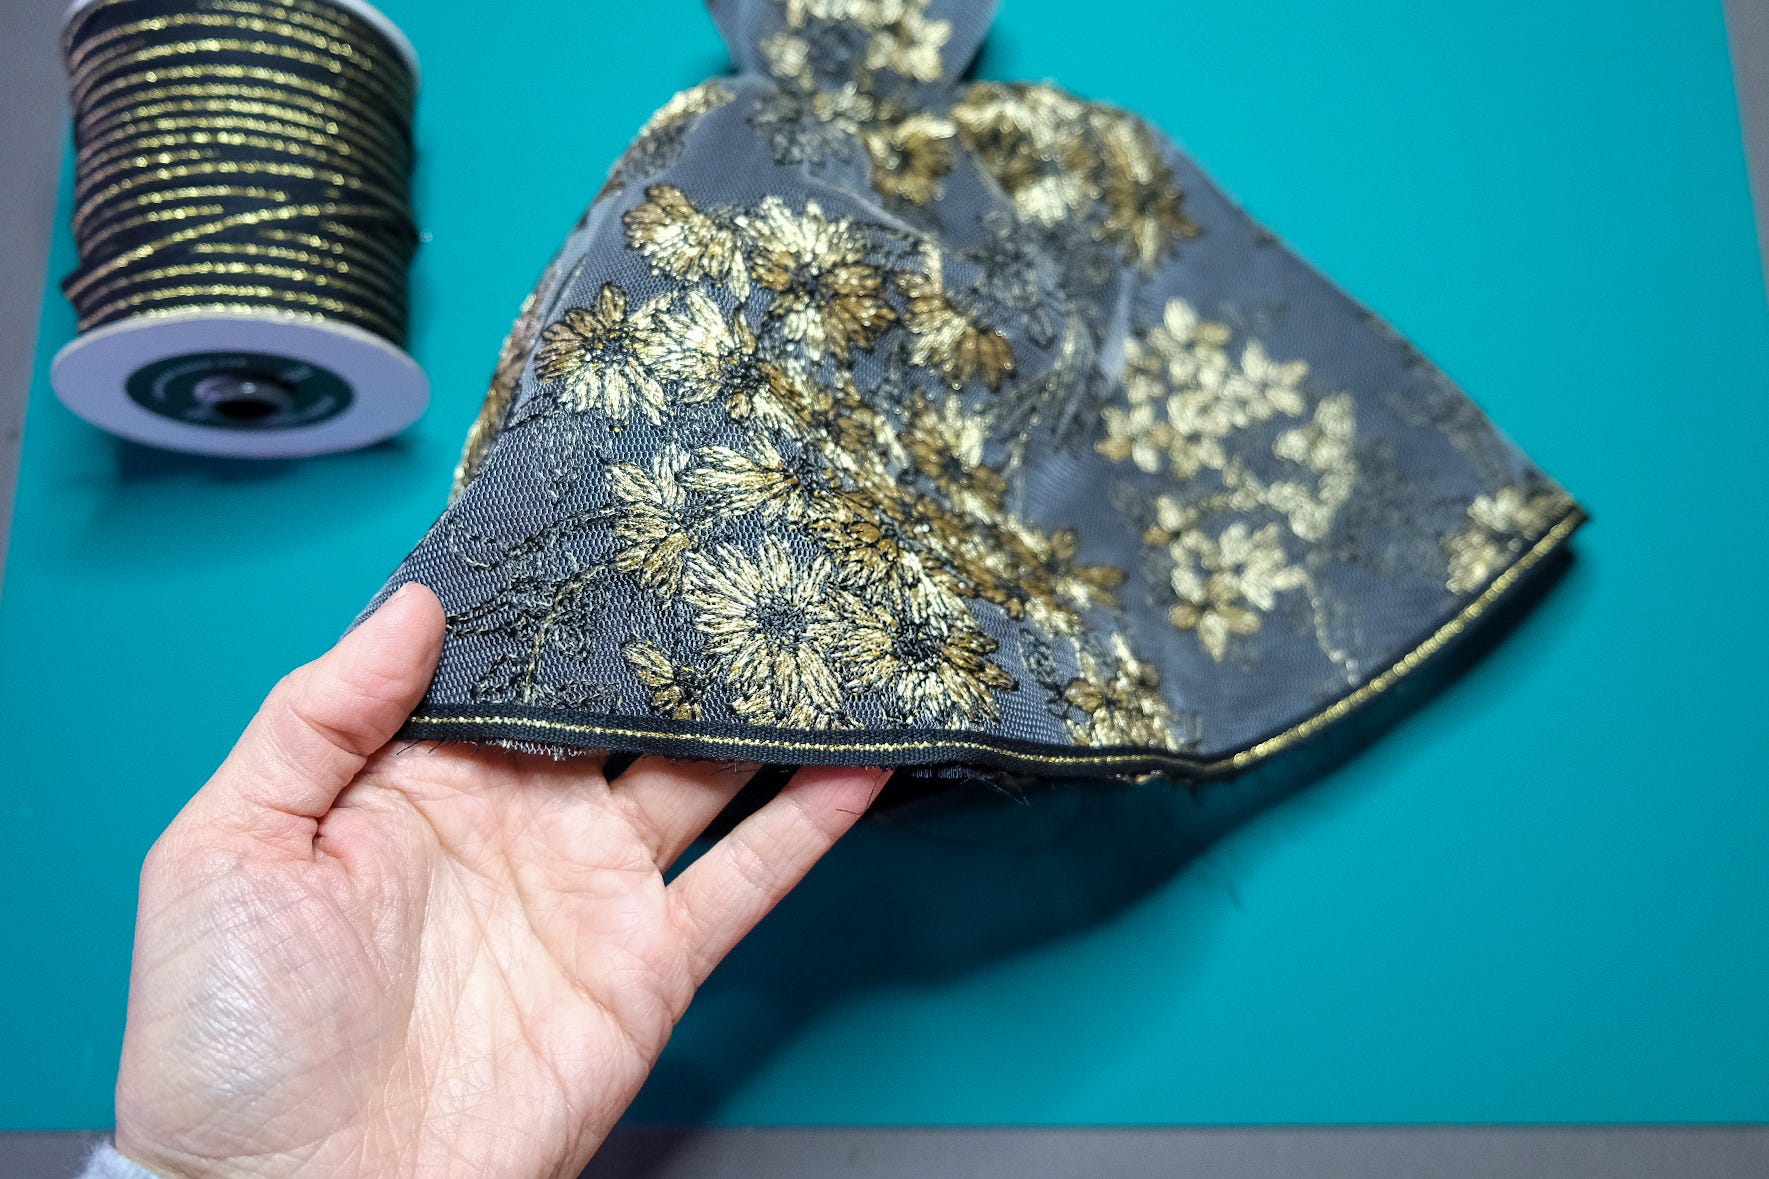
Consider scale and proportion when working with fabric featuring graphic elements like prints or embroidery. A large floral motif might overwhelm the doll-sized Barbie, or maybe it’ll be so big that it becomes its own abstract pattern. The choice is yours.
Also, when working with prints and motifs, think about pattern placement. For example, I centered a small cluster of embroidered flowers on this strapless bodice to create an artful, balanced look.
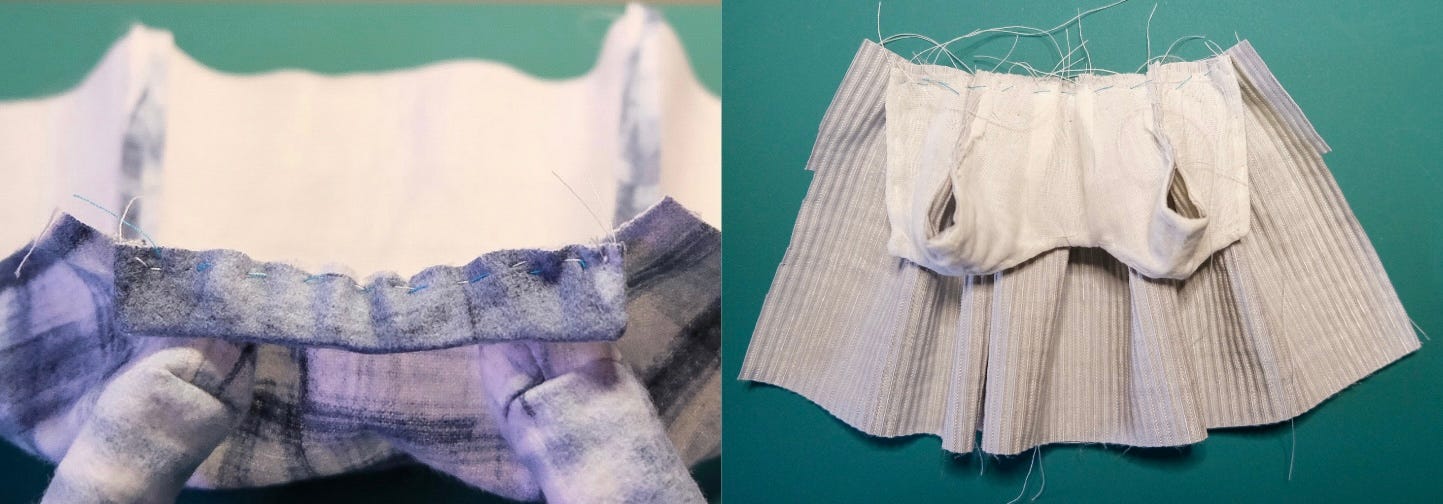
2. Baste, Baste, Baste
Basting makes sewing tiny clothes so. much. easier. While it does take extra time upfront, it ultimately saves you time in the long run. I find basting allows for greater precision in my sewing and reduces mistakes that require seam-ripping later. Plus, it’s especially helpful when working with mounting fabric, which leads me to my next tip.
3. Mounting Fabric
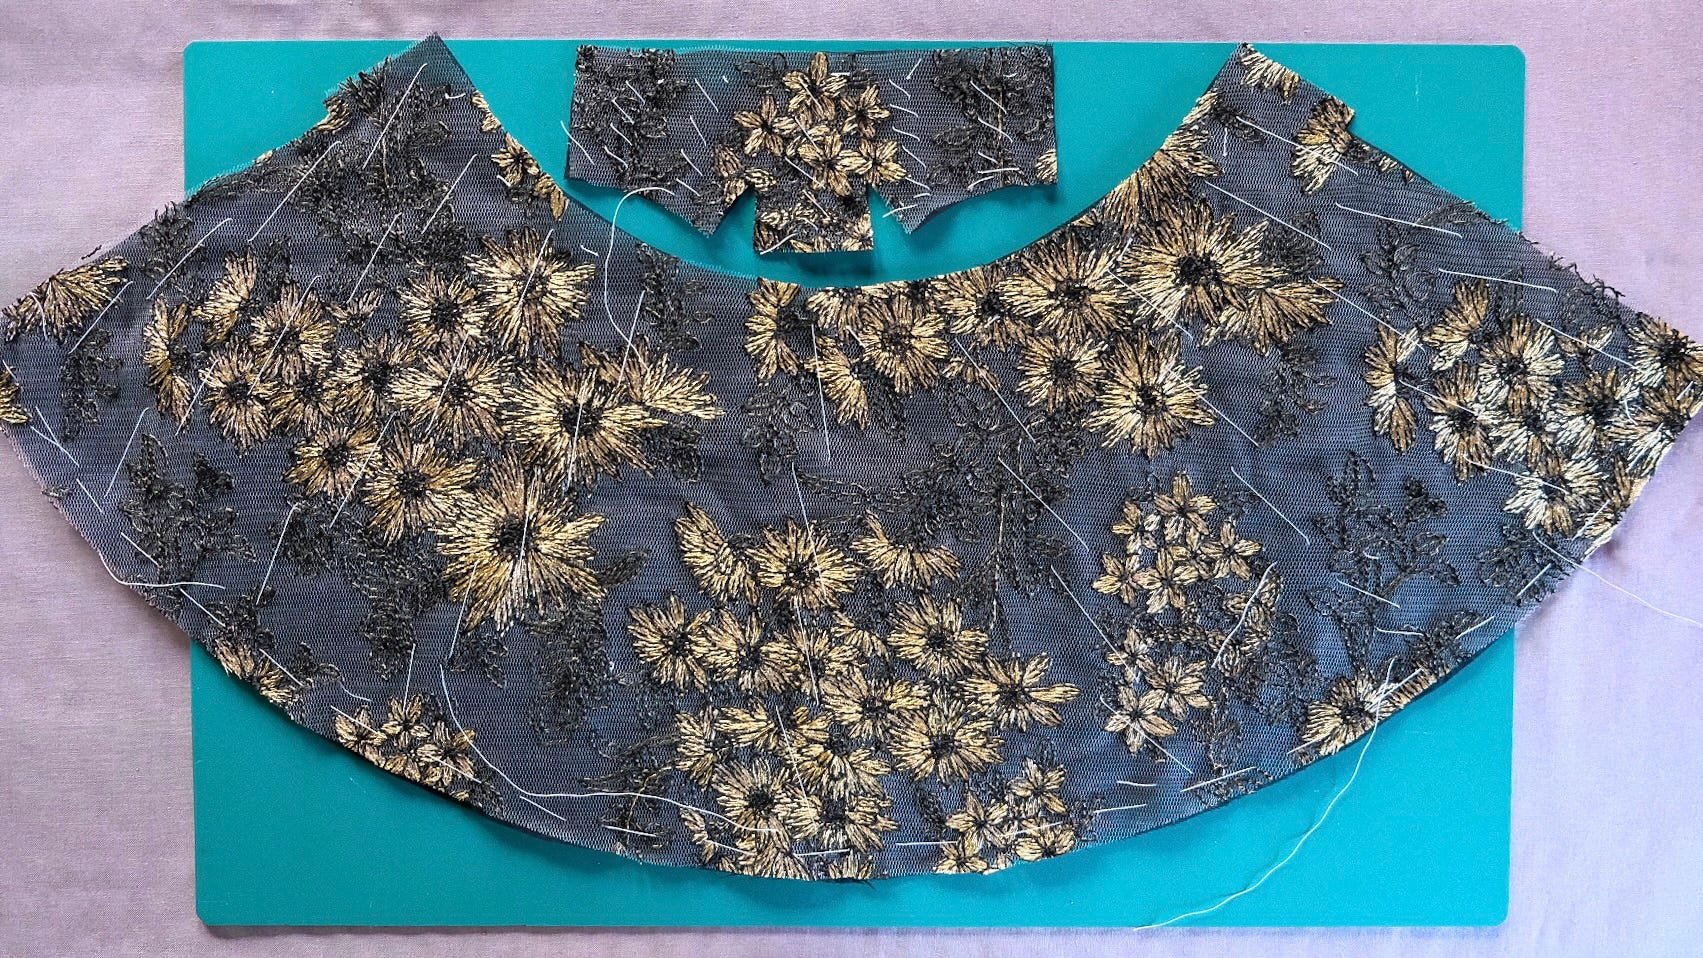
A mounting fabric is a backing material used to support or stabilize the primary fabric during sewing. For this project, I used black cotton voile as a mounting fabric for both embroidered tulle and see-through jacquard. It helped prevent fabric distortion, added structure to the main fabric, and also served as a lining.
Tip: When using a mounting, make sure to align grain lines for proper drape.
4. Use What You Can Find
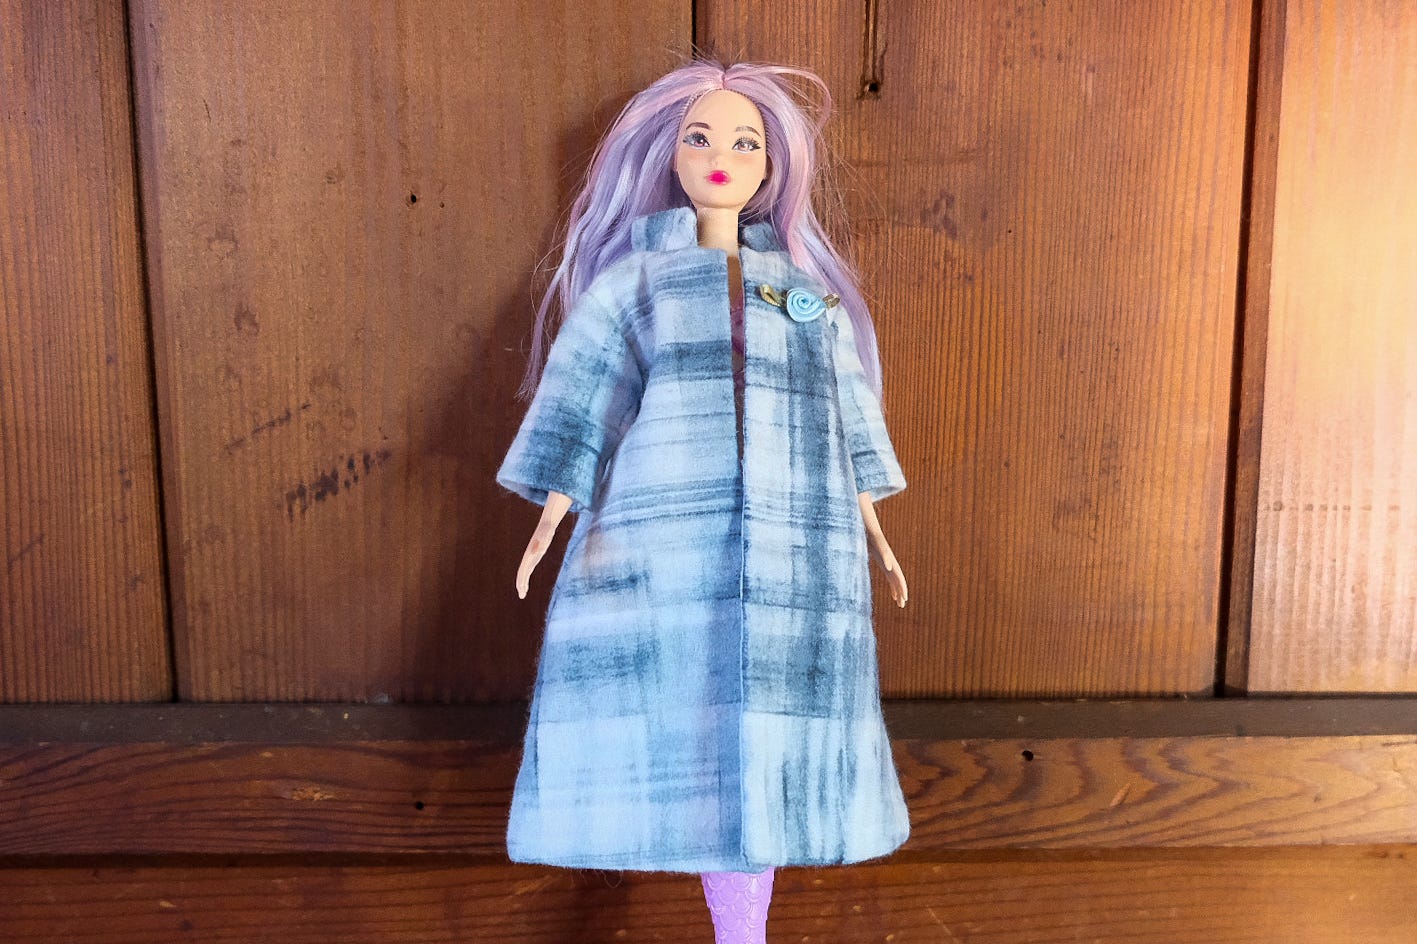
I have a soft spot for saving wrapping ribbons and trimmings that garnish gifts and packages. This velvet ribbon was one of those items I’d squirreled away. Too short for most uses, but just right as a waist accent and hem finish!
And then I found this lovely spool of cloth ribbon I use for wrapping gifts. With its metallic gold accent, it turned out to be the perfect touch for finishing a hem.

And here’s a little rosette I found at the bottom of my trim box for another touch of embellishment.
5. Too Small Scraps
Scraps. Sometimes they’re not quite big enough—even for doll clothes. But resist the temptation to cheat the grainline by repositioning the pattern just to make it fit. Instead, let the scraps work for you by seaming them together.
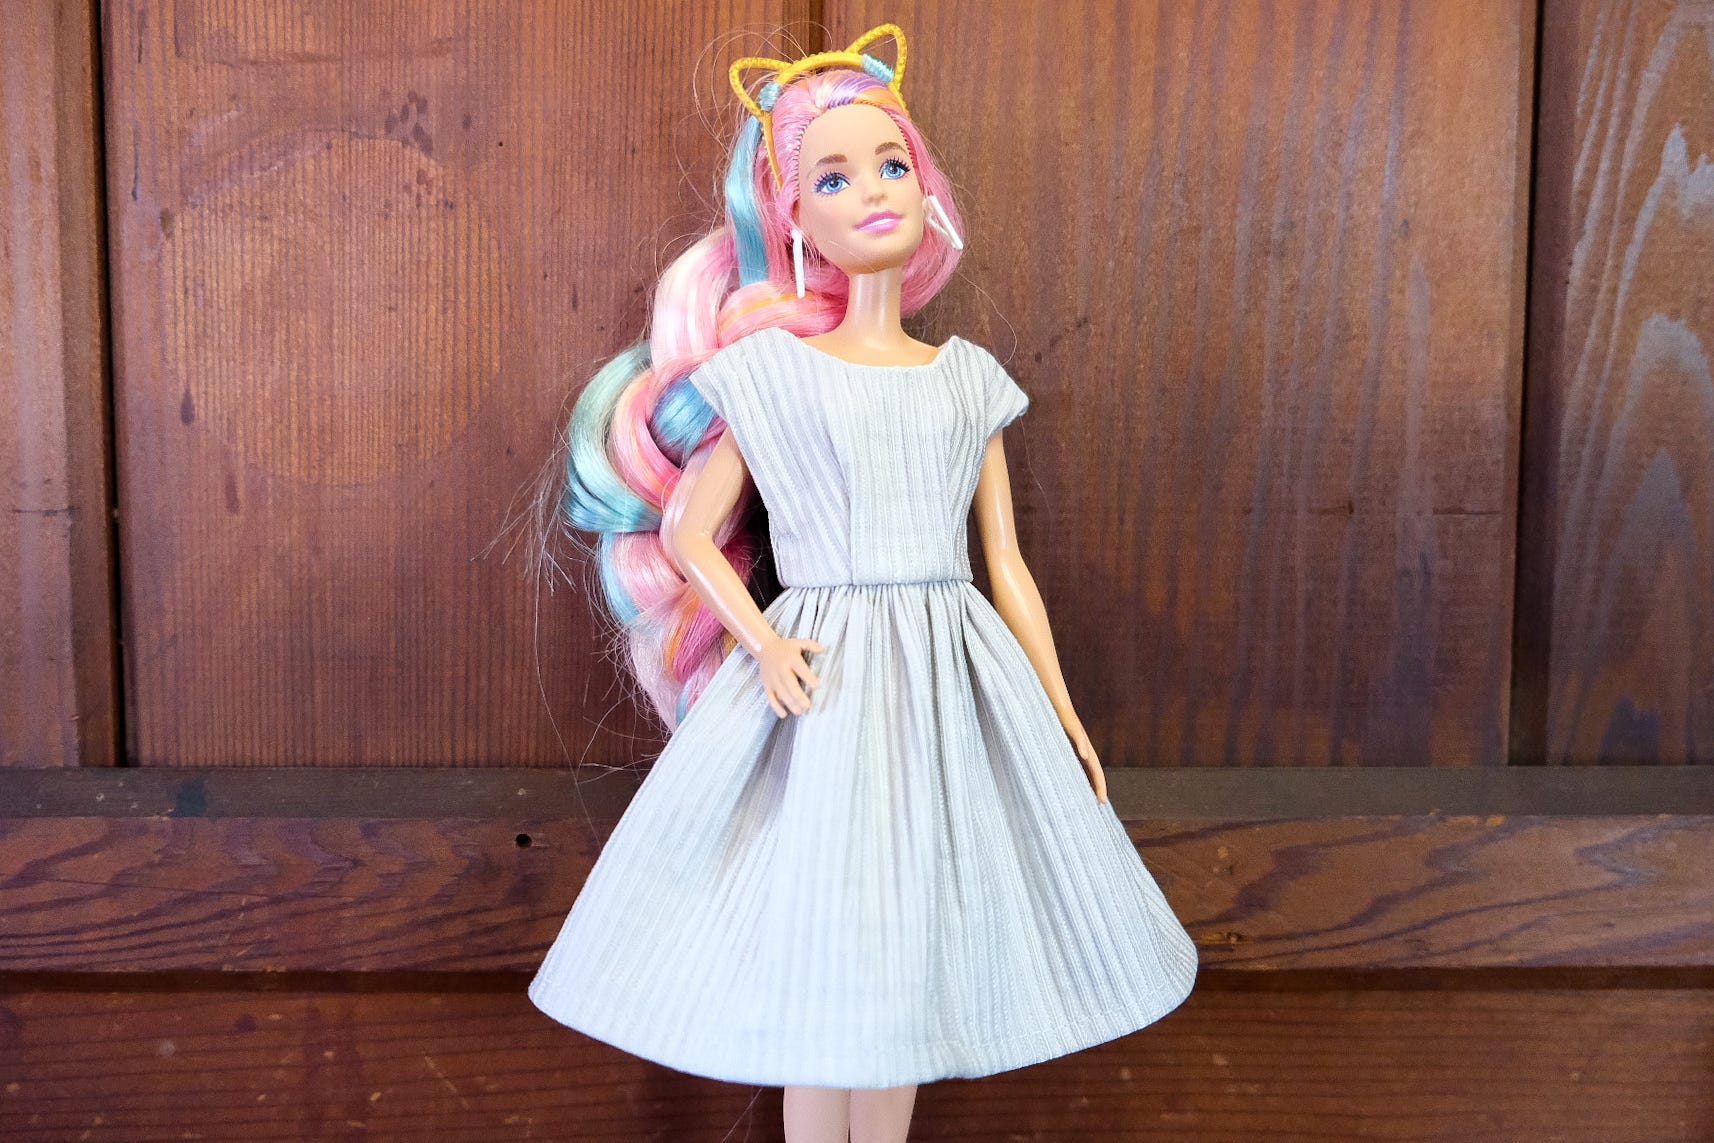
For instance, this ribbed jacquard came from a fabric header, and there wasn’t enough to cut the skirt on the fold. The solution? I added a seam down the center front.
*A fabric header is a small piece of fabric, often attached to a cardboard “header.” It’s used by fabric vendors to showcase their latest textiles to designers and buyers. The header will include details like fabric type, content, available colors, width, price, and supplier information.
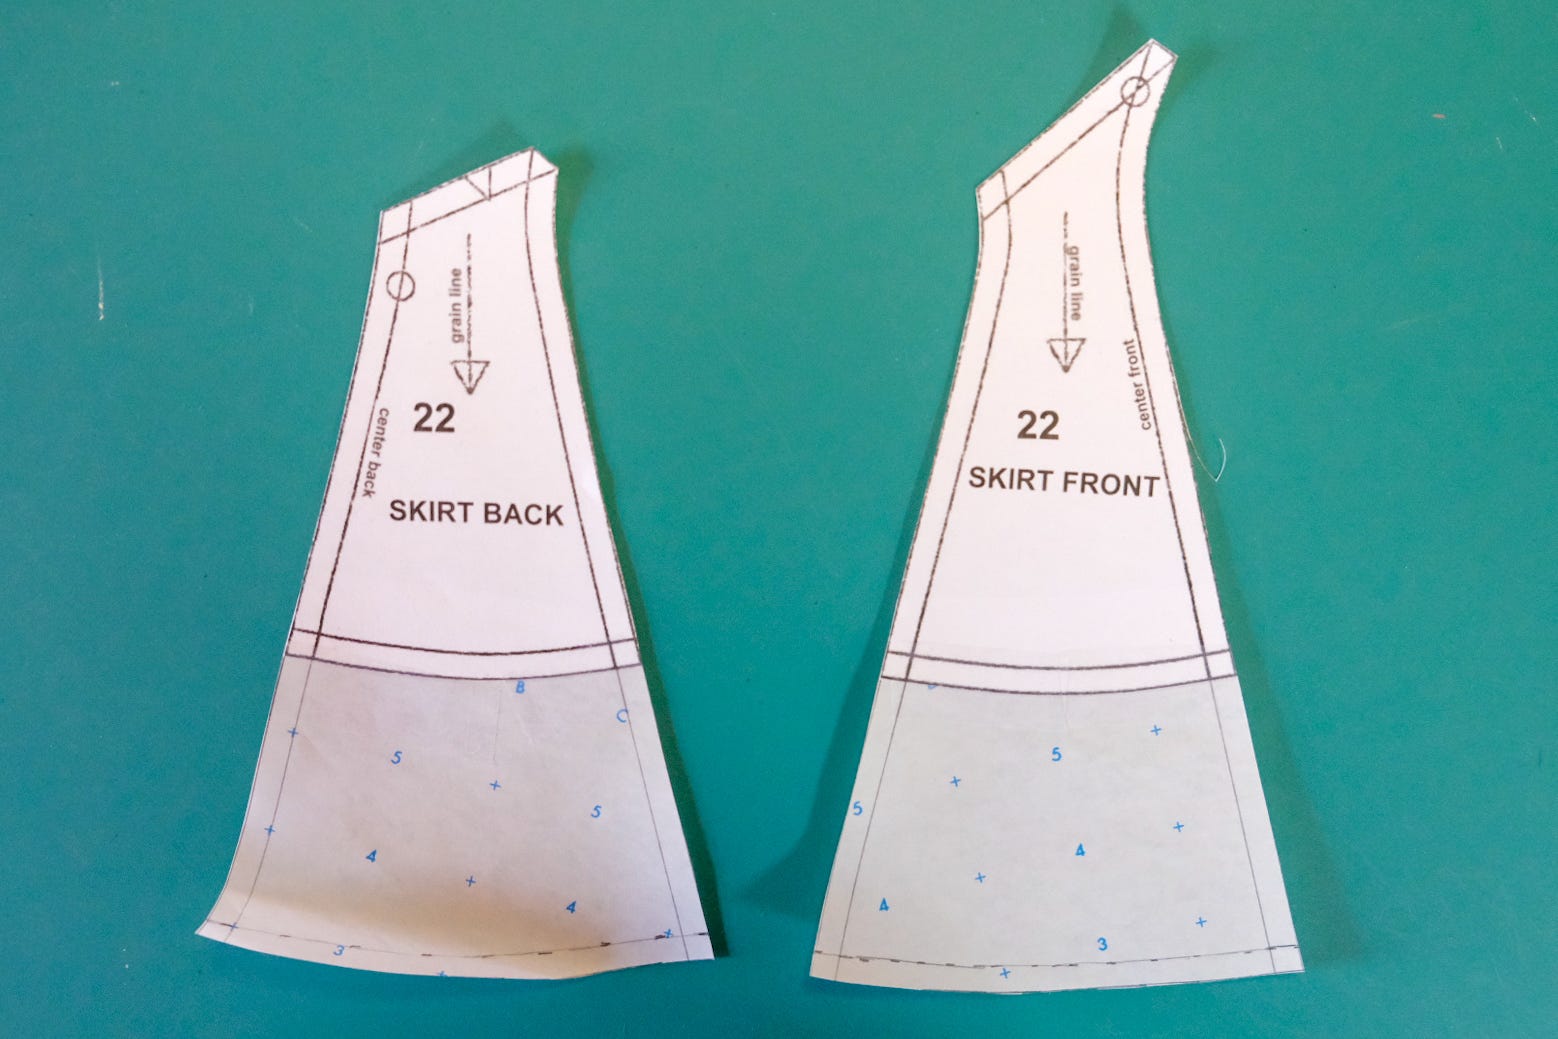
6. Pattern Adjustments
Let’s get creative with the flat patterns—nothing too fancy, just a simple skirt lengthening to change things up a bit.
She’s ready for her accessories, yes?
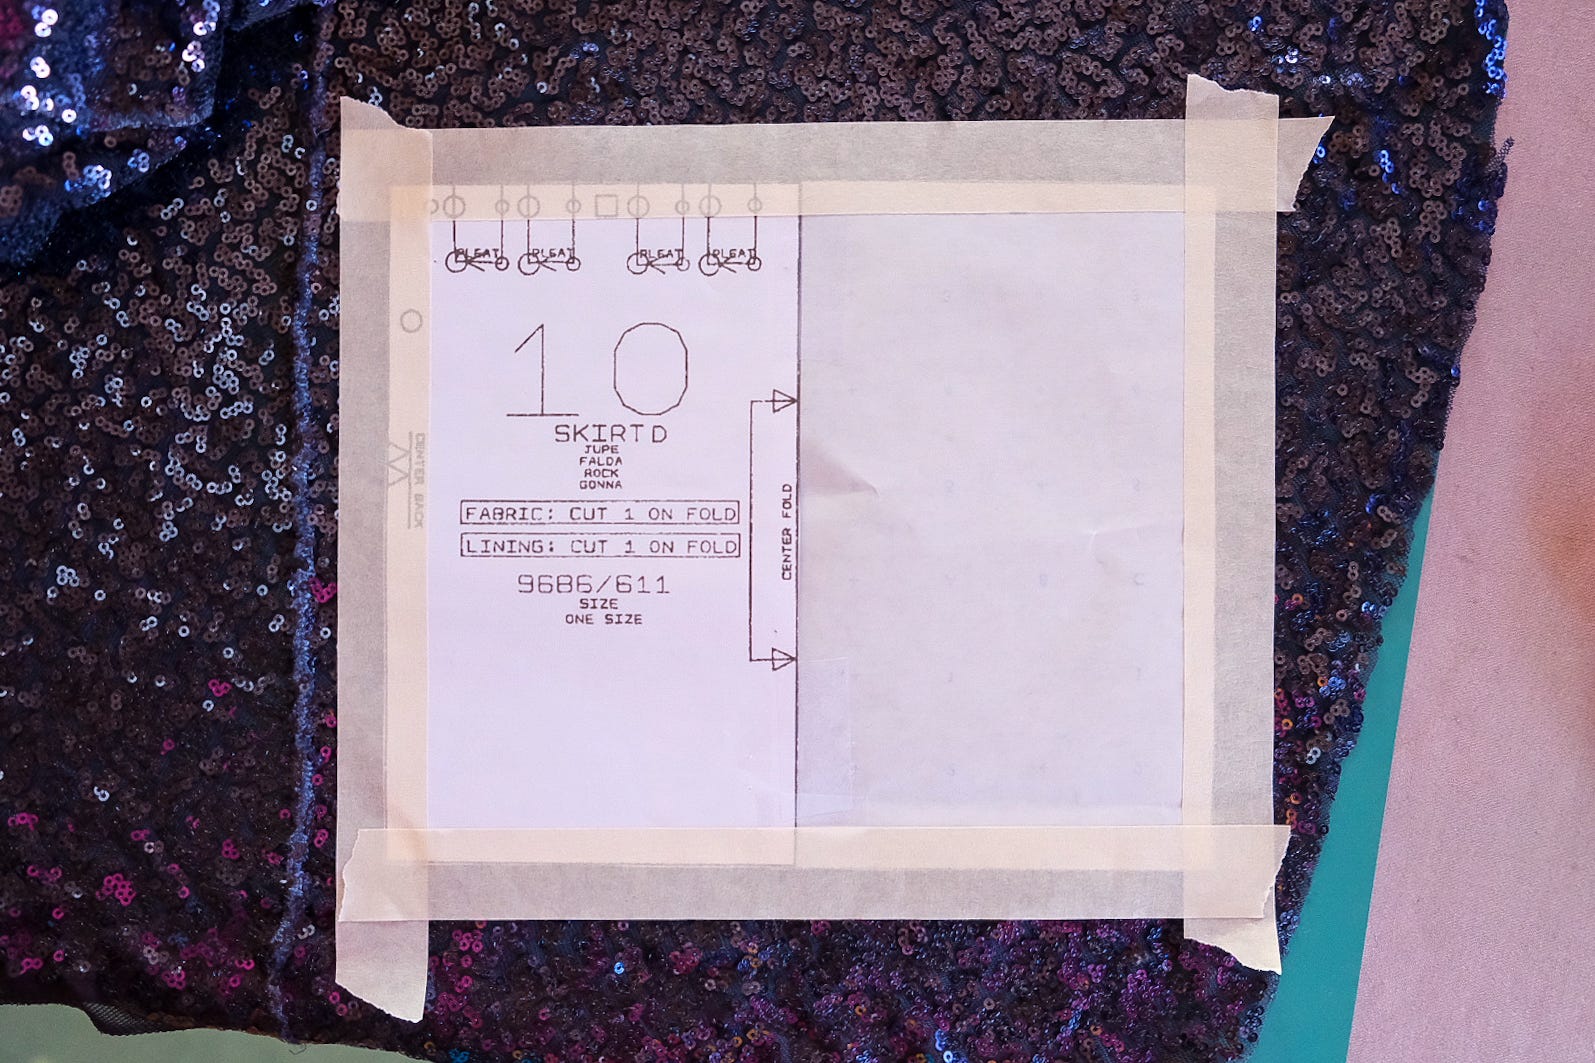
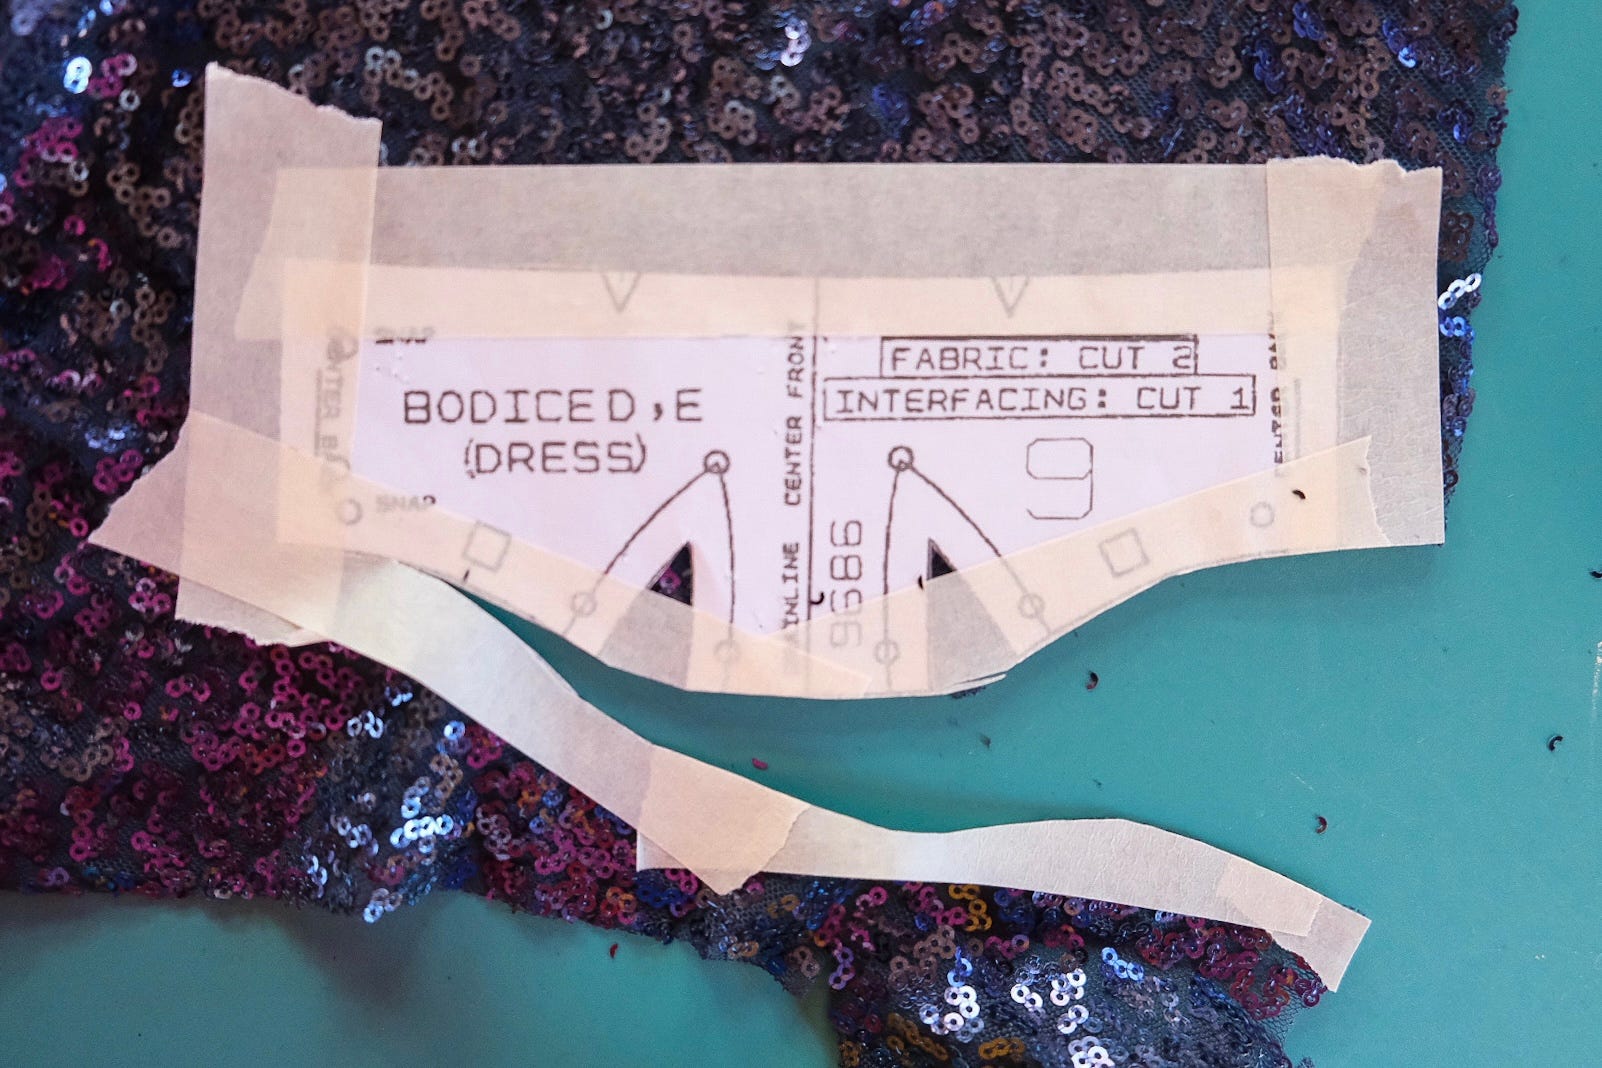
7. Working with Sequins
A few tips for working with sequins:
Full Pattern Pieces: If a pattern calls for a fold placement, trace and create full pattern pieces using tissue or pattern paper. Then, cut the sequins as a single layer, right side up, so you’re not cutting on a fold.
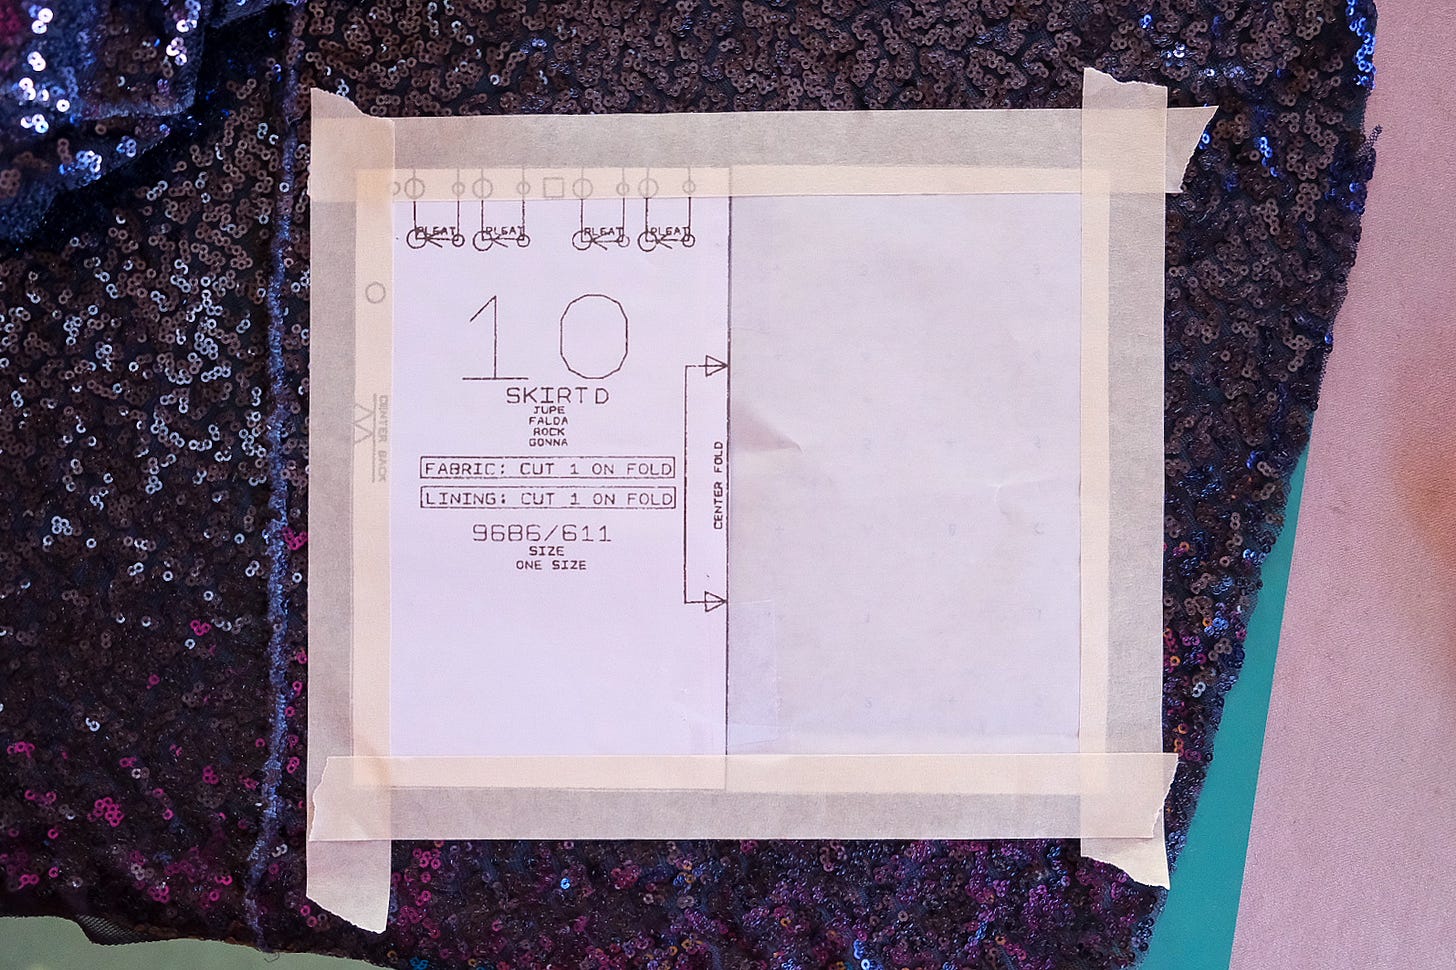
Use Masking Tape: Secure your pattern pieces with masking tape. Cut through both the tape and fabric. The tape helps keep sequins in place at the raw edges and minimizes flying fragments as you cut. Best to avoid using your pristine fabric scissors to cut through masking tape.

Staystitch: If after cutting, sequins are falling off, staystitch along seam lines directionally with the fabric right side up. This helps to prevent sequin loss and keeps the feed from catching on sequins. If making a full-size garment, you may need to replace needles often, as sequins can dull them quickly.
Gentle Pressing: Avoid heat pressing. Instead, finger press seams with a thimble or use the blunt end of a point turner to press along the seam line. For final pressing, use a low-heat iron on the seam line only and skip the steam—it can dull the sequins' sheen.
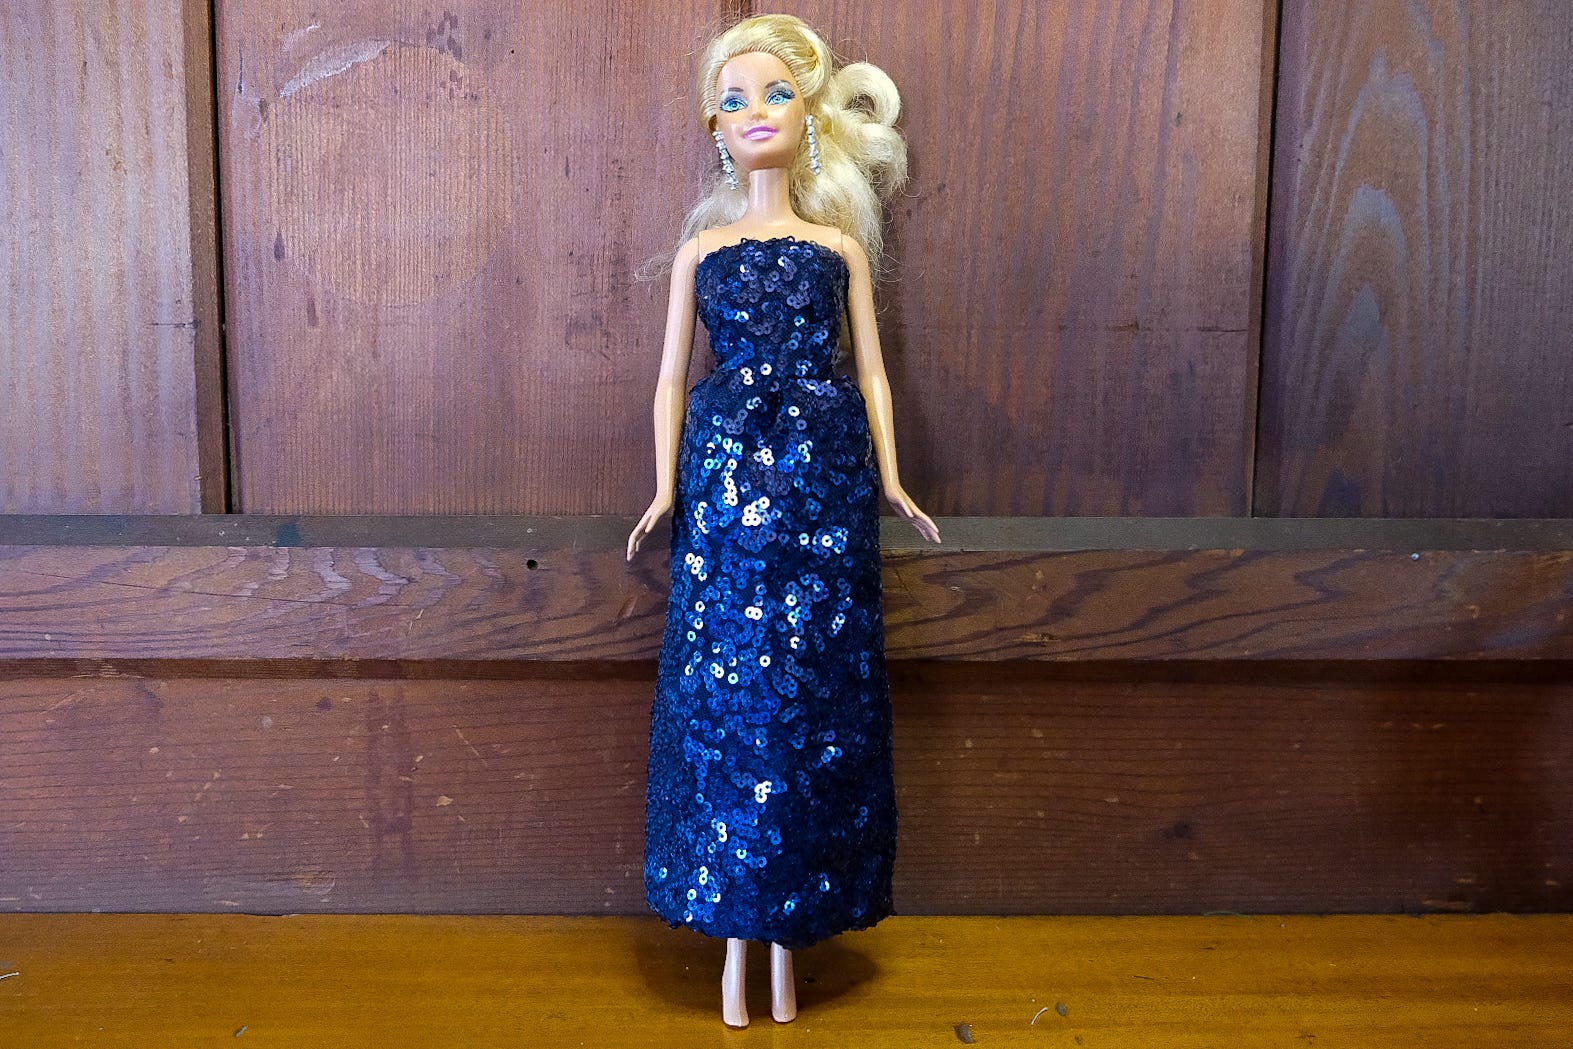
8. Snap Fasteners
Thank goodness for snap fasteners. If I had to sew tiny zippers, I might’ve skipped this project all together. I exaggerate, but I’ve never enjoyed sewing zippers, at any scale.
Snaps also allow more leeway. I was able to make quick fit fixes on gowns that were a tad too big. By positioning the snaps for more overlap at the center back, I achieved a snugger fit. Another bonus? Little fingers can work snaps. There’s no need for ties or laces.
A snap has two pieces: the little nub part that’s called the ball, and the socket that the ball snaps into.
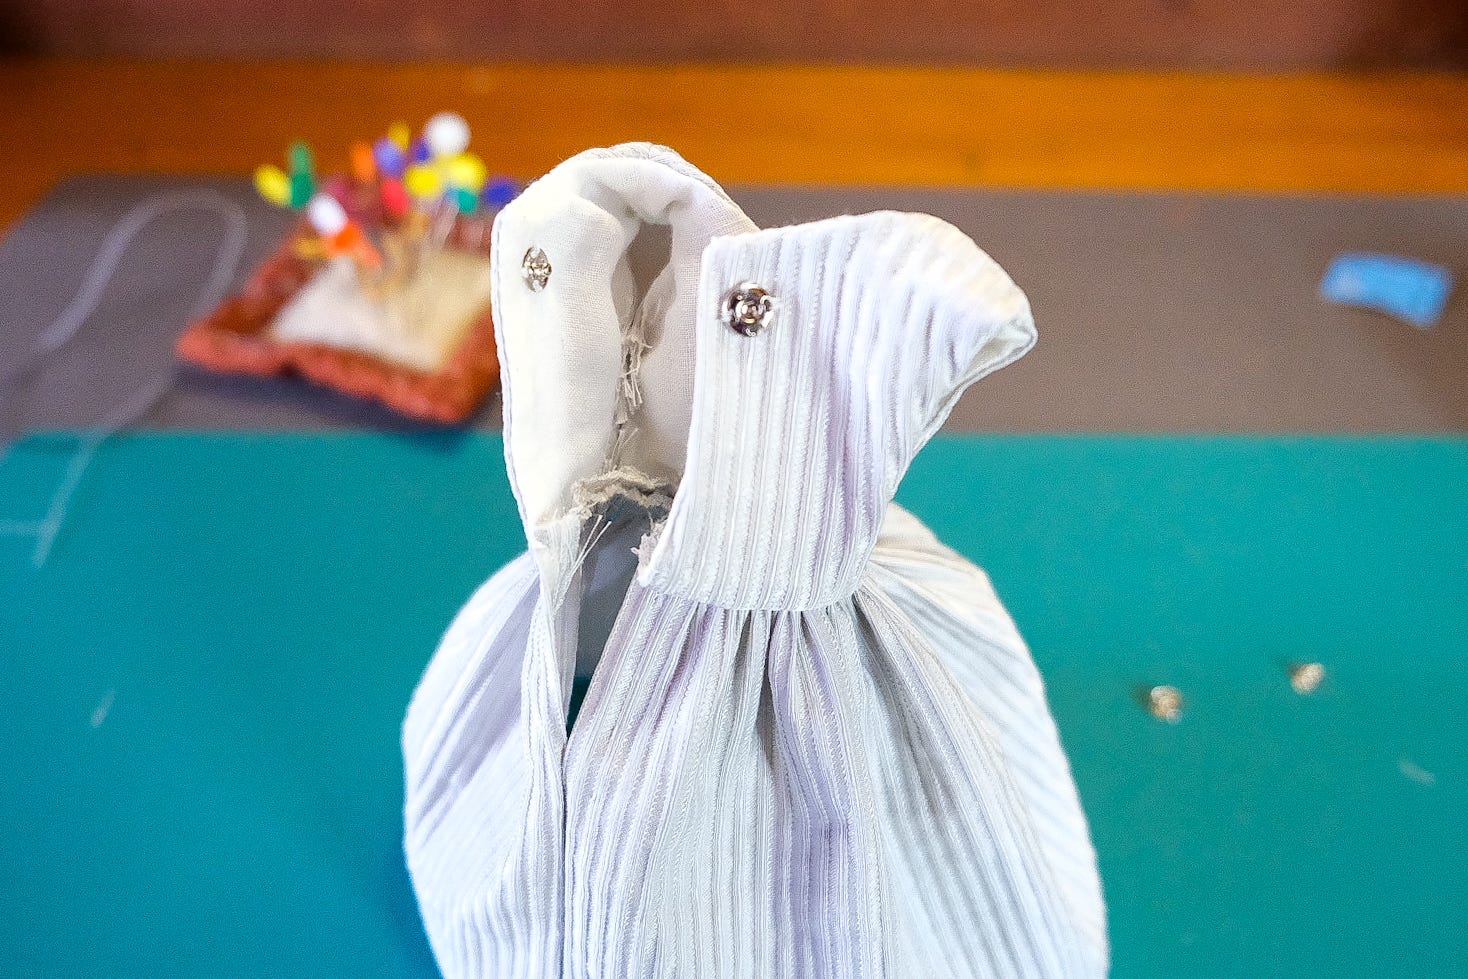
Here’s a refresher for attaching a snap: Position ball half on underside of overlap far enough in from the edge so it will not show; whipstitch over each hole. Then position the socket half on the right side of underlap to align with ball; whipstitch over each hole.
And the best part? My daughter was super happy about her new Barbie clothes. I hope this project inspires you to try something new—whether it’s working with vintage patterns or sewing something small and creative. Until next time, happy sewing! ~ Jane
I treasure the Barbie clothes my grandmother made for my dolls in the 1970s. They’ve survived two generations of play so far, and are still in good shape in case there’s another generation someday!
I wish I was Barbie sized, I'd wear all of these! I also wish you were my Mum so that you could make them! Ha-ha!