


The Casual Charm of Tailored Curtains
A Step-by-Step Guide to Sewing Rod Pocket Curtains & Classic Cool Sewing's Launching Newsletter!

Welcome to the inaugural Classic Cool Sewing newsletter, a bimonthly newsletter about sewing and pattern drafting, with the occasional fashion extra sprinkled in. Each newsletter can be a standalone piece or paired with my video tutorials as a complementary resource. For complex techniques or many-stepped projects, I recommend the latter.
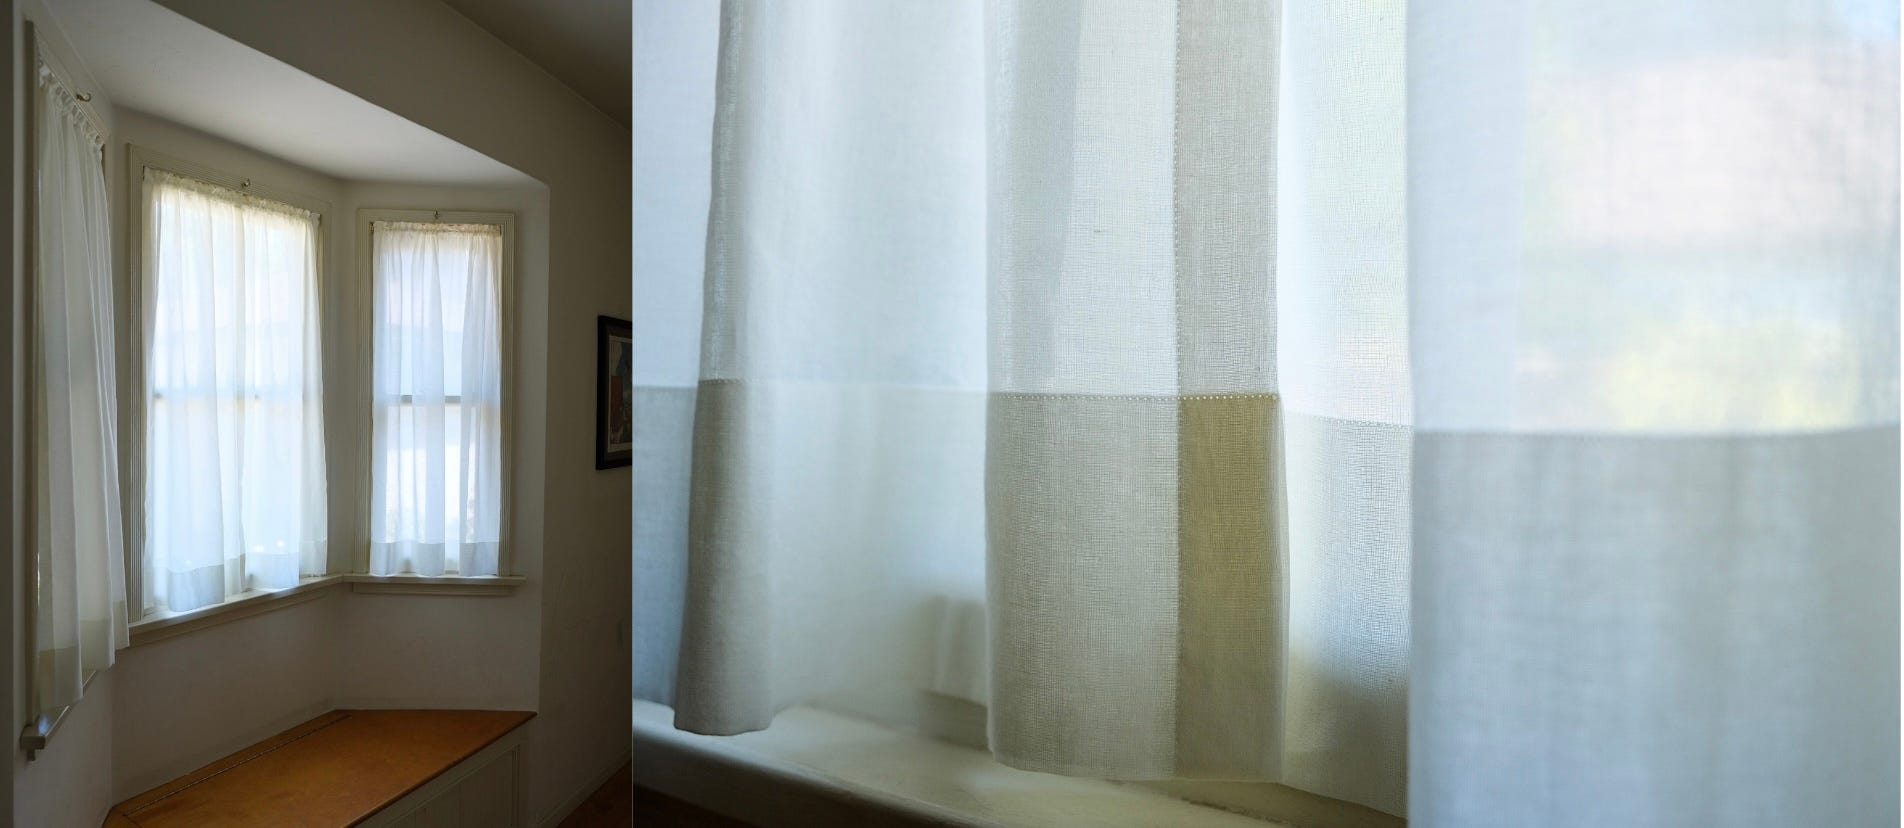
I’m kicking off with a classic sewing project: making rod pocket curtains for our hallway bay windows.
Rod pocket curtains, also known as rod-top, tailored, or pole top curtains, are the most basic curtain style with a sewn-in rod casing at the top of each panel.
For this project, I chose semi-transparent cotton voile since the fabric would let in natural light while still offering privacy, and I opted for Swivel Sash Curtain Rods because I wanted minimal, low-profile hardware that was easy to install and would still hold the lightweight cotton voile panels.
Rod pocket curtains are easy to customize and a beginner-friendly sewing project. Keep reading for a step-by-step guide on how to make curtains fit for your windows, and be sure to watch the video tutorial on my YouTube channel: Learn How to Sew Rod Pocket Curtains

Recommended Materials
Fabric
Thread
Scissors
Pins
Graph Ruler
Sewing Machine
Iron
Ironing Board
Graph Paper
Seam Gauge
Seam Ripper* Mistakes are part of the process!
Part 1. Calculations for Making Top Rod Curtains
This curtain tutorial uses a woven fabric, so it’s important to cut your panels on the straight of grain. If your curtain panels aren't cut straight, they won't drape correctly, and may stretch in odd ways.
The straight of grain, or warp, runs parallel to the selvage and has the least amount of stretch. The weft, runs right to left—an easy way to remember is weft rhymes with left—and has a small amount of stretch. Bias runs on the diagonal and gives you the most stretch.
Before cutting, I like to visualize the layout with graph paper. This way, I know if I have enough yardage. If I don’t, this is the time to make adjustments to maximize fabric yield, or order more fabric.
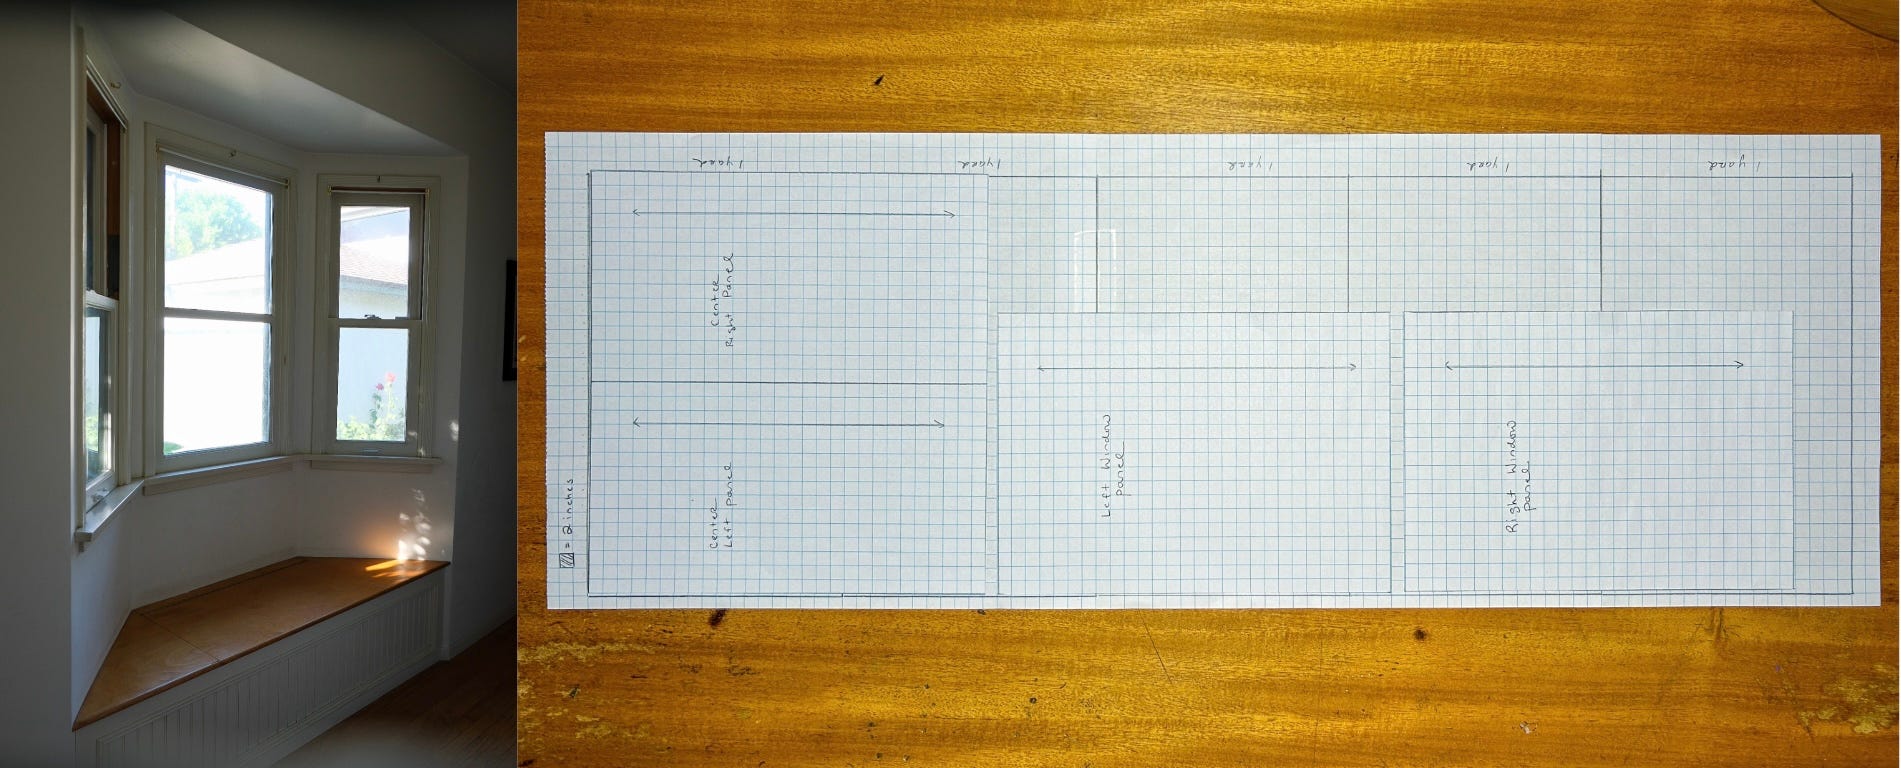
I used this chart from Time Life Books’ The Art of Sewing: MAKING HOME FURNISHINGS to calculate my yardage:

Part 2. Cutting and Preparing the Fabric
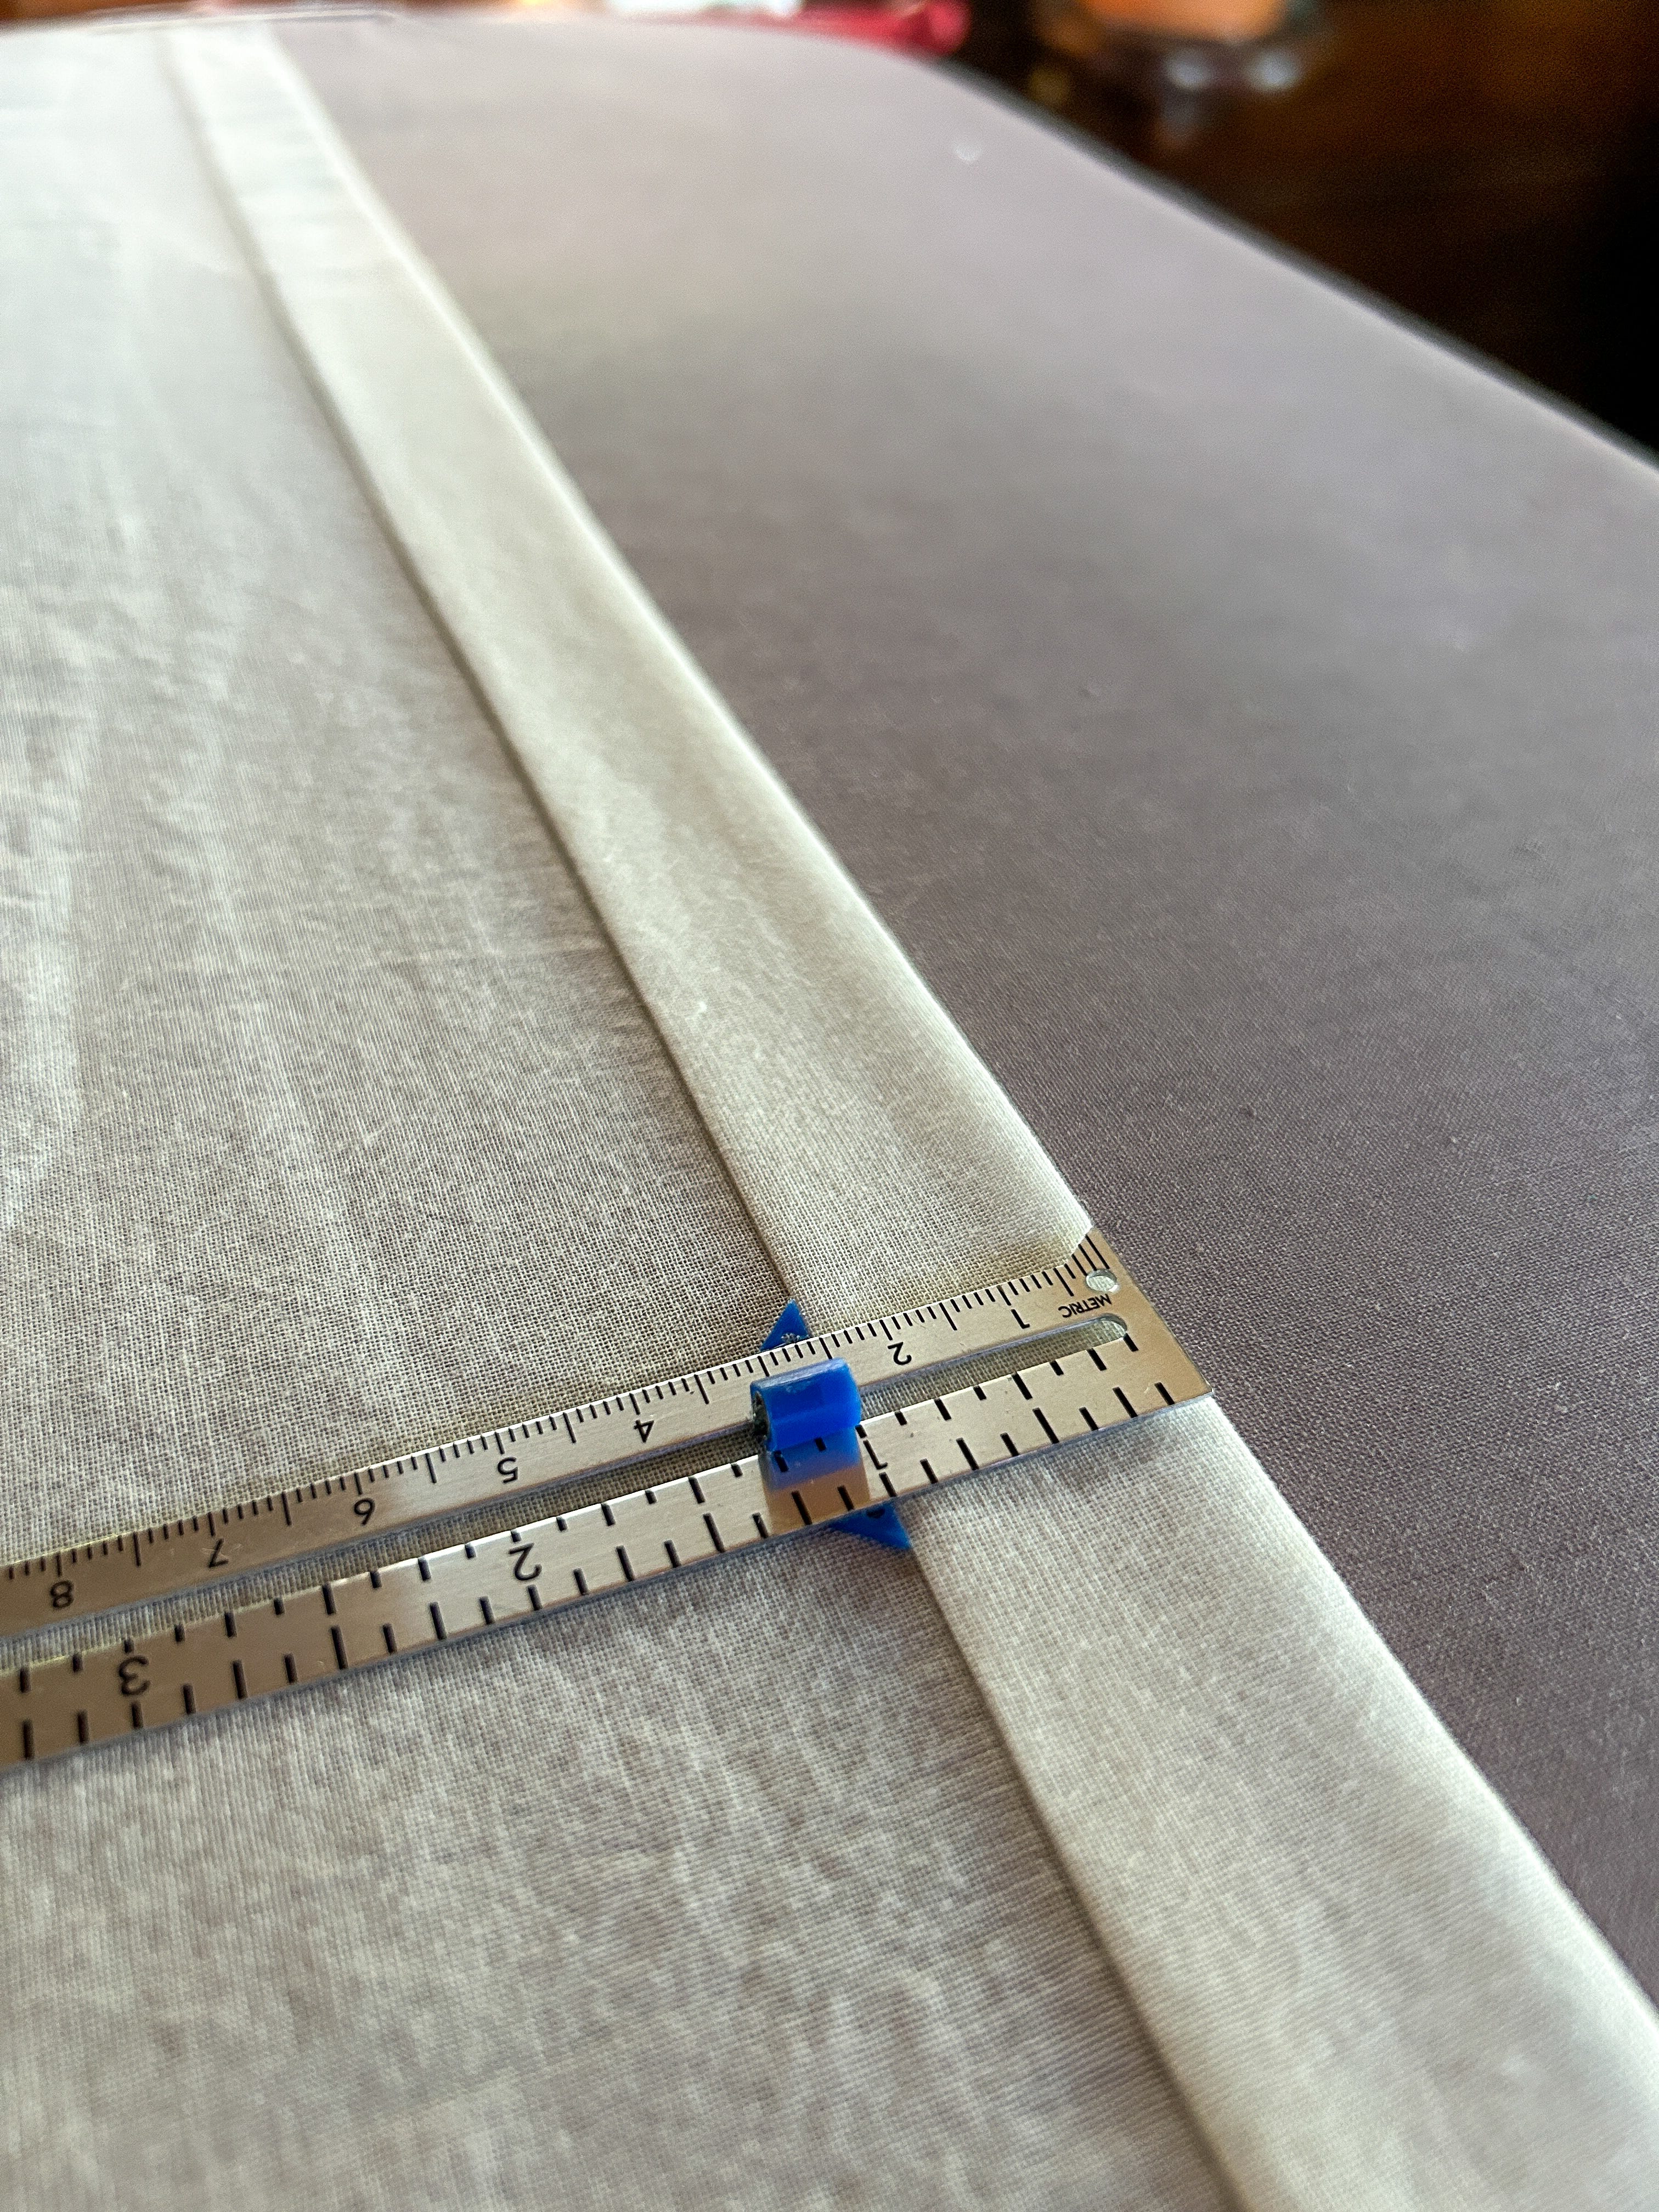
Measure and mark your panel lengths with a pin. Place the fabric, wrong side down. Straighten one edge by drawing a crosswise thread and cutting along the drawn thread, or by drawing and cutting along a chalk line. I prefer the crosswise thread method because it’s easier for me to make a straight line, especially on a large panel of airy cotton voile.
Here’s a minute-long short video on how to do this, and you can find it here.
Use the desired panel length measurement which you’ve already calculated to make and cut off as many sections as you need. Then trim the panels according to the width measurement(s) as well. If you need to divide one fabric section into two half widths, an easy way is to fold the section lengthwise down the center, press and cut along the crease.
To see if the grains of fabrics need straightening, align two adjacent sides of a section to a right-angled corner of a table, If the edges do not align properly, gently pull on the true bias of the fabric until its sides are at right angles, then steam-press.

Part 3. Hemming the Sides of the Panels
Place one curtain panel wrong side up. Make a double hem 1 inch deep on each side by folding up each edge 1 inch and pressing in a crease, then folding each edge another 1 inch and pressing again. (You can choose your own measurements. I enjoy the look of a 1-inch double side hem for this curtain design.)
Pressing before sewing makes it easier to stitch close to the edge, and a seam gauge is a very helpful tool here.
Machine stitch along the inner edges of the hem, and repeat for all panels.
To note, SPI is the number of stitches in one inch of a seam. Often, companies choose to decrease the stitches per inch to reduce the cost of manufacturing—it takes less time and less thread to sew an item using less stitches. I use a stitch length in the 2.0 to 2.5 range. I appreciate the smaller stitch aesthetic and find it an advantage of sewing your own curtains.
Part 4. Making Casing Tops
With one curtain panel wrong side up, fold down the edge to start your casing top. You can make a double hem, or a small fold—I’m doing a ¼ fold for these curtains—and press.
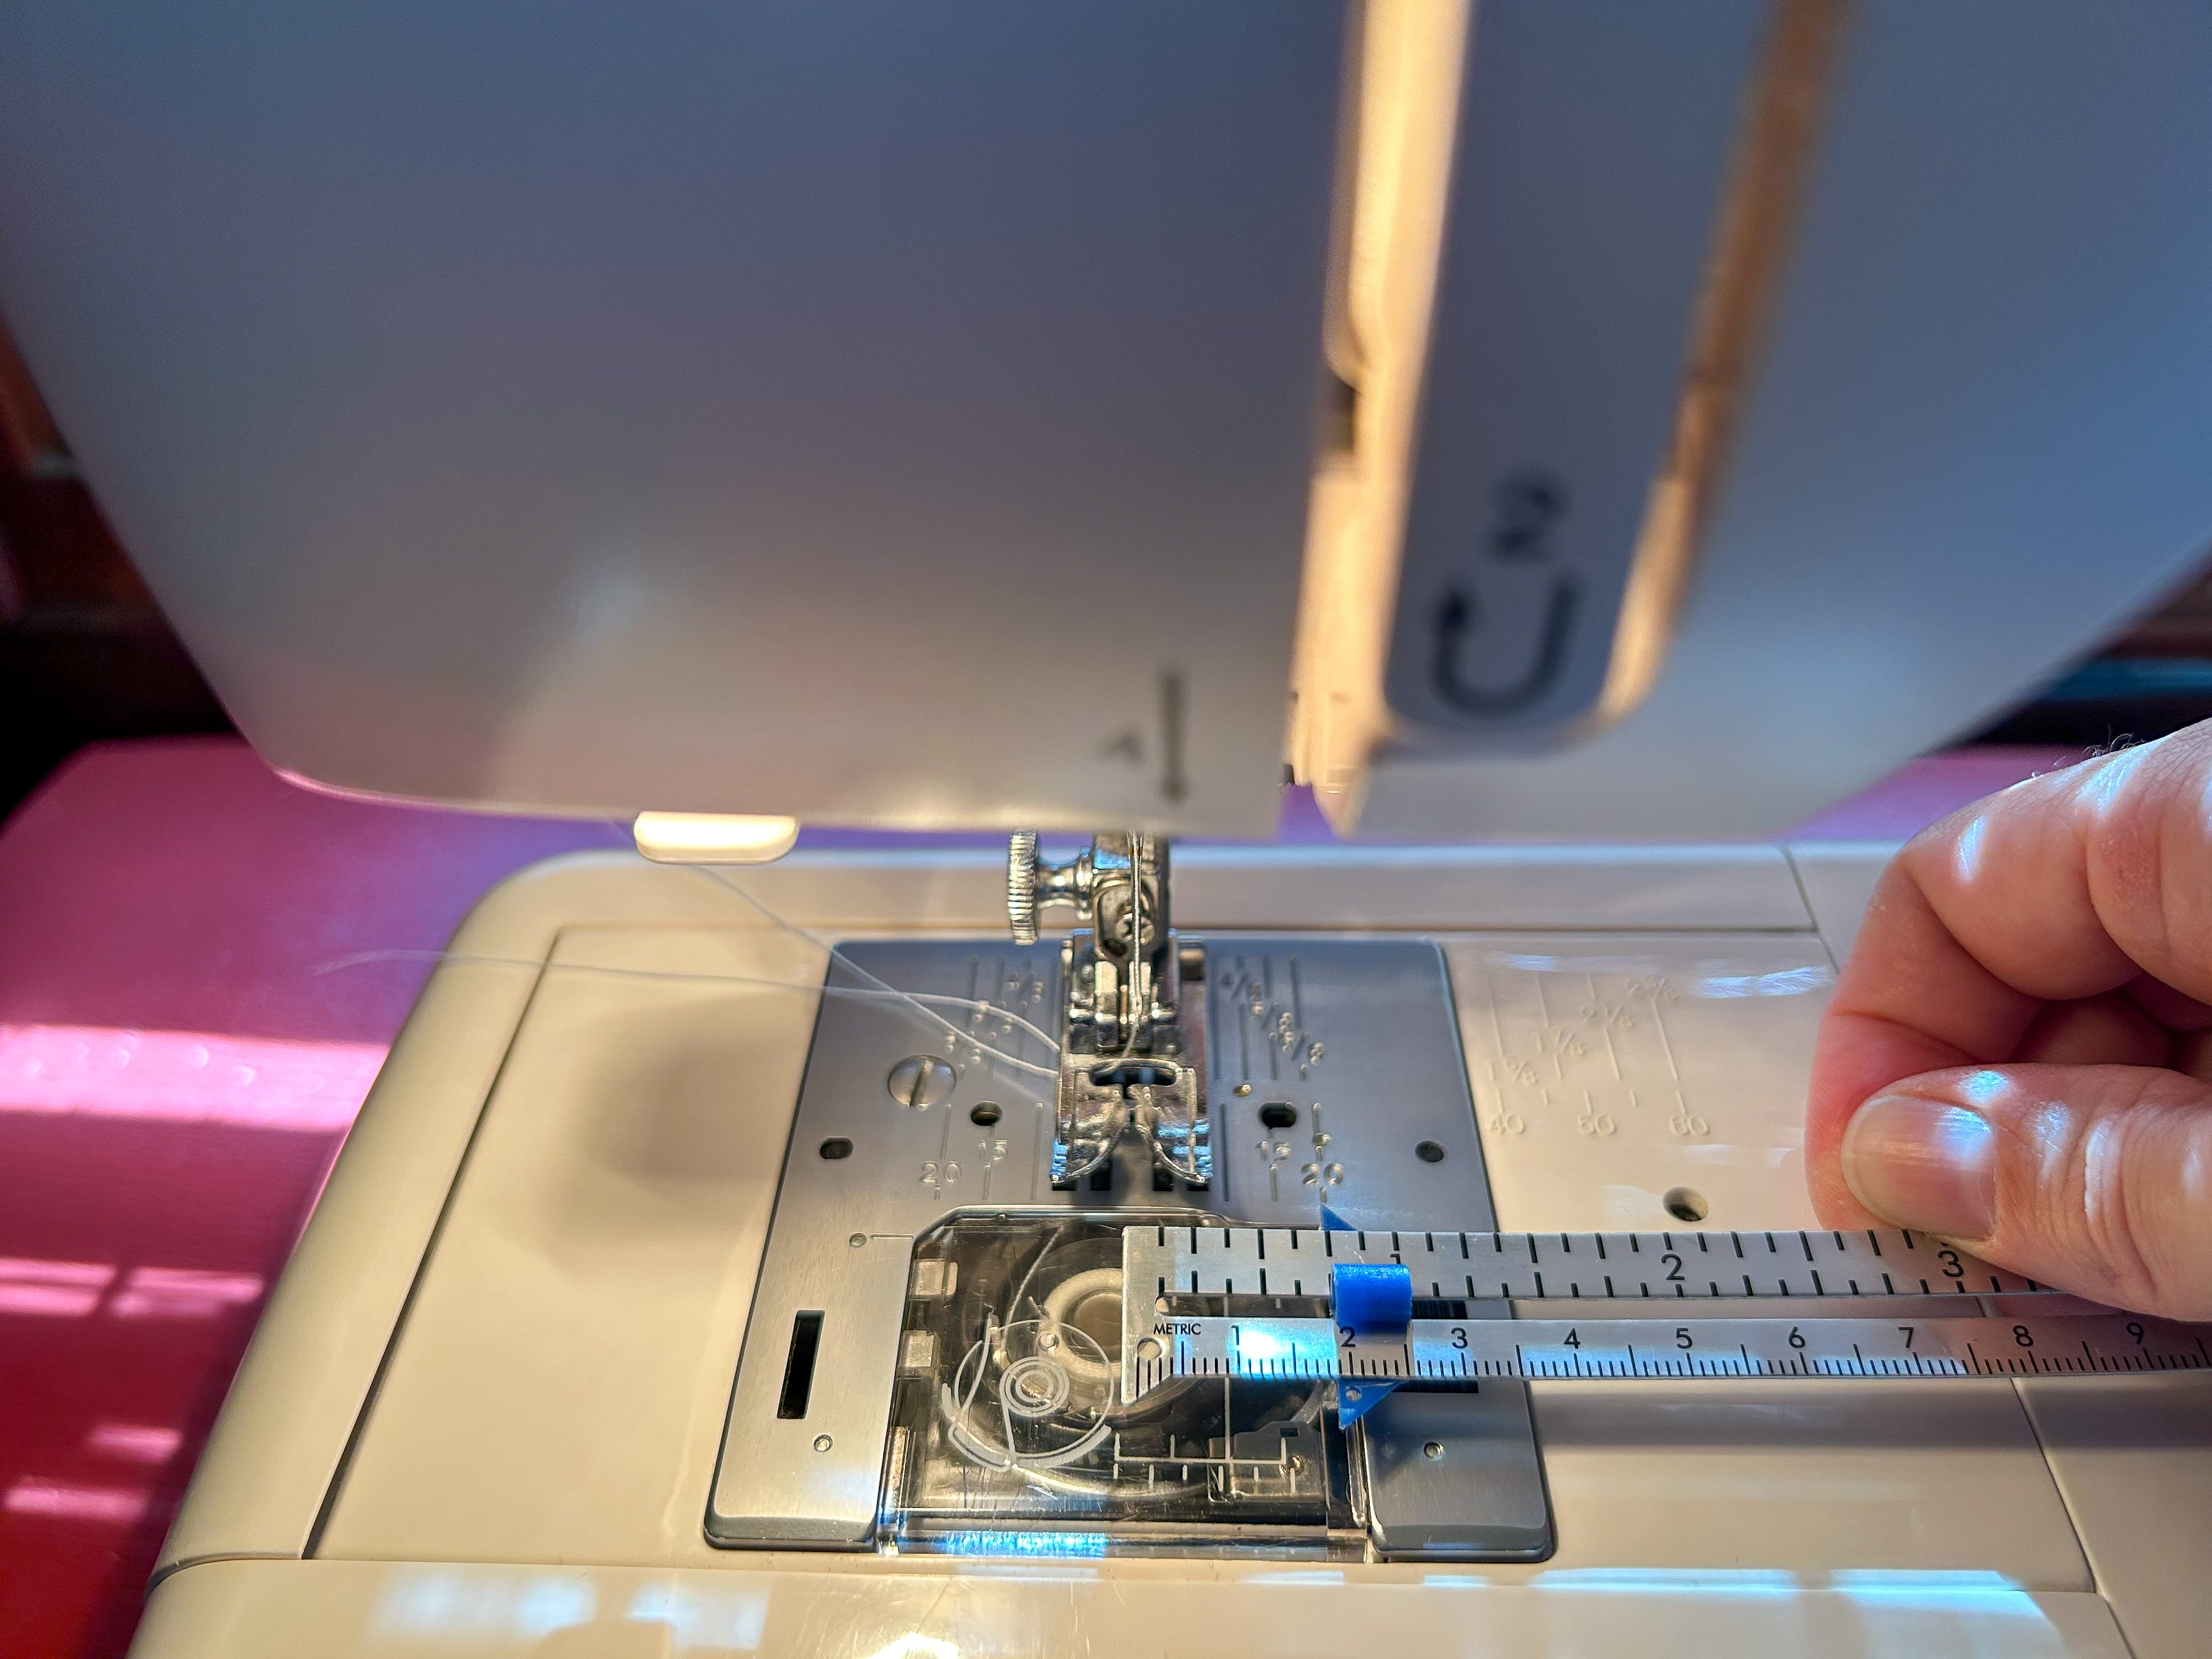
To find the depth necessary for casing tops, measure the diameter of your round rod by placing a ruler in front of it, then double the figure. If you have a flat rod, measure its depth and add 3/8 inch.
Determine the number of inches you need to make a hem for the casing and heading—i.e., the top section that will extend above the casing. Measure this distance from the top edge on both sides of the panel and pin.

Make a double hem for the casing and heading by folding the panel down at the pin markings. Press in a crease and pin. Again, pressing before pinning makes it much easier to stitch close to the inner edge. Stitch as close to the inner edge of the hem as possible, and make sure to backstitch at each end.
To make the casing, there are two options:
One, you can insert pins at 2-inch intervals between the panel top and the line of stitching to mark your heading seam. Stitch along the row of pins as you sew.
Or, Two, skip the pins and use the seam guide on your sewing machine to guide the line of stitching.
Part 5. Finishing the Hems
Before finishing the hems, hang the panels in place on the rod or rods.
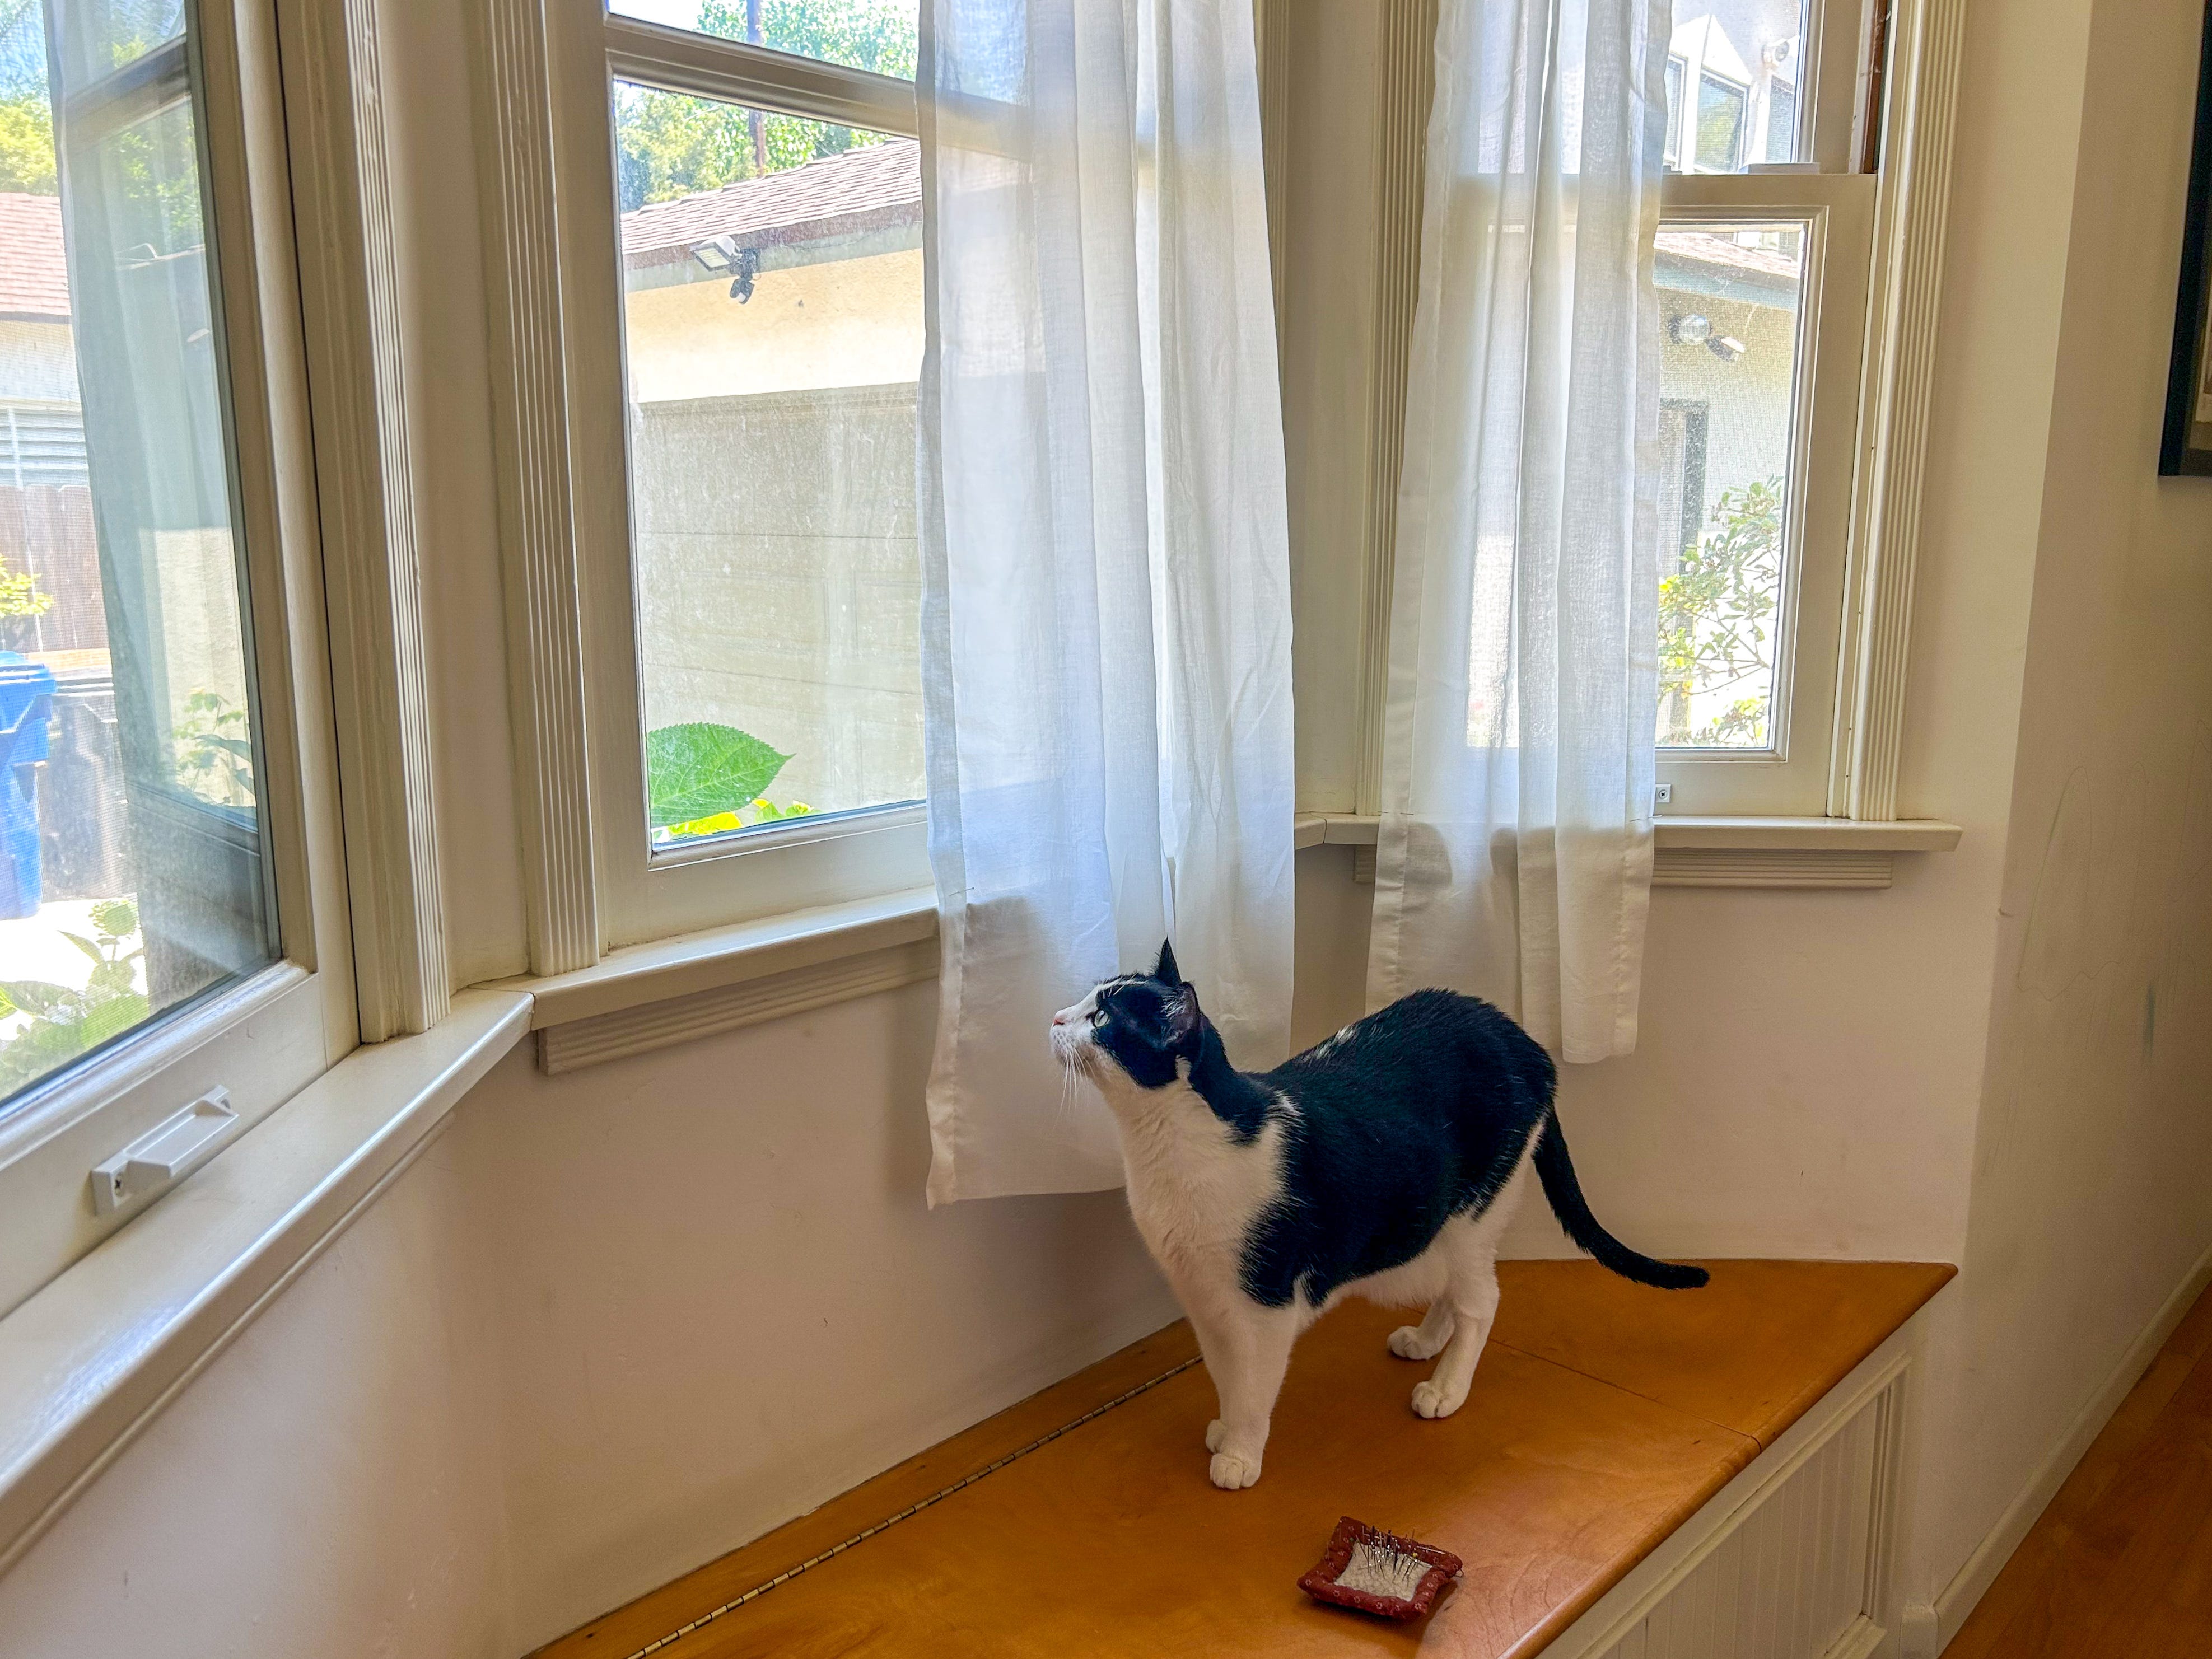
A helper… Our cat, Ivy, investigates the work in progress.
To make a bottom hem, insert pins on both sides of each panel at the level you want the bottom of the hem to reach, and remove the panels from the rod.

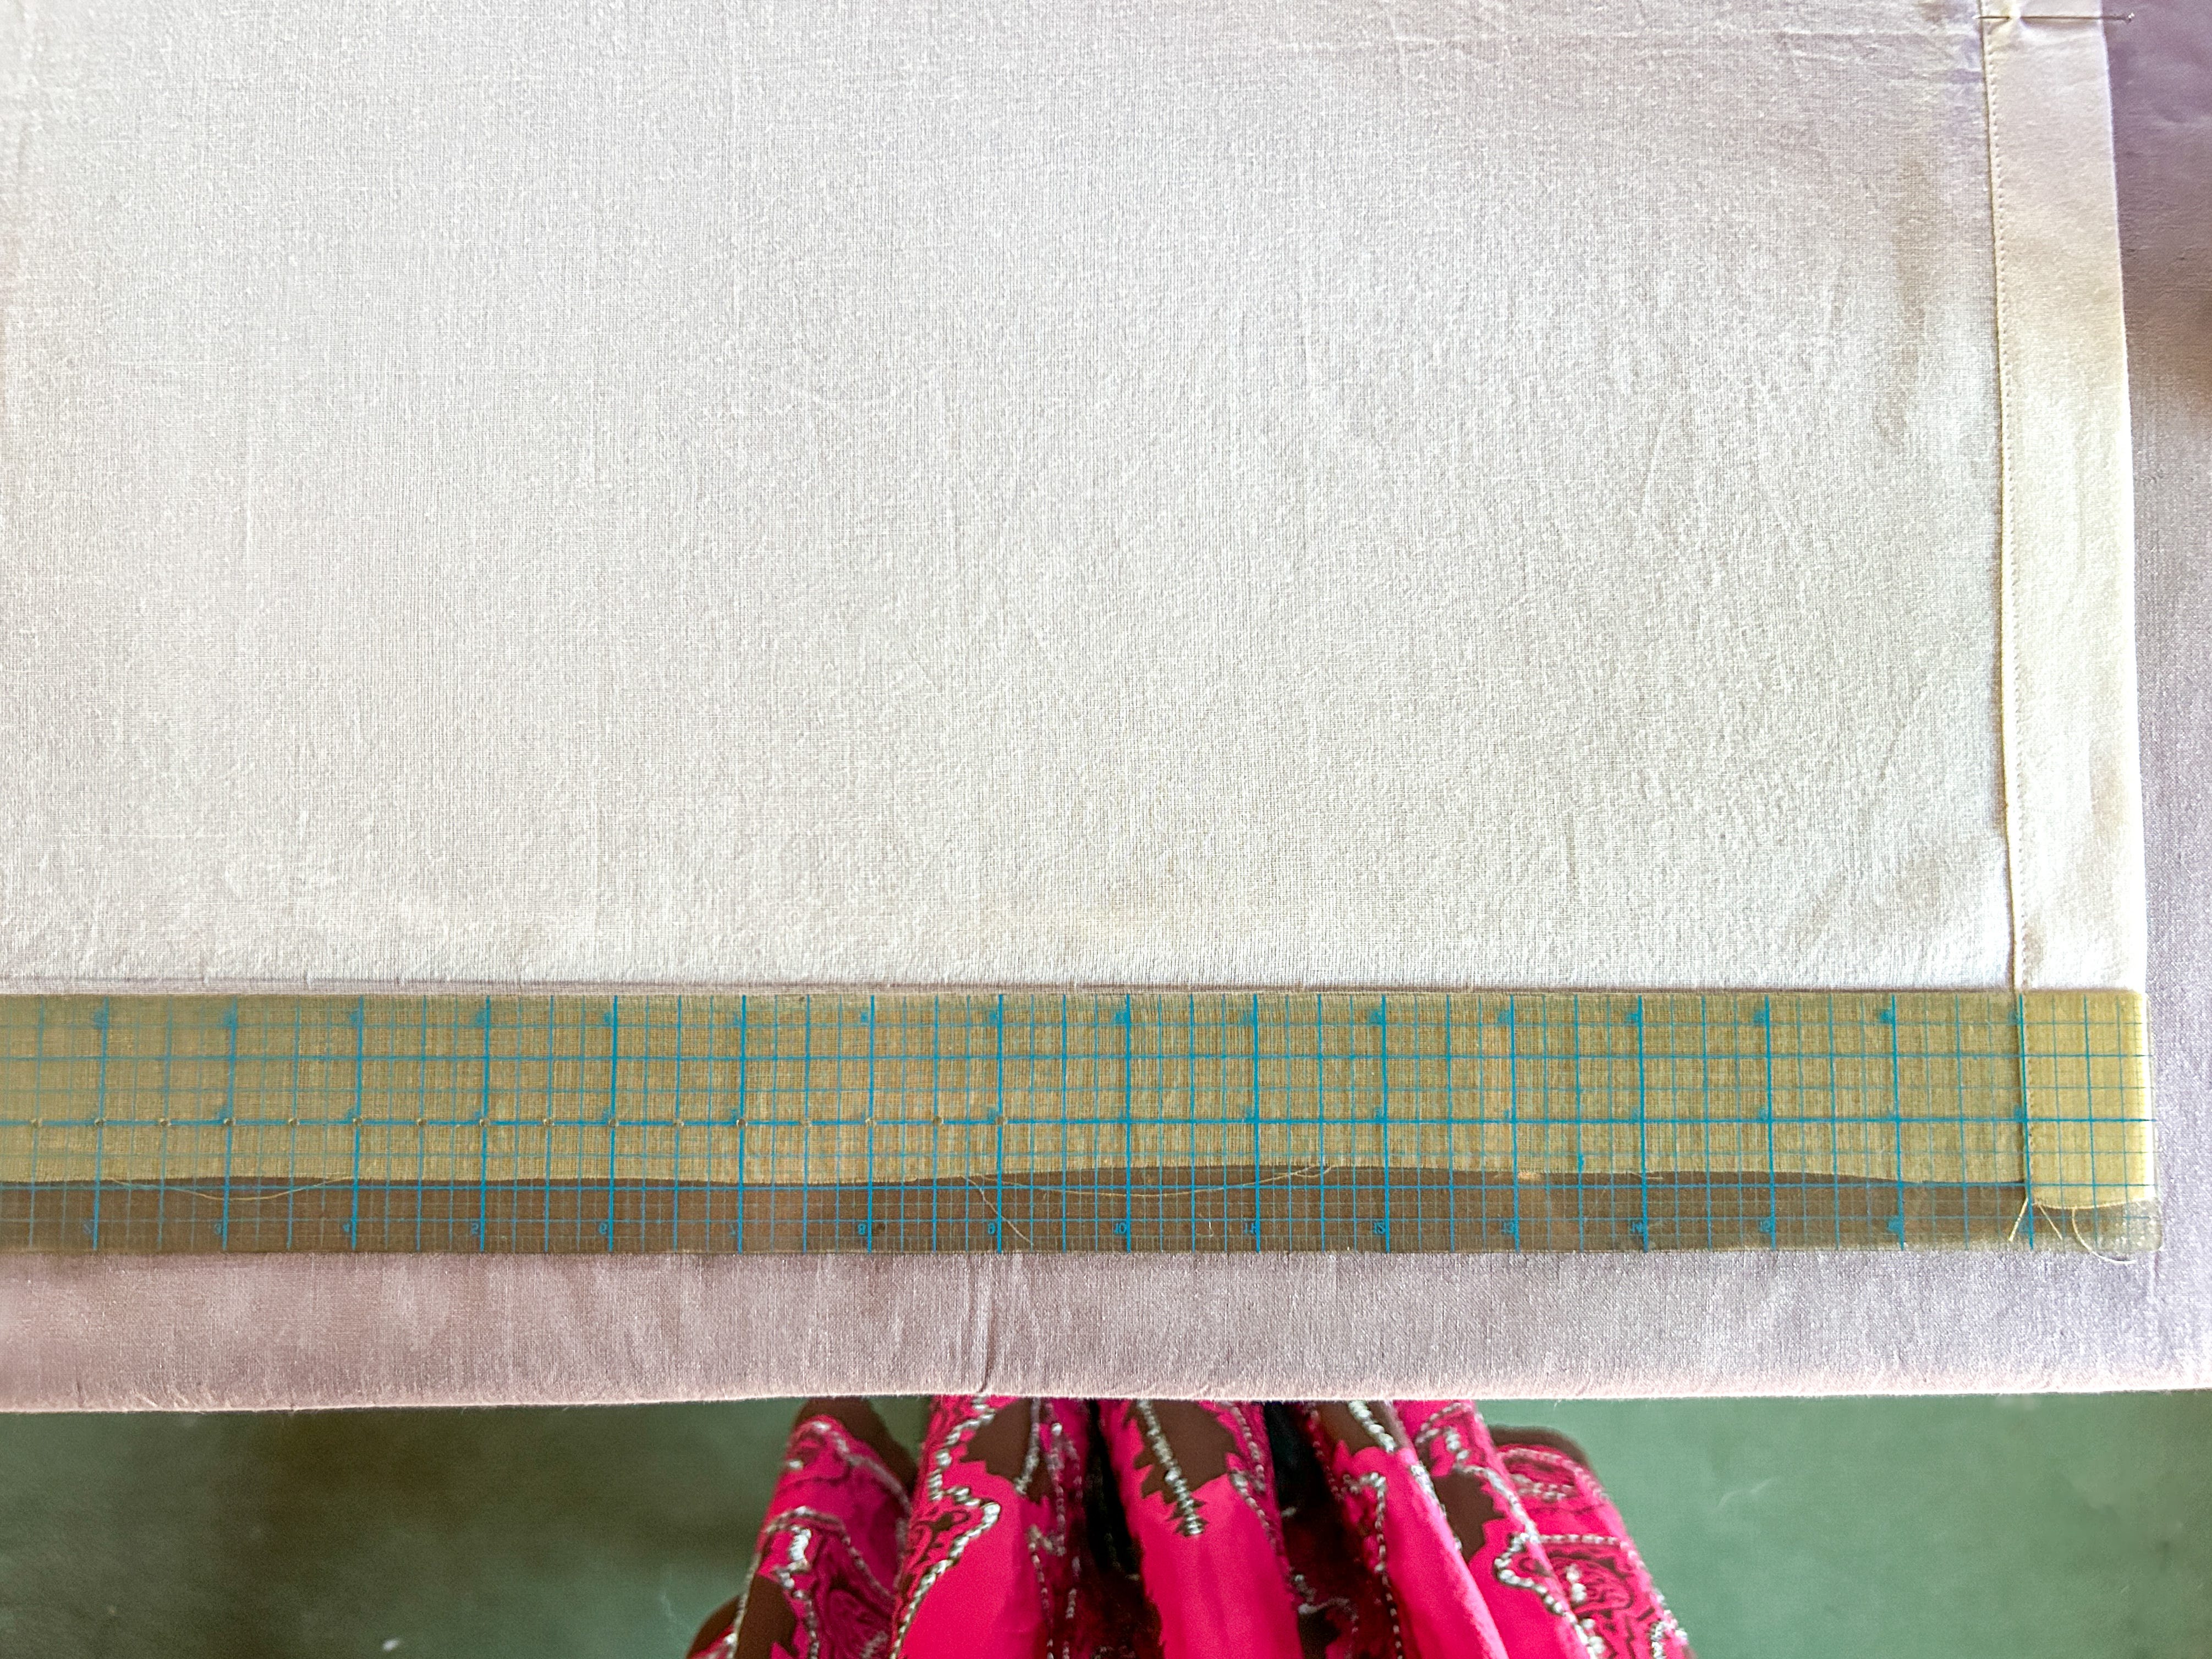
Calculate the amount needed for the hem and trim off any excess. I wanted these curtains to have substantial hems. Cotton voile is sheer, and the hems will be more visible than with an opaquer fabric. So, I trimmed 8” below the pin marks to create a 4-inch-wide double hem.
If you have an uneven hem, use your graph ruler to find an average of the over under, mark a cut line with chalk or a drafting pencil, and trim.
Turn each panel top side down (if it isn’t already), then make your hem following the same method used to make a double hem in Part 3.
Give all the panels a final press—don’t forget to press on the grain of the fabric—and that’s it! It’s time to hang the curtains.
Thanks for reading! See you next time with traditional techniques on how to sew buttons.
~ Jane
Reference List: Time Life Books’ The Art of Sewing: MAKING HOME FURNISHINGS ©1975