


Pattern Grading: Reverse Engineering a Vintage Evening Jacket Part 2
Pattern grading overview and techniques to adjust your pattern's size.

This is the second letter in my series on reverse-engineering a vintage Mary McFadden evening jacket. If you missed Part 1, you can find it here:

The evening jacket patterns are done—phew! I checked them to make sure the seams matched in shape and length. When checking patterns, if you run into easing, gathering, or pleating, shift or “walk” the pattern along the seams, matching notches and key points as you go.
If seams don’t match, you can equalize them by laying one pattern piece over the other and aligning the seams as you would when sewing. For small differences, trim one side or add a bit to the other. But if the seam lengths are way off, it’s time to go back to the source—whether that’s a vintage jacket reference (like I did), slopers, or original measurements. Let’s just say… I had a few trips back to the source.
After drafting patterns, it’s always a good idea to sew a mockup. Mockups, toiles, first samples—whatever you like to call them—they’re so necessary! Any fit or sewing issue you don’t catch and fix now will definitely show up later, so it’s worth taking the time, even if you’re eager to move on (like I often am).
That’s why before grading, I made a muslin mockup, focusing on the basic shape and drape. I skipped facings and linings and used a machine basting stitch—it’s like a quick 3D sketch of the pattern. Right away, I could see what needed tweaking.

For one, I drafted a Mandarin collar instead of using the original tracing. I figured I could sew it more accurately if I drafted it. But as you can see above, I made it too long and need to adjust the stand’s angle—so that’ll be a pattern fix. Sewing is a process, and rarely do I get it right the first time!
A quick note about the lining patterns—
I decided to draft a new lining from the graded pattern instead of making two separate sets. Which is fantastic because next time, I’ll show you how to draft your own lining pattern, and these general drafting techniques apply to many designs, not just a reverse-engineered Mary McFadden evening jacket.
But today, this letter is all about grading!
What is Grading?
Grading changes a pattern’s size.
When I think of grading, I think of proportion. The grading process makes a pattern shape larger or smaller—but it doesn’t change the shape itself. When you grade up or down, you’re not just scaling everything equally. Different body parts scale at different amounts, and grading takes those proportional changes into account. Confused? Let’s break it down. :)
On a commercial pattern, you’ve probably seen the graded sizes—it looks like a nested set, and you pick the size you want to cut. You’ll also see that not all parts of the pattern scale the same. That’s intentional. It keeps the garment’s original proportions intact, so whether you’re an XS or an XL, the garment will have the same proportions when worn. In a nutshell, grading allows for proportional adjustments to ensure accurate fit and consistent styling.
Here’s a detail of a Balenciaga jacket pattern. The different lines (long dash, short dash, dot, etc.) are cut lines that identify different sizes. You can see how the grading is proportional: seams do not increase the same amount.

What’s the difference between pattern grading and pattern alteration?
Grading changes the proportion of the entire garment. You’re creating a new size or an entire size run. Altering adjusts one or more of these measurements. An alteration may be lengthening the sleeves or shortening the waist.
Grade Rules
Grade rules are a set of measurements used to adjust a pattern’s size.
Grade rules determine how much each measurement point on a pattern increases or decreases when sizing a garment up or down. Since there’s no universal standard in the fashion industry, grade rules vary by brand and manufacturer.
A common standard follows a staggered approach: sizes 0–10 grade by 1 inch, sizes 12–16 by 1 1/2 inches, and sizes 18+ by 2 inches, with a 1/4 inch length increase between sizes. For example, a size 8 pattern would grade down 1 inch in total circumference (1/2 inch at the front and 1/2 inch at the back) to create a size 6.
Ultimately, grade rules depend on the brand’s preference and the type of garment—precision matters more for a fitted gown than for a relaxed tee.
Here’s a helpful diagram and grade rule chart for cut-and-spread grading, which I’ll demonstrate below.
How Much Should I Grade?
If you’re unsure about your size—or if you’re working with a vintage pattern like I am, where sizing has changed over time—try comparing measurements.
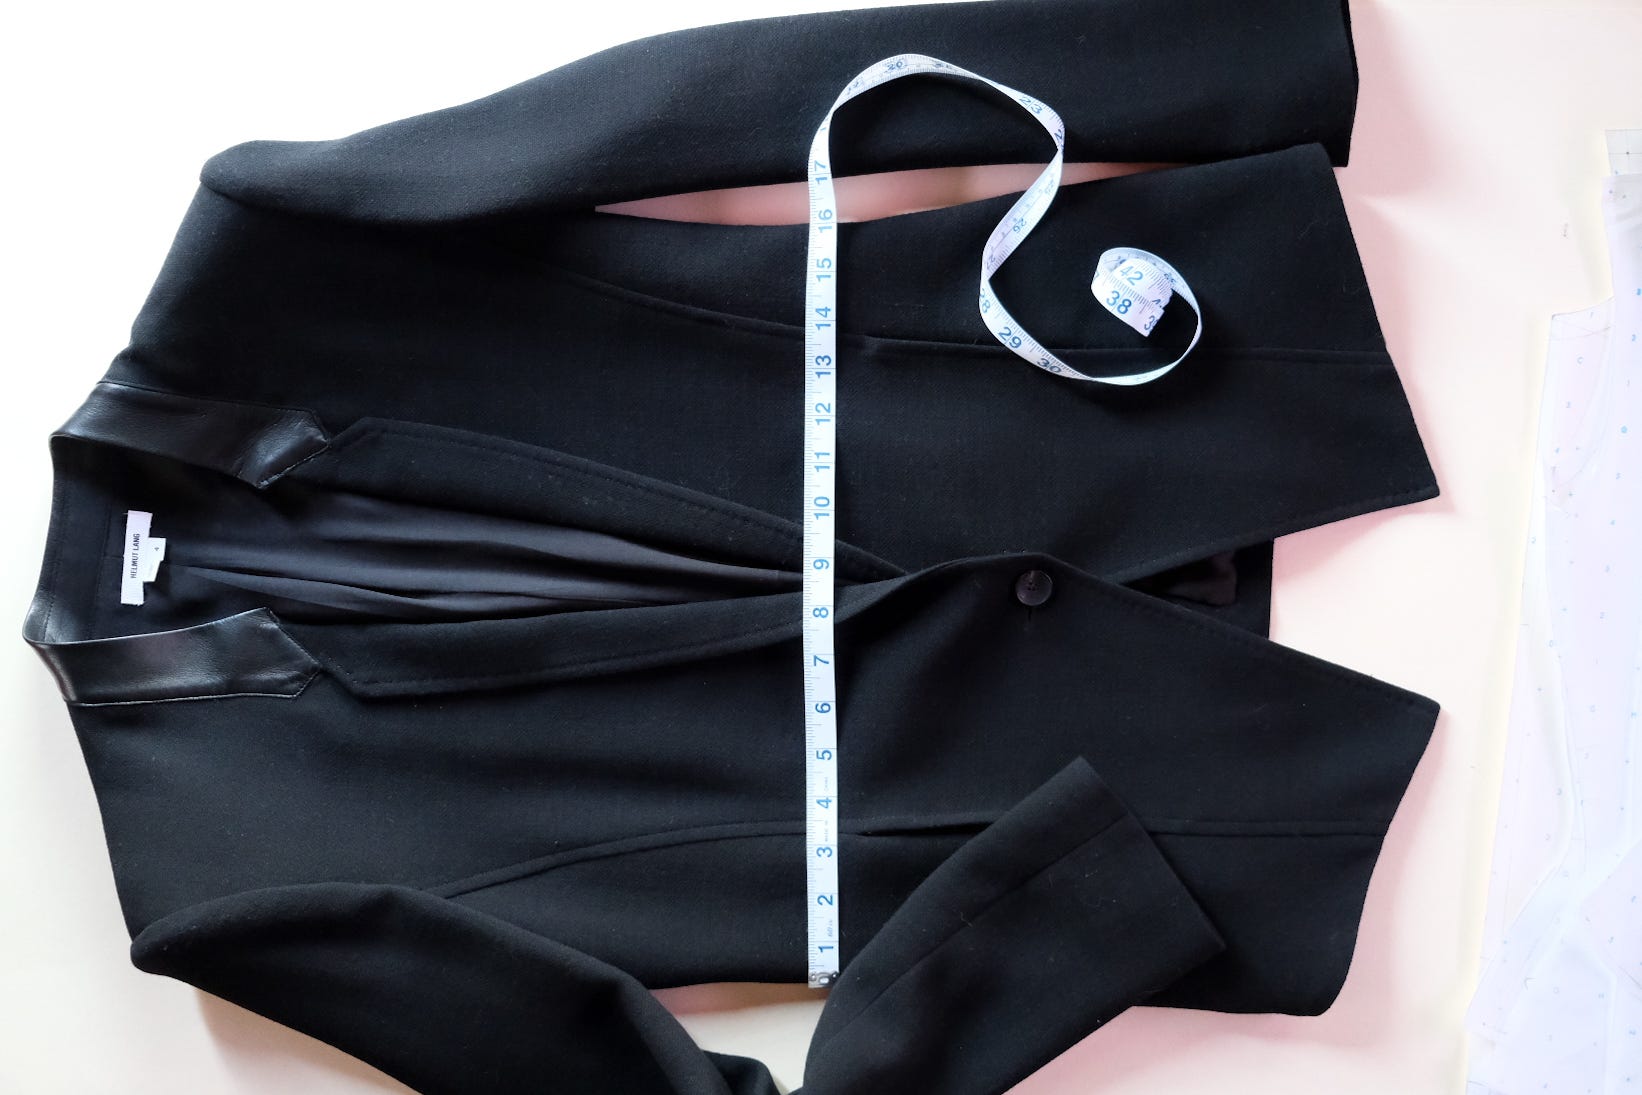
I took a jacket I love the fit of and measured it, then compared those measurements to my Mary McFadden evening jacket. The difference between the two jackets told me how much I needed to grade. Based on that, I’m grading 2 inches total, so I’ll be grading two sizes up.
The Cut-and-Spread Method
From fashion houses to factories, pattern grading is computerized, but there are also manual methods like the cut-and-spread method or the pattern shifting method. I prefer the cut-and-spread method because it lets me clearly see the grade.
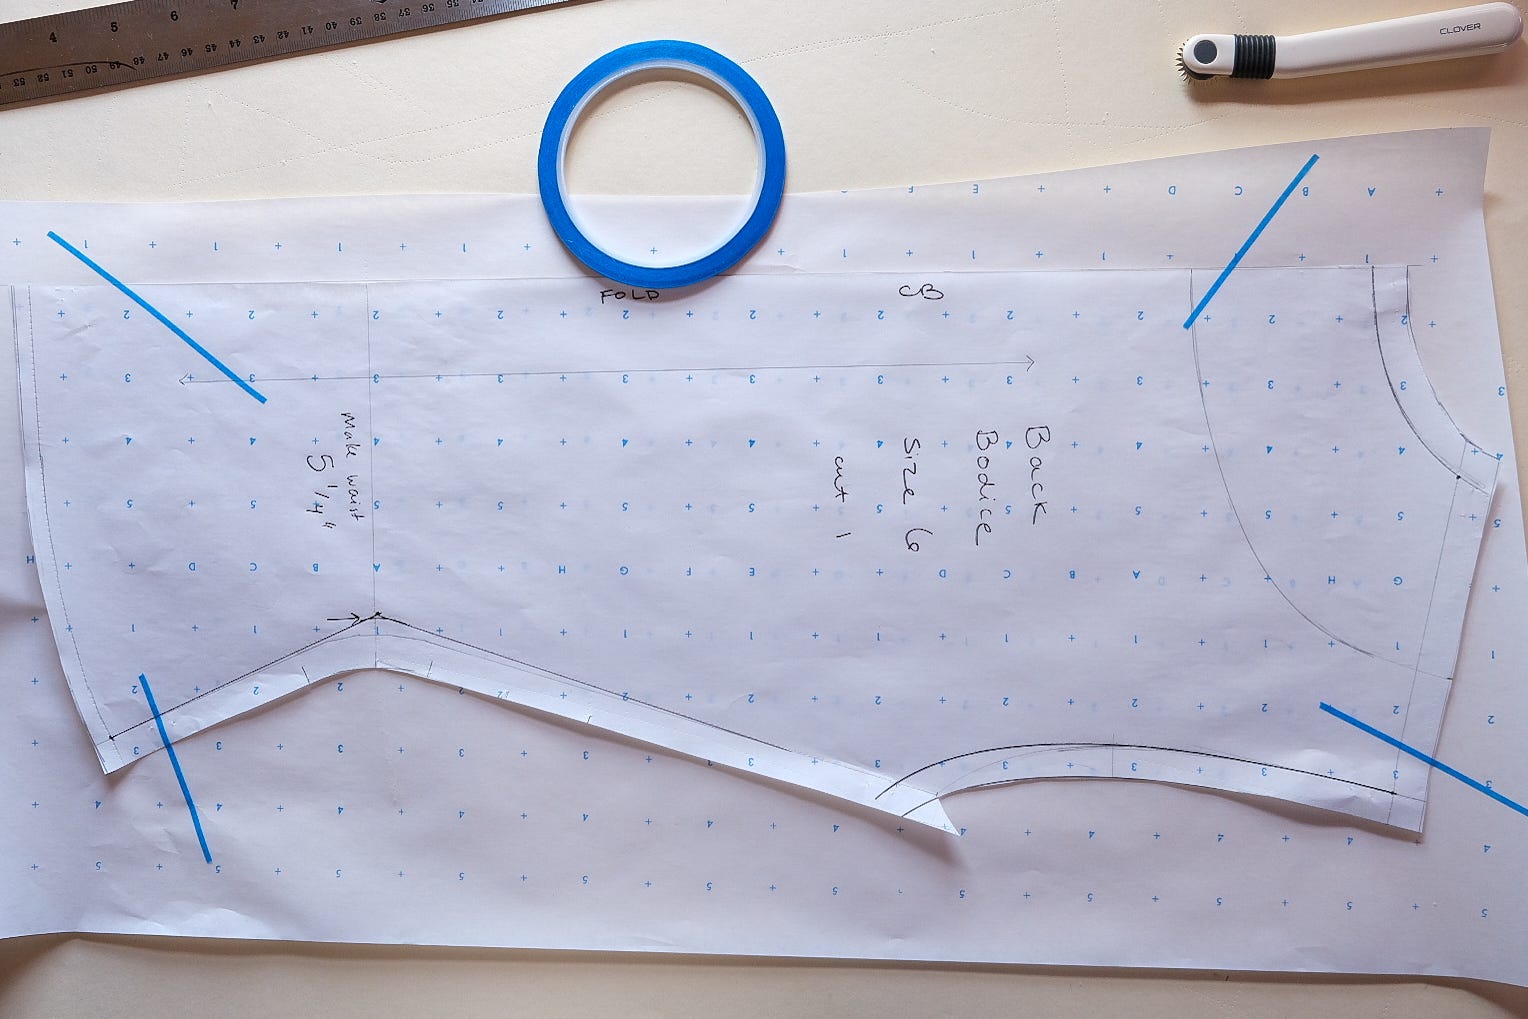
First, make a clean copy of your patterns—without seam allowances.

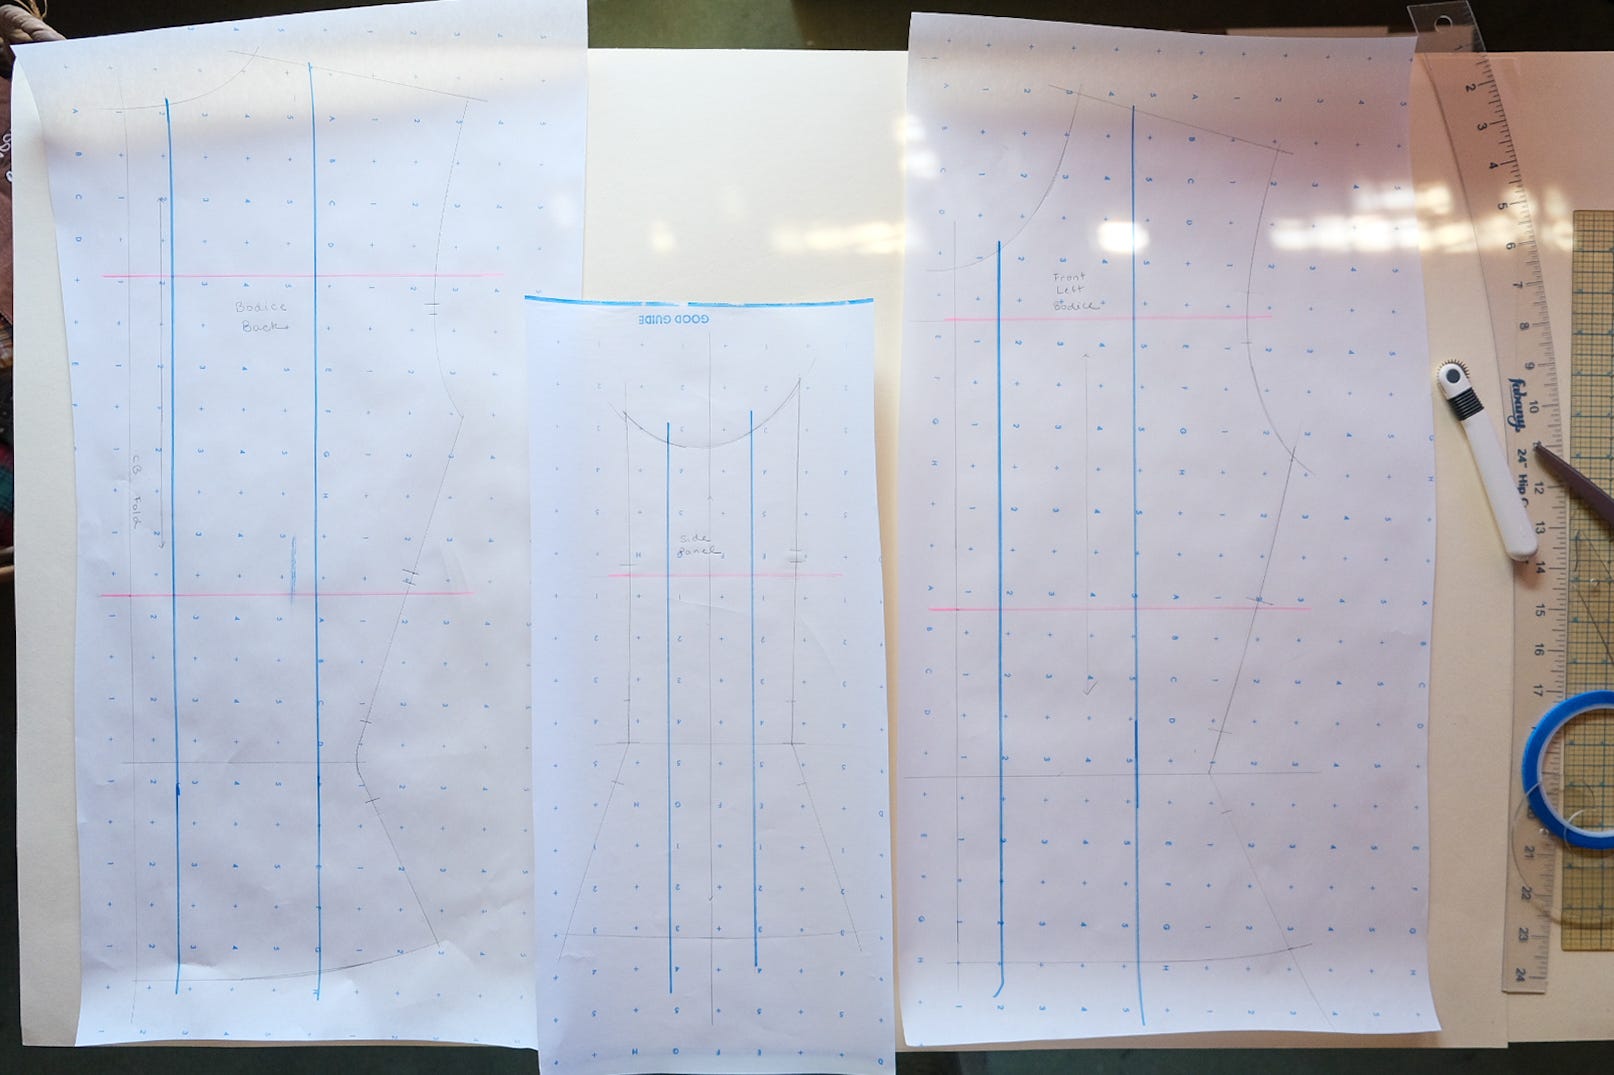
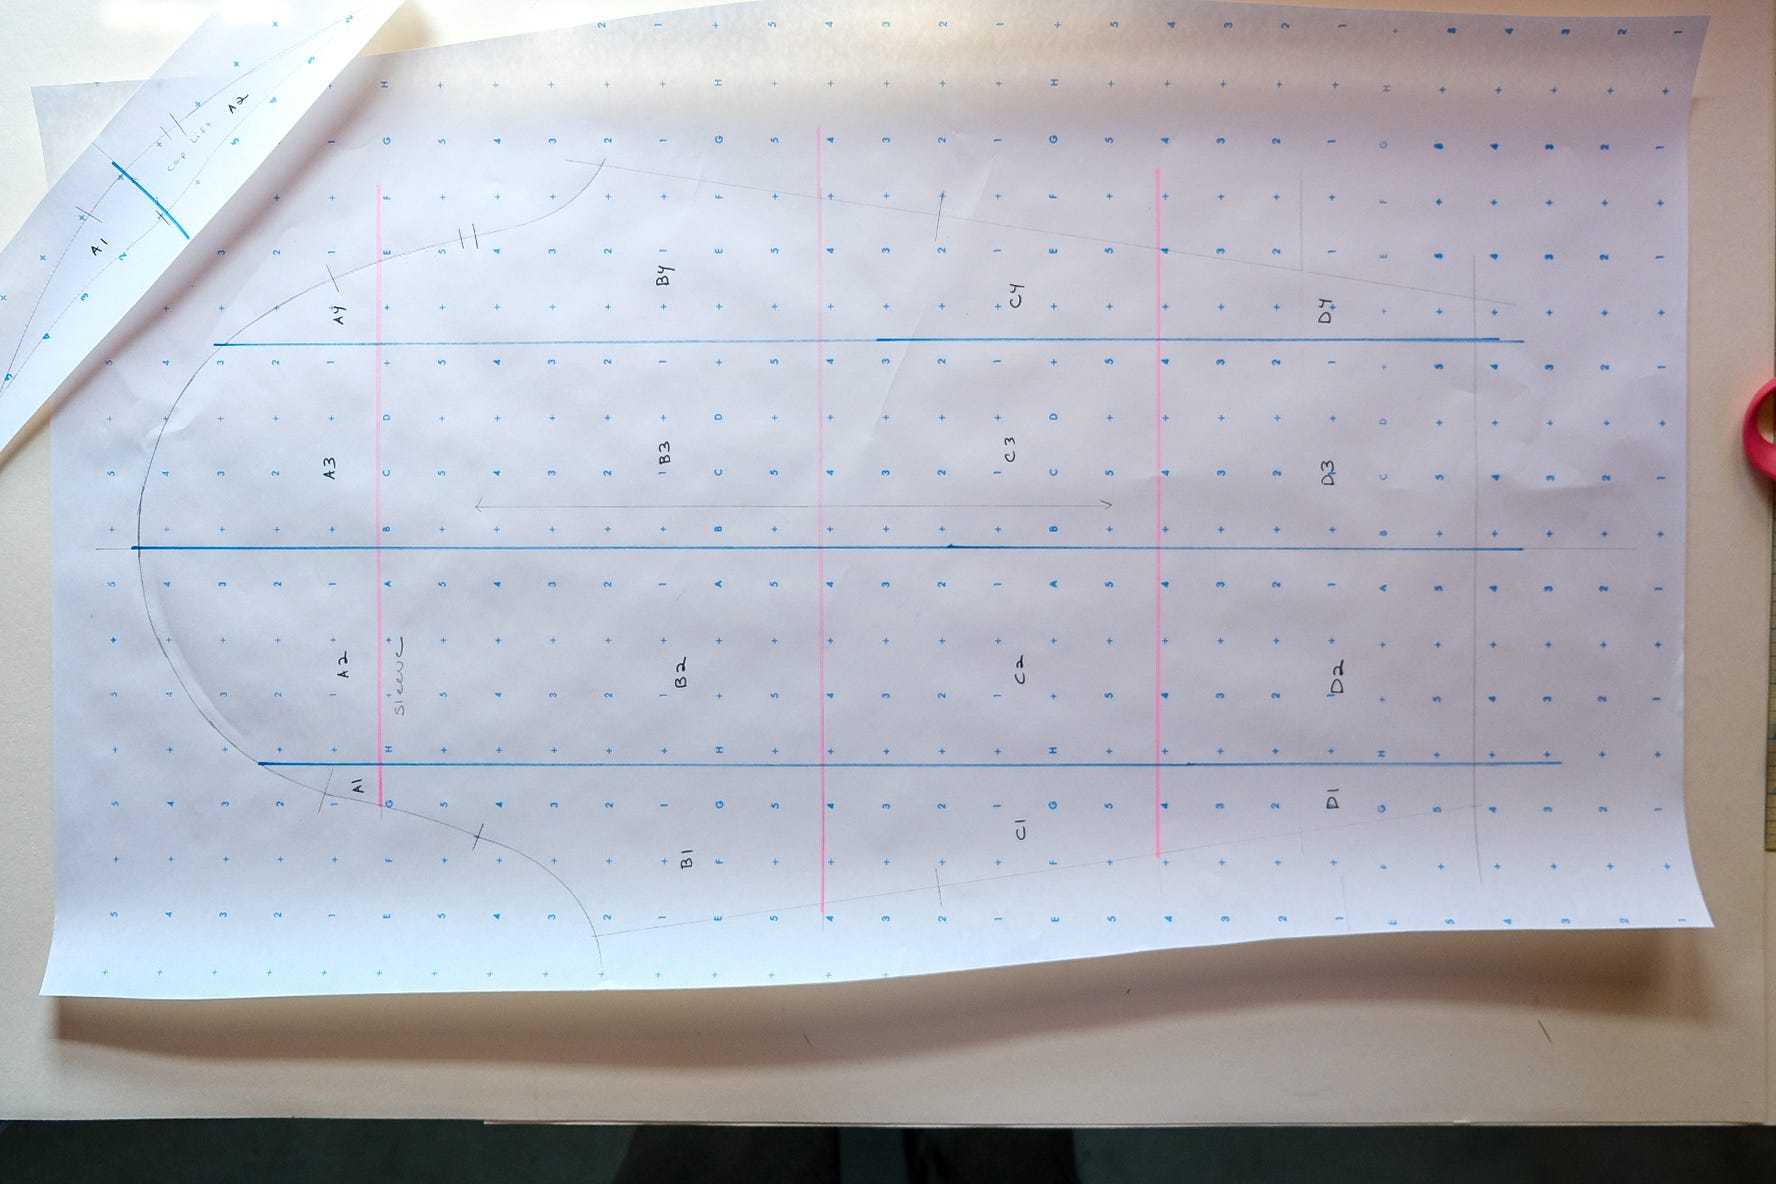
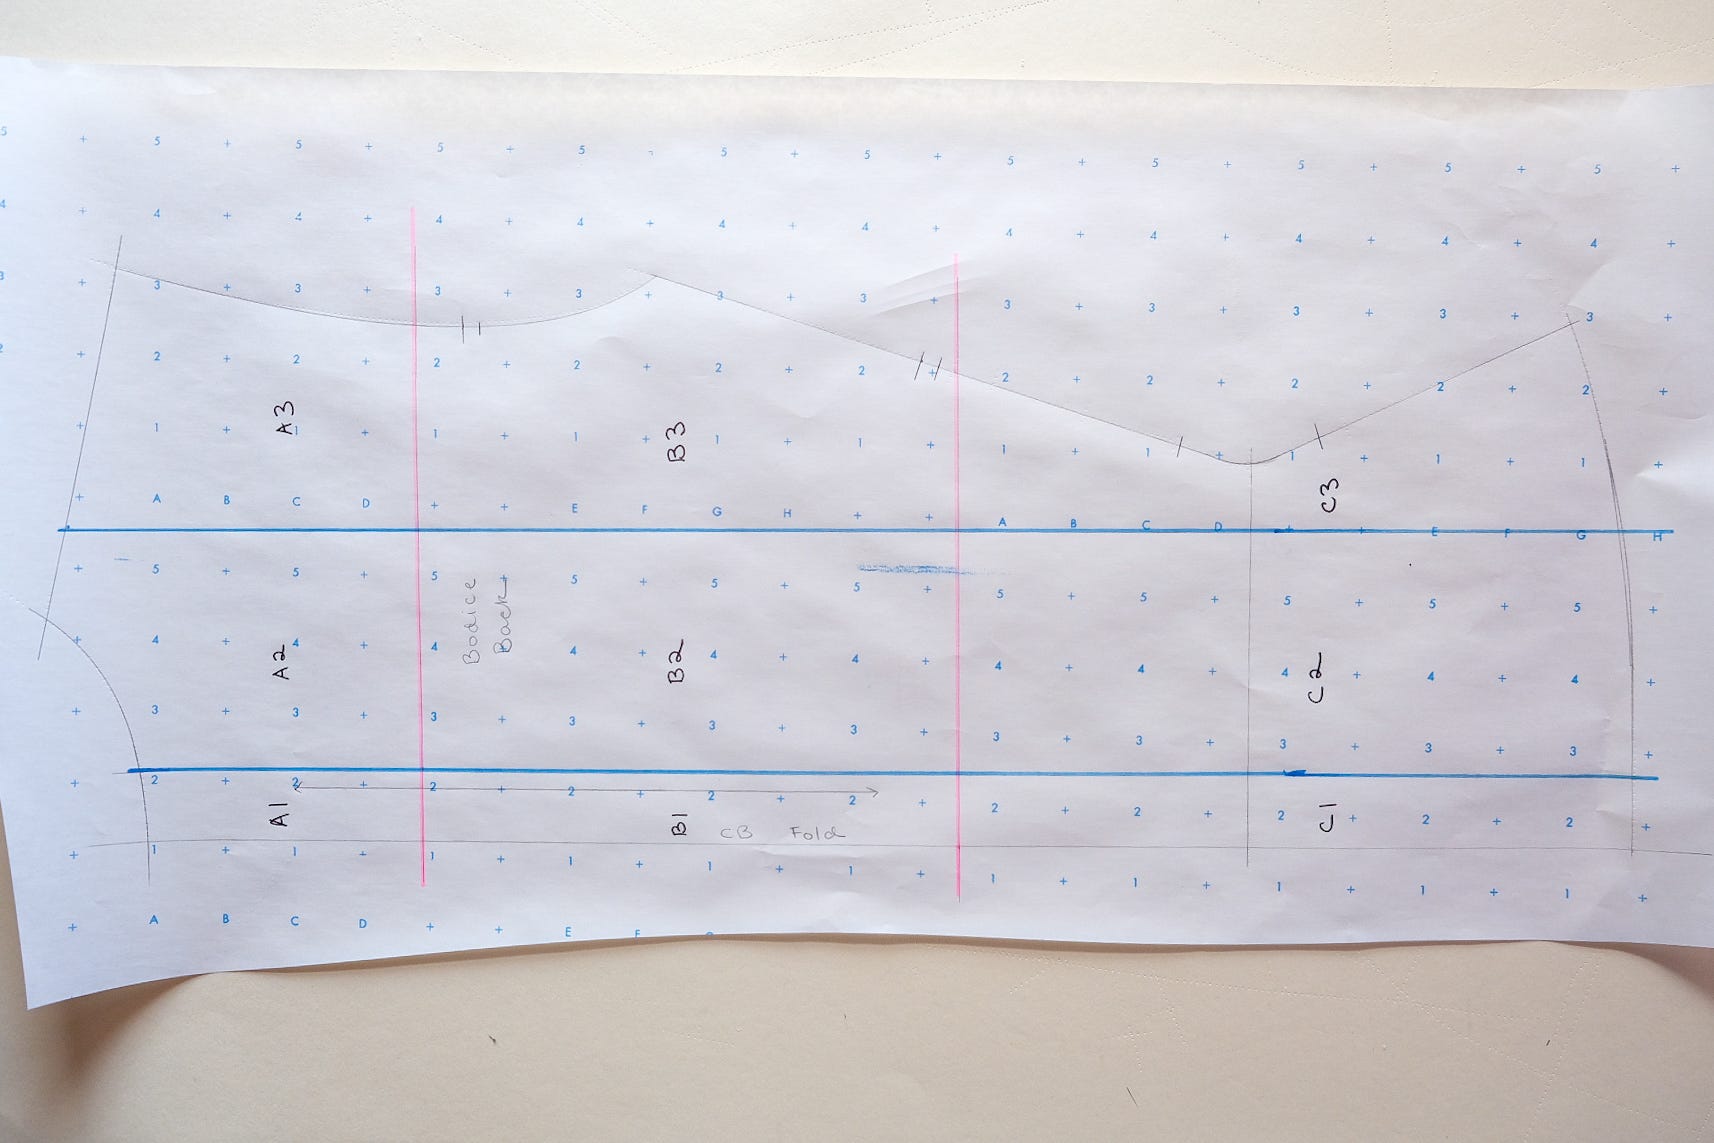
I use nail art tape (since I had it on hand) to hold down patterns—it’s low-tack, so it peels off without tearing the paper. But any low-tack tape will do the trick. Add the cut lines for the grade—these are the points where you’ll shift the pattern to maintain the right proportions. For me, the horizontal grade cut lines go through the neckline, shoulder line, and underarm for the bodice (marked in blue). For the length grade, I use two cut lines: one running from the center to the armhole and another halfway between the armhole and waist (marked in pink).
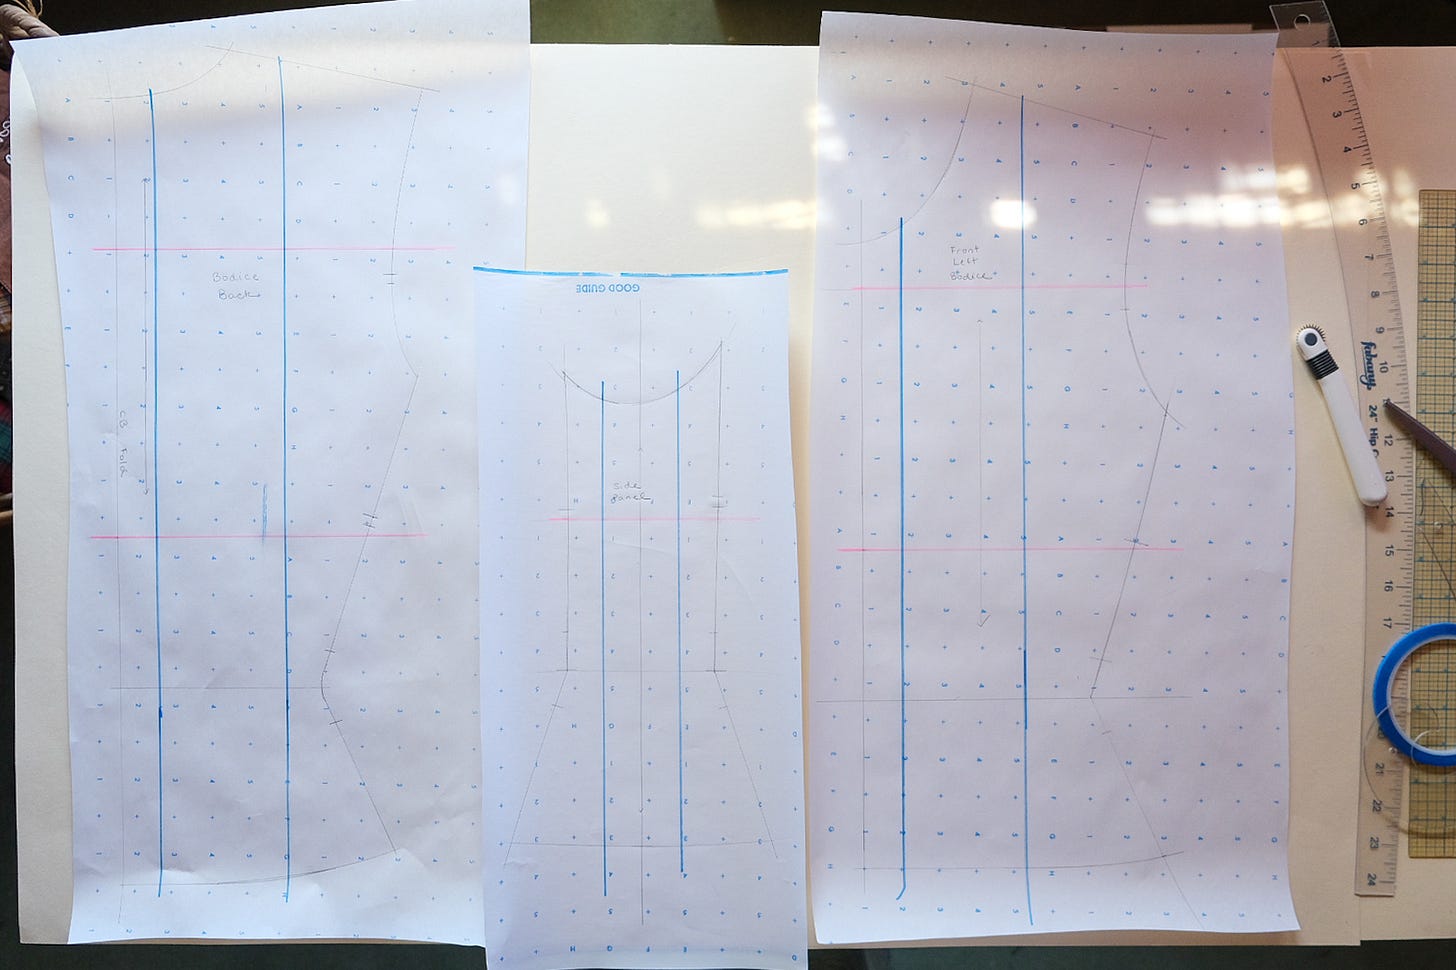
Horizontal grade lines (which create vertical cuts) run parallel to center front, center back, or sleeve grainline, while length grade lines run perpendicular to them. 
Cut lines for my long sleeve grade. Before cutting, label your pieces to keep track of them when cutting and taping.

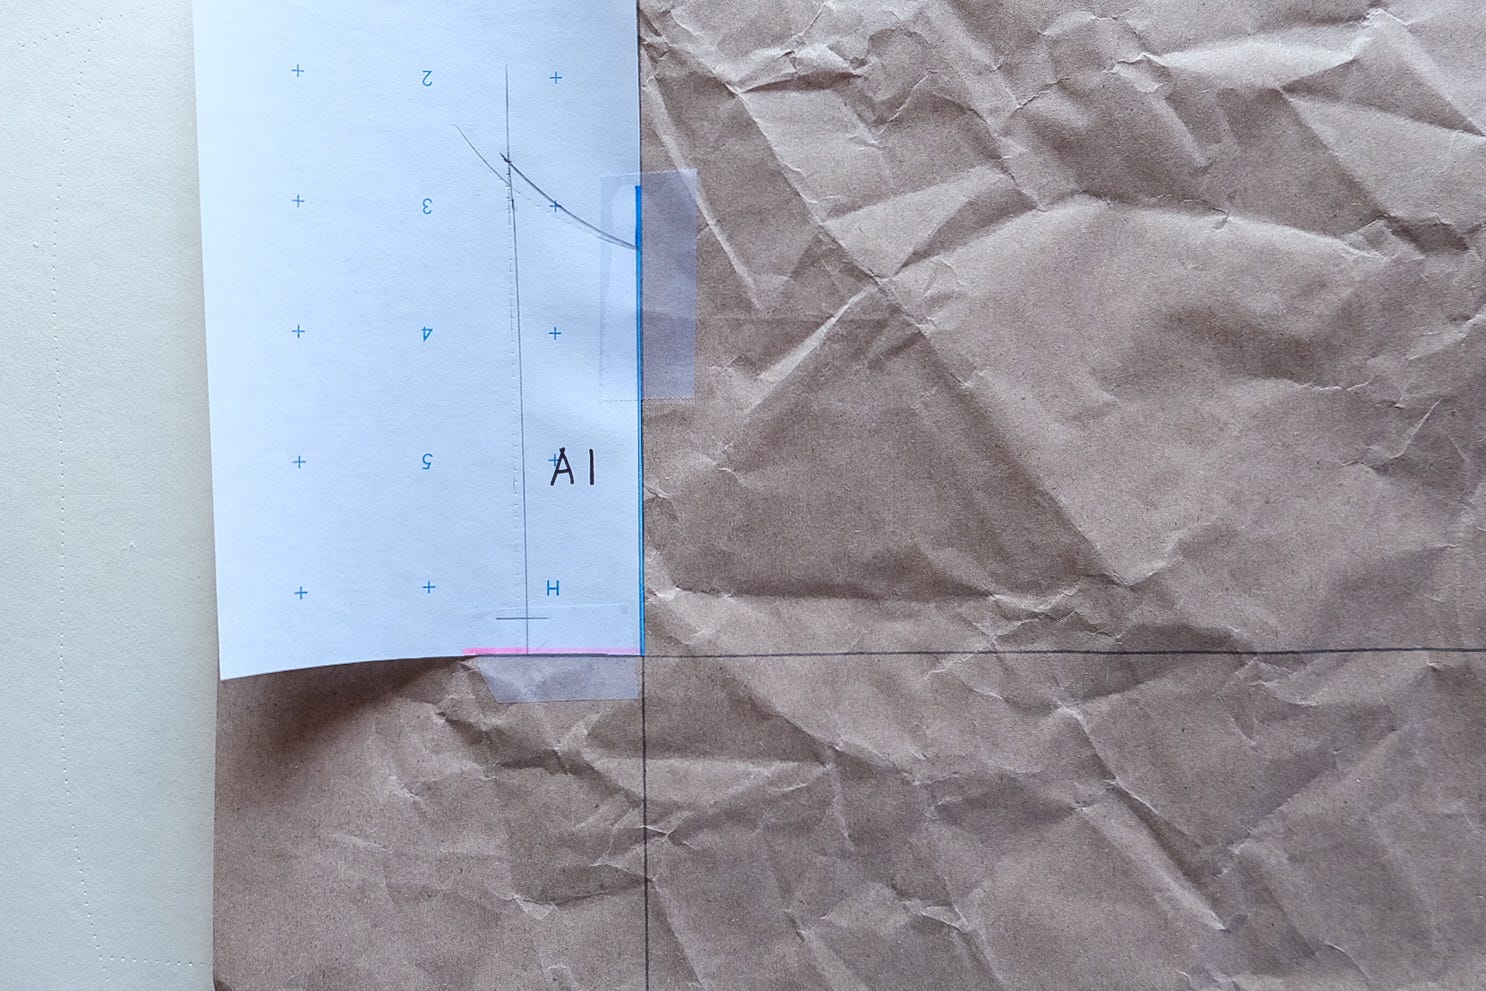
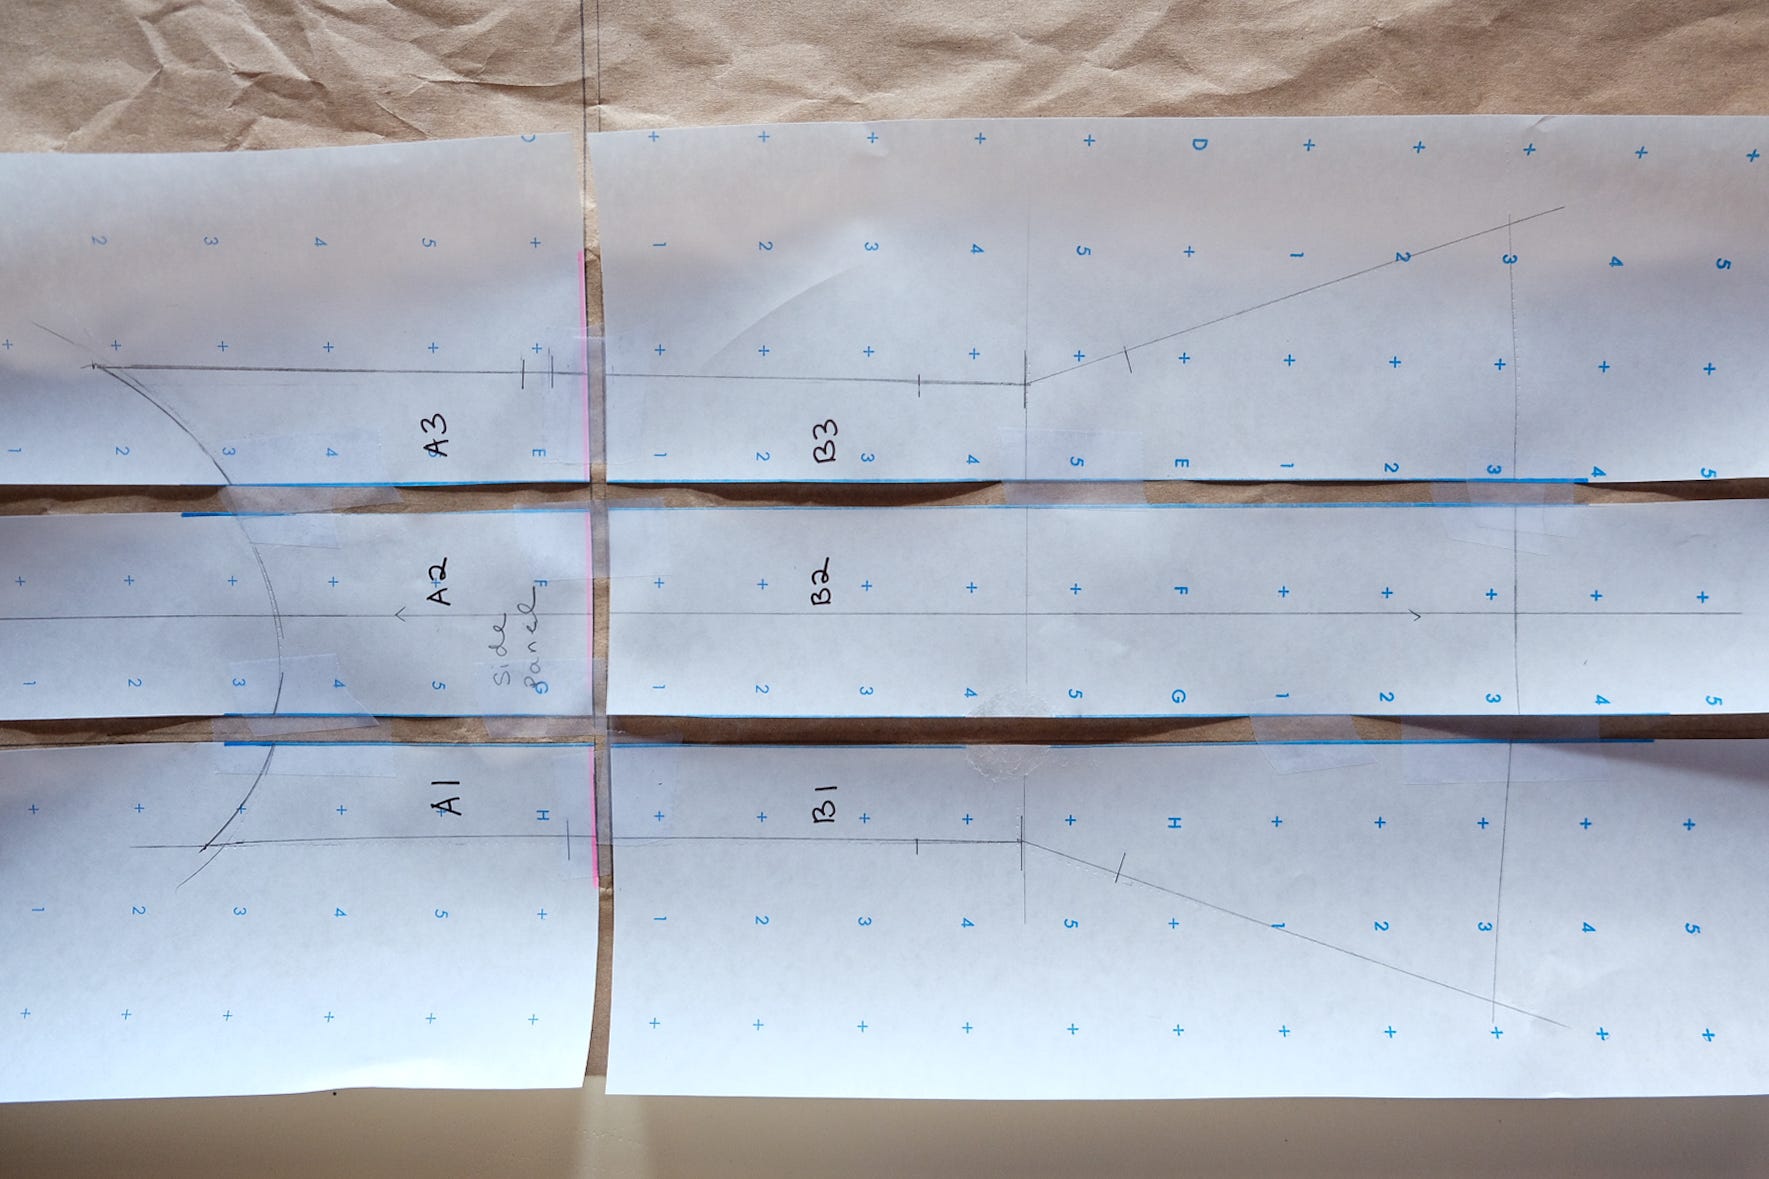
Cut along the designated lines and spread each section by the required amount. On my pattern paper, I square one line to keep everything aligned, then work row by row. Here’s a link to a grade rule chart and illustrations from Threads Magazine, in case you need a set to work from.

Blend gaps, then trace the graded piece onto clean paper. Transfer the grainline and notches, and don't forget to add your seam allowances.

I’ve taped this pattern piece to packing paper to make the grade change more visible.
This cut-and-spread method could also be called the cut-and-overlap method when sizing down, because instead of spreading, you’ll overlap the pieces by the required amount.
Thank you for reading! Next time we’ll draft linings. Are they the same patterns as the jacket? Nope! Linings are a little bigger than the jacket to allow for movement, ease, and comfort. And if you ever have questions—about this letter or sewing in general—drop them in the comments or reply to this email. I love hearing from you!
~ Jane
I'm so excited to have found this series!