


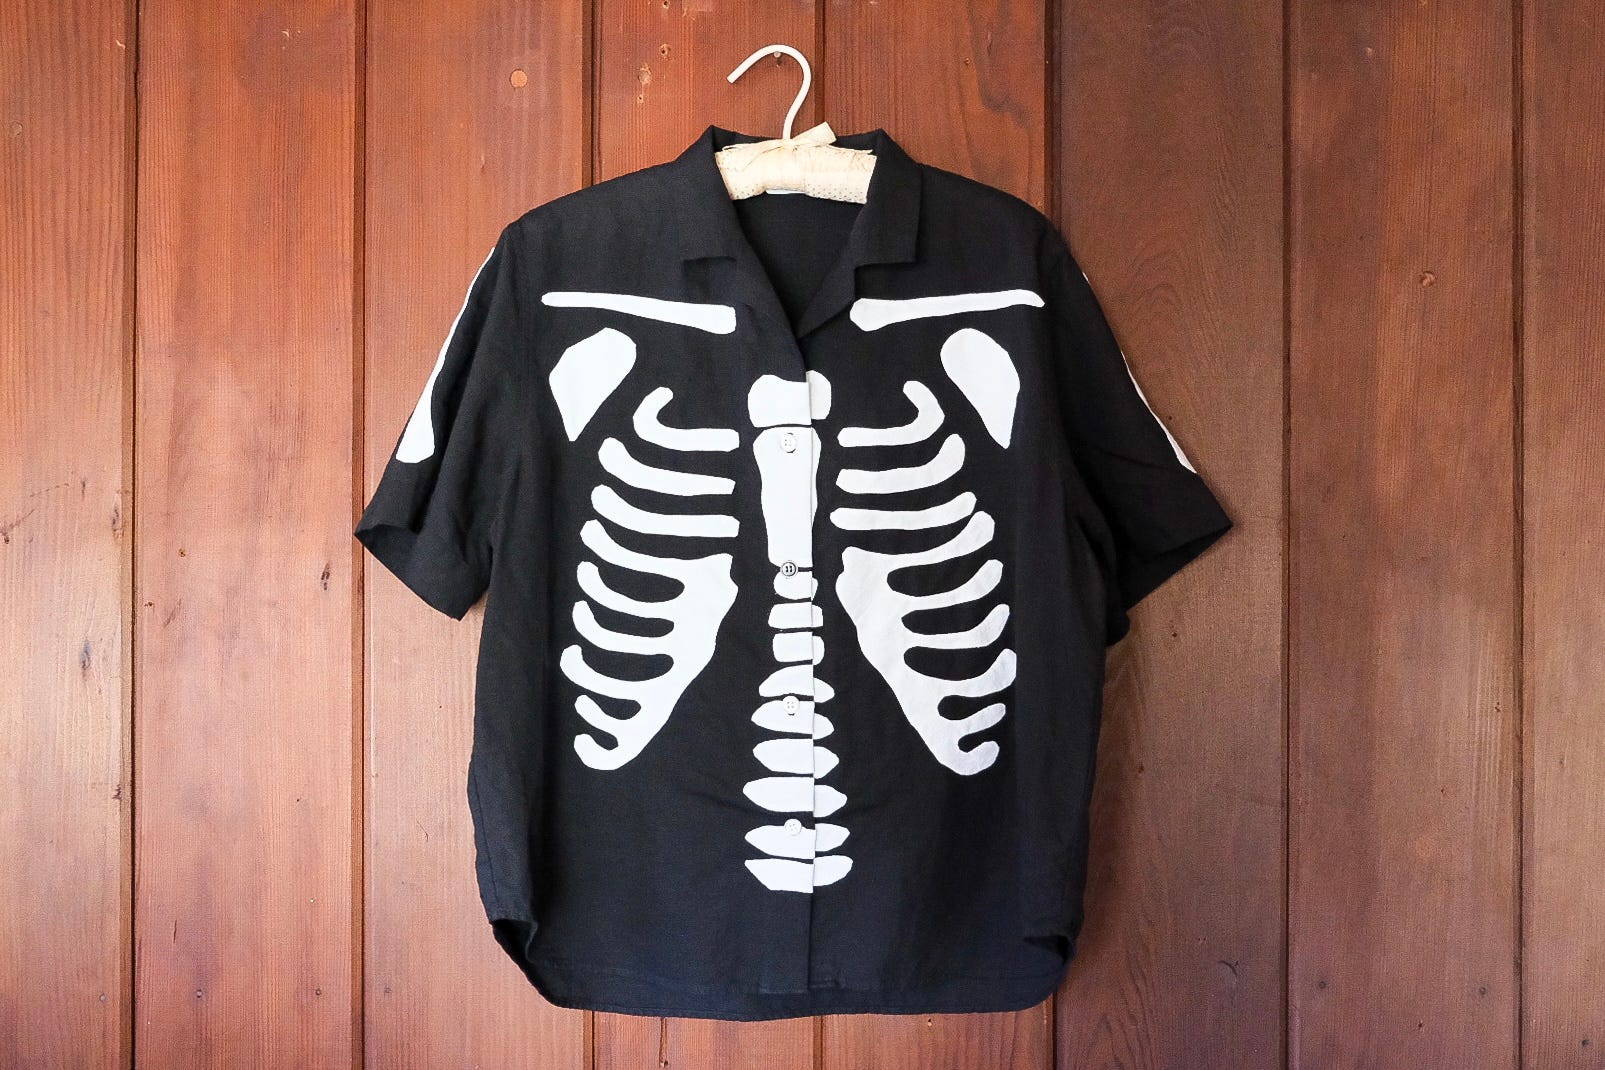
The Skeleton Shirt: Needle-Turn Appliqué
Transform a Basic Button-Up into A Skeletal Style

All projects begin with simple intentions. I expected this one to be straightforward: design the artwork, create the appliqué pattern, baste, and appliqué. But, as with many projects, what seems simple can quickly become complex—and in this case, the challenge lay in the front placket.
Appliqué is a form of ornamental needlework where pieces of fabric are sewn or applied onto a larger fabric to form pictures or patterns. It can be done by machine or by hand. Needle-turn appliqué specifically involves turning the raw edge of the fabric under with a needle to achieve a smooth, finished look.
Needle-turn appliqué is a delightful way to add decorative touches to garments and accessories. For this project, I created a bone-themed top for Halloween, but its bold, graphic style makes it wearable year-round.
I'll walk you through how I made this skeleton top, but the steps apply to any design or pattern you choose.
This project’s video tutorial features a needle-turn sewing demonstration: Turning a Basic Button-Up into a Skeleton Bone Shirt with Needle-Turn Appliqué. While the video provides a step-by-step sewing guide, the pattern tutorial is only available in this post.
For this project, I used:
Bleached muslin
White Thread
Contrast Color Threads
Scissors
Pins
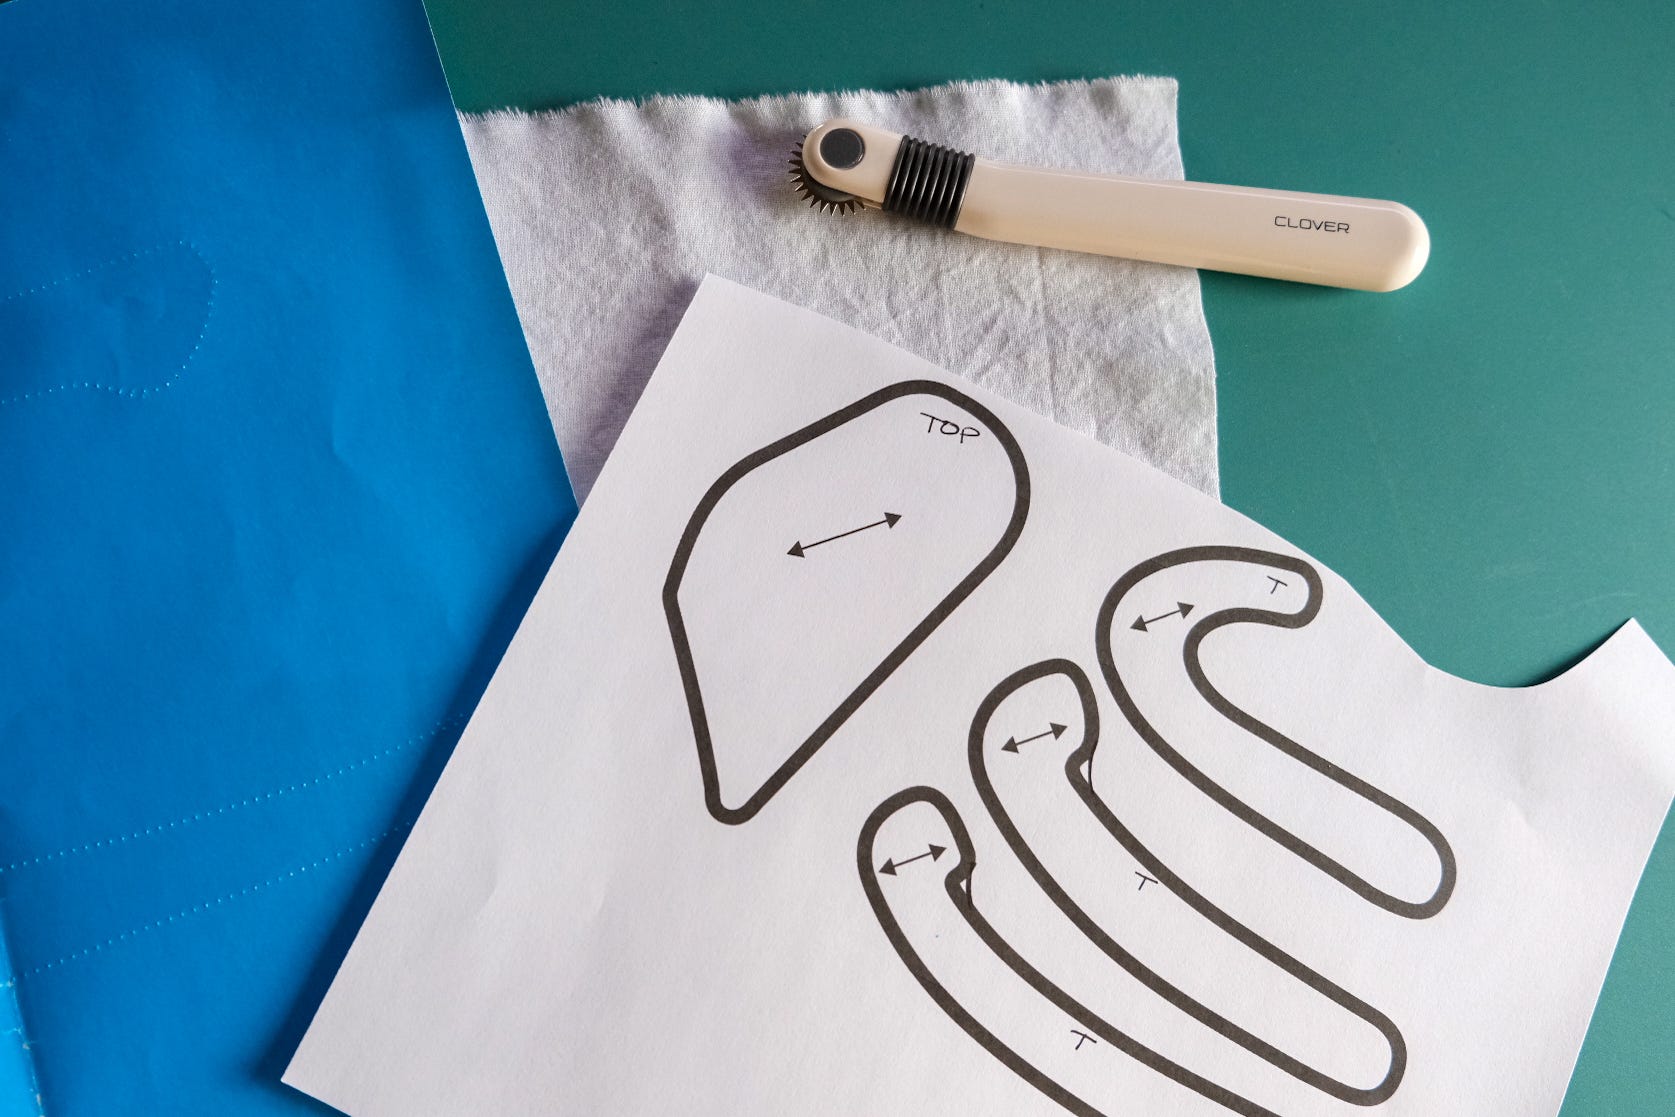
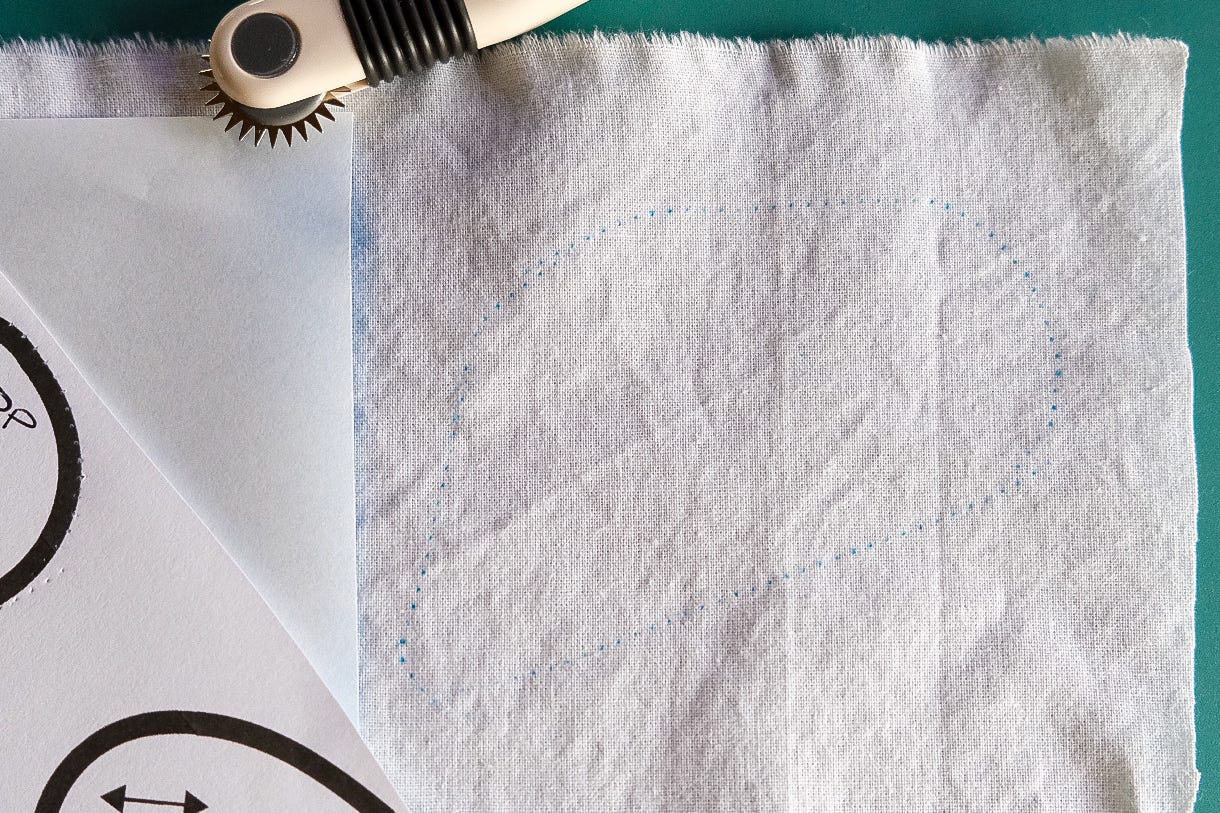
Clover Tracing Paper
Clover Tracing Wheel
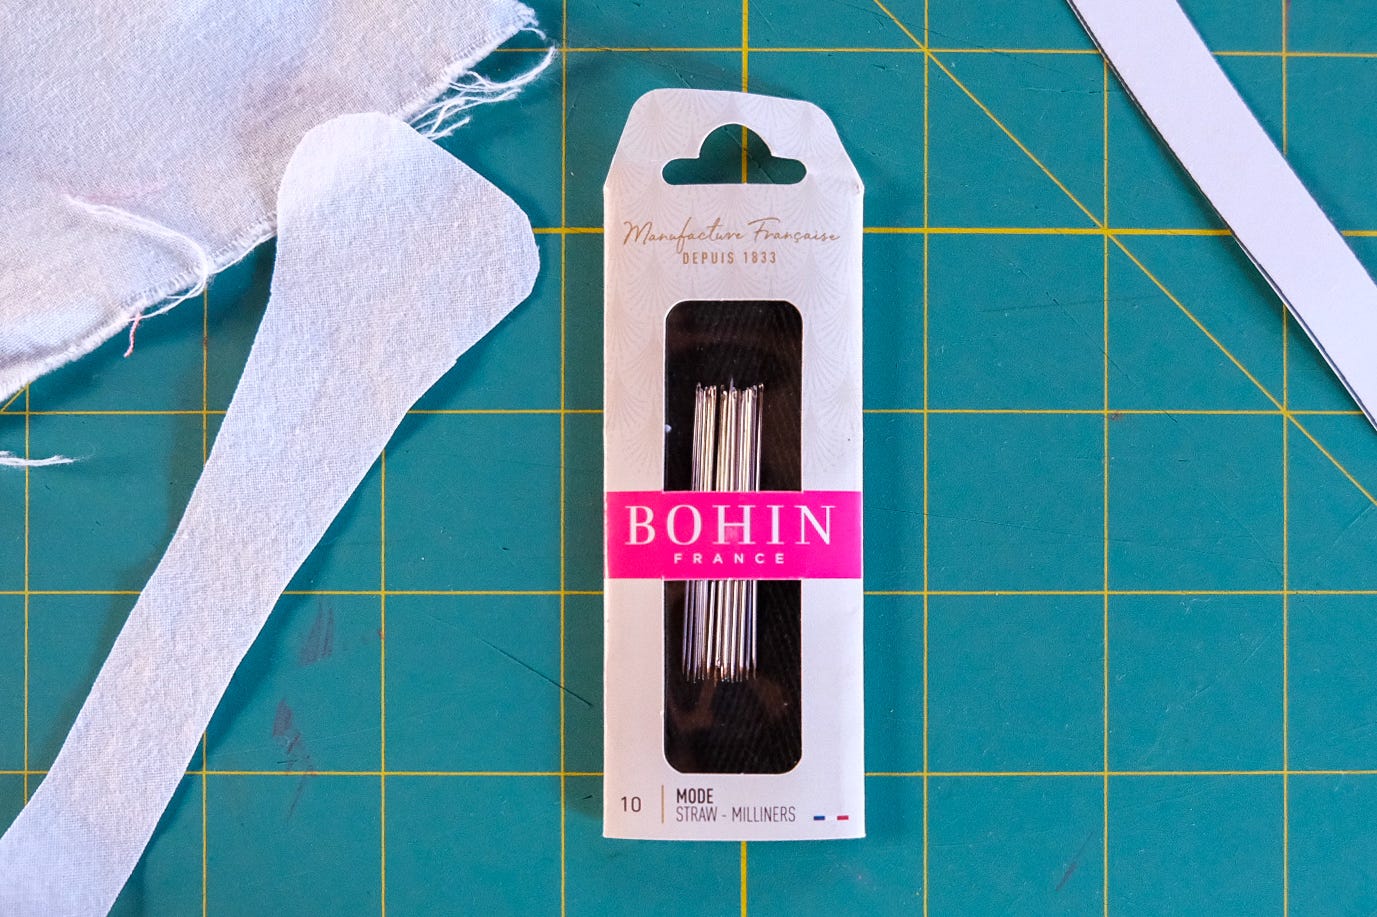
Size 10 Milliners Needle
Part 1: Appliqué Artwork
To start, I measured my shirt to determine my artwork size.
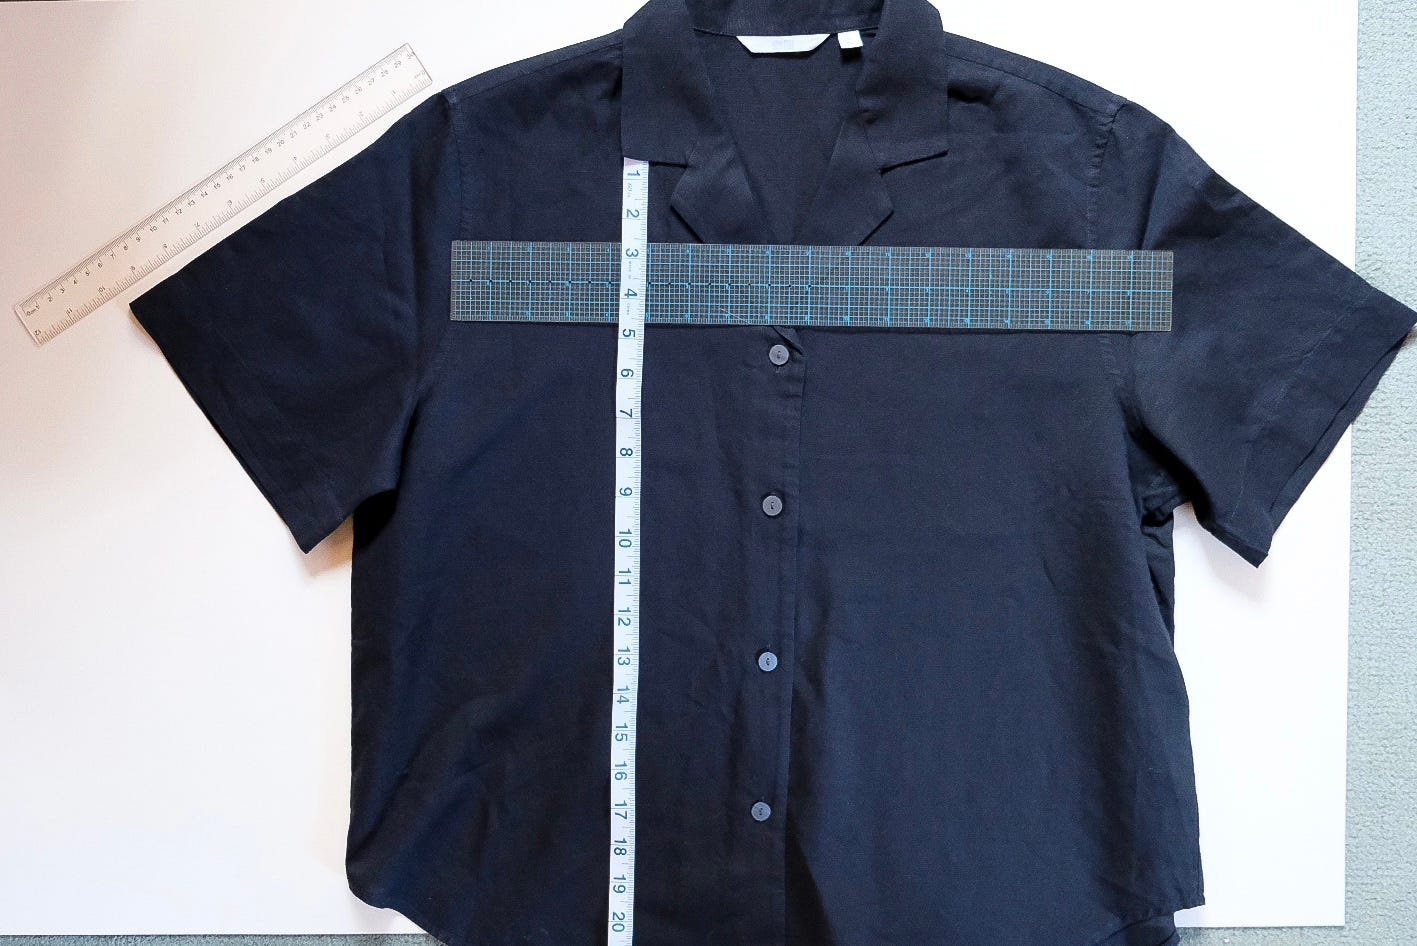
I found a skeleton graphic and scaled it to the size I wanted. Then I checked the pattern’s scale and proportion on my garment by roughly laying out the pieces.
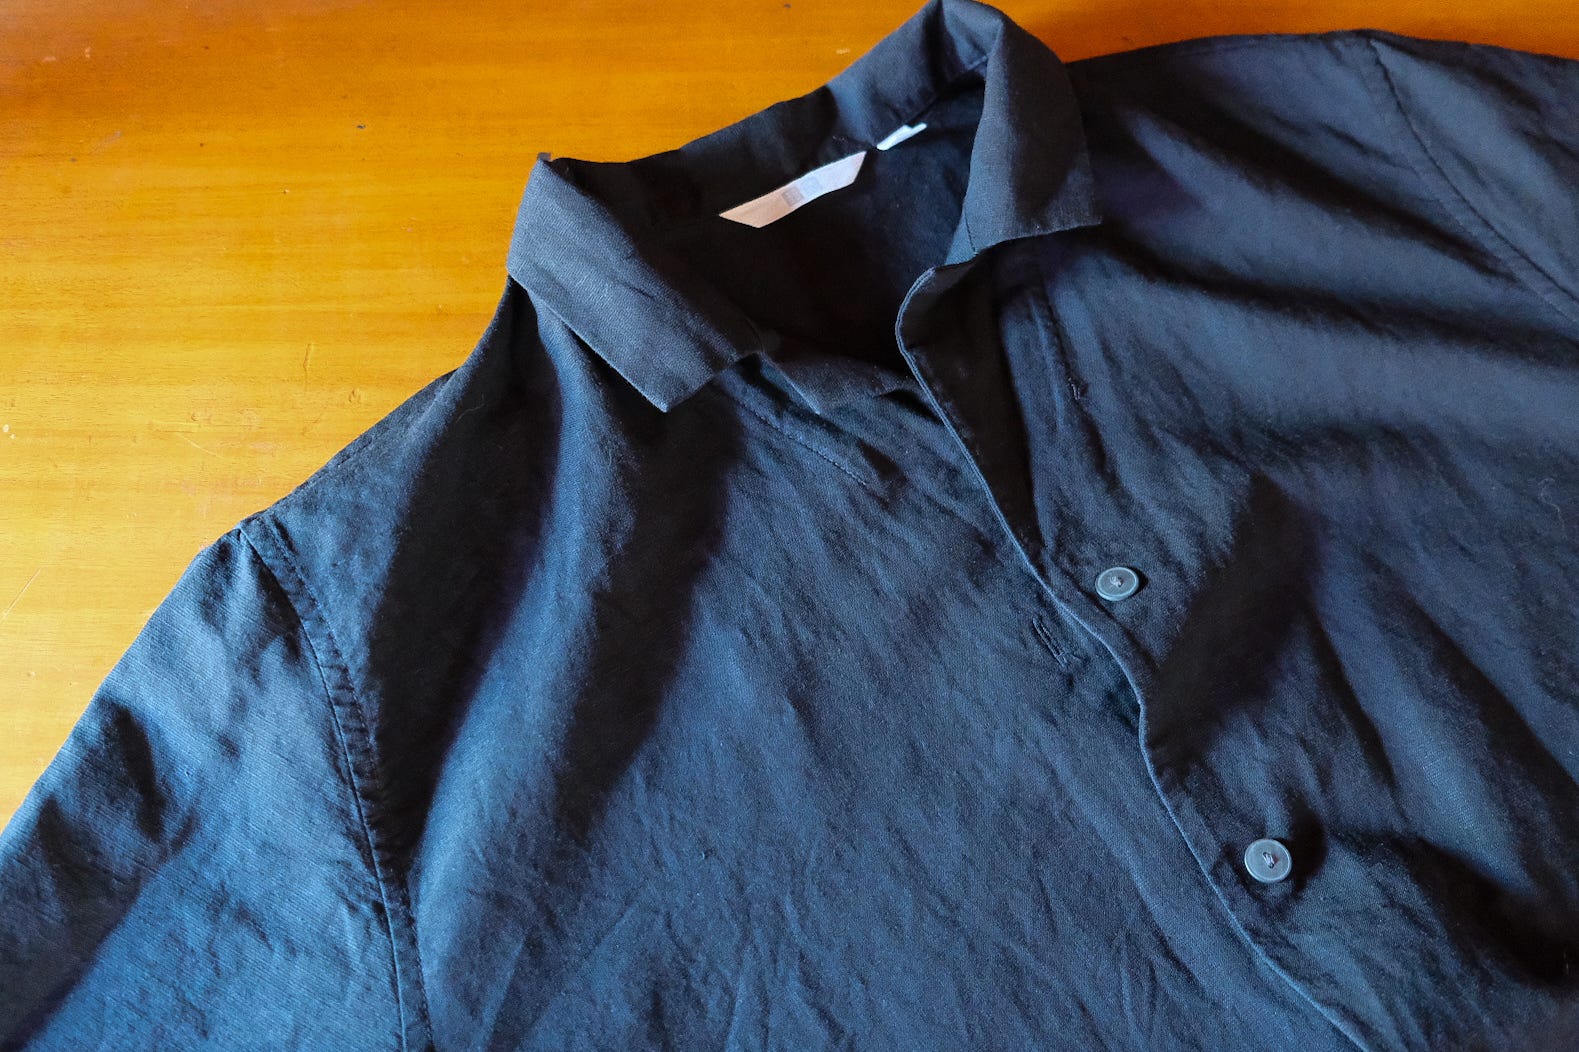
To note, this is also when I noticed my Uniqlo top has a fit issue. Gah! I’m guessing if you lined up the front and back pattern pieces, the front shoulder seam and back shoulder seam would not match, so one is tugging the other causing it to pull and not lay flat. Fortunately, it’s not a make-or-break situation.
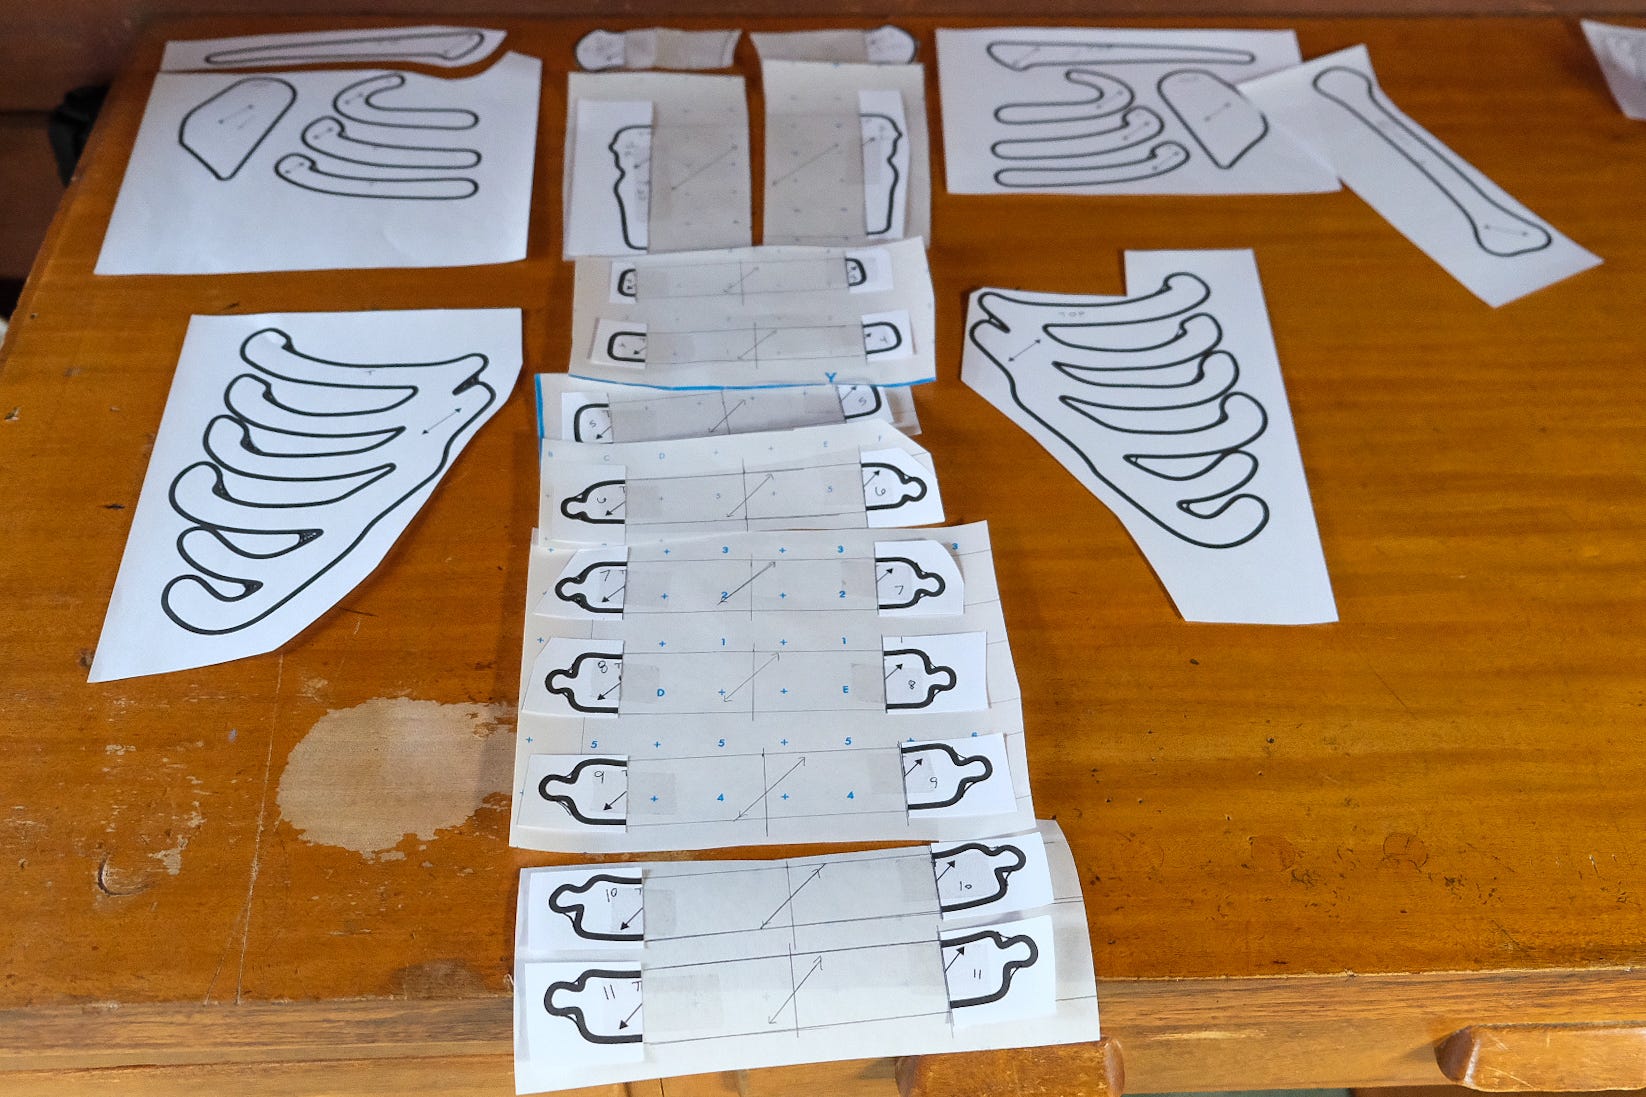
Part 2: Pattern
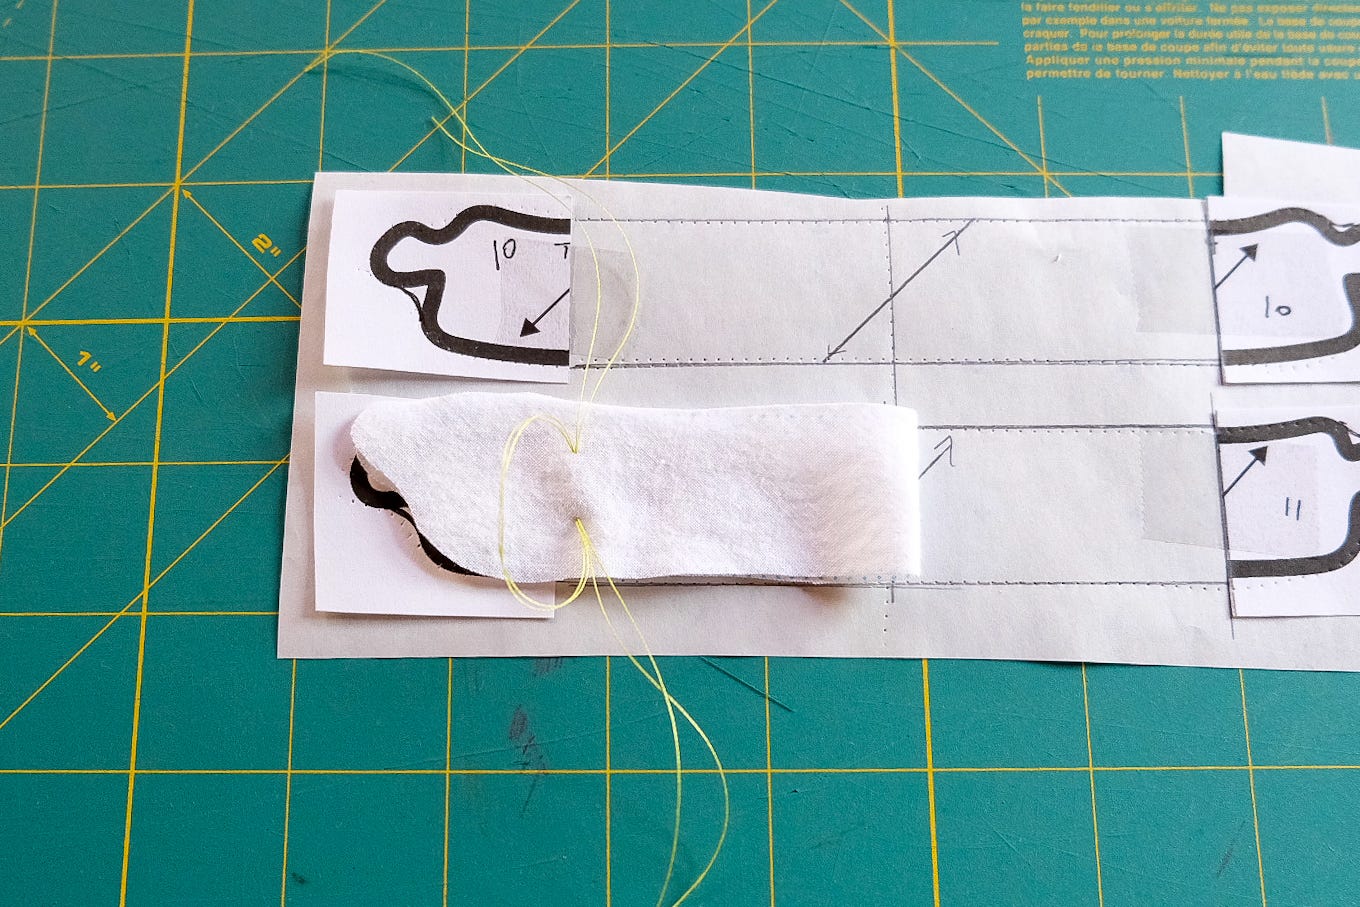
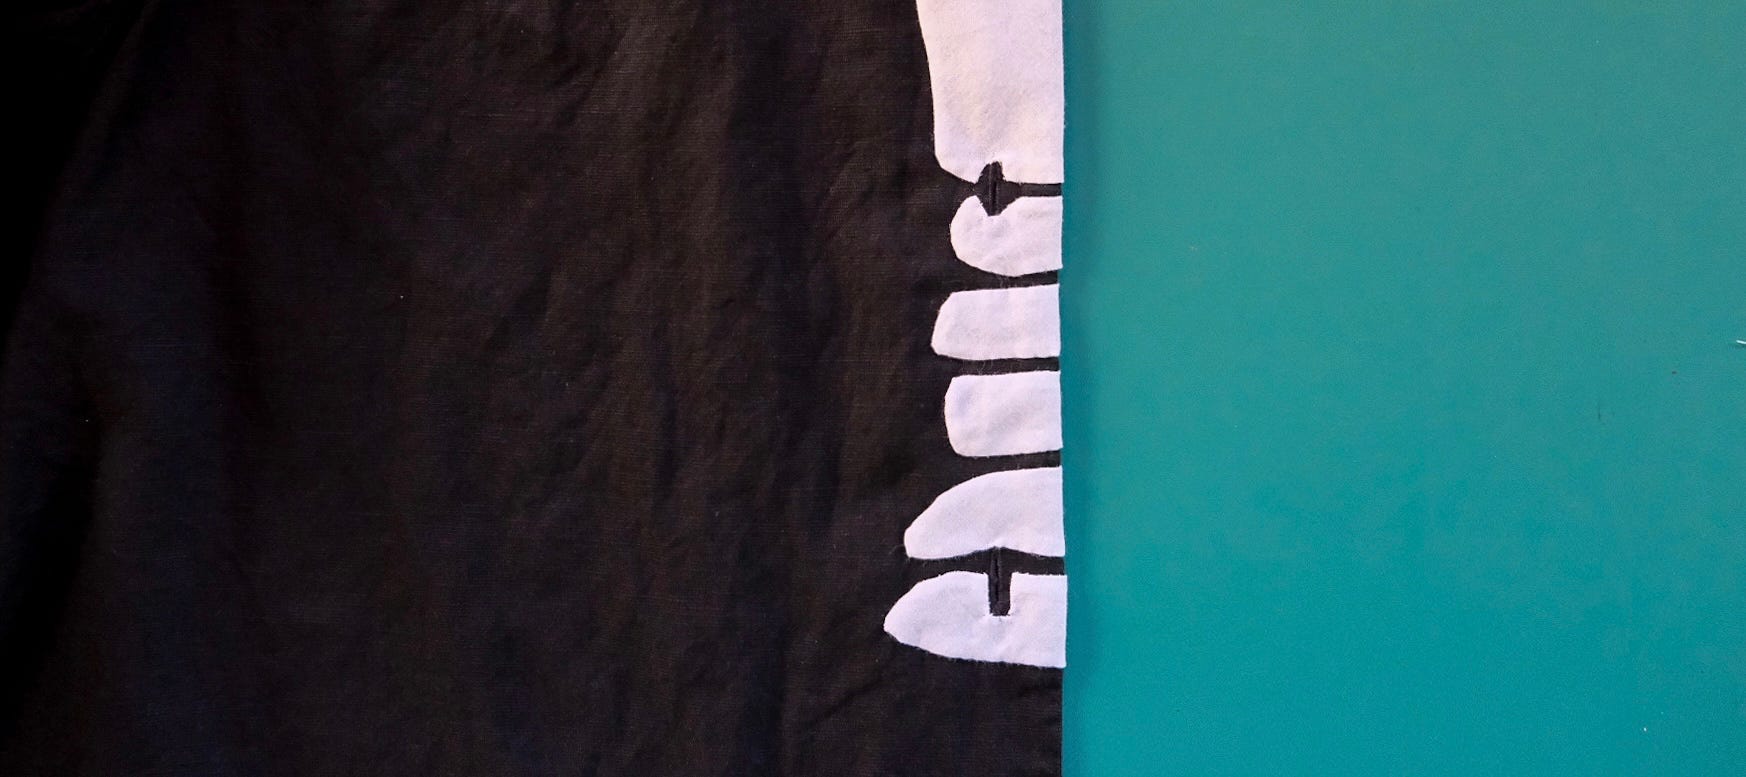
After checking the placement, I used the graphic to make my appliqué pattern. I added a bias grainline and a 1/8-inch seam allowance to each piece. Cutting on the bias keeps fraying at a minimum and makes it easier to turn curves.
If you have access to Adobe Illustrator, an easy way to add 1/8-inch seam allowance is to make the stroke size 8, then select ALIGN STROKE TO OUTSIDE.

You can also scale by hand. Here’s a way:
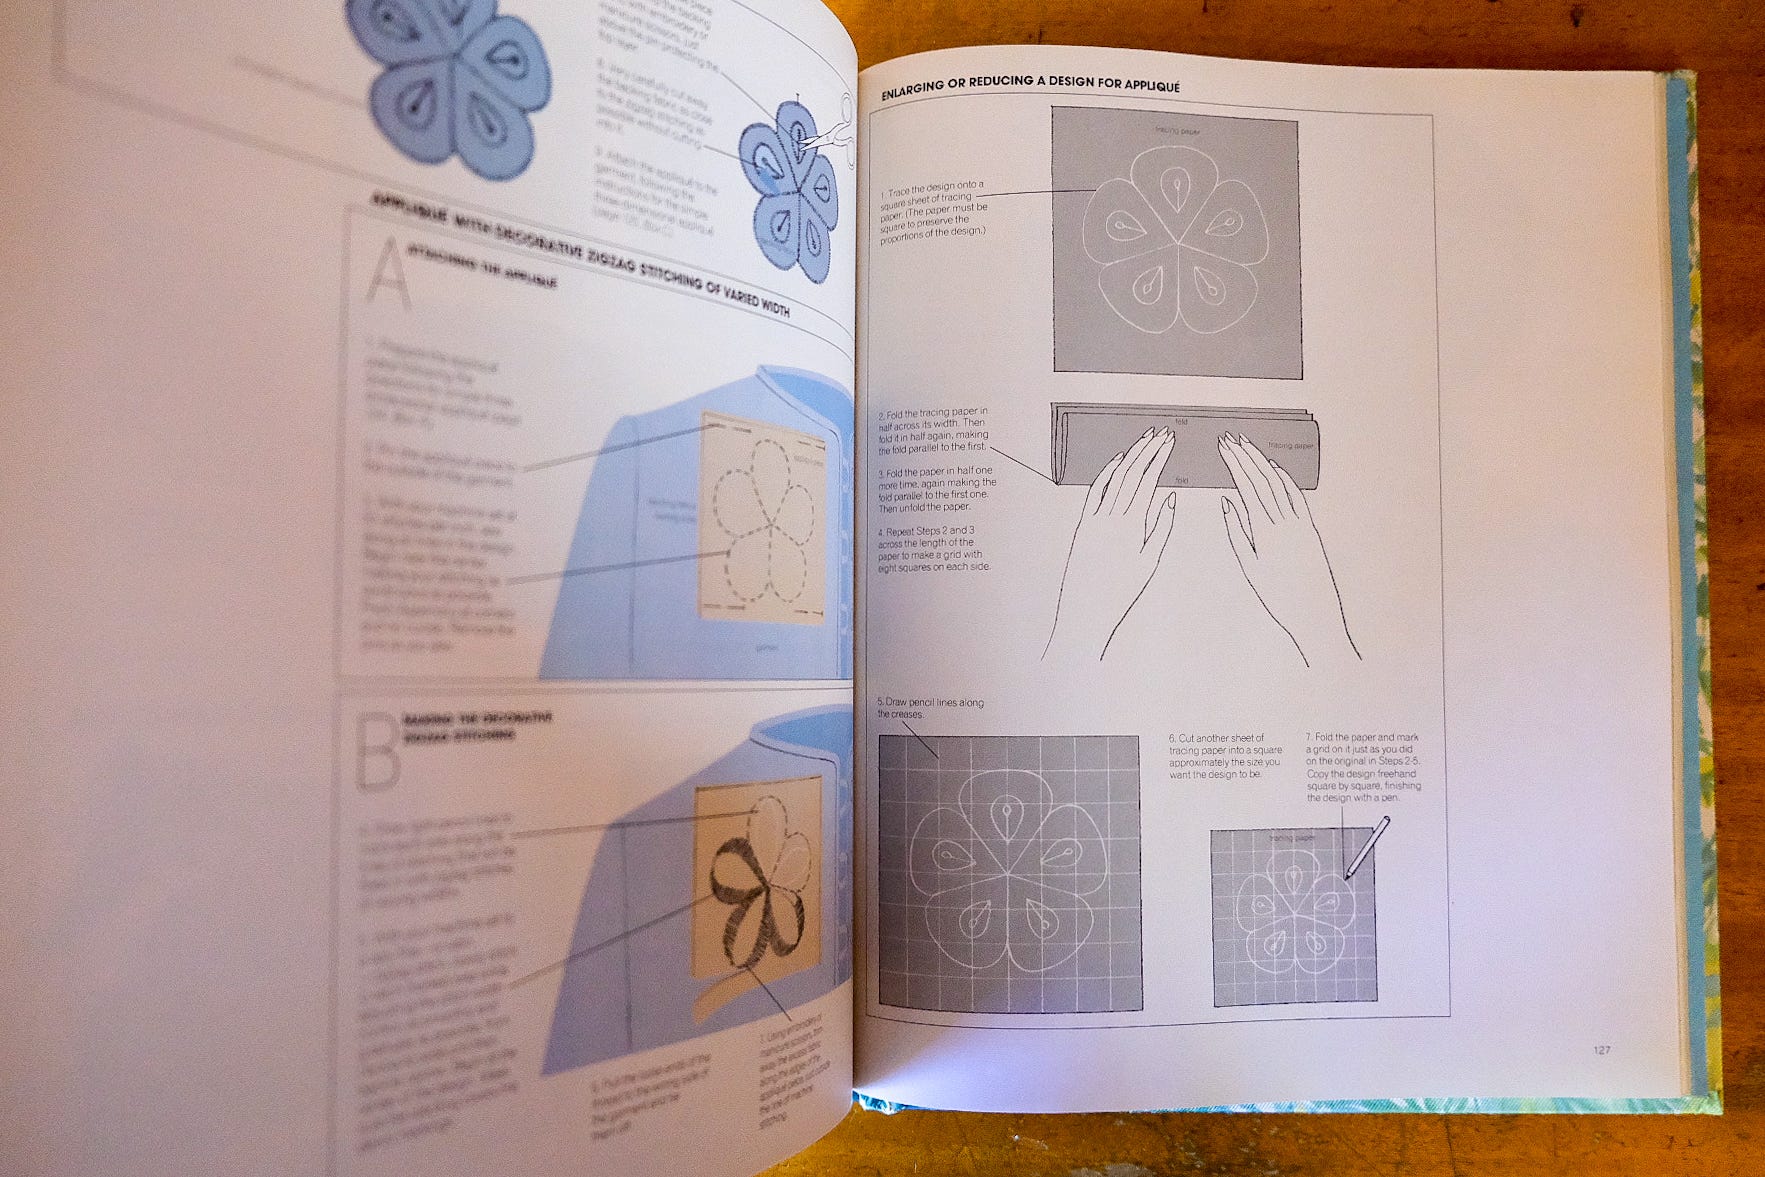
After I printed the pattern to scale, I reduced deep curves and rounded edges by hand to make the shapes easier to needle-turn. In doing so, I'm embracing a loose interpretation of the skeleton graphic—this won't be an exact replica of a human rib cage. :)
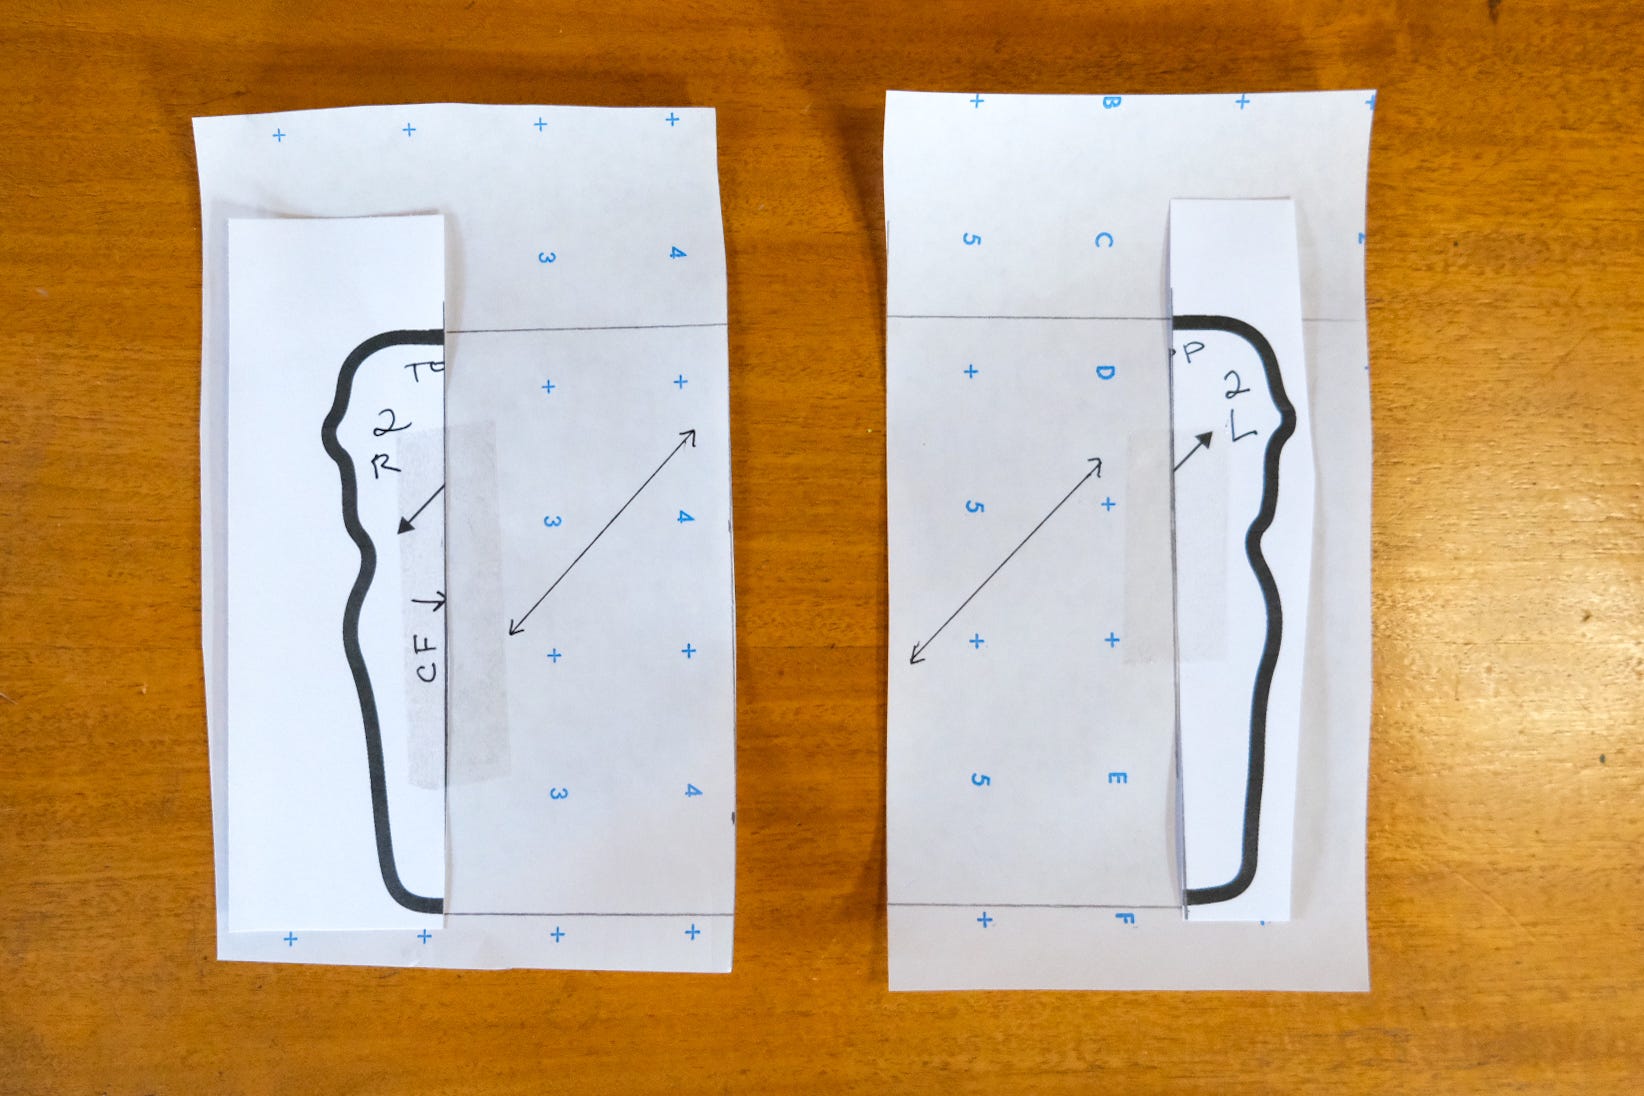
My challenge was figuring out how the appliqué would stitch to the placket. I would have to modify the pattern by adding placket extensions, then cut away the fabric where there were buttonholes, and snip and reattach the buttons.
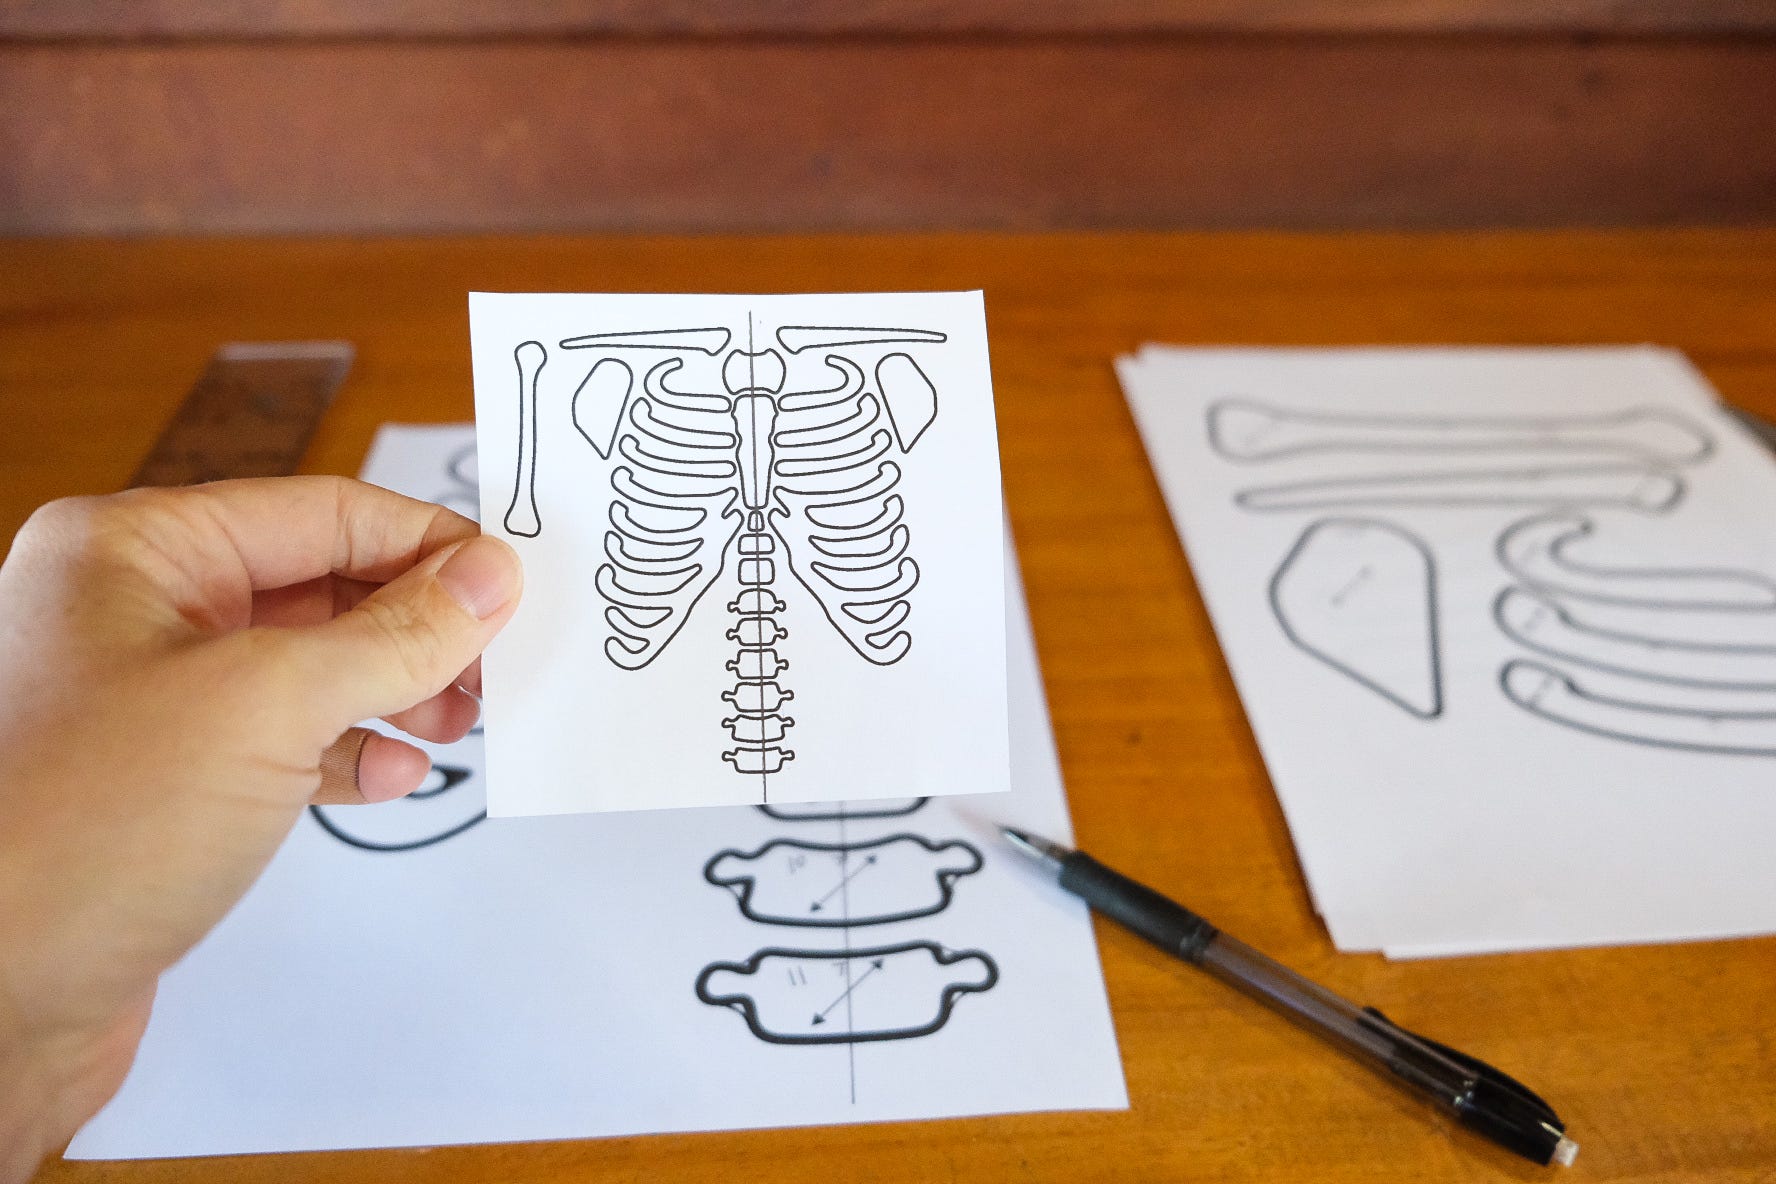
To do this, I drew a line down the middle of each piece. This is the center front and can be aligned with the button holes. The extension will be the measurement from [button hole (center front) to placket edge] + [inside placket width] + [1/8-inch seam allowance].
Part 3: Fabric
I used bleached muslin as my appliqué fabric. A tightly woven cotton works very well for needle-turn appliqué. Either pin and cut or transfer your patterns via tracing paper. I used tracing paper for ease, and don’t forget to cut on the bias to keep fraying at a minimum and make it easier to turn curves.
If I were working with an asymmetrical design, I’d place my pattern wrong side facing up on the wrong side of the fabric so the transfer lines wouldn’t be visible.
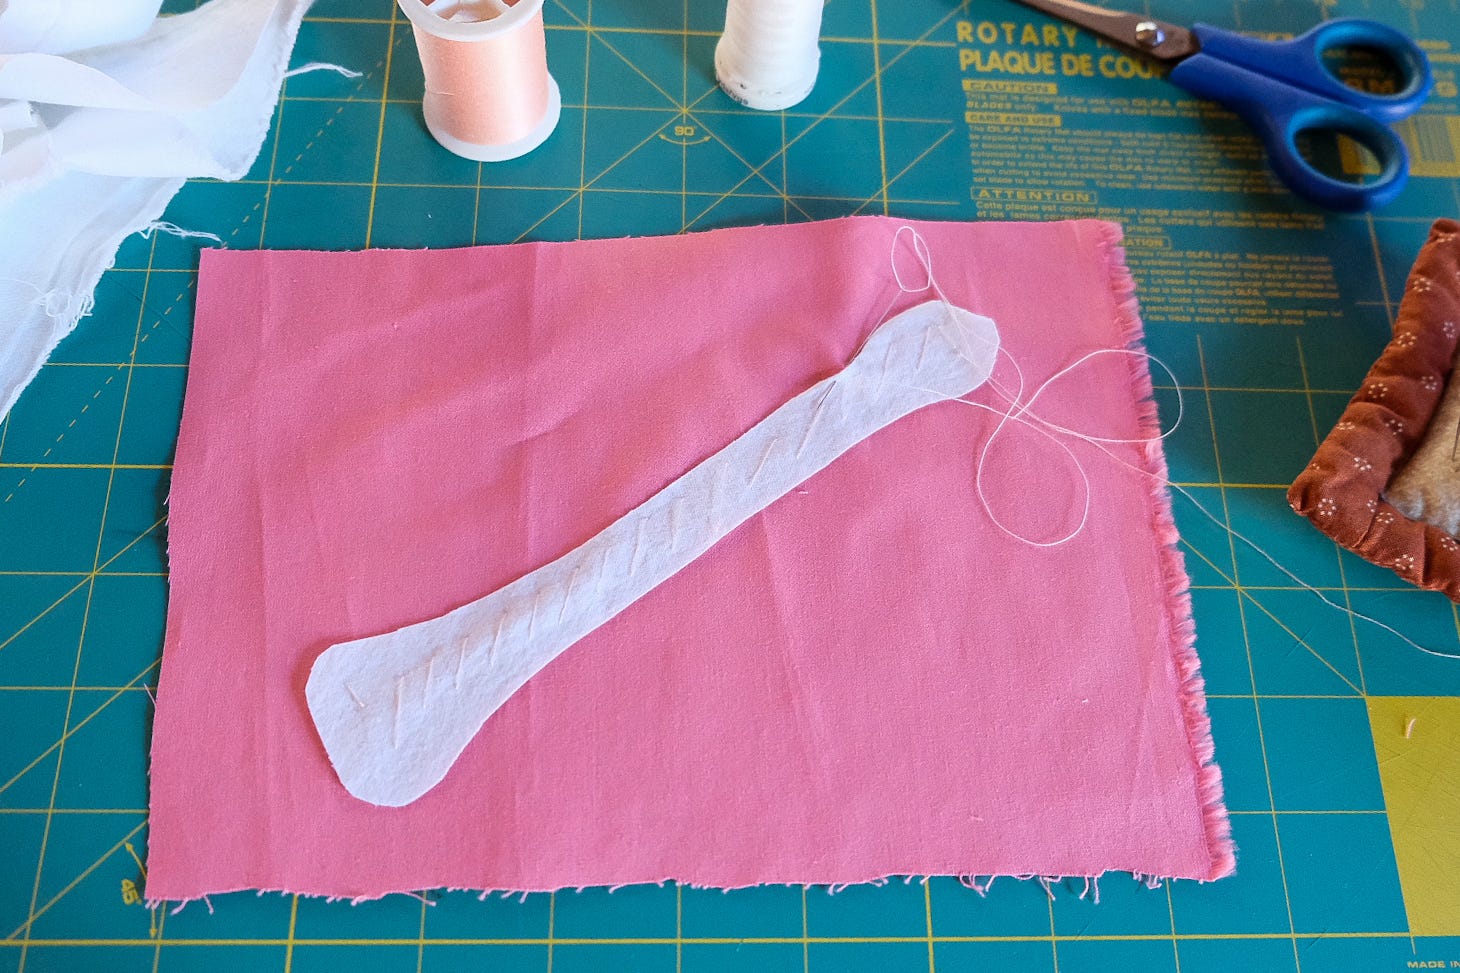
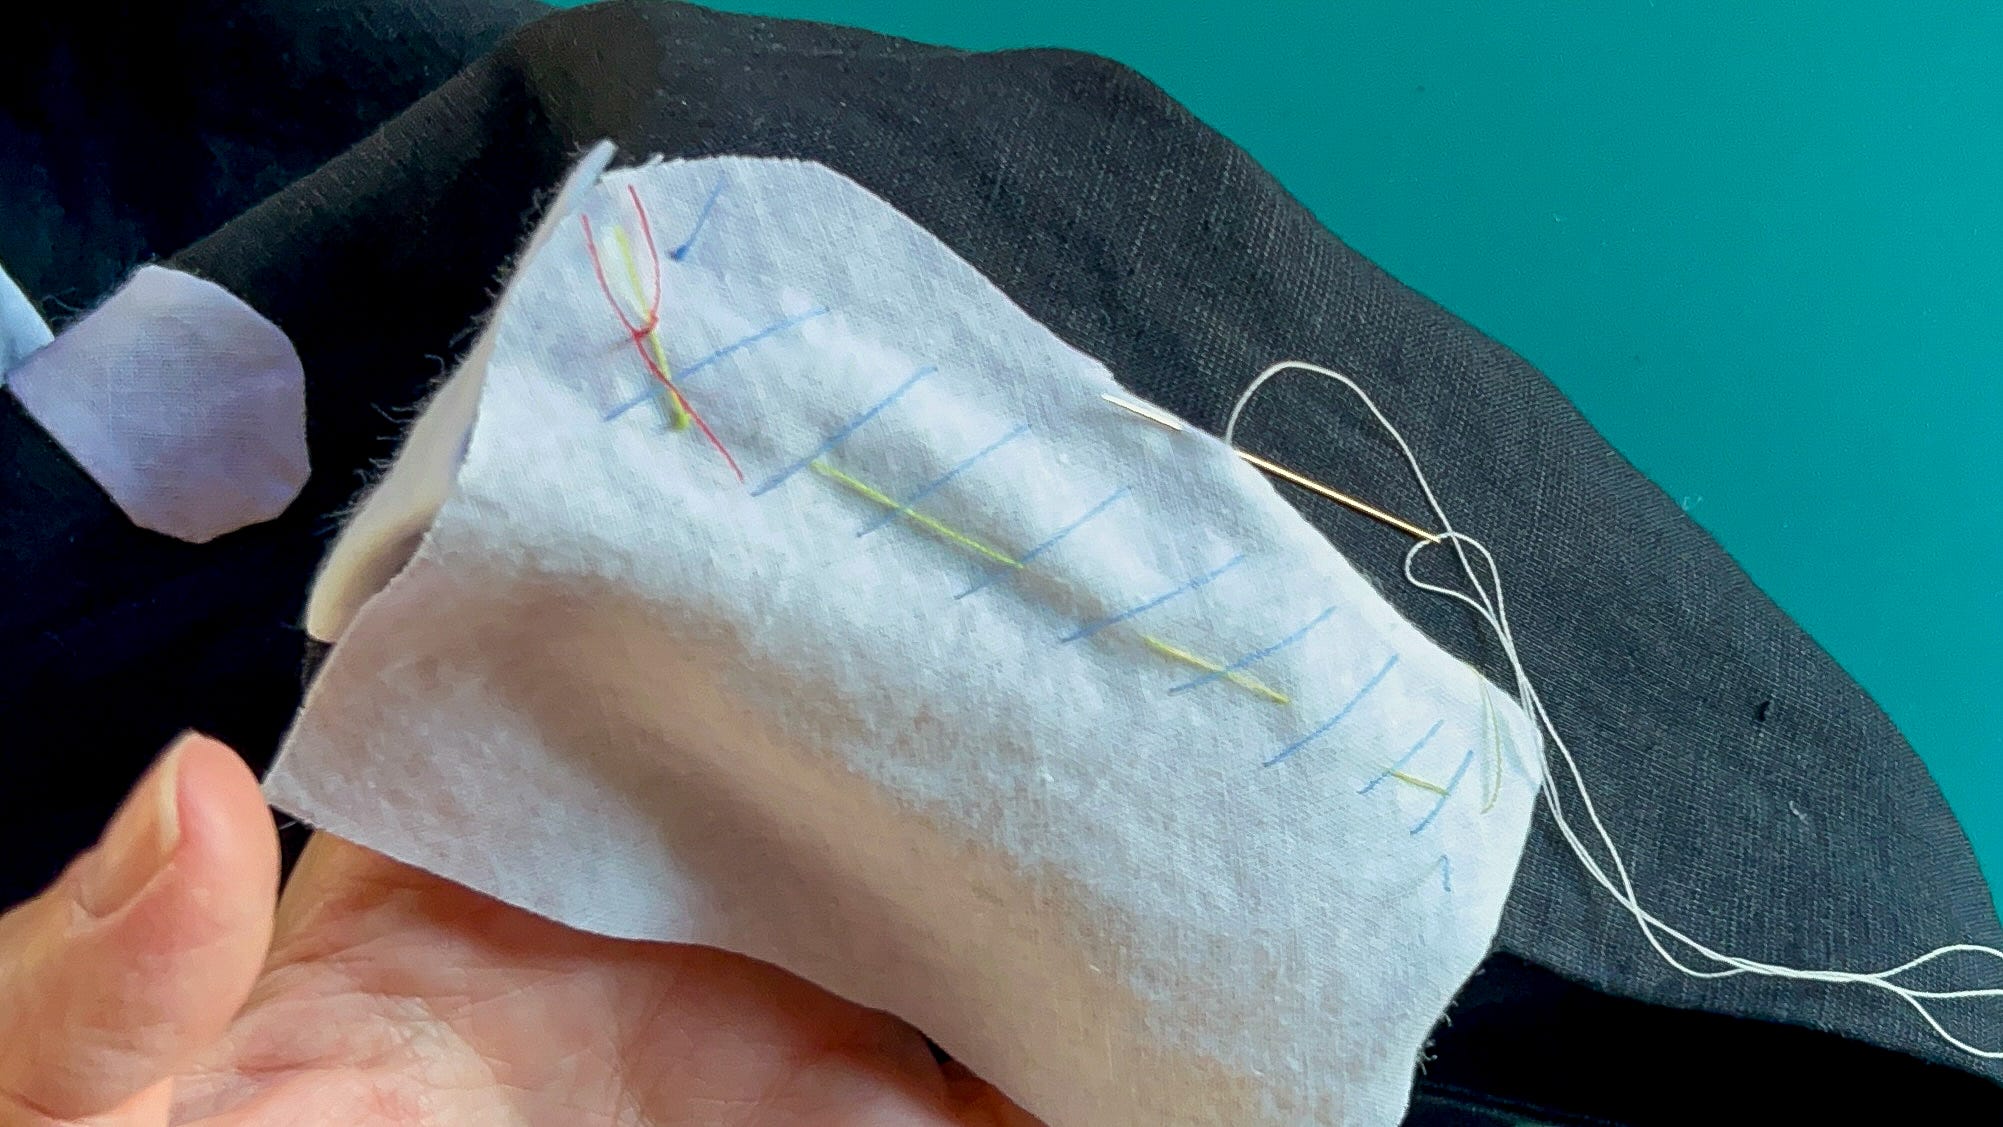
This is also a good time to do a mockup so you can practice both your basting technique and needle-turn appliqué. I cut one pattern piece and diagonally basted it onto a scrap.
Part 3: Needle Turn Appliqué
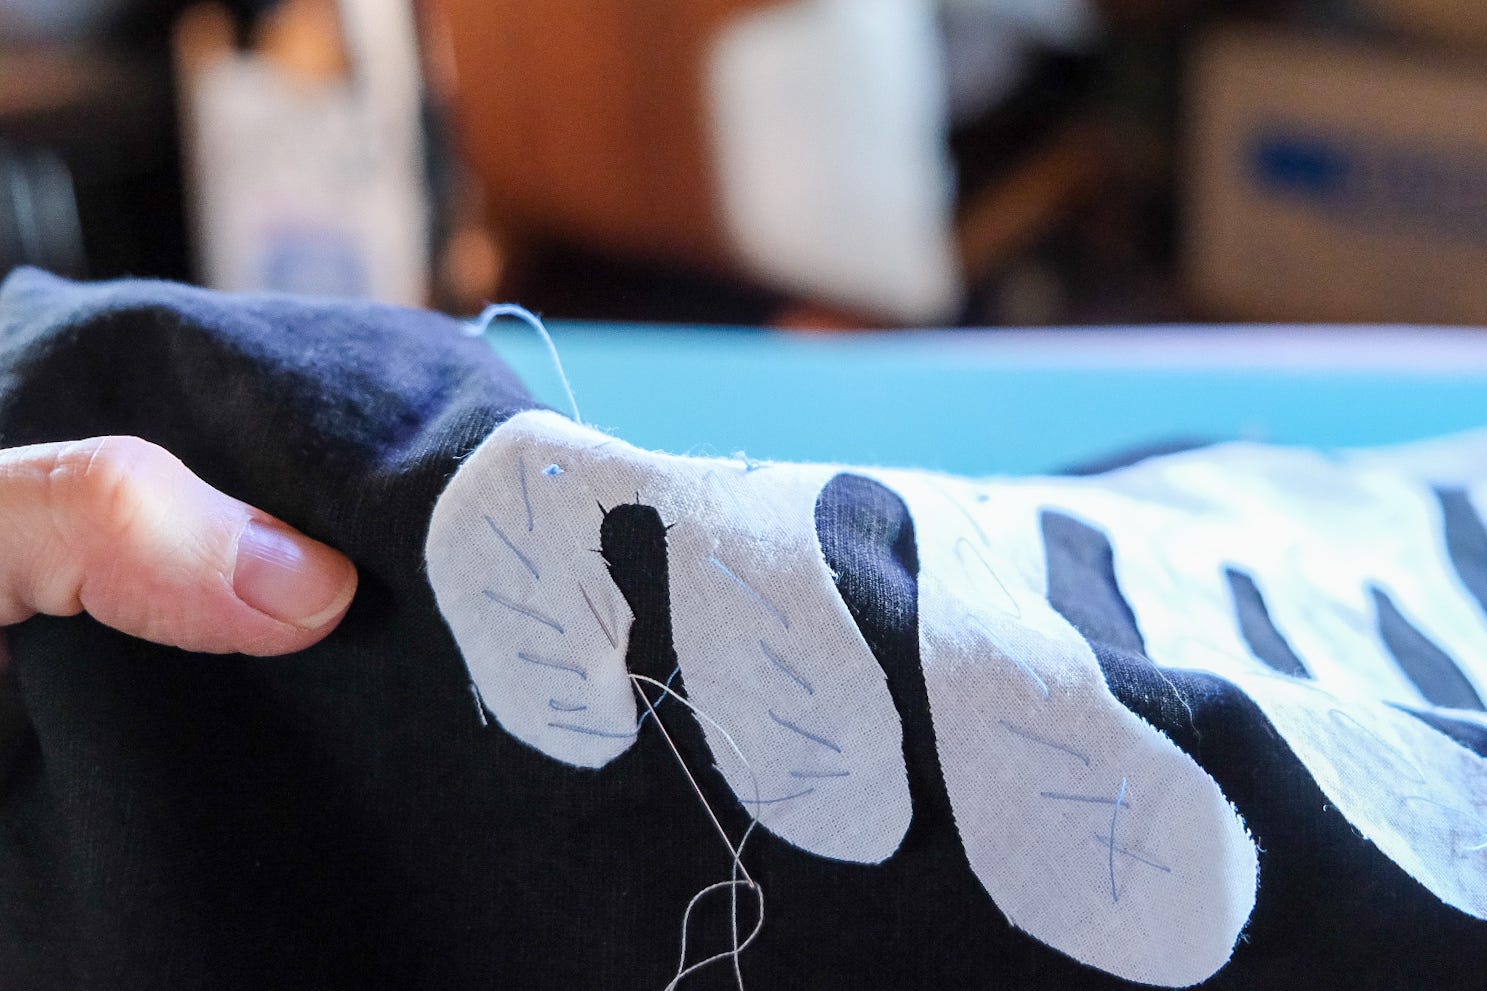
Basting vs. Pinning: Basting is better than pinning. Pins can catch or fall off while basting will keep your pieces in place and prevent the appliquéd fabric from puffing. I used diagonal basting to attach my pieces.
Tip: I found it easier to baste and stitch one piece at a time. Constantly moving the garment while sewing can cause slight fraying. Plus, working one piece at a time made it simpler to visualize placement.
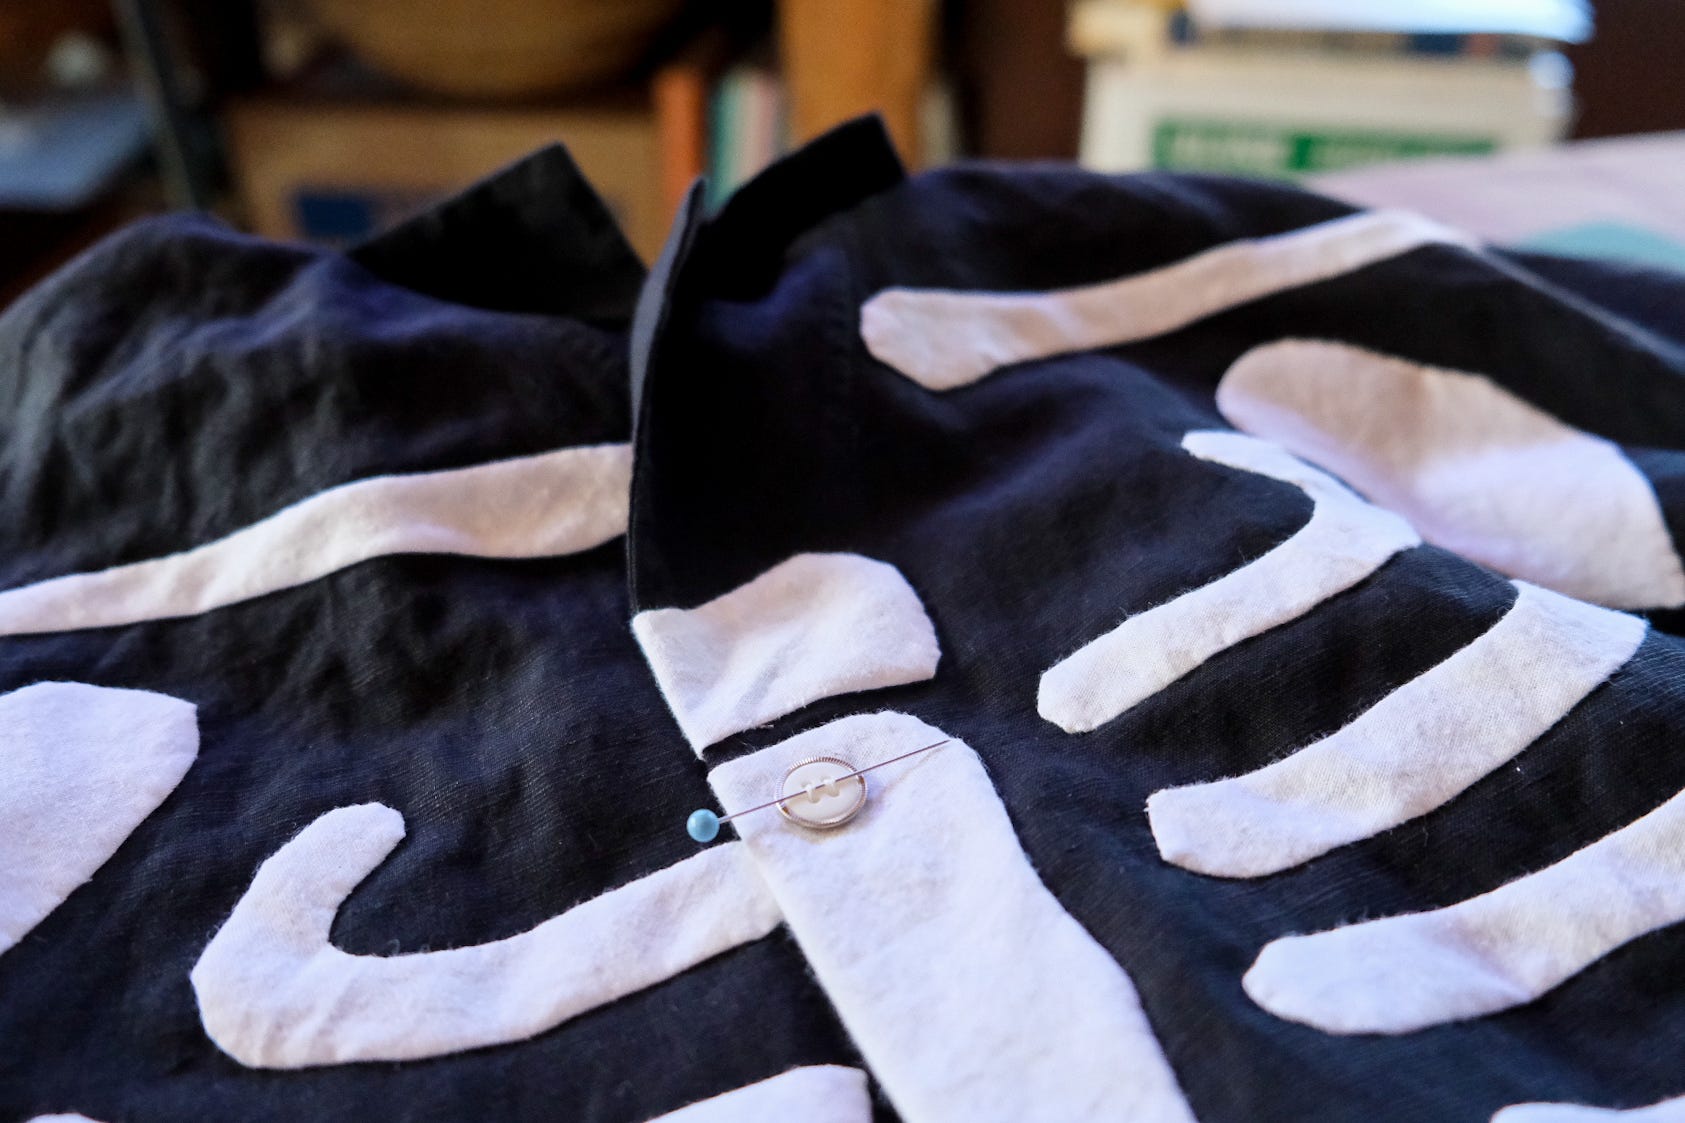
Basting and appliquéing, I worked from top to bottom. On the placket pieces, I basted and appliquéd the front first, then the back. This made it possible for me to mark button holes before I completely covered them.
Tailor’s tacks mark the center front. Watch how to make a tailor’s tack here.
For u-shaped curves, I delicately clipped before turning.
Part 5: The Placket
I made small snips over the button hole as if making a bound button hole. First, I cut along the button hole and then snipped diagonally at the corners, like this:
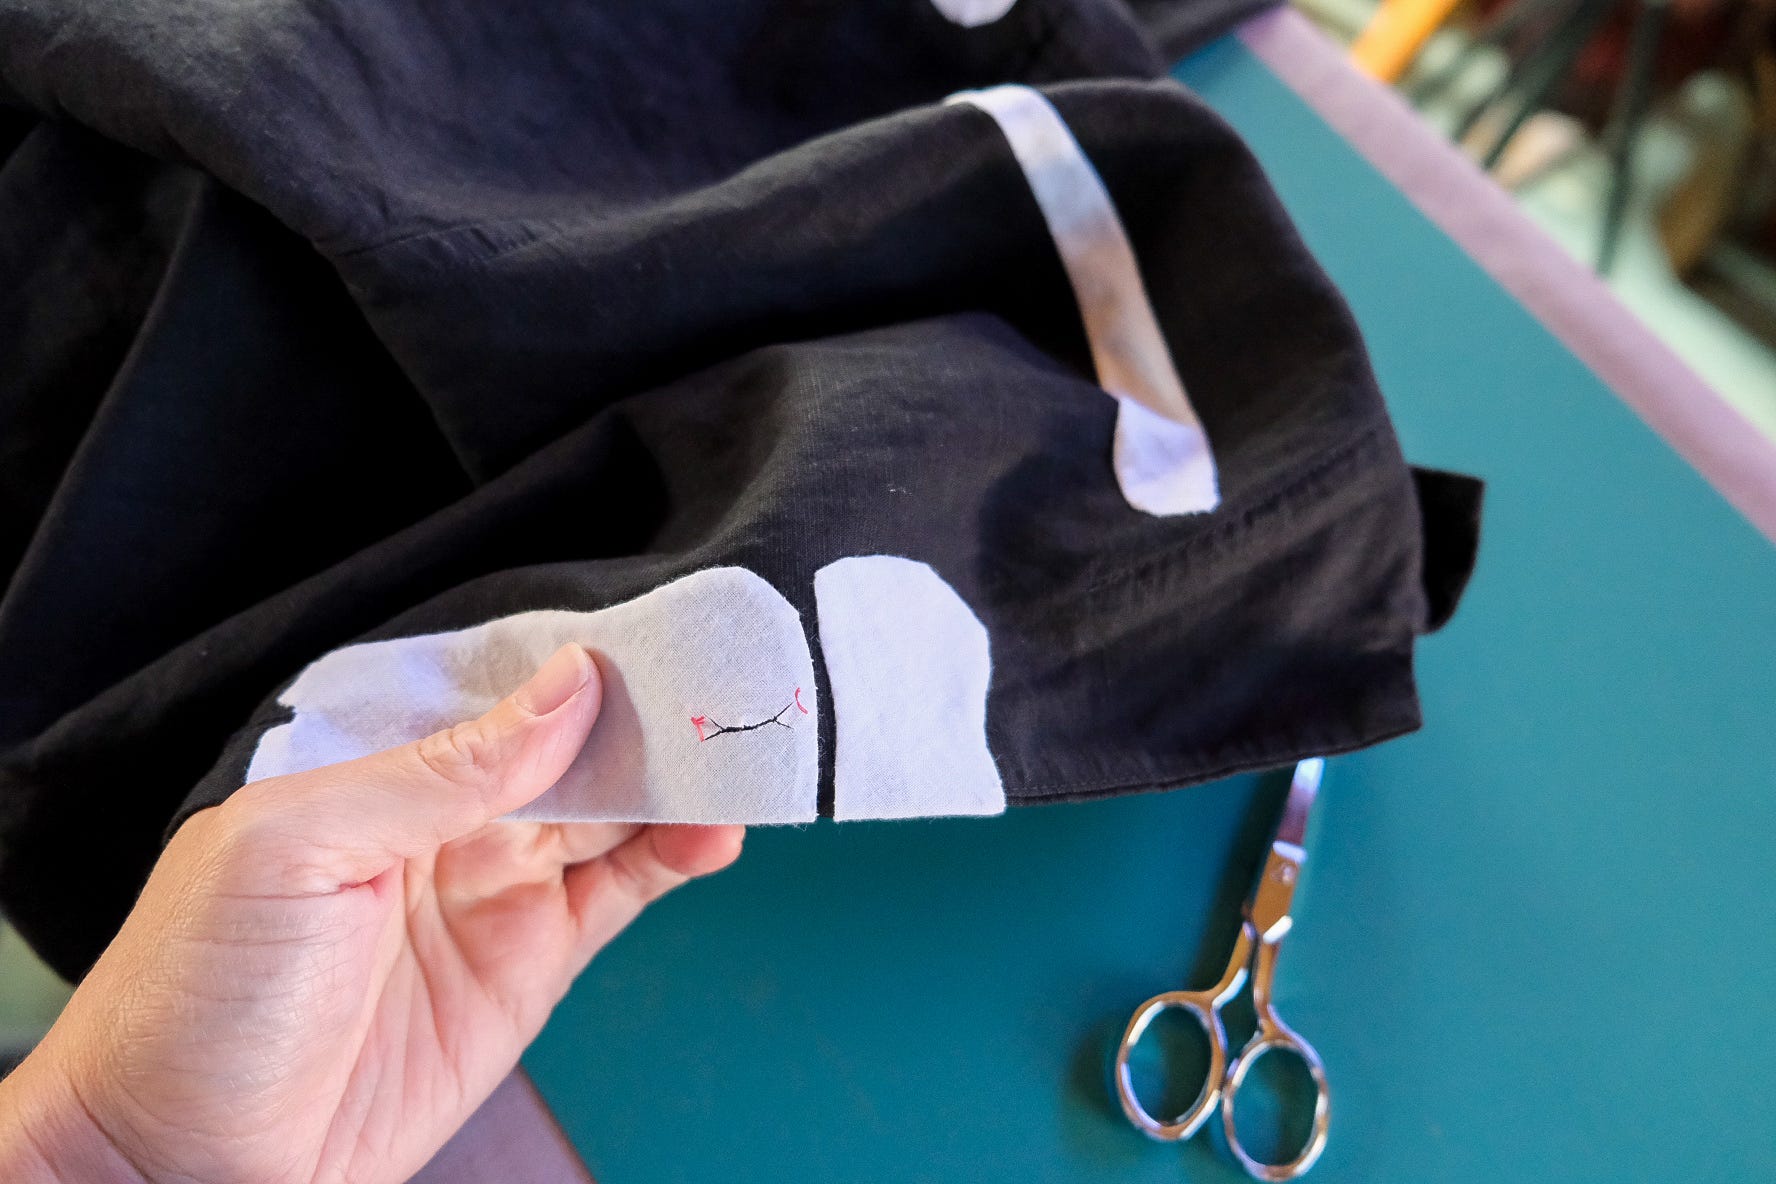
For buttonholes that were not completely covered, I worked first on the front and then on the back and snipped the buttonhole in the same manner as step 11.
And the finishing touch! I switched out the shirt’s original buttons with buttons from my button box.
Here’s a refresher on how to attach buttons: Button, Button, Who’s Got the Button
I'm all set for October with my skeleton shirt! Whether you're creating for Halloween or just love adding unique touches to your wardrobe, needle-turn appliqué is a fun, creative way to bring your ideas to life. Happy sewing!
7 Tips for Needle-Turn Appliqué
Smooth pattern edges makes them easier to turn under with your needle.
Select a woven cotton to appliqué.
Cut pieces on the bias to prevent fraying and to make turning curves easier.
Transfer patterns with tracing paper.
Diagonal baste pieces to garment.
Use a sharp needle.
Baste and stitch one piece at a time.
Lastly, I've been enjoying browsing vintage sewing books available on public databases and internet archives. These excerpts are from How to Make Over Old Dresses (1892), a book that's over 130 years old! Enjoy :)
If your buttons do not all match each other, and you haven't a full set of any one kind, sew on a tiny ruffle of lace down the front of your dress, covering the buttons and buttonholes.
Keep cloves in your bureau drawers and dress boxes, to keep away moths. The cloves will also give an agreeable odor to the garments, and will keep away mustiness.