


How to Draft a Lining Pattern: Reverse Engineering a Vintage Jacket Part 3
Simple methods for drafting a jacket lining pattern. Plus, tips for selecting the right fabric, and more.

Linings are the unsung heroes of clothing, working behind the scenes to improve fit, movement, and comfort. They provide a clean finish, concealing inner construction while adding durability. Take a look inside your closet. How many of your garments are lined? Are they fully or partially lined? How do they layer over other garments? Or how does the fabric feel against your skin?
For jackets and coats, linings are typically made from lighter-weight fabric than the outer garment, making it easier to slip on and off. They can follow the garment’s style lines or be adjusted to shift seams away from the outer layer to reduce bulk. Linings are also cut larger to prevent stress and allow for ease of movement.
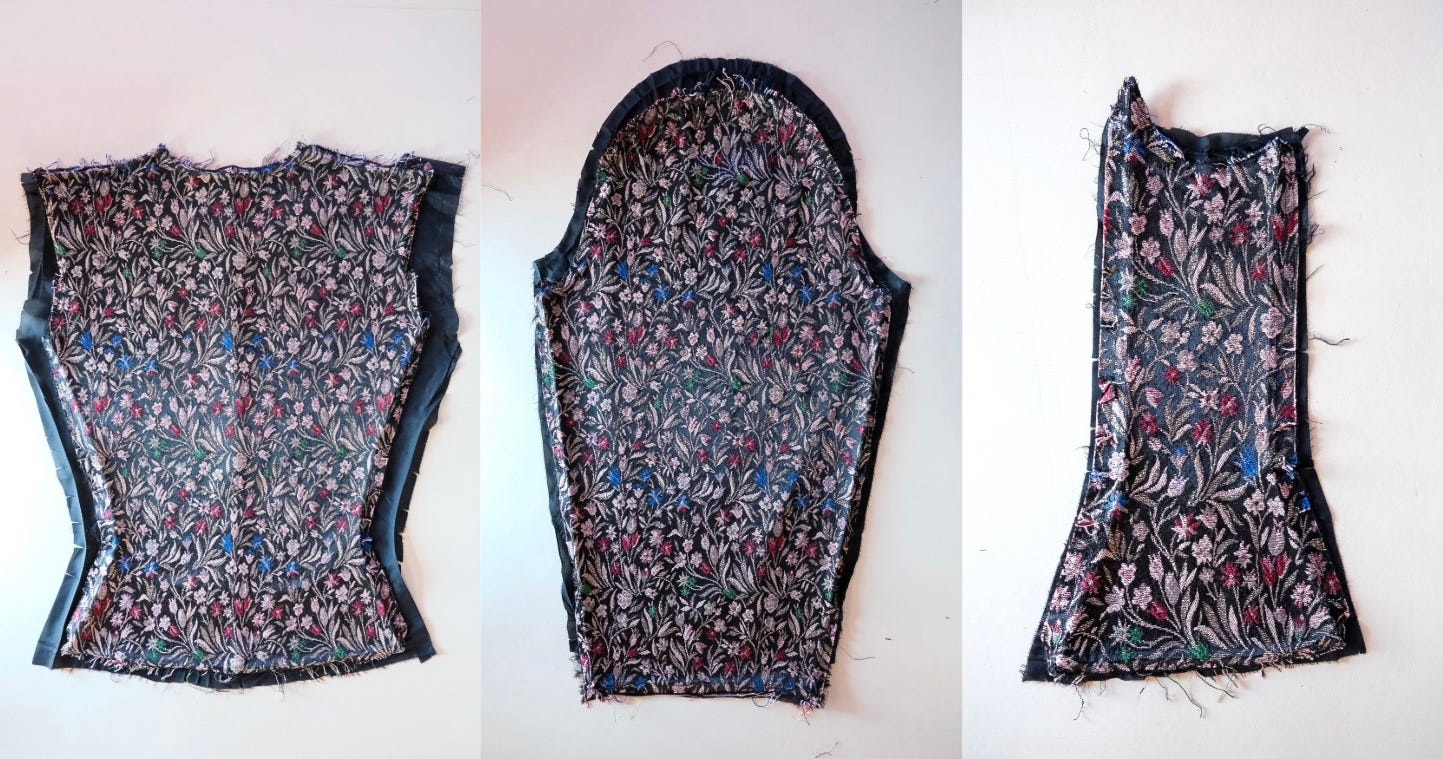
In today’s letter, I’ll share how I drafted a lining from the patterns created after deconstructing a vintage Mary McFadden jacket. You can also use this method to draft your own jacket lining, especially useful when working with a pattern that doesn’t include one. It’s a long read, but with lots of extras woven in—lining fabrics, burn tests, and more. Enjoy!
This is the third installment of my Reverse Engineering series, where I take apart, analyze, and recreate a vintage Mary McFadden evening jacket. If you missed Parts 1 and 2, you can find them here:
Reverse Engineering a Vintage Evening Jacket Part 1

Deconstructing the design and drafting the pattern.
Reverse Engineering a Vintage Evening Jacket Part 2: Pattern Grading

Pattern grading overview and techniques to adjust your pattern's size.
What makes a good lining fabric?
A good jacket lining fabric won’t add bulk, and it should feel comfortable against the skin or glide smoothly when layered over other garments.
When choosing a lining fabric, consider your garment’s weight, season, opacity, and volume. Common jacket lining fabrics include silk, viscose, acetate, rayon, cupro, cotton, and polyester. The eveningwear designer, Tadashi Shoji, lines his gowns and party dresses with darted and intricately seamed jersey knit to create custom-like fits with the softness of a T-shirt. So break the rules—choose a lining fabric that works best for you.
Ultimately, choosing a lining comes down to balancing a fabric’s benefits with its price point.
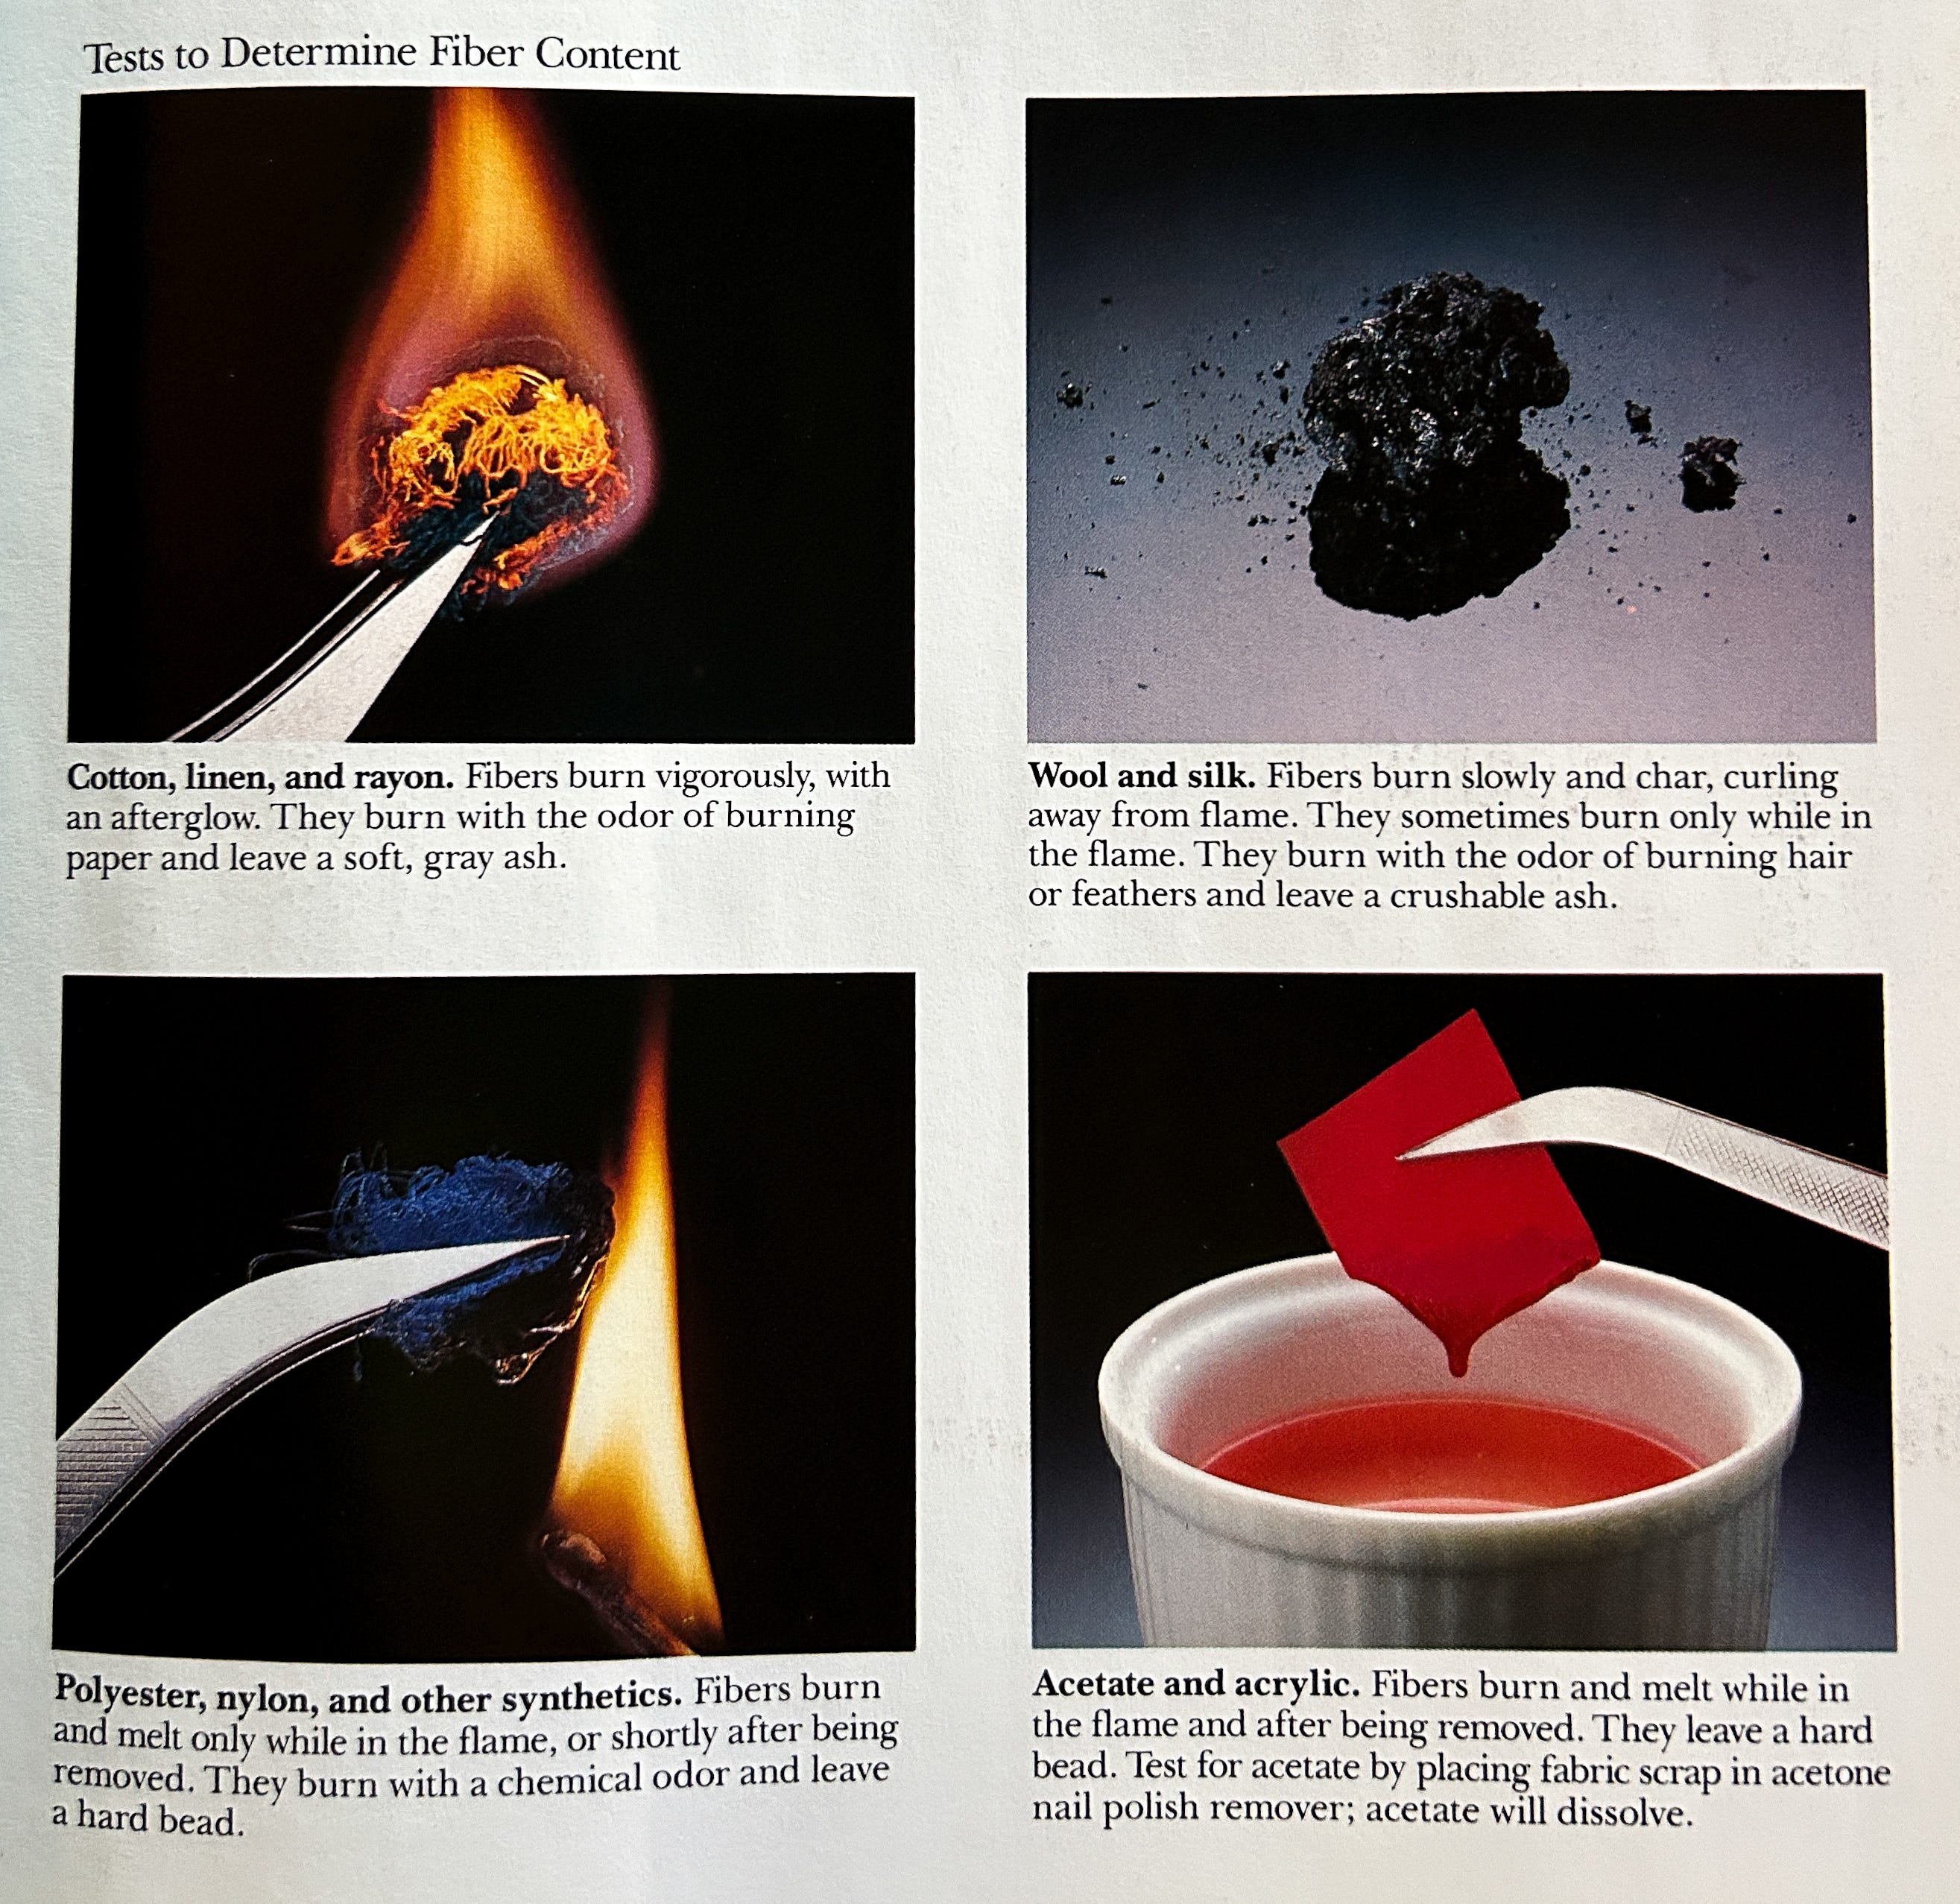
Fabric Burn Test
I wasn’t sure what lining fabric Mary used for this jacket, so I performed a burn test. The fibers burned quickly, producing a grey ash. With its silky, luxurious feel and vintage age, I’m guessing rayon. Keep in mind, blends burn like their dominant fiber, so burn tests aren’t always definitive.
Here’s a handy guide to help identify fiber content using the burn test.
Drafting a Lining Pattern
When drafting a lining—or any pattern—you might come across the term ‘armscye.’ If you’re unfamiliar, it refers to the armhole opening in a garment, specifically its shape or outline. It’s often used interchangeably with armhole, and both are correct. According to Wikipedia, ‘armscye’ comes from ‘arm’ + ‘scye,’ with ‘scye’ being a Scots and Ulster dialect word for ‘armhole.’
As with most sewing projects, while there are specific techniques, modifications and measurements do differ. There's no right or wrong as long as you achieve the result you want.
Since measurements for drafting linings vary across sources, I took these into account while drawing inspiration from my Mary McFadden piece. Below are the steps I followed, along with a few alternate suggestions.
Shoulder Pads: Shoulder and Sleeve Cap Adjustments
When drafting a jacket and you plan to include shoulder pads, adjust the shoulder line and sleeve cap to accommodate the extra thickness.
Raise the front and back shoulder tips and sleeve cap height by the thickness of the shoulder pad, minus 3/8 inch. Then, blend the cap and shoulder line for a smooth transition. Do not make this adjustment on your lining pattern. The lining should fit the body, with the shoulder pads placed on top.
However, because I’m reverse engineering this jacket, I adjusted my lining pattern to account for the shoulder pad difference since the jacket already included it, and I’m drafting the lining from scratch. Confused? Me too. Drafting backwards can be tricky!
Facings
We can’t talk about linings without mentioning facings. While both help conceal seams, facings also reinforce and stabilize areas, preventing them from stretching or losing shape. They can follow the garment’s style lines or bypass them entirely.
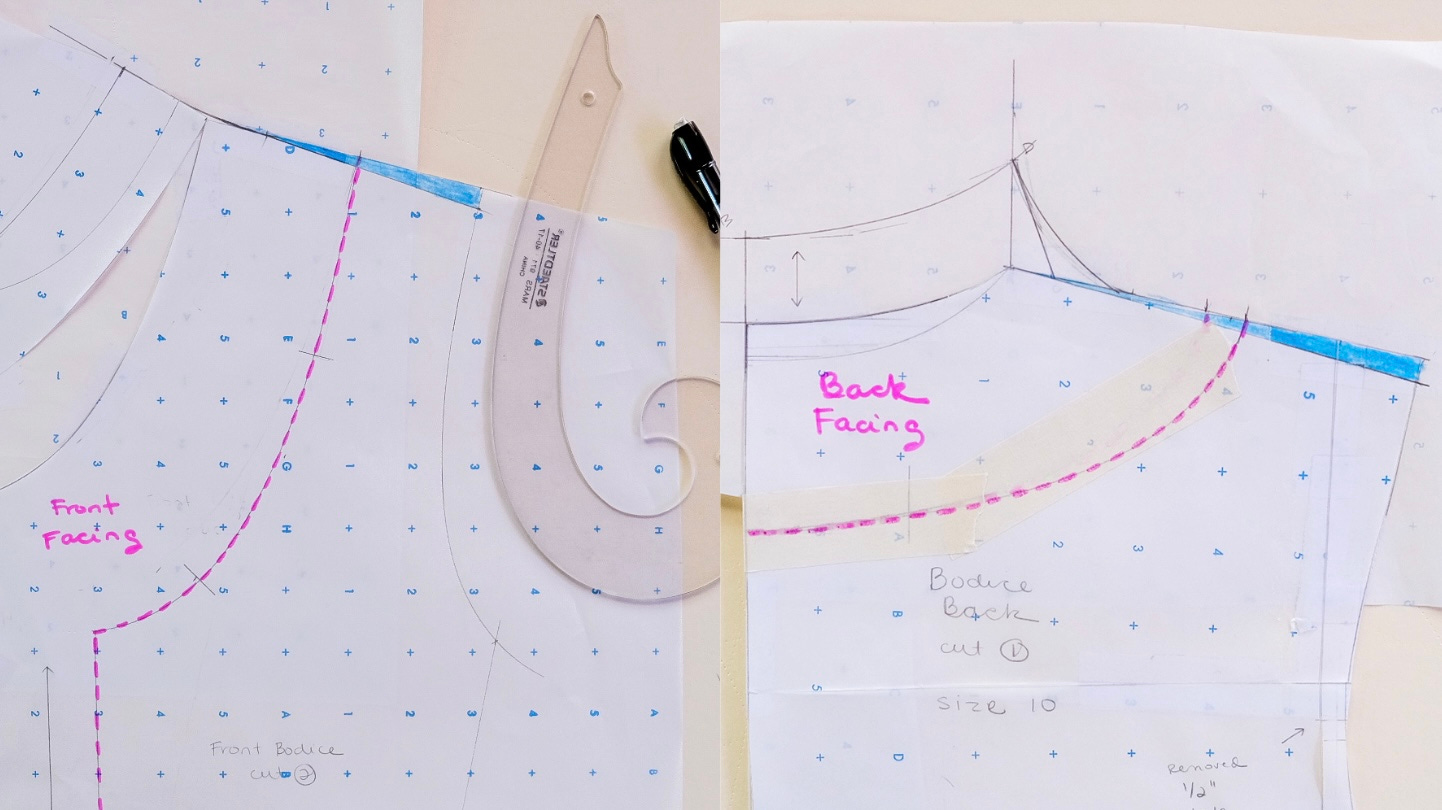
Before starting your lining pattern, draw the facings on your patterns to trace off later. Add one or two match points so the lining and facing will be easy to join together.

Facings marked in pink.
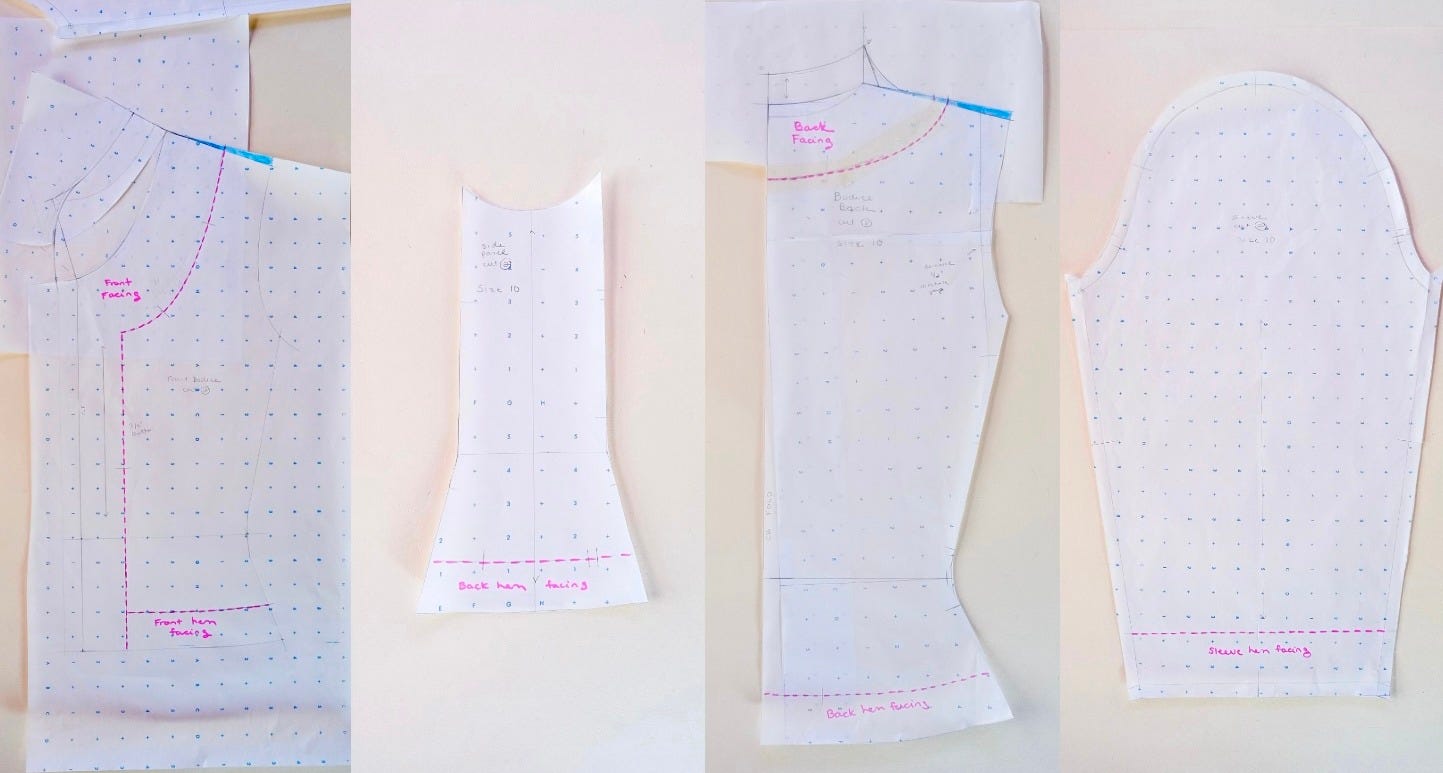
You may’ve noticed a few modifications from the original Mary McFadden design, including a change from a mandarin collar to a built-up neckline—just a personal preference. I’ll share how to do this in a future letter!
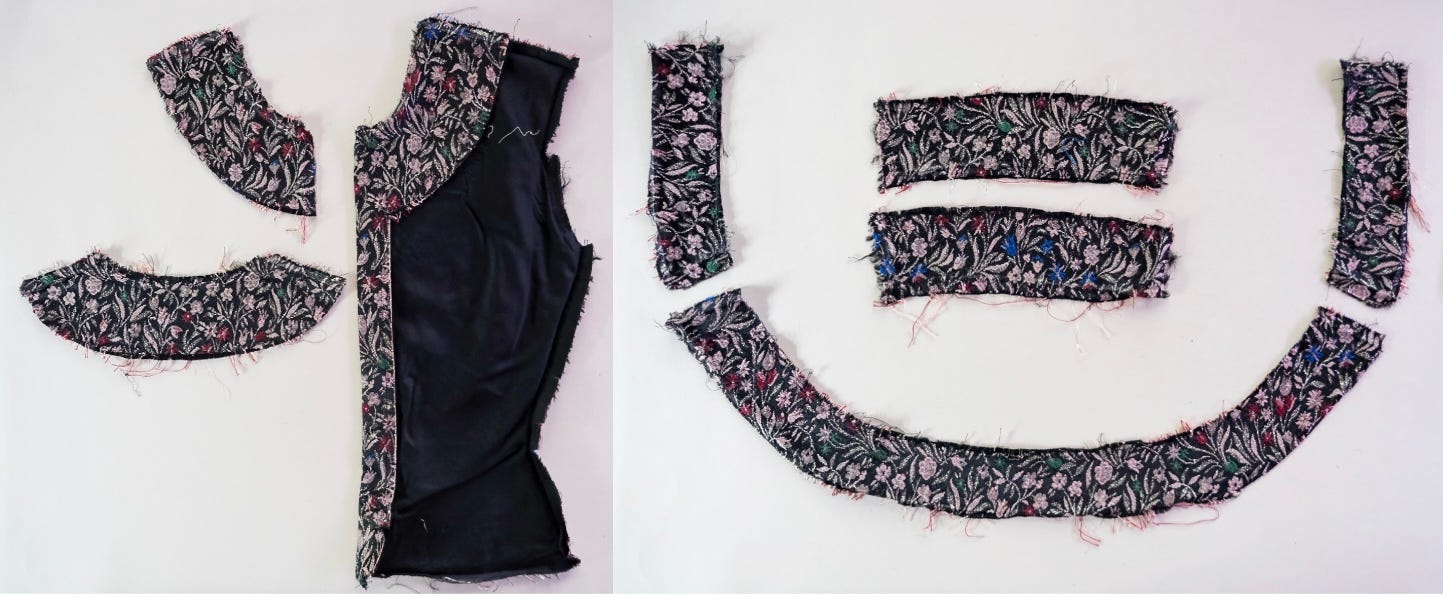
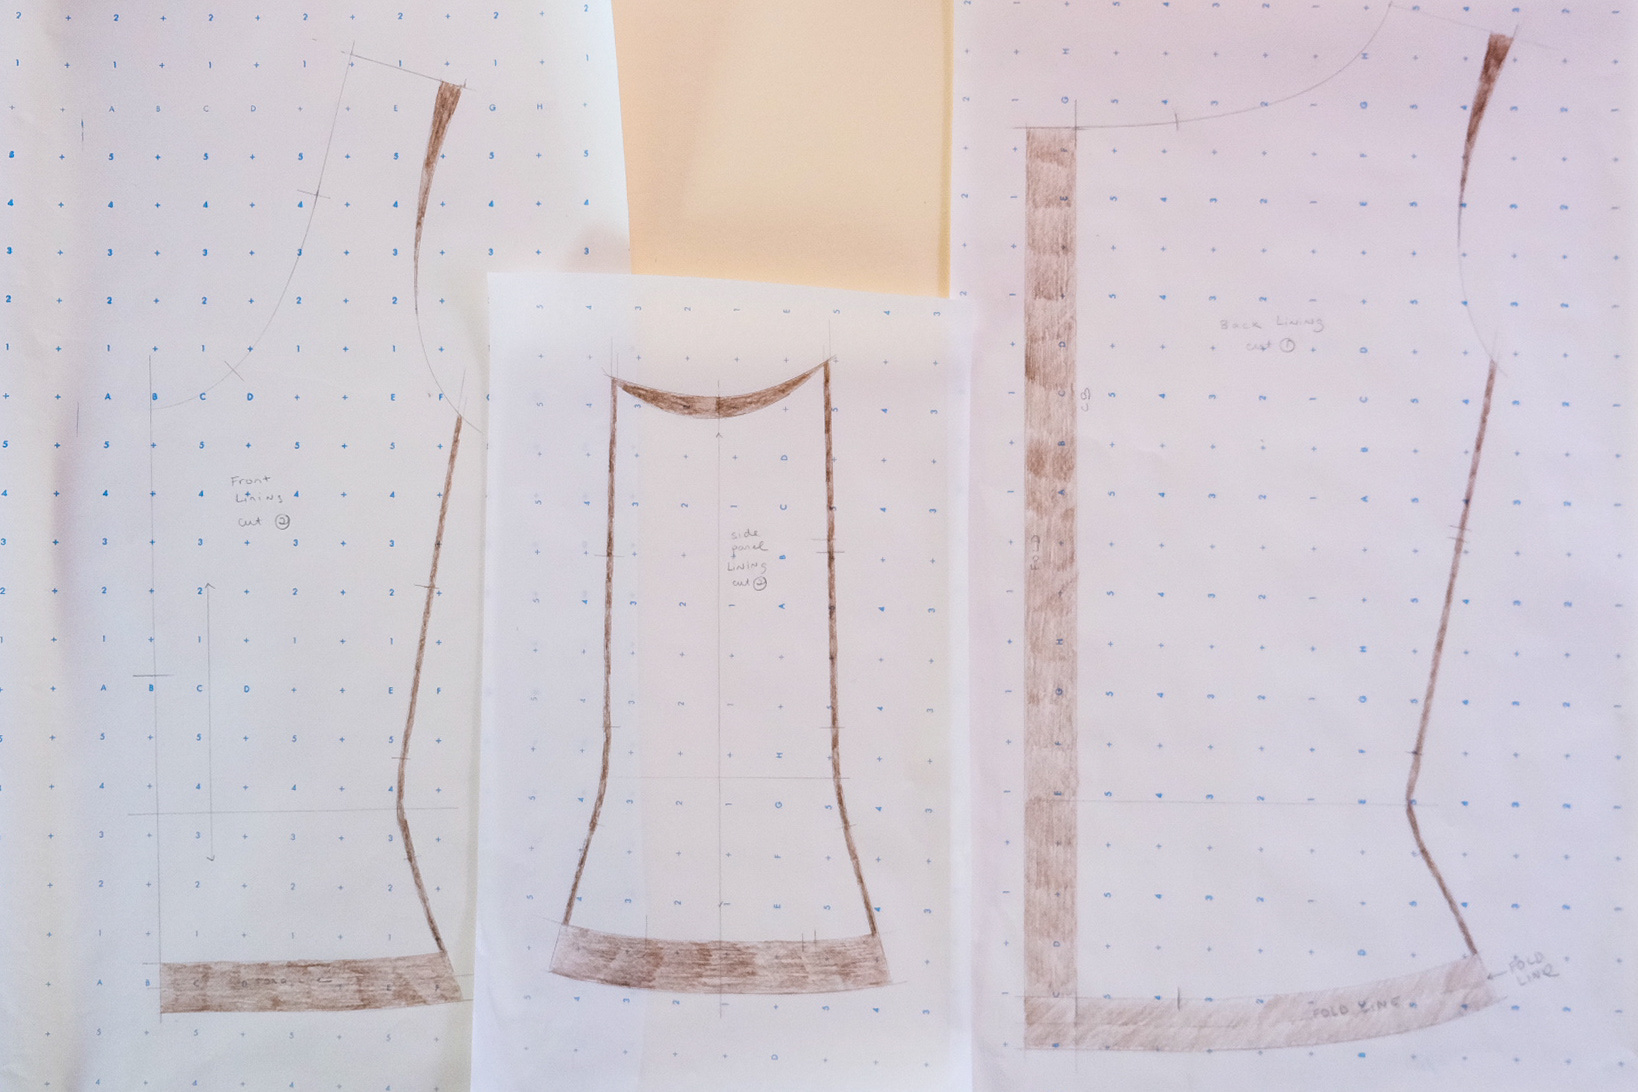
Bodice Lining
Trace off lining patterns, omitting sections used for facings, and mark as ‘lining.’
Extend front and back shoulders 1/2 inch.
Add 1/4 inch to side seams.
I added 1/8 inch to all bodice seams because this jacket has side panels.
Raise side seam 1/2 inch (or thereabouts) above armhole.
This raises the sleeve lining at the underarm, preventing the armhole seam from flattening and reducing puckering and stress under the arm.
Blend front and back armholes to notches.
If the design has a side panel, raise the armhole at the deepest point and blend.
Action pleat time! Extend the center back neckline 3/4 inch to 1 inch at center back. (Total add will be 1½ to 2 inches.) Draw the pleat parallel to the center back or taper it to waist level.
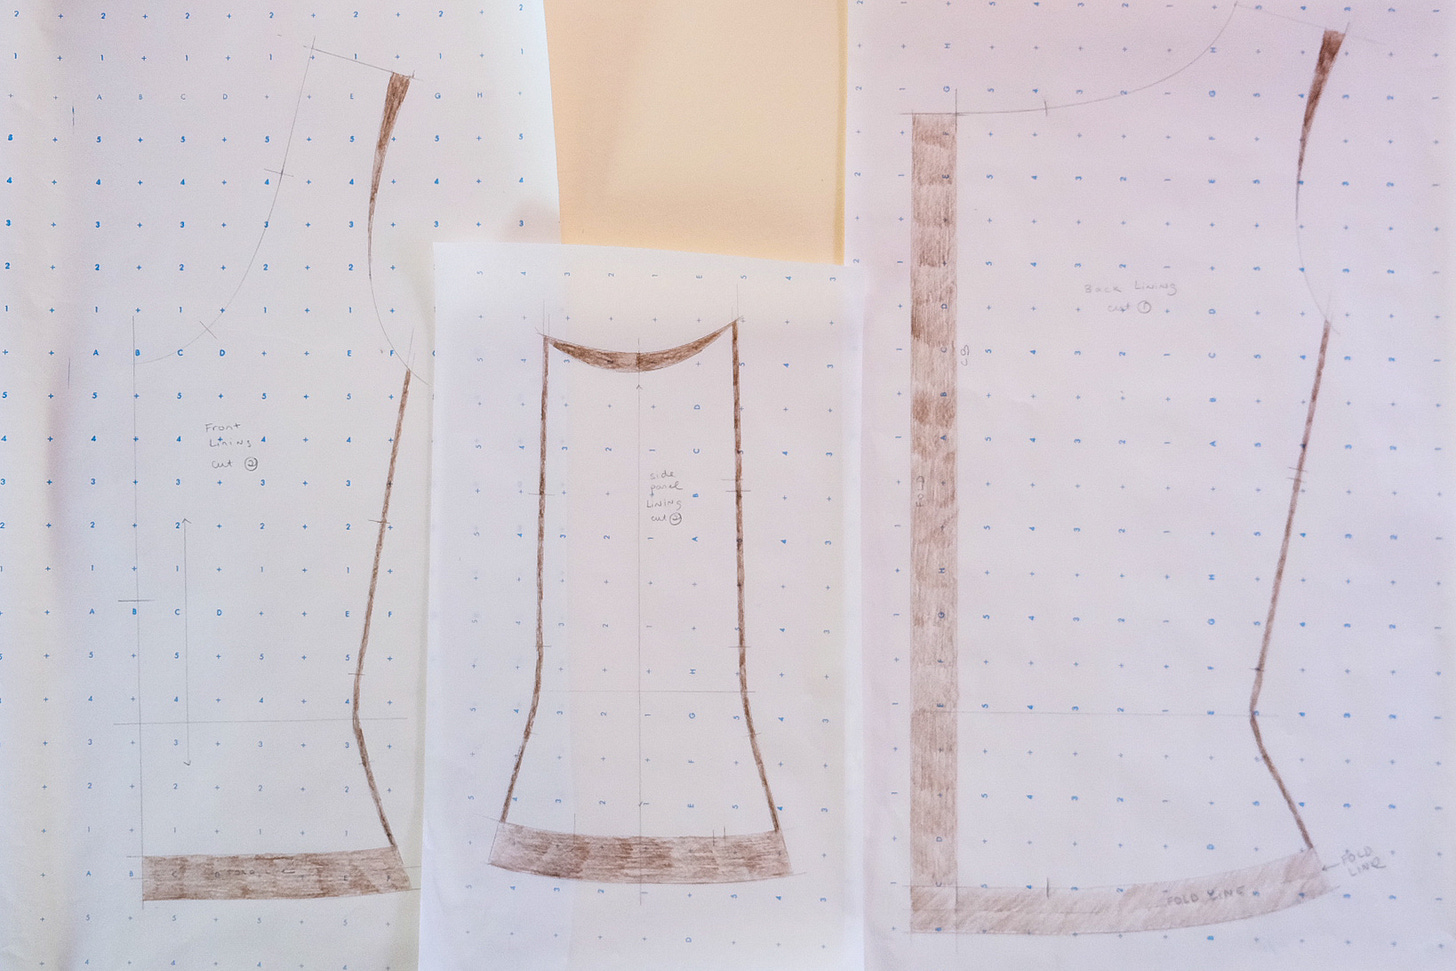
Steps 1-6 in brown mark the bodice adjustments.
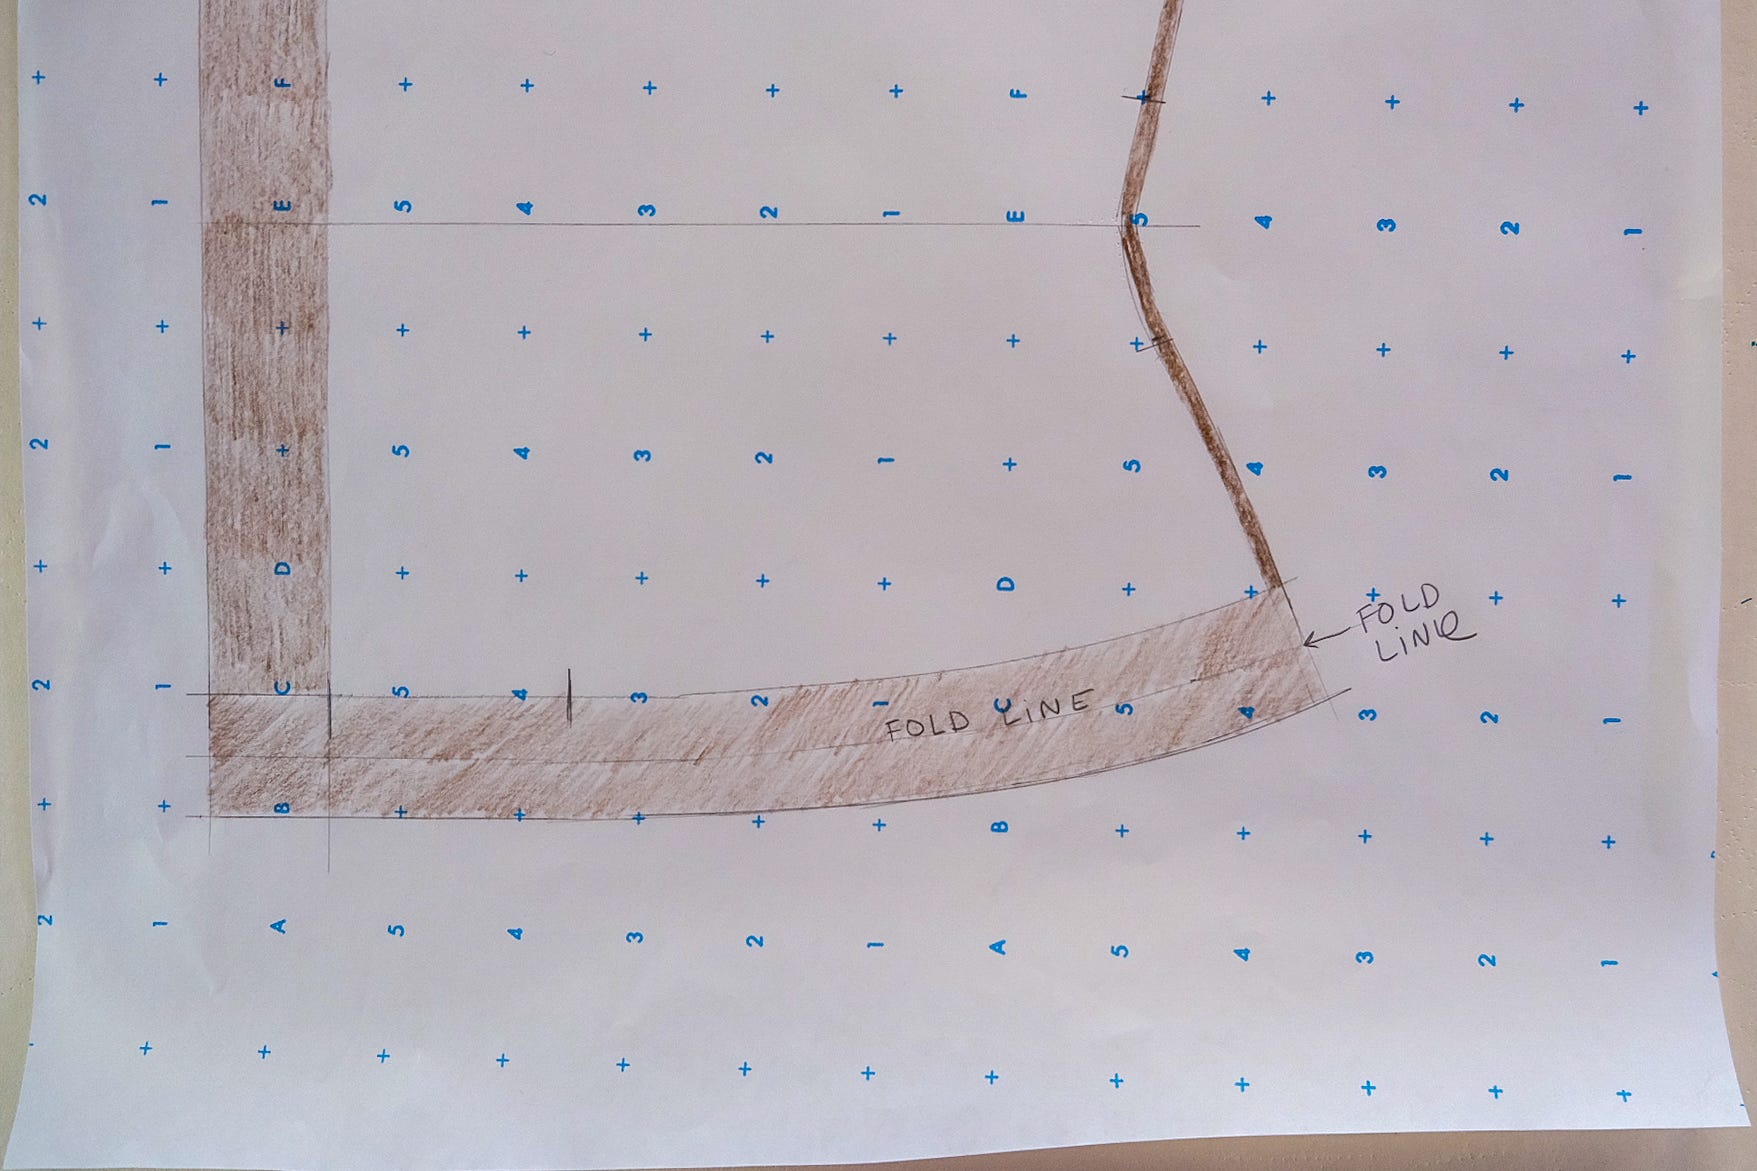
Hemline
A finished lining should end above the bottom of the jacket and is finished with a gentle fold.
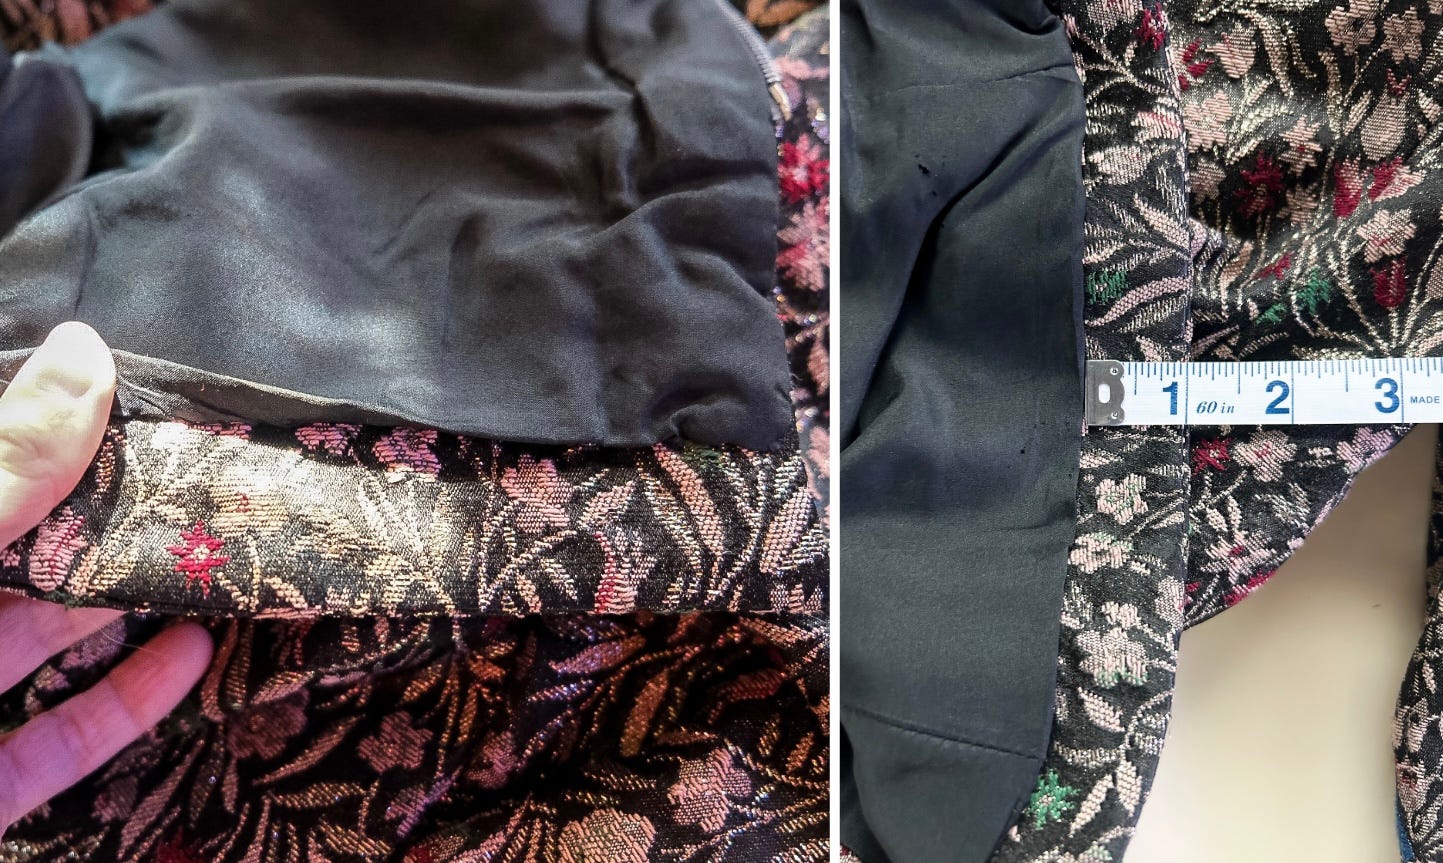
Taking your fold depth into consideration, draw the hemline parallel to the jacket hem.

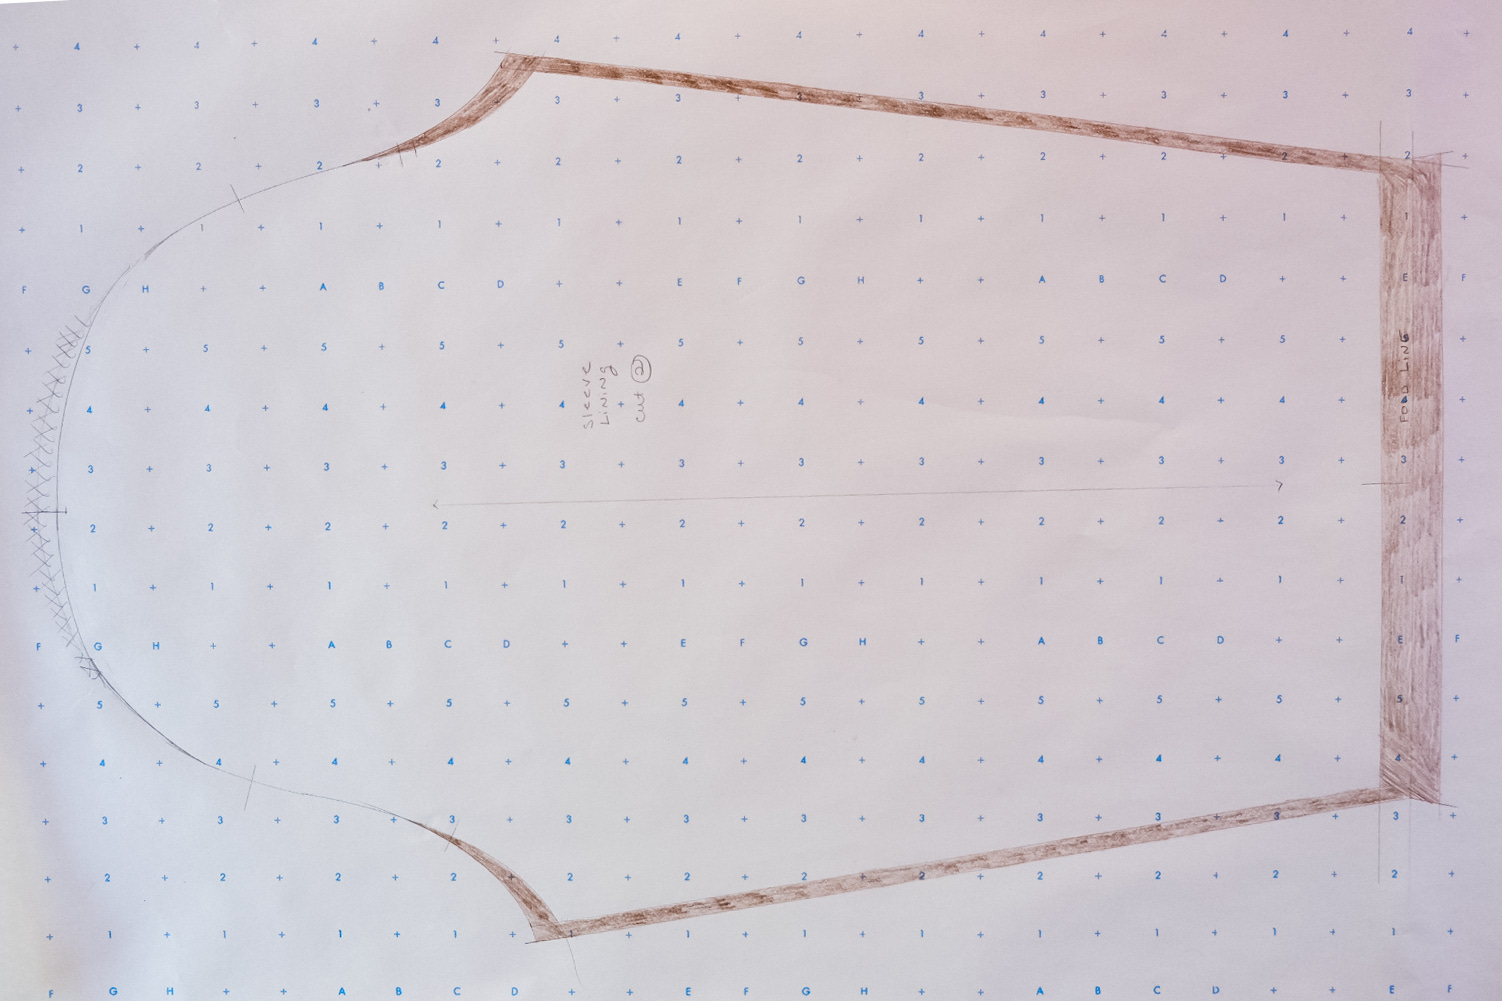
Sleeve Lining
These go hand in hand with the modifications made to the bodice’s armhole. My jacket also has sleeve facings, which makes my modifications a bit different from the standard.

Subtract 1/2 inch from sleeve cap height. Blend.
Raise front and back armholes 1/2 inch, and blend.
Add 1/4 inch at underseam to zero at hemline (or 1/4 inch parallel with underseams).
Extend sleeve length to accommodate the hem fold.

Steps 1-4
Last but not least, don’t forget to add all your seam allowances before cutting and sewing!
I hope you enjoyed Part 3 of this Reverse Engineering series! Thank you for reading, see you next time, and happy sewing!
~ Jane
Awesome images and process descriptions. Thank you for sharing !